enoki mushrooms

Sautéed Enoki Mushrooms with Garlic – Quick and Easy, Vegan, Paleo

enoki mushrooms 3

This is a super speedy and delicious vegetable dish for nights when you want to get dinner on the table as quick as possible. It’s paleo, and vegan and works with most dietary restrictions.

When I was growing up, we ate enoki mushrooms in Hot Pot at Lunar New Year, and for family celebrations. I loved scooping them out of the pot with a slotted spoon (along with lots of baby corn and tofu) and eating them with Taiwanese BBQ Sauce (the BBQ sauce with the cartoon bull on the side of the can is where it’s at, but it’s been a few years since I’ve had it).

The mushrooms come in 7 oz packages from the Asian grocery stores, and while I love button mushrooms too, eating the enoki mushrooms is sometimes a nice way to change up the different vegetables in my diet.

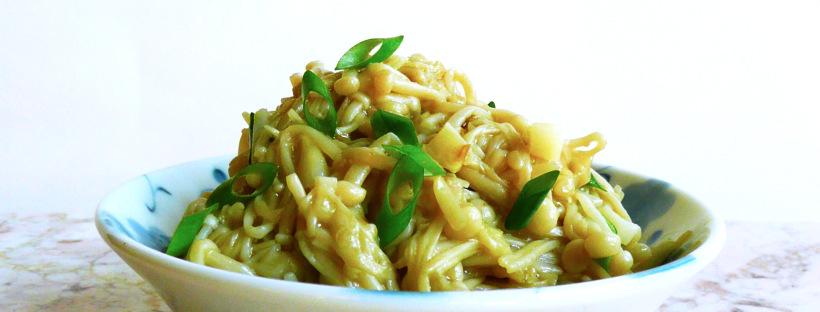
Giving the enoki mushrooms a quick sauté with a little garlic enhances the delicate flavor of the mushrooms. They have a great texture and are a great side dish to have on any table.

Sautéed Enoki Mushrooms with Garlic

Makes 2 small servings


Ingredients

2-3 cloves of garlic, finely chopped

1 package of enoki mushrooms (7.05 oz / 200 g)

1-1.5 tbsp olive oil

sprinkle of sea salt to taste


Note – I added the green onions in for the picture, but when I tasted it, I found that I actually preferred the mushrooms without the green onion. The enoki mushrooms have a subtle flavor, and that was overpowered slightly by sharpness of the green onions, but if you like green onions, go ahead and add them. It’s all about cooking the food that you enjoy eating.

Instructions

1. Wash the mushrooms under cool water. Cut the mushrooms about 1 inch above the roots. Give them another good rinse. Place them on a cutting board and cut them lengthwise in half.

enoki mushrooms 2

2. Add the mushrooms to a sauté pan with the garlic and olive oil. Cook over medium heat for 5 minutes, stirring constantly. Then turn the heat up to medium high and cook for another 3 minutes until lightly golden brown. 

Add a sprinkle of salt to taste and serve.

enoki mushrooms 1

Happy Eating!


Vegan Taiwanese or Chinese Sausage – “Xiang Chang”(香腸) / “Lap Chong” (臘腸)

vegan taiwanese-chinese sausage

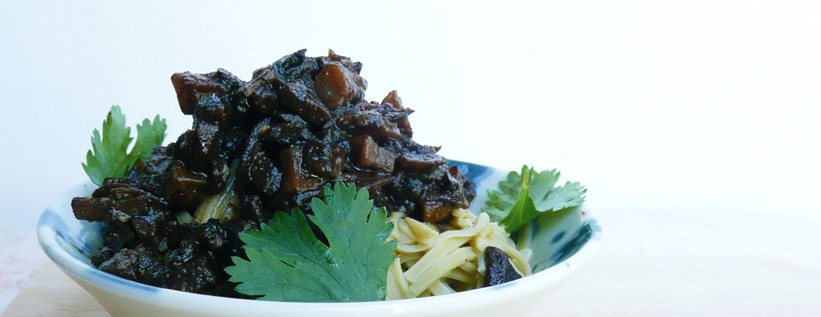
This vegan Taiwanese / Chinese sausage is easy to make and tastes very similar to the real thing.

Spooned over noodles or a steaming bowl of rice, it’s happiness in a bowl.

Taiwanese and Chinese sausages can be found at Asian supermarkets, but I’ve never seen an organic one that’s free of added nitrates yet (here’s to hoping!). They taste amazing, and even though I’ve watched a YouTube video on how to make the sausages the traditional way, I haven’t actually made them myself yet.

This recipe is an easy way to get a similar flavor and texture without the hassle of making the sausage, or the nitrates from the store bought versions.

I used this recipe instead of real Chinese sausage when I made Turnip Cake for Lunar New Year and it worked great, so you can potentially swap this in for recipes that call for diced Taiwanese of Chinese sausage.


Vegan Taiwanese Sausage (香腸) or Chinese Sausage (臘腸)

Makes 1 serving

Ingredients

6 white or crimini mushrooms – cut into ¼ inch dice (about 1 ½ cups)

2 ½ tbsp. avocado oil (or any neutral flavored high heat oil)

¼ tsp + 1/8 tsp granulated garlic

¼ tsp + 1/8 tsp 5 spice powder

½ tsp organic red miso paste

2 – 2 ½ tsp maple syrup*

maybe a pinch of salt to taste (depending on how salty your miso is)


*Taiwanese sausage or “Xiang Chang”(香腸) is usually a little sweeter than the Chinese sausages or “Lap Chong” (臘腸), so if you’re looking for more of a Taiwanese sausage flavor, use the 2 1/2 tsp of maple, and 2 tsp of maple if your looking for more of a Chinese sausage flavor.

Instructions

1. Stir together the granulated garlic, 5 spice, miso, and maple syrup until smooth.

2. Make your pan non-stick. Add the oil and diced mushrooms to the pan and cook on medium high heat, stirring frequently, for 8-9 minutes until the mushrooms are golden brown around the edges.

3. Add the cooked mushrooms to the spice mix and stir until well combined. Give it a taste, adjust the seasoning to your liking.

You can also spoon this into romaine lettuce leaves (like vegan chicken lettuce wraps), or serve it over steamed rice or noodles.

However you eat it, I hope that you enjoy the recipe!


Note – This isn’t sponsored, but I just wanted to mention that the noodles that I used in the picture were Organic Edamame Spaghetti Noodles made by Explore Asian Authentic Cuisine (it looks like they may have changed the company’s name to “Explore Cuisine” now).

The only ingredients are water and soybeans and the noodles have a lovely flavor and texture and cook up in about 5 minutes are a good non-grain pasta alternative (if that’s something that you’re looking for). I used up the last of the box I had for this recipe (the box I had was from Costco, and they don’t carry the noodles anymore) but you can find the noodles online.

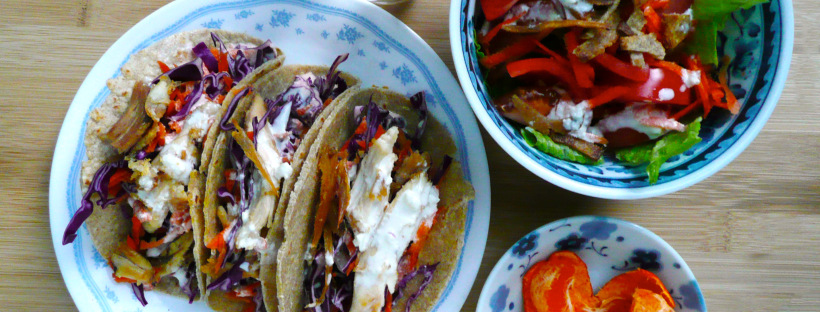
cole slaw tacos

Cole Slaw Dressing (Paleo, Refined Sugar Free, Soy Free)

cole slaw tacos

I love this creamy dressing. The dressing takes just minutes to put together and you can make it ahead of time as well and dress the cabbage and carrots when you’re ready to eat.

It’s slightly sweet from the maple syrup, and has a little bit of a bite from the apple cider vinegar and finely grated onion. And the dressing makes eating a good size serving of a cabbage (which is really good for you as it’s a cruciferous vegetable) a delicious experience.

When I first went gluten free, I experimented with a lot with different food combinations to try and come up with more exciting dishes to eat.

One of my first and favorite food combinations ones turned out to be chicken and cole slaw tacos.

I use homemade gluten free tortillas, top them with cole slaw and some leftover roasted chicken. If you’re vegan, you can use a vegan mayo and a meatless chicken subsitute (or crispy tofu would be good too).

You can also serve the dressing over a normal salad (like I did in the picture). I trimmed off the edges of the tortillas and pan fried them with a little oil until they were crispy and added them to salad as a crouton substitute.

I hope that you enjoy the dressing (and that it makes eating lots of vegetables more exciting!).

Happy Eating!


Cole Slaw Dressing

Makes 1 serving

Ingredients

1/2 tbsp finely grated white onion (I use the really small holes on my box grater for this)

3 tbsp mayo (I used an avocado oil mayo)

3/4 tsp apple cider vinegar

1- 1 1/4 tsp maple syrup

pinch of salt (to taste)

1 cup finely shredded cabbage and grated carrot mix


Instructions

Stir together the onion, mayo, vinegar, and maple syrup. Add salt to taste.

Pour over the cabbage and carrots and stir until well mixed. Serve.

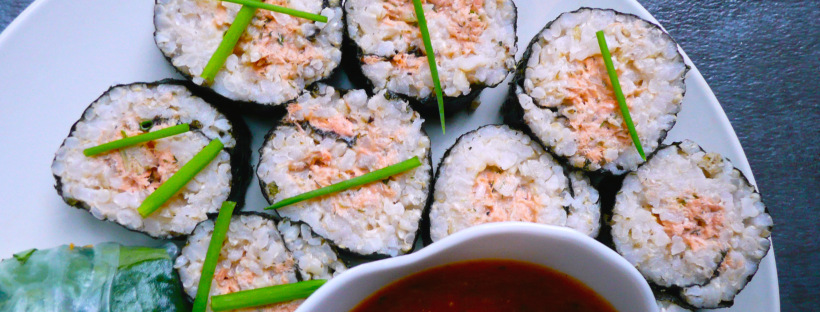
salmon sushi

Salmon Salad Sushi – Super Easy

P1080078-2

I love tuna salad, and this is a slightly fancier version but is still super simple to make. It’s perfect for a quick dinner, or an easy snack and you can use up your leftover brown rice or salmon to make this tasty dish.

Salmon Salad Sushi

Makes 8 pieces (2 snack size servings, or 1 serving for a hungry person)

Ingredients

1/3 cup cooked flaked salmon (canned salmon is fine too)

2 ½ tbsp. mayo (I used an avocado oil mayo)

1/8 tsp dijon mustard

2 ½ tsp finely chopped green onion

3 tsp lemon juice

tiny pinch of pepper

¼ tsp dried parsley

1/8 tsp granulated garlic

¼ tsp sea salt

1 ½ cups warm cooked brown rice (I just steam it for a few minutes in the rice cooker to warm it up if it was in the fridge)

1 sheet of nori

Instructions

1. Stir together the salmon with everything but the rice and nori.

2. Lay the nori sheet on a plastic wrap covered bamboo mat.

Wet your fingers, and spread the warm rice on the nori into a thin layer leaving about a ¾ inch of nori uncovered at the top of the sheet.

3. Spoon the salmon salad into a line at the bottom of the rice covered nori. Roll firmly into a sushi roll, and set in the fridge for 10 – 15 minutes to firm up. Cut into 8 slices and serve.

P1080077-2

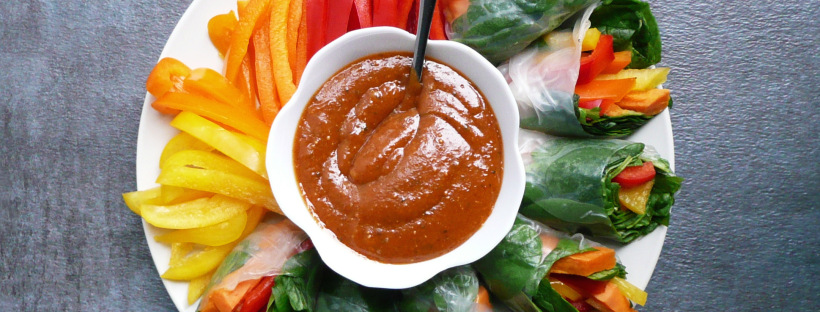
Salmon Salad Sushi and Vegan Thai Peanut Sauce with Veggie Spring Rolls

The snack plate of dreams…

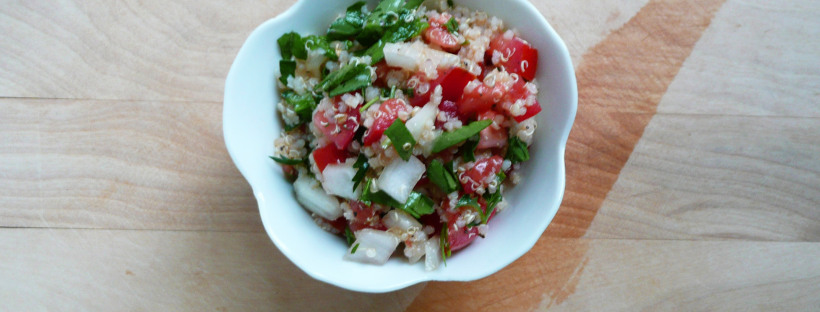
Tabbouleh

Quinoa Tabbouleh – Easy, Gluten-Free, Vegan, Delicious

P1060497

I have a bit of secret…

I don’t actually love eating quinoa.

I know that it’s healthy, but like most people, I didn’t grow up eating it. So quinoa lacks that sense of nostalgia and comfort that many of my favorite foods have. It doesn’t have too much of a flavor, and to be honest I’m still sometimes at a loss as to what to eat with it, or lack ideas on how to make it more exciting.

I know that people say that you can swap quinoa out for rice, but honey, it ain’t the same.

Making sushi with quinoa doesn’t work that well, and when you’re eating something like Lou Rou Fan (Taiwanese Braised Pork with rice) or Taiwanese Style Scrambled Eggs with Tomatoes and Green Onion, you want rice. I can eat brown rice with both of those dishes and not feel like I’m missing out, but I don’t want to eat those dishes with quinoa.

But this is a recipe that I love to eat. This recipe makes quinoa taste (imagine Oprah saying this) amazing! I love the brightness of the lemon juice with the freshness of the mint and parsley. The quinoa has a lovely texture that really works well with this dish, and gives the tabbouleh a lot of good protein. This tabbouleh is also full of different colored vegetables and herbs, and it’s a very nutrient dense salad that just tastes great.

And it doesn’t feel like another boring old salad, it looks and tastes exciting.

P1060493-2

So if you’re ever stumped as to what to do with leftover quinoa, make this dish and see if you don’t just eat the entire portion yourself in one sitting.

I like to make this dish a day in advance so that the lemon juice has time to mellow out the sharpness of the onion. It’s also nice to have a batch of this sitting in the fridge so that there’s always something healthy to snack on when you’re hungry.

Quinoa Tabbouleh

Makes 2-3 servings


Ingredients

1 diced Roma tomato (about 2/3 cup)

½ cup diced white onion

¼ cup finely chopped parsley, loosely packed*

1 tbsp finely chopped fresh mint*

¾ cup cooked quinoa**


1 tbsp olive oil

3 tbsp fresh lemon juice***

¼ level tsp sea salt

¼ level tsp black pepper


*For tips on how to keep your excess herbs fresh, here’s a link to a post that I wrote about that.

**If at all possible, buy the quinoa in the store that doesn’t say to rinse it on the package instructions. Quinoa can be difficult to rinse if you don’t have a fine enough strainer, and life is easier if you can just scoop the dry quinoa out from the container, add it to a pot with some water and cook it in the rice cooker and not have to think to hard about it.

*** If you have any excess lemons, you can freeze them.

Instructions

Stir all ingredients together. Cover and refrigerate overnight. Taste it the next day, and adjust the seasoning if needed.


P1060495- 2

Happy Eating!

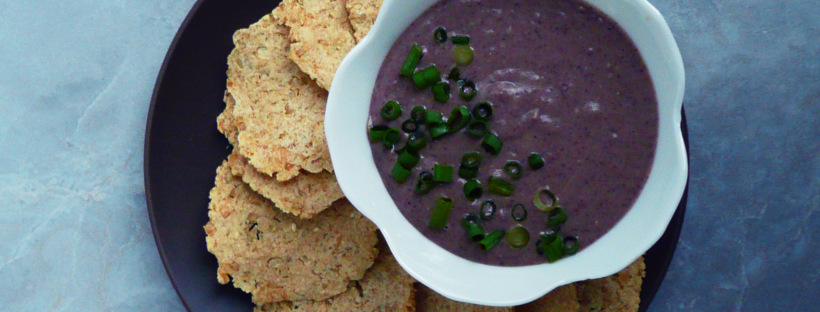
Creamy Lemon Garlic Black Bean Dip

Creamy Lemon Garlic Black Bean Dip

P1070086 copy

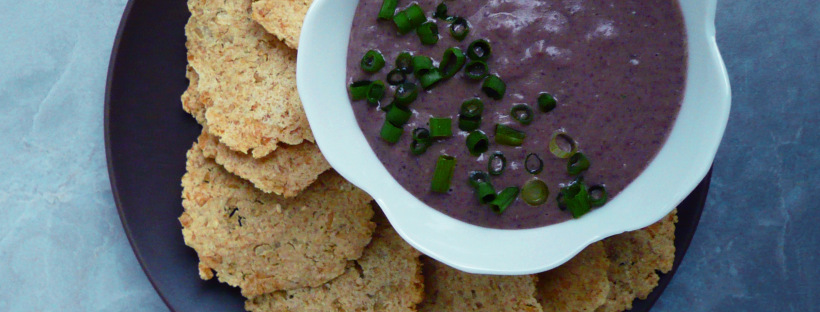
I love hummus, and this dip originally started out as a black bean hummus, but I kept adding more lemon juice and more green onions until it became something slightly different, something even better.

It’s thinner than store bought hummus, but still wonderfully creamy and has an incredibly bright happy flavor from the lemon juice, which works well with the flavors of the garlic and green onion (which sort of prance around in the background and bring even more joy to the party).

It’s better if you make it a day ahead, that way the lemon juice will mellow out the sharp flavor of the garlic and the dip will be extra delicious.

I hope that you give this dip a try!


Creamy Lemon Garlic Black Bean Dip

Makes about 2 -3 servings

Ingredients

7 tbsp + ½ tsp fresh lemon juice

3 cloves fresh garlic

1 can black beans, drained

4 tbsp. + 1 tsp olive oil

4 tbsp finely chopped green onion

1/2 tsp sea salt

1/8 tsp black pepper


Instructions

Add all ingredients to a food processor and blend until smooth.

If you like things more lemony you can add another 1 tbsp of lemon juice, or more to taste.

Transfer the mixture into a bowl, cover with a lid or plastic wrap and refrigerate overnight.

Serve with tortilla chips or cut veggies, and if you’d like you can sprinkle over some finely chopped green onion for color and extra crunch.

Oat Flour and Brown Rice Tortilla Chips

Oat Flour and Brown Rice Tortilla Chips – Gluten Free, Dairy Free, Vegan – Tostadas

P1070082

When I first went gluten free I really missed having something crunchy to dip into hummus, or top with egg salad like a cracker.

When I came up with this recipe I found that it checked lots of carb-y, crunchy boxes.

You can eat these chips with guacamole or hummus. You can mix flax seeds and chia seeds into the dough to make multigrain crackers. For cheesy herby crackers, you can add some granulated garlic, parsley, oregano, and nutritional yeast into the dough and they bake up a treat.

Another thing that you can do with this dough is make tostadas. The tostadas bake up super crunchy and you can top them with anything that makes your heart happy.

I tried making tortilla chips and crackers in all kinds of ways before I came up  with this recipe, but it turns out that leftover brown rice was the key to making a great crunchy oat flour tortilla chip.

If you have leftover brown rice in the fridge, this is a perfect way to use it up. Making these chips / crackers are also so much cheaper than buying gluten-free crackers in the store, and I promise that they taste so much better. And if you can’t tolerate corn chips, this recipe is a great alternative. These chips also go great with my creamy lemon garlic black bean dip.

Brown Rice and Oat Flour Tortilla Chips (Baked)

Makes 10 chips (about 1 generous serving)

Ingredients

1/3 cup cooked short grain brown rice

1/3 cup oat flour

½ tsp olive oil

pinch of salt

1 -1 ½ tsp water


Instructions

1. Preheat the oven to 350 F.

2. Add all the ingredients into a bowl and mash the brown rice into the oat flour with the back of a fork. Squeeze the mixture together in your hands so that the rice incorporates into the oat flour and forms a nice dough. If the dough feels a little dry, add a little water to the dough. If the dough feels too sticky, add a little more oat flour.

3. Divide the dough into 10 equal sized pieces and roll each piece of dough into a ball .

Wet you hands lightly press each ball of dough into a 1/8 inch thick disk onto a silicone baking mat. The mixture won’t spread so the chips can be baked close together as long as they don’t touch.

4. Bake for 15 minutes, then take the chips out of the oven and use a spatula to flip over each chip. Bake for another 15 minutes until crisp.

Let them cool on the silicone baking mat for about 10-15 minutes. They will crisp up even more as they cool.

You can also use this same mixture to make about 3 tostadas about 4-5 inches in diameter (1/8 inch thick). Bake the tostadas for 15 minutes per side at 350 until crisp.

Kitchen Tips – How To Use Every Drop Of Olive Oil

P1070675

One ingredient that I use almost everyday is olive oil.

I use it in salad dressings for it’s peppery bite, drizzle it over soups and pasta sauces to give them richness, and add it to hummus for a smooth and silky texture.

Inevitably, at some point, the bottle runs empty save for a few teaspoons of that beautiful green oil that you can never seem to shake out of the bottle.

If you too can’t stand the thought of letting any food go to waste, this is my solution for getting every last drop of precious oil from the bottle.

Take a wide mouth mason jar and put it inside of a 1 quart measuring cup. Then turn the bottle of oil upside down and place the mouth of the bottle inside of the mason jar. Leave this to sit in an area where it won’t be disturbed for a day or two and all of the oil that’s left over in the bottle should drain into the mason jar.

(Putting the mason jar inside of the big measuring cup makes the bottle of oil and mason jar less likely to tip over.)

Use this reclaimed oil within a day or two, as it has been exposed to air and light and won’t keep for too long before oxidizing.

Thanks for reading!

Happy Cooking!

spring rolls and peanut sauce

Vegan Thai Peanut Sauce and Veggie Packed Spring Rolls – Vegan, Gluten Free, Dairy Free, Refined Sugar Free, Peanut Satay Sauce

P1080067-2

When I was in high school, our “wild night out” on the weekends (more often during the summer) was going bowling, and then going to eat shrimp spring rolls at the Thai restaurant that my friend’s family owned.

The spring rolls were actually a Vietnamese dish, but I didn’t know that at the time. All I knew was that these spring rolls were amazing! They were one of the best things that I’d ever eaten, and we always ate them with the Thai peanut satay sauce.

When I moved away, the shrimp spring rolls and peanut sauce was the dish that I most associated with that time in my life.

I absolutely loved eating those spring rolls, and I could never find a restaurant that made them the same way. I wanted to make them myself, but the most difficult part of recreating that dish was trying to get the peanut sauce right.

I never did get the recipe for that peanut sauce. I managed to recreate the sauce a few years later through trial and error, but it did have a lot white sugar in it, so I wanted to create a version that was refined sugar free.

And this version is vegan to boot.

P1080074-2

It tastes very similar to that peanut sauce that I first had all those years ago, sweet and mildly spicy, rich with the flavors of ginger and chili, with just a hint of salt to round out the flavor. The extra salt replaces the savoriness of the fish sauce, and the sauce is so good that you won’t miss the fish sauce.

This peanut sauce is also easier to make than the traditional version (this one you don’t have to cook, just stir it all together), but still tastes incredibly similar.

You can make this peanut sauce in advance, and it will thicken and become creamier in the fridge as it chills.

I usually make extra sauce, as you can dip vegetables in it, or spread it over noodles, and I usually eat more than one serving of spring rolls at a time, so having extra sauce on hand is great.

Vegan Thai Peanut Sauce

Makes ¼ cup of peanut sauce (1 serving)

Ingredients

3 tbsp. + 1 tsp unsweetened natural peanut butter

1 level tsp of red curry paste (most supermarkets carry it these days, I used the Thai Kitchen Brand)

3 tbsp maple syrup

4 tbsp hot water

¼ tsp – ½ tsp sea salt (to taste)


¼ tsp. crushed dried mint* (optional)

1/8 tsp ground coriander seed* (optional)


*If you don’t have a few leaves of fresh mint and cilantro to put into your spring rolls, you can add these spices to the peanut sauce to give it a similar herby brightness.


Instructions

Ideally, your peanut butter would be room temperature, but if it’s cold from the fridge, that’s ok too. It will just take a little more mixing to get everything to combine.

Stir together the peanut butter, curry paste, maple syrup and optional spices until smooth. Add in the 4 tbsp of hot water, and still until well combined. Add salt to taste (I added ½ level tsp of sea salt).


P1080069-2

Veggie Packed Spring Rolls

For the spring rolls, I wanted to make a more colorful version, because it’s January, and spring rolls are a good way to eat lots of vegetables without having to think too hard about it. You can fill them with whatever you like really, that peanut sauce tastes amazing on pretty much everything.

I’d count on making about 4-5 spring rolls per person if you’re want to make them a main course, and 2-3 spring rolls per person if you want to make them as an appetizer.

You can cut them in half on an angle if you want to show off the colorful vegetables inside, or just leave them whole (which does make them a little easier to dip into the sauce, or you can spoon the sauce over the spring rolls instead).

I used Three Ladies Brand of rice paper wrapper in the 25 cm size (which is non-GMO and gluten free), but feel free to use your favorite brand of rice paper wrapper.

I would make the spring rolls right before you plan to eat them. They texture of rice paper wrapper changes after it’s been refrigerated, so it’s better to make them fresh. You can also pre-cut your vegetables in advance and assemble them right before serving to save time.


P1080070-2


Ingredients

(For each spring roll)

1 rice paper wrapper

¼ cup lightly packed baby spinach leaves

4-5 slices bell peppers

1-2 pieces of roasted sweet potato (cut into ½ inch thick strips)


2-3 mint leaves (if you have them)

3-4 cilantro leaves (if you have them)


To make the spring rolls, dip one rice paper wrapper into warm water for about 20-30 seconds. It should just begin to feel like silk between your fingertips. Spread the rice paper onto a plate, place the mint and cilantro leaves on first, followed by the baby spinach, then the bell peppers, and roasted sweet potato.

Wrap each roll like a burrito, so the sides get folded in first, then the fold the edge closest to you over the vegetables, and roll until the spring roll is closed, and then set the spring roll aside onto another plate, and start the next one.

Here’s a good visual lesson on how to do it.

https://www.youtube.com/watch?v=IfI1wMeDXhg


Before I moved away, I did have the foresight to buy some spring rolls from my friend’s restaurant, and take one home. Here’s what was in it:
1 1/2 teaspoons of bean sprouts

1 Sprig of Cilantro

2 one inch long pieces of mint leaves

3 pieces of Halved Shrimp (shrimp cut in half length ways)

3 teaspoons of rice noodles (possibly cooked in chicken broth, as they were light brown in color, I seem to remember my friend mentioning that they may have mixed the noodles with a bit of oyster sauce).

6 teaspoons of shredded romaine lettuce

1/2 teaspoons shredded carrots


My friend’s family has since sold the restaurant, and I make simpler version of these spring rolls now at home (which I will post on the blog another day), but I thought that I’d include the recipe just in case you were curious.

Happy Eating!

Instant Homemade Vegetable Stock

Instant Homemade Vegetable Stock Mix – Vegan, Soy-free, Gluten-Free

P1080022-2

Vegetable stock is easy to make, but can be a little bit of hassle, and takes up a lot of space in the freezer. Store bought veggie stock can be expensive, and it can have a lot of added ingredients that leave you wondering “What is organic caramel coloring?” and “Why does it need to be in vegetable stock?” I find myself asking the same questions when I read the back of soup bouillon labels as well.

If you too have these questions (and are wondering if there is an easier way to make vegetable stock with less additives) this might be the answer that you’ve been looking for.

This is a super simple and easy recipe to always have vegetable stock on hand. This recipe is soy free, thrifty and easy to customize.
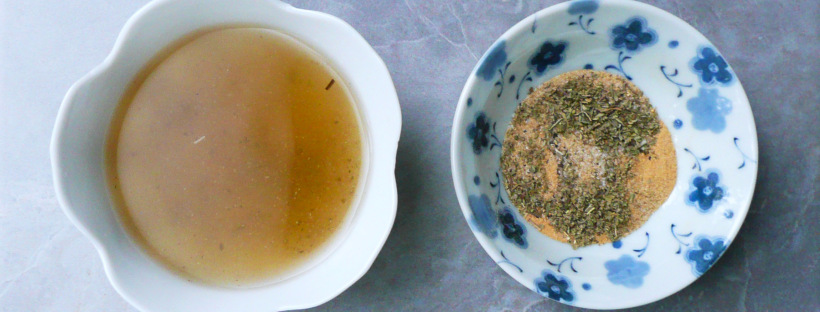
We’re going to basically make a spice mix that contains a lot of flavors that you would normally find in vegetable stock. You can almost think of it as a tea. Admittedly, it takes 10 minutes to steep (so not quite “instant”) but it’s still pretty quick.

You can also make a large batch of this veggie stock mix and put it into a little jar to use as needed.

If you don’t like the little bits of dried spices in your soup, you can strain the broth through a coffee filter, or place the spices in some layers of cheese cloth, tie it up with some kitchen twine and place it into your soup pot (basically like a tea bag) to fish out later once the flavors of the broth have infused.

I hope that this recipe helps you make lots of wonderful soups in the future. I plan on making a noodle soup with this pretty soon. Perfect for the cold weather.


Makes a scant 2 tbsp of veggie stock mix = 4 cups of vegetable stock

Ingredients

1 tsp granulated onion

3/4 tsp + 1/8 tsp celery salt

1/4 tsp + 1/8 tsp of granulated garlic

1/4 tsp dried rubbed sage

1/4 tsp dried parsley

1/4 – 1/2 tsp sea salt

1/8 tsp black pepper


Instructions

Stir all the spices together. Add the mixture to 4 cups of boiling water and allow to steep for 5-10 minutes. You can strain the mixture at this point or leave the spices in the stock depending on your preference.

Use in your favorite soup recipes, or add some noodles, and some veggies for a quick and filling lunch or dinner.

Enjoy!