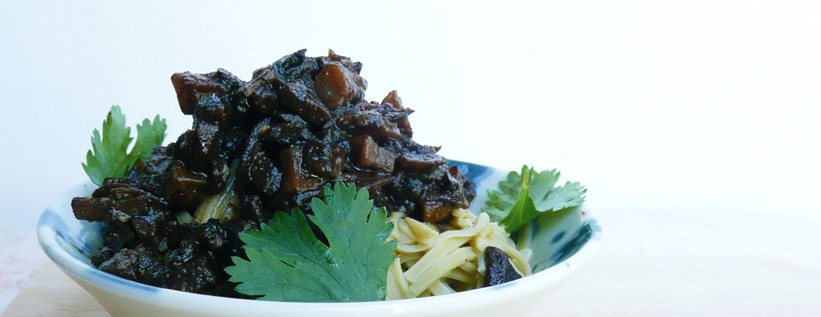
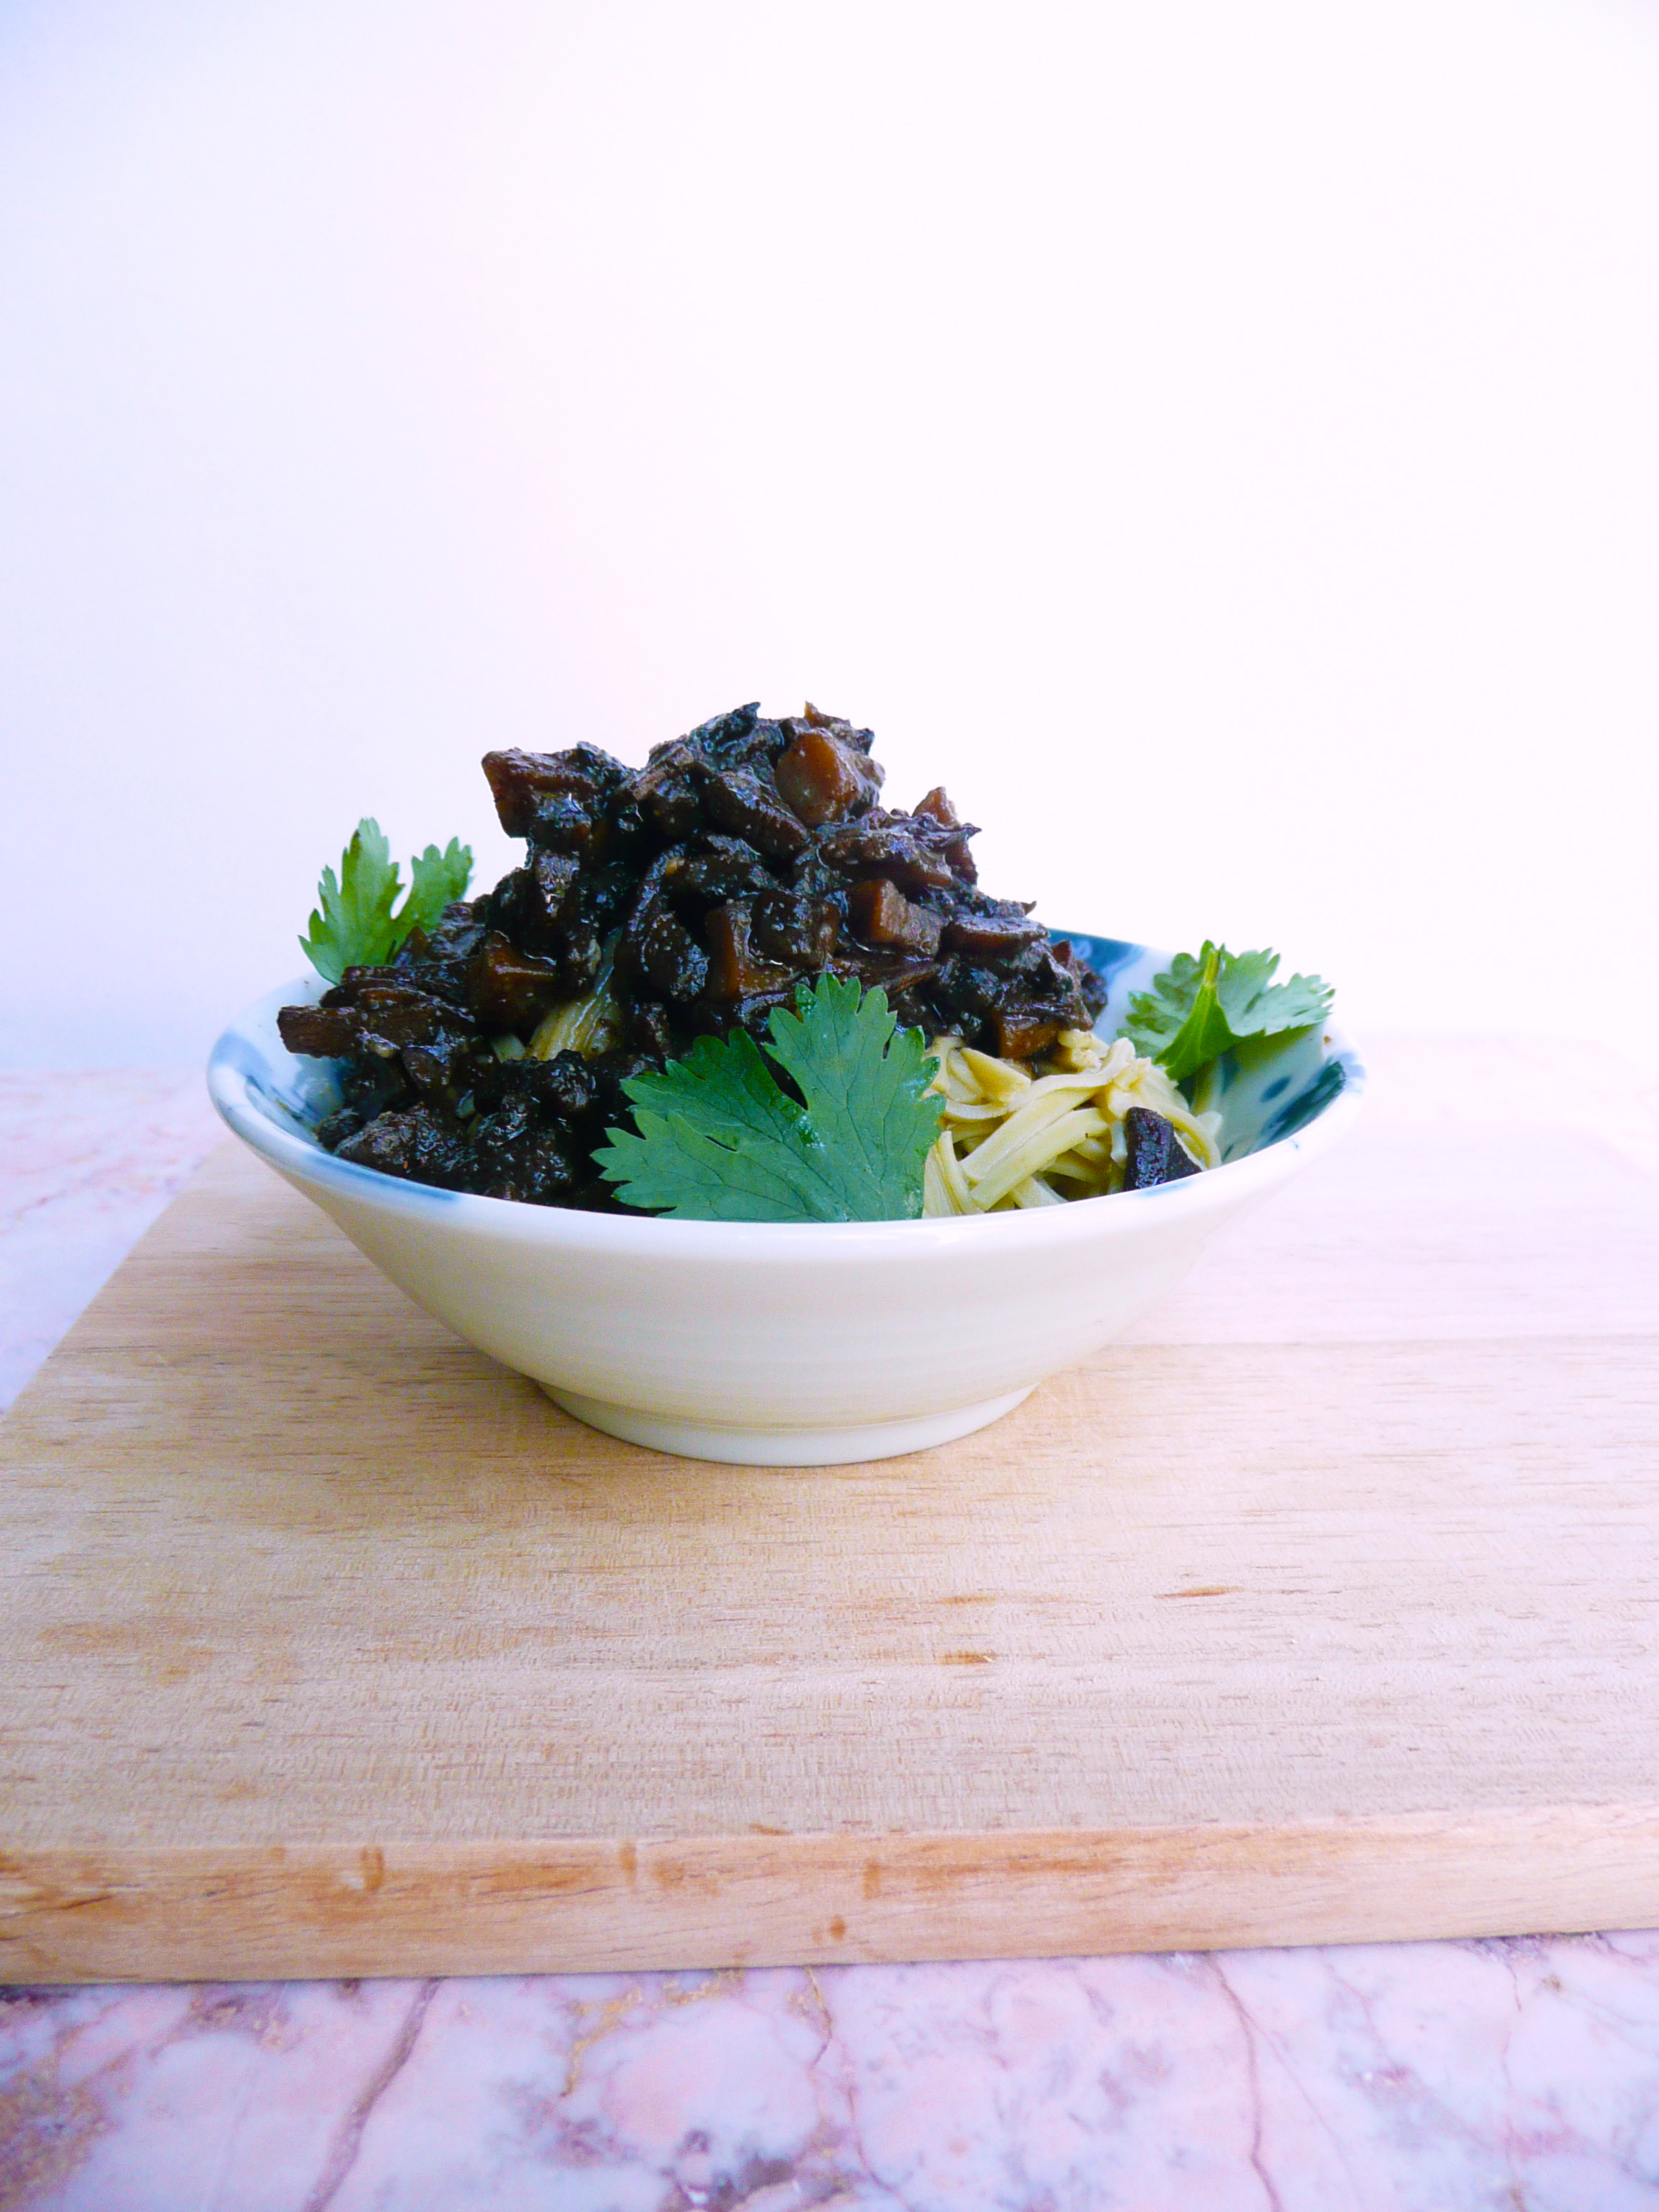
This vegan Taiwanese / Chinese sausage is easy to make and tastes very similar to the real thing.
Spooned over noodles or a steaming bowl of rice, it’s happiness in a bowl.
Taiwanese and Chinese sausages can be found at Asian supermarkets, but I’ve never seen an organic one that’s free of added nitrates yet (here’s to hoping!). They taste amazing, and even though I’ve watched a YouTube video on how to make the sausages the traditional way, I haven’t actually made them myself yet.
This recipe is an easy way to get a similar flavor and texture without the hassle of making the sausage, or the nitrates from the store bought versions.
I used this recipe instead of real Chinese sausage when I made Turnip Cake for Lunar New Year and it worked great, so you can potentially swap this in for recipes that call for diced Taiwanese of Chinese sausage.
Vegan Taiwanese Sausage (香腸) or Chinese Sausage (臘腸)
Makes 1 serving
Ingredients
6 white or crimini mushrooms – cut into ¼ inch dice (about 1 ½ cups)
2 ½ tbsp. avocado oil (or any neutral flavored high heat oil)
¼ tsp + 1/8 tsp granulated garlic
¼ tsp + 1/8 tsp 5 spice powder
½ tsp organic red miso paste
2 – 2 ½ tsp maple syrup*
maybe a pinch of salt to taste (depending on how salty your miso is)
*Taiwanese sausage or “Xiang Chang”(香腸) is usually a little sweeter than the Chinese sausages or “Lap Chong” (臘腸), so if you’re looking for more of a Taiwanese sausage flavor, use the 2 1/2 tsp of maple, and 2 tsp of maple if your looking for more of a Chinese sausage flavor.
Instructions
1. Stir together the granulated garlic, 5 spice, miso, and maple syrup until smooth.
2. Make your pan non-stick. Add the oil and diced mushrooms to the pan and cook on medium high heat, stirring frequently, for 8-9 minutes until the mushrooms are golden brown around the edges.
3. Add the cooked mushrooms to the spice mix and stir until well combined. Give it a taste, adjust the seasoning to your liking.
You can also spoon this into romaine lettuce leaves (like vegan chicken lettuce wraps), or serve it over steamed rice or noodles.
However you eat it, I hope that you enjoy the recipe!
Note – This isn’t sponsored, but I just wanted to mention that the noodles that I used in the picture were Organic Edamame Spaghetti Noodles made by Explore Asian Authentic Cuisine (it looks like they may have changed the company’s name to “Explore Cuisine” now).
The only ingredients are water and soybeans and the noodles have a lovely flavor and texture and cook up in about 5 minutes are a good non-grain pasta alternative (if that’s something that you’re looking for). I used up the last of the box I had for this recipe (the box I had was from Costco, and they don’t carry the noodles anymore) but you can find the noodles online.
When I first realized that St. Patrick’s Day was coming up, I was at a bit of a loss as to what to make to celebrate.
So I googled “Traditional Irish Food” and pictures of things like shepherd’s pie, Irish stew, and colcannon popped up, along with literally a picture of a potato. That’s right, a plain ol’ uncooked potato.
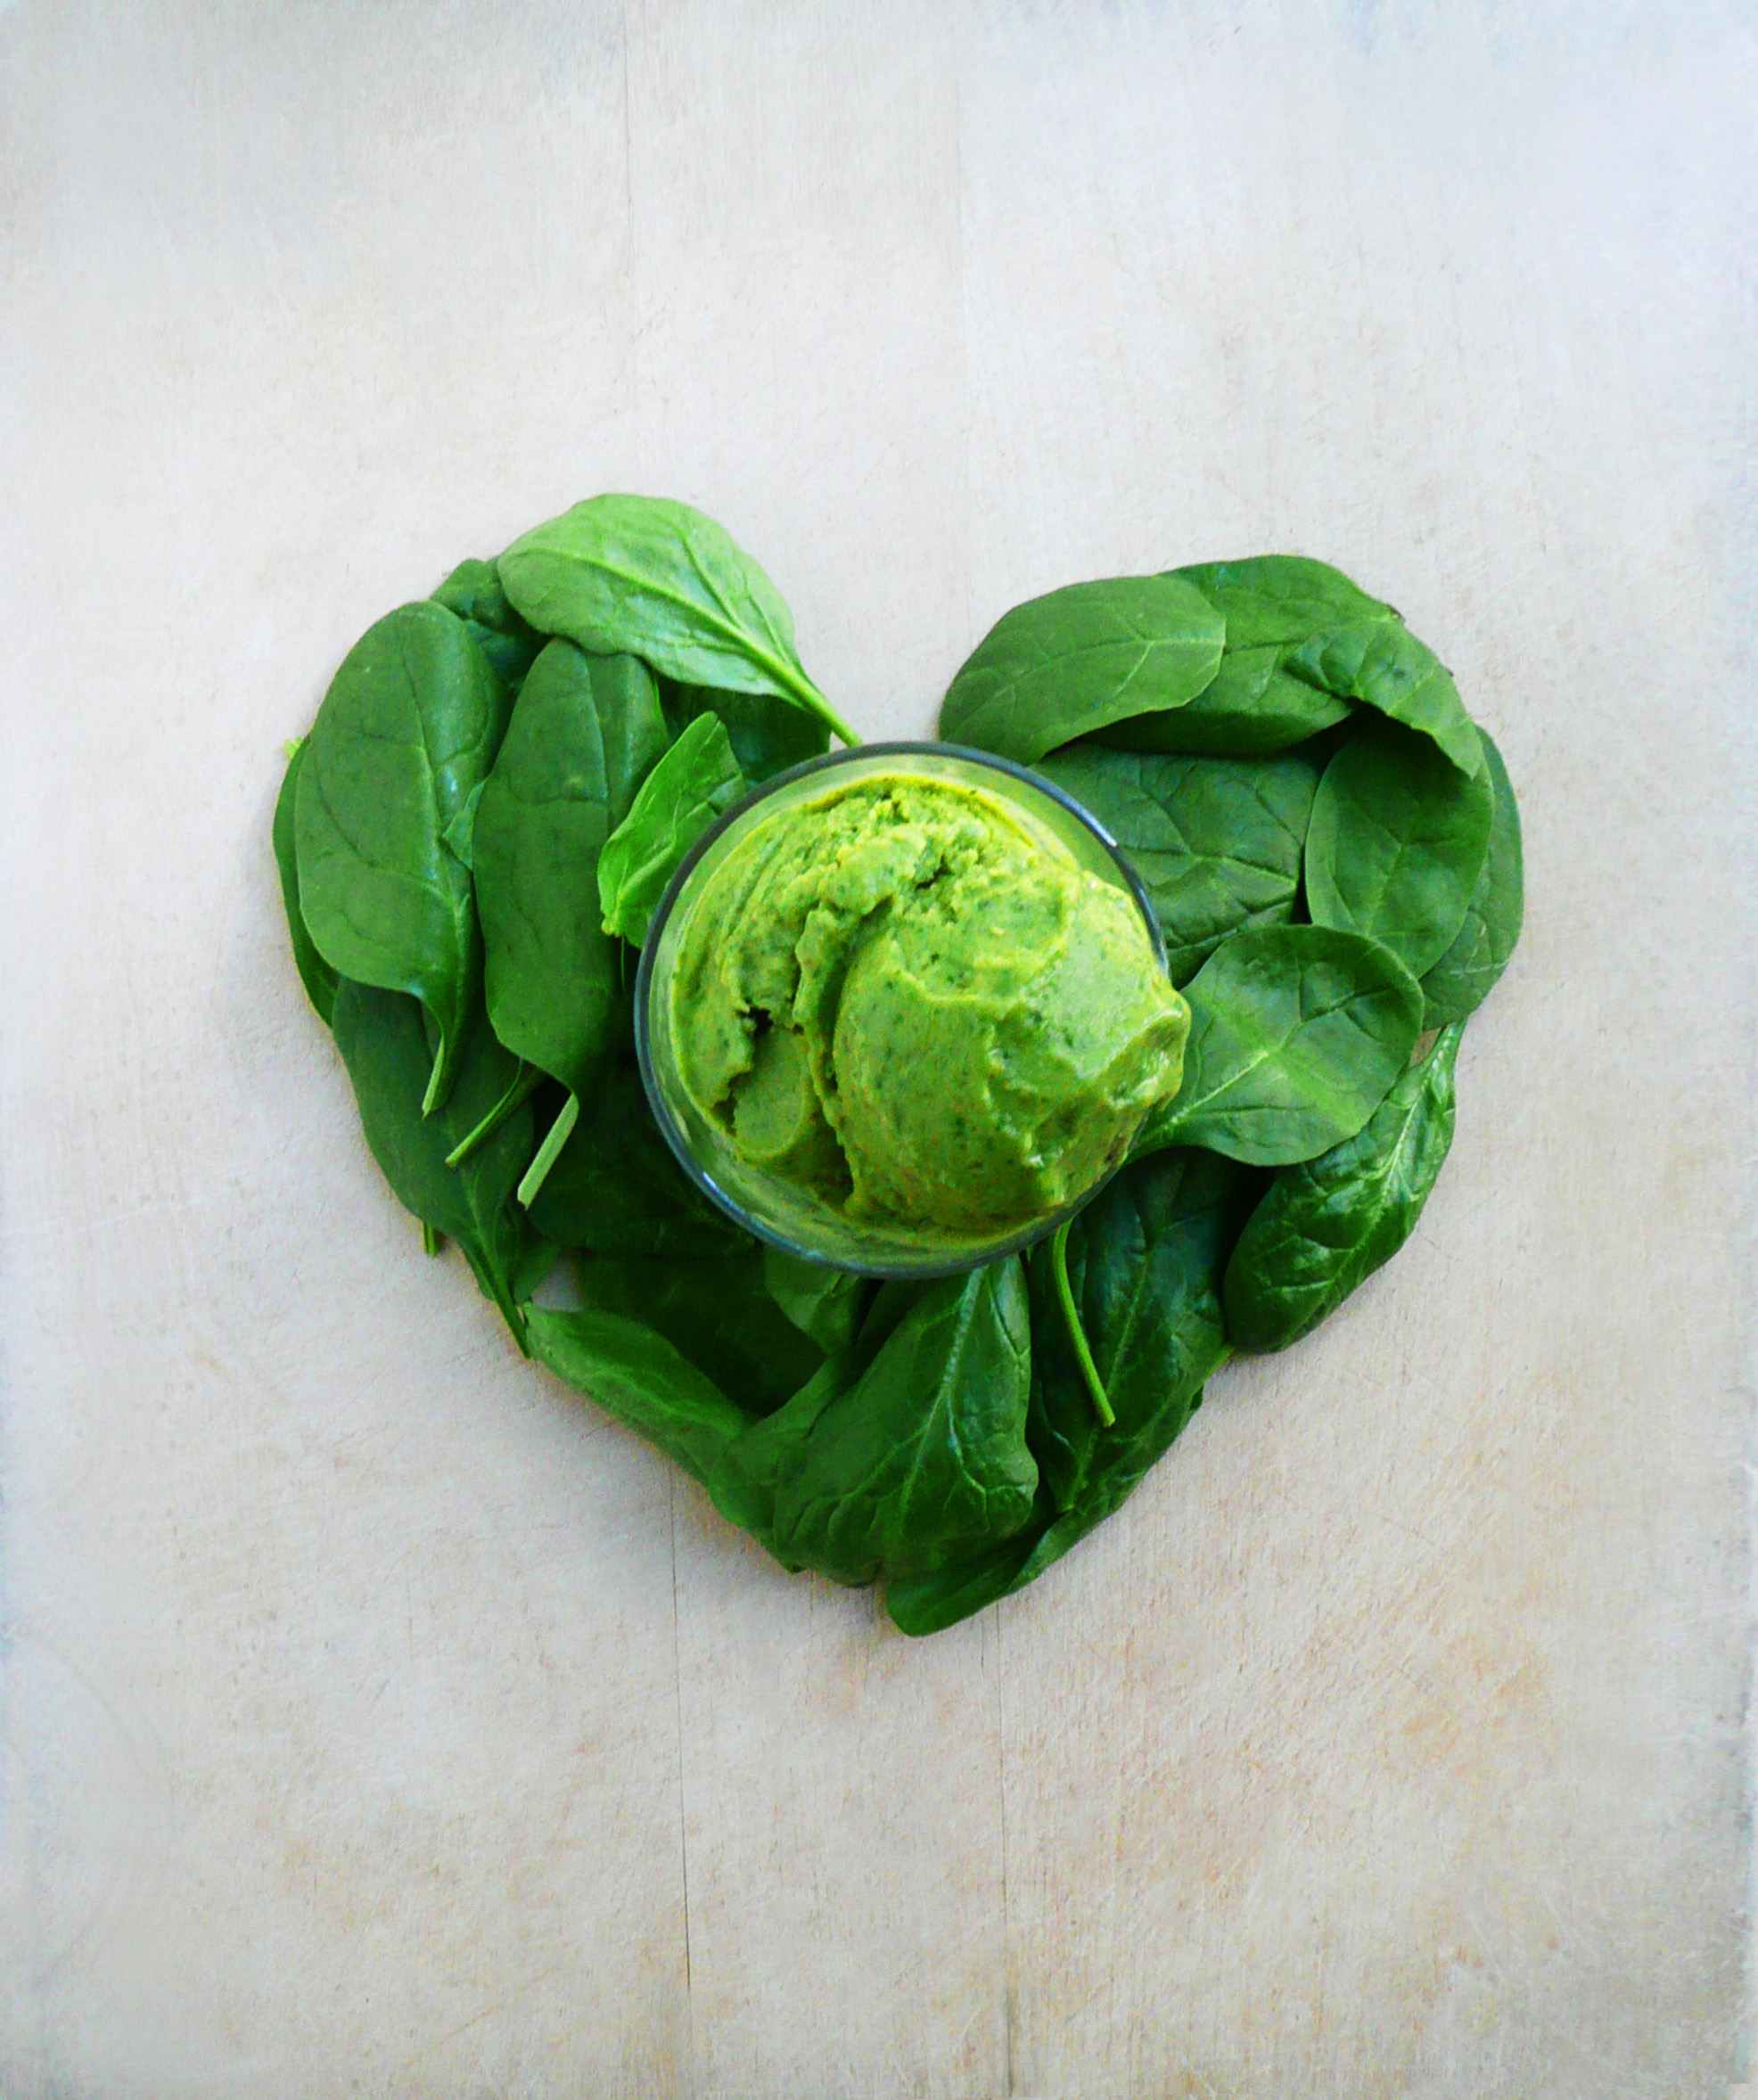
After I finished laughing for a good solid minute (that lone potato really cracked me up), I decided to go check out what was in the fridge and see if I could come up with a recipe from the ingredients that I already had. After a quick glance at the bananas on the counter, I opened the fridge to find that I still had a big box of baby spinach. After a little tinkering, I came up with a recipe for this gorgeous ice cream.
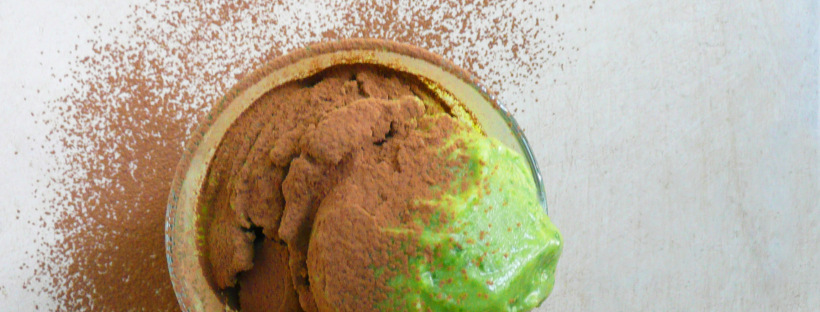
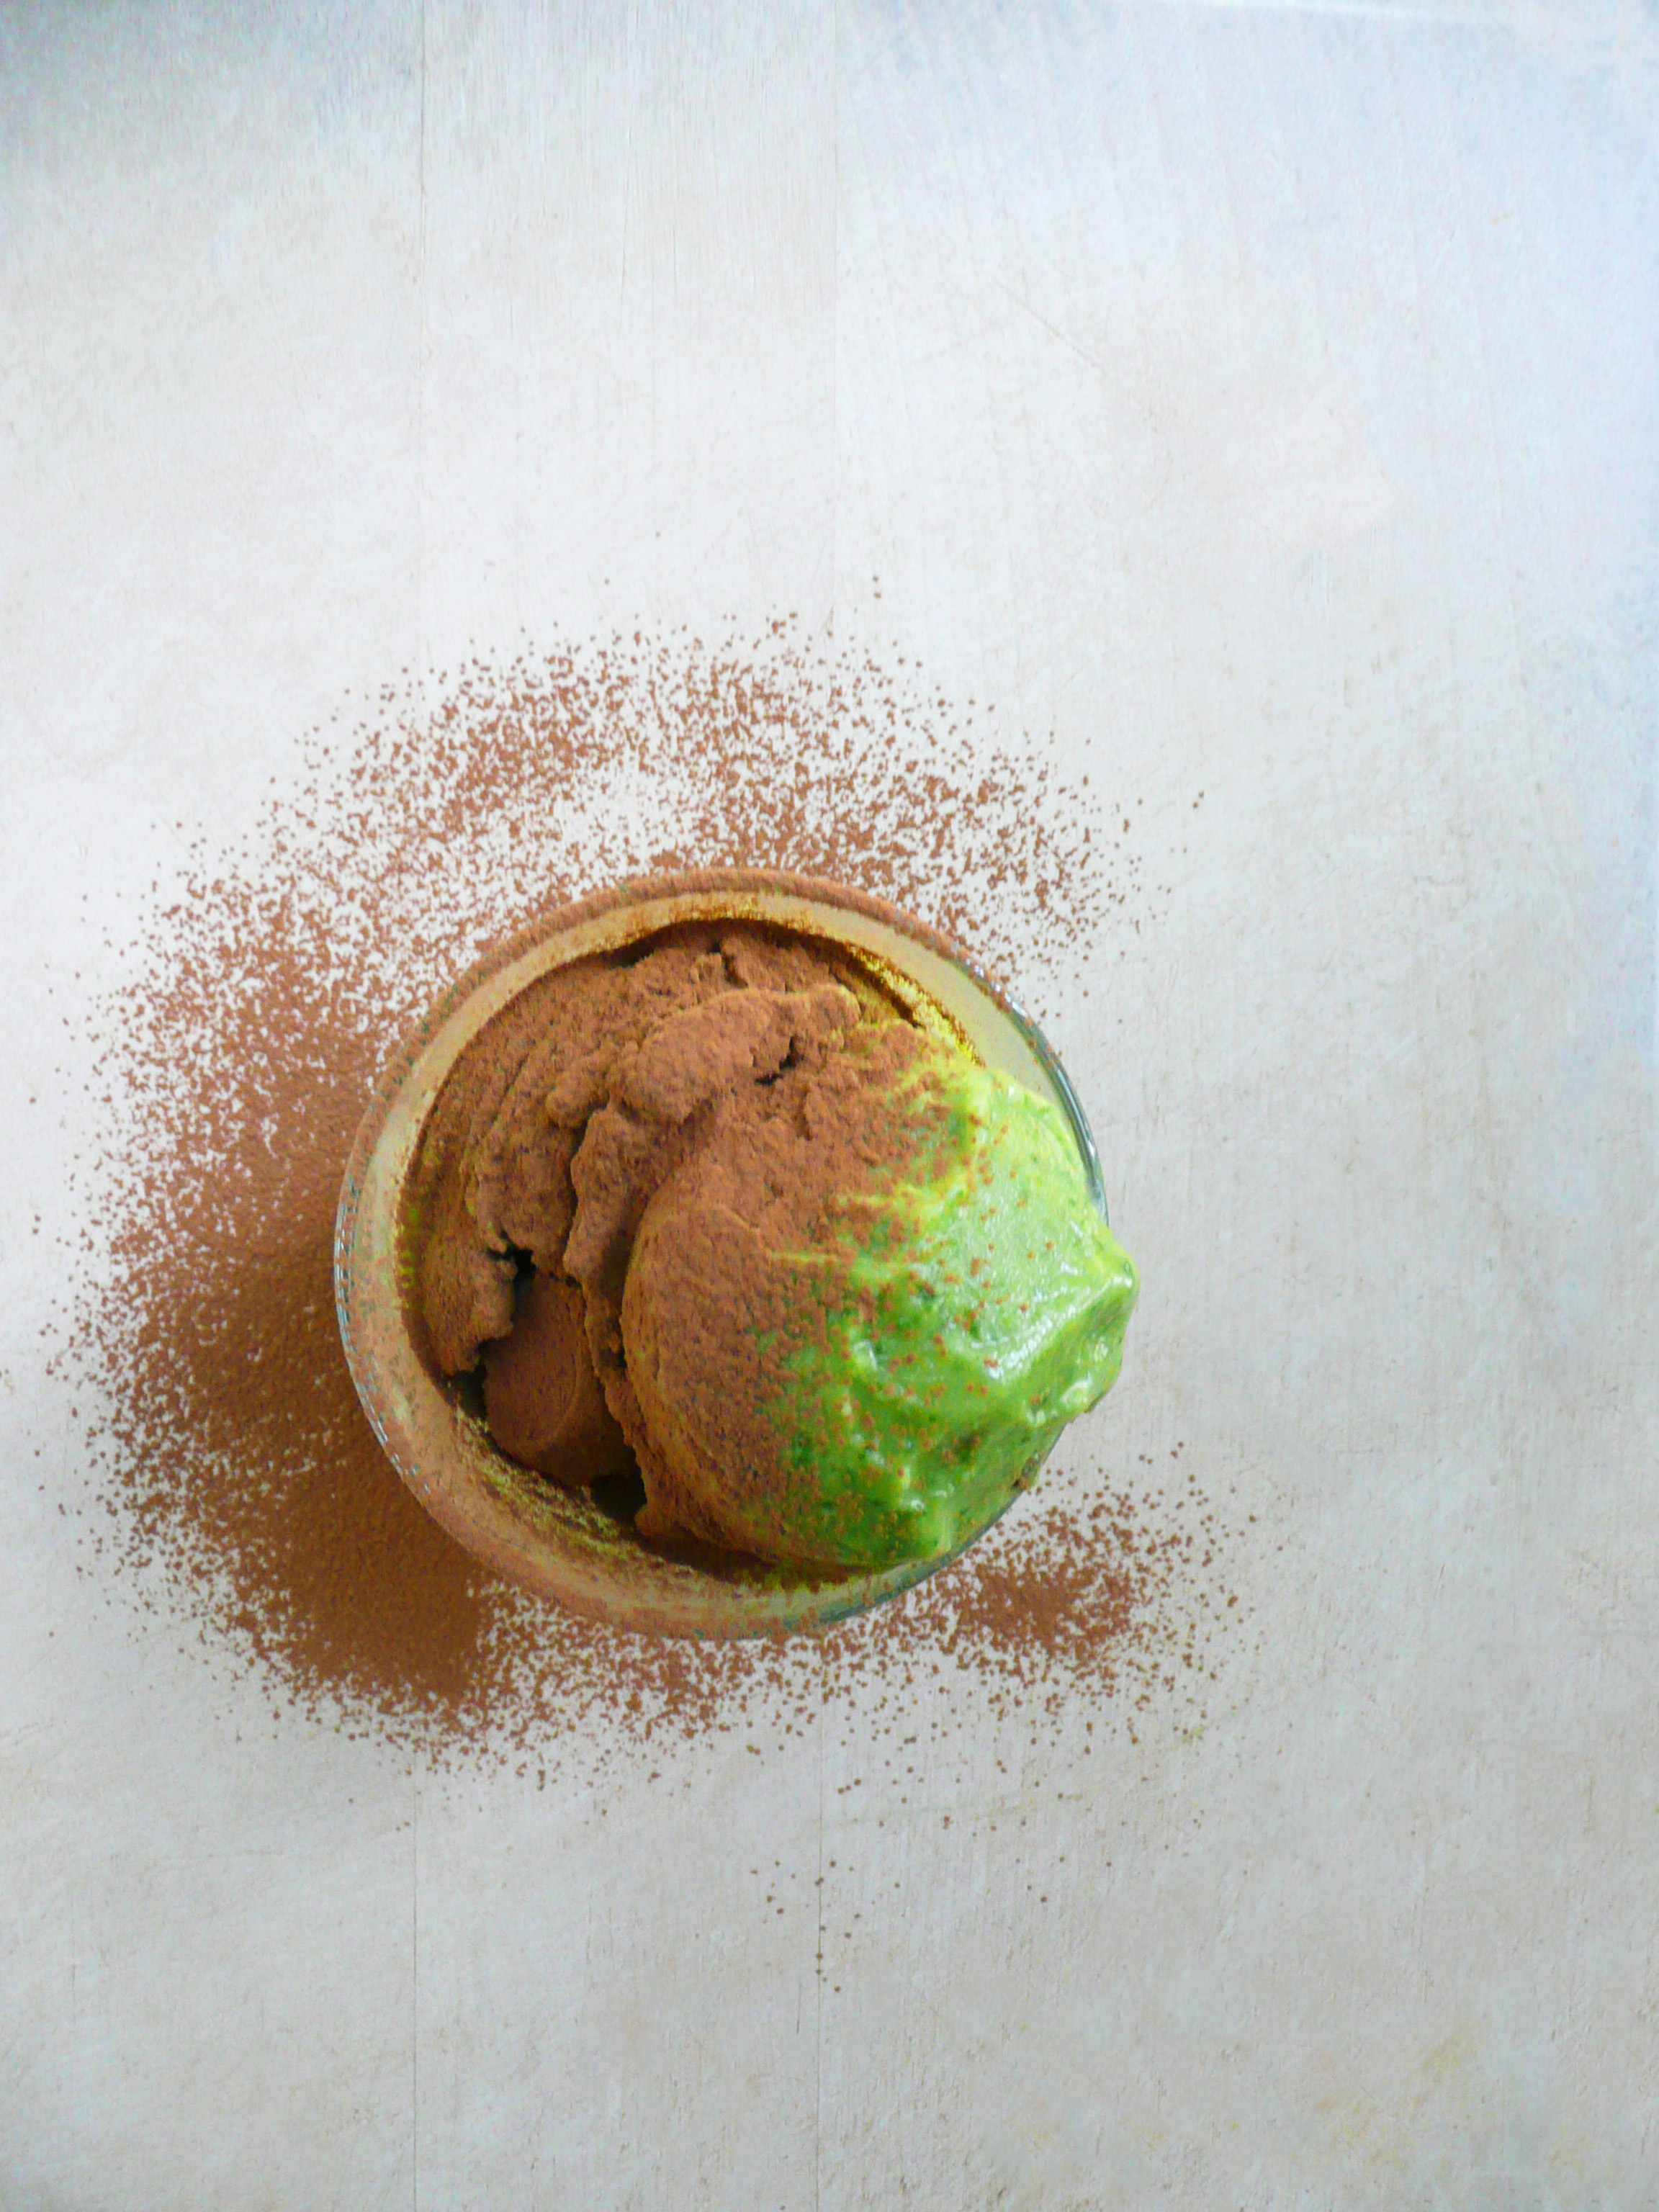
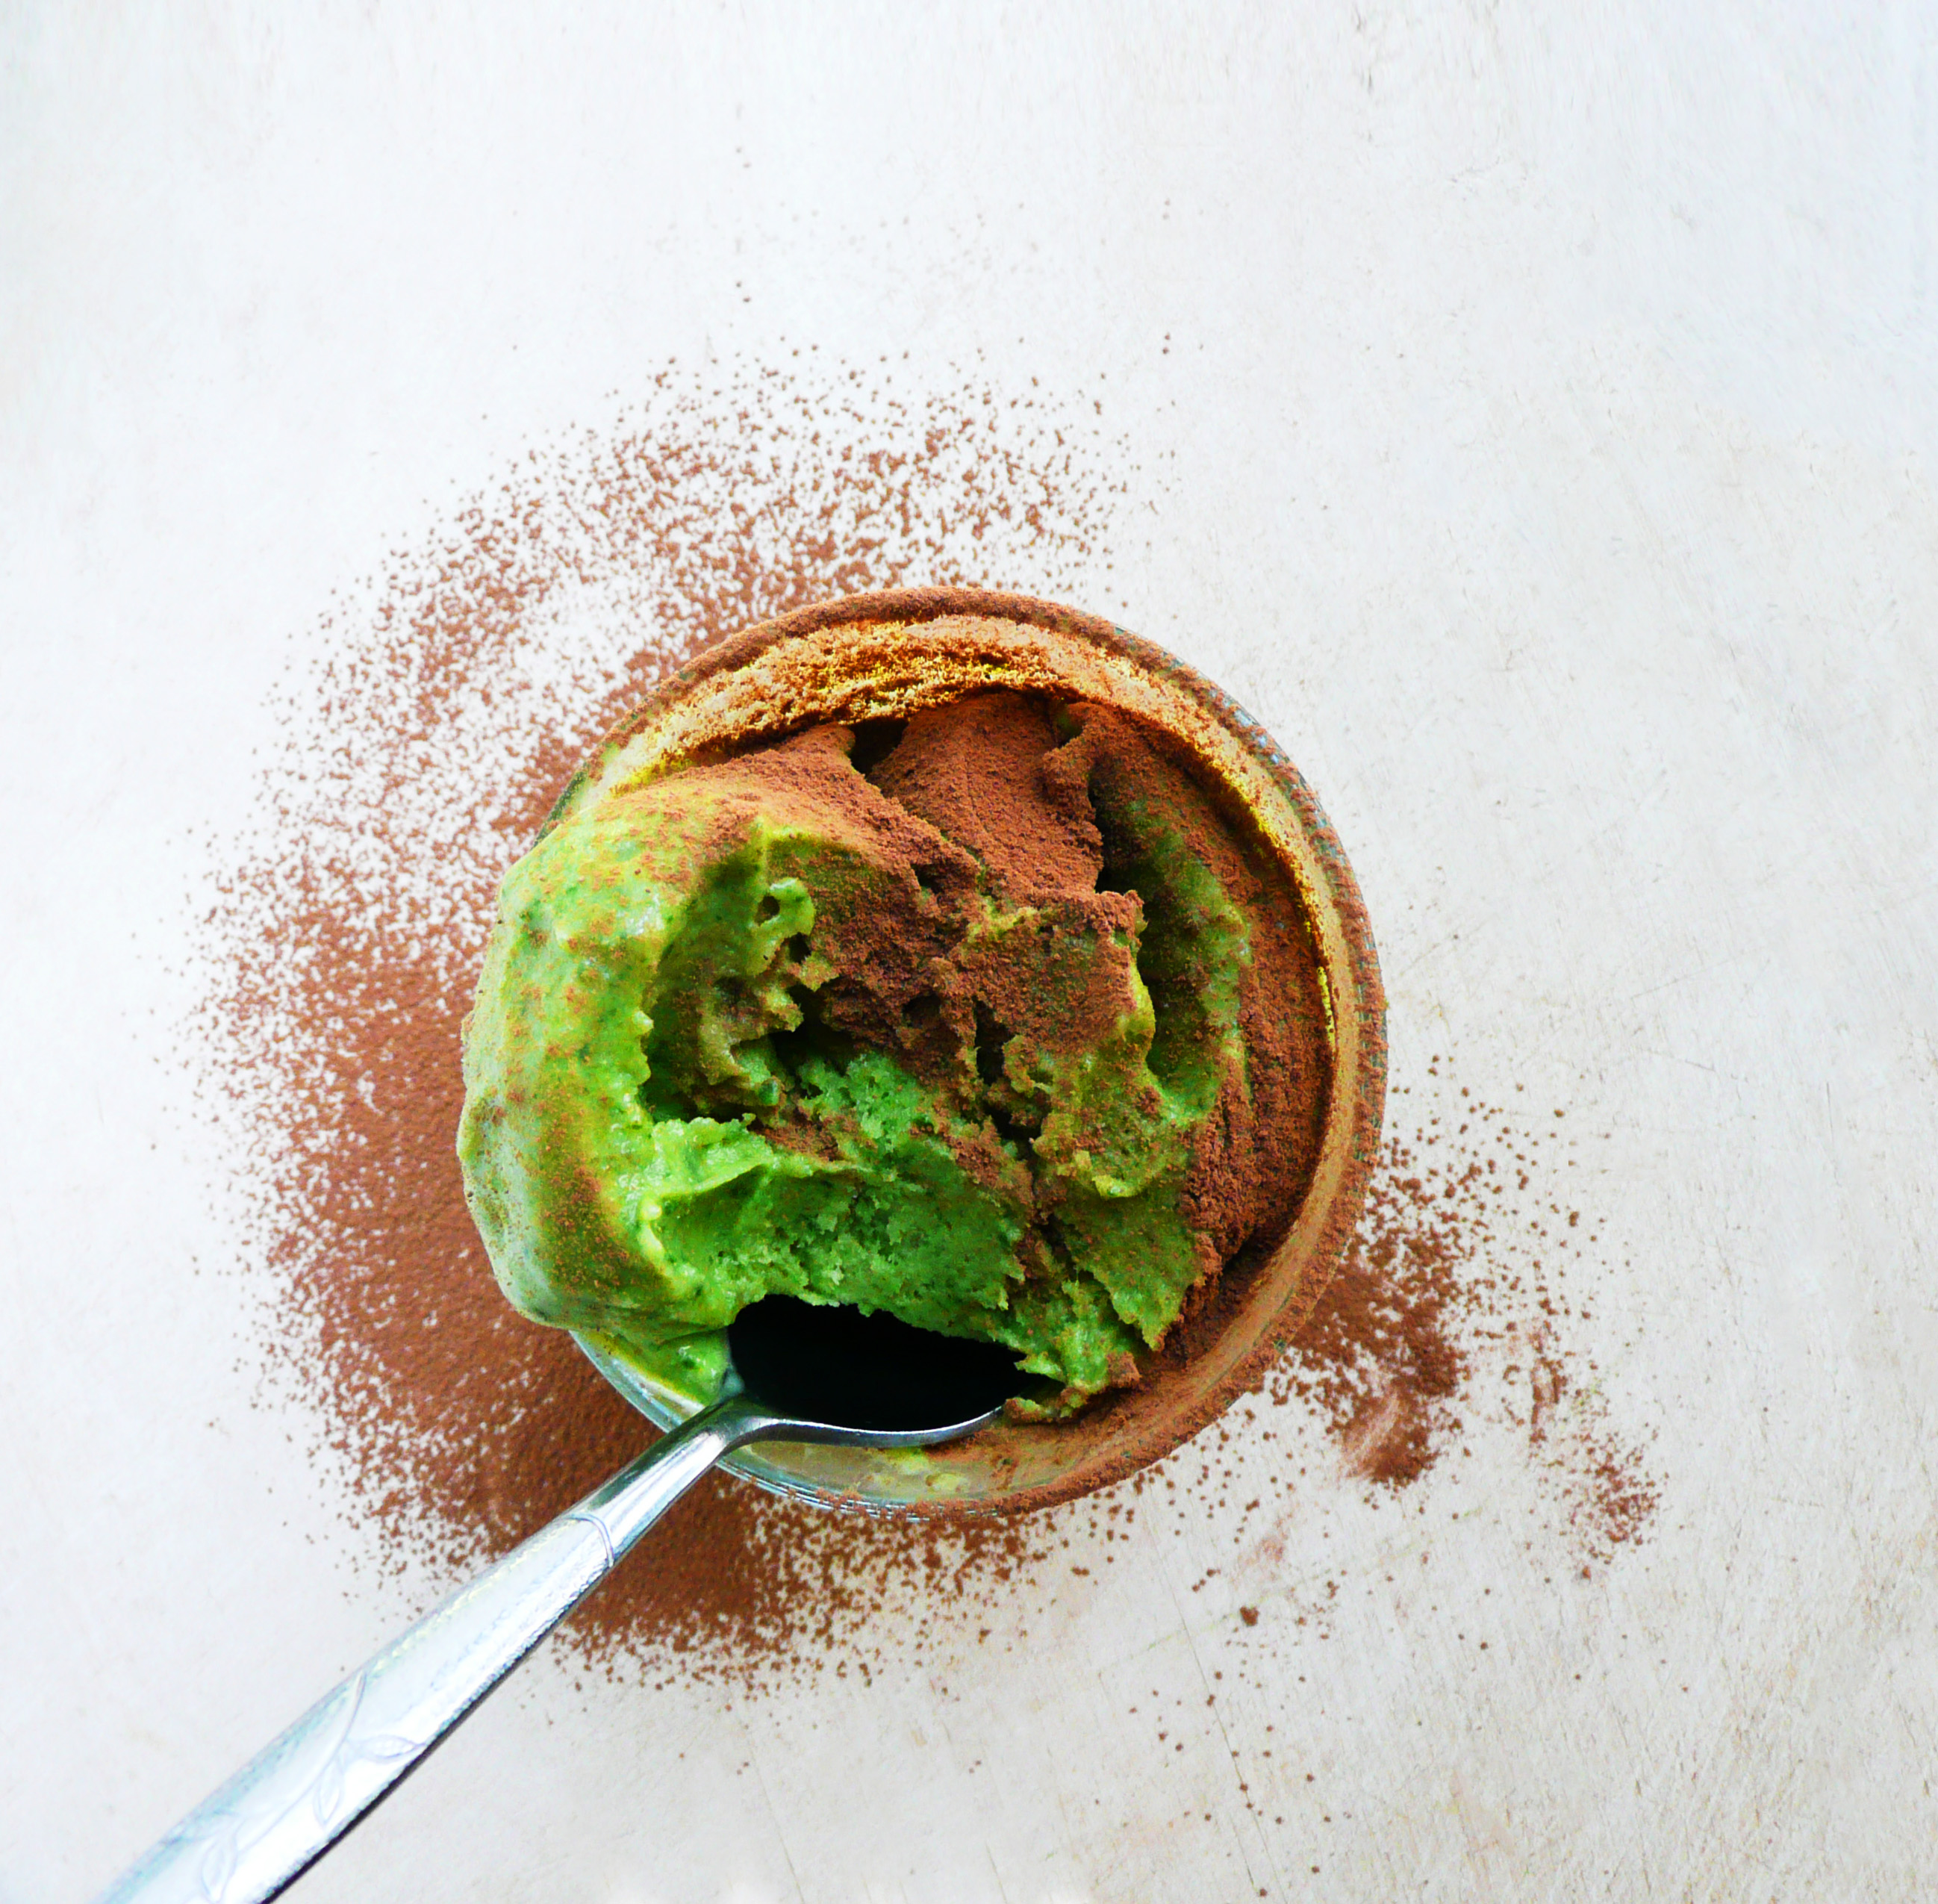
Ireland is the Emerald Isle after all, and this recipe borrows just a bit of that lush green color just in time for St. Patrick’s Day.
This amazing mint chocolate ice cream is rich and creamy, and you can’t taste the baby spinach at all, but it gives the ice cream it’s lovely bright green color without any food coloring. Little flecks of dark green dance across every beautiful spoonful, making every bite a little more festive, a little more special.
Sprinkle over a little cocoa powder before just serving and every delicious bite will taste just like a Thin Mint cookie, but in ice cream form (which is even better).
That little bit of cocoa gives a little bit of bitterness which goes incredibly well with the brightness of the mint and allows the flavor of the ice cream to really sing.
This recipe is also a great way to use up extra baby spinach and overripe bananas. The avocado oil seems like a funny addition, but it adds a real creaminess and makes it taste more like traditional mint ice cream.
Mint Chocolate Ice Cream
Makes a generous serving for 1 (about 3 scoops)
Ingredients
2 bananas
1/2 cup packed baby spinach leaves
5 1/2 tsp – 6 1/4 tsp maple syrup
5 tsp avocado oil (or any neutral flavored oil)
1/8 cup water
1/8 tsp peppermint extract (or more to taste)
the tiniest sprinkle of sea salt imaginable (optional)
A little cocoa powder to sprinkle over the ice cream before serving
Instructions
1. Peel and slice the bananas into 1/2 inch slices. Put a piece of plastic wrap over a plate and arrange the banana slices in a single layer over the plastic wrapped plate. Cover with another layer of plastic wrap and freeze until solid.
2. Allow the bananas to defrost for 5-8 minutes until just thawed. Add the bananas, baby spinach, maple syrup, avocado oil, water, and peppermint extract to a food processor.
Blend until smooth. Taste and add in the tiniest sprinkle of sea salt if desired, and at this point you can add more mint flavoring if you like (add a drop at a time as this stuff is strong).
3. Once you’re happy with the flavor of the ice cream, scoop the ice cream into a dish and sprinkle with cocoa powder. Serve.
Notes – The bananas that I used were medium sized and they were ripe but were only lightly speckled brown, so if the bananas that you use are very brown and sweet, then you can probably decrease the amount of maple syrup.
The measurements that I ended up using in my own batch were 6 1/4 tsp maple syrup, and 1/8 tsp + 3 drops of peppermint extract (as I like a strong minty flavor in this ice cream).
You can also make the ice cream ahead of time and put it into something like a plastic snapware container and stash it in the freezer. This works especially well if you want to be able to scoop it into pretty scoops of ice cream for a nice presentation.
I love this creamy dressing. The dressing takes just minutes to put together and you can make it ahead of time as well and dress the cabbage and carrots when you’re ready to eat.
It’s slightly sweet from the maple syrup, and has a little bit of a bite from the apple cider vinegar and finely grated onion. And the dressing makes eating a good size serving of a cabbage (which is really good for you as it’s a cruciferous vegetable) a delicious experience.
When I first went gluten free, I experimented with a lot with different food combinations to try and come up with more exciting dishes to eat.
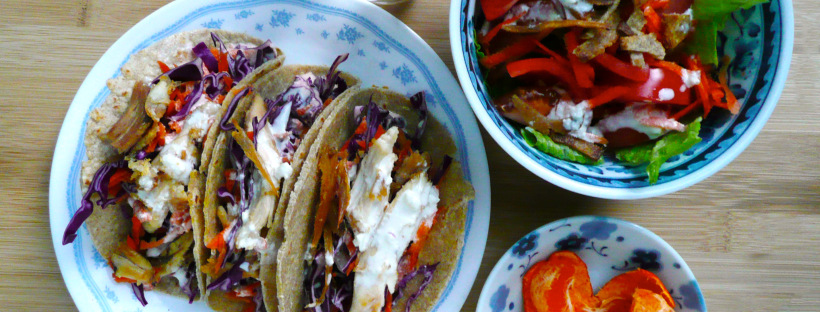
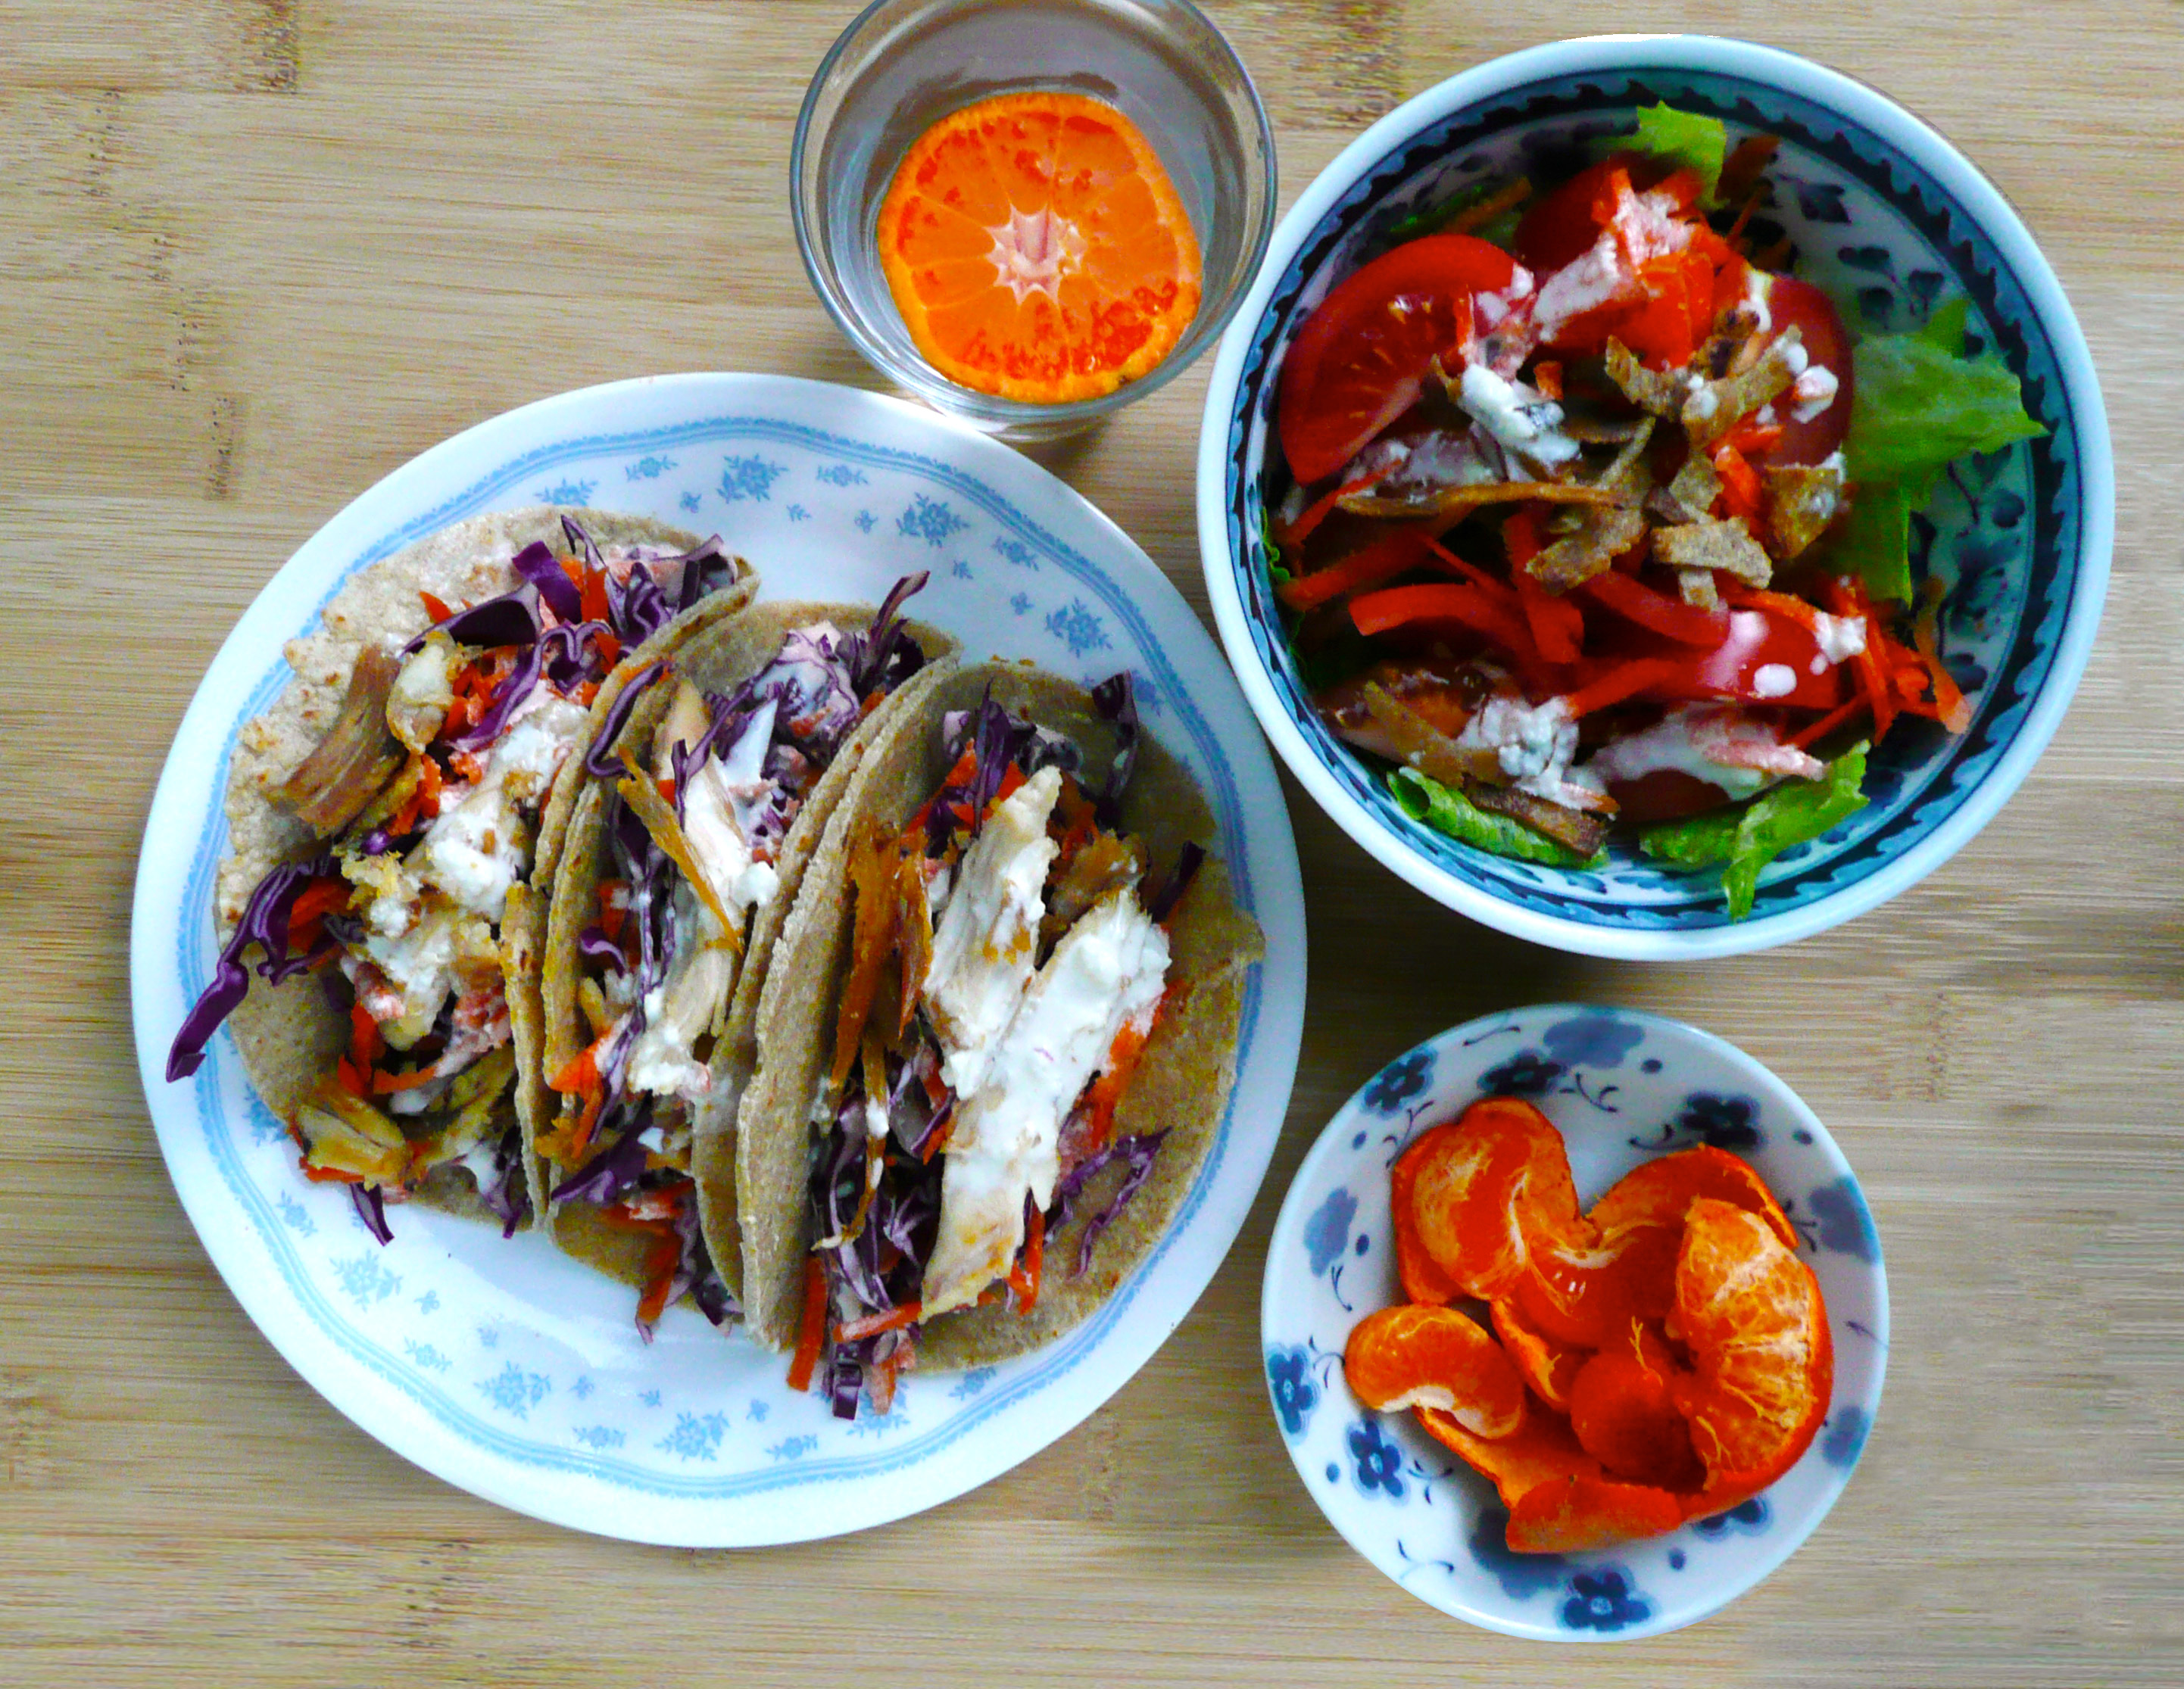
One of my first and favorite food combinations ones turned out to be chicken and cole slaw tacos.
I use homemade gluten free tortillas, top them with cole slaw and some leftover roasted chicken. If you’re vegan, you can use a vegan mayo and a meatless chicken subsitute (or crispy tofu would be good too).
You can also serve the dressing over a normal salad (like I did in the picture). I trimmed off the edges of the tortillas and pan fried them with a little oil until they were crispy and added them to salad as a crouton substitute.
I hope that you enjoy the dressing (and that it makes eating lots of vegetables more exciting!).
Happy Eating!
Cole Slaw Dressing
Makes 1 serving
Ingredients
1/2 tbsp finely grated white onion (I use the really small holes on my box grater for this)
3 tbsp mayo (I used an avocado oil mayo)
3/4 tsp apple cider vinegar
1- 1 1/4 tsp maple syrup
pinch of salt (to taste)
1 cup finely shredded cabbage and grated carrot mix
Instructions
Stir together the onion, mayo, vinegar, and maple syrup. Add salt to taste.
Pour over the cabbage and carrots and stir until well mixed. Serve.
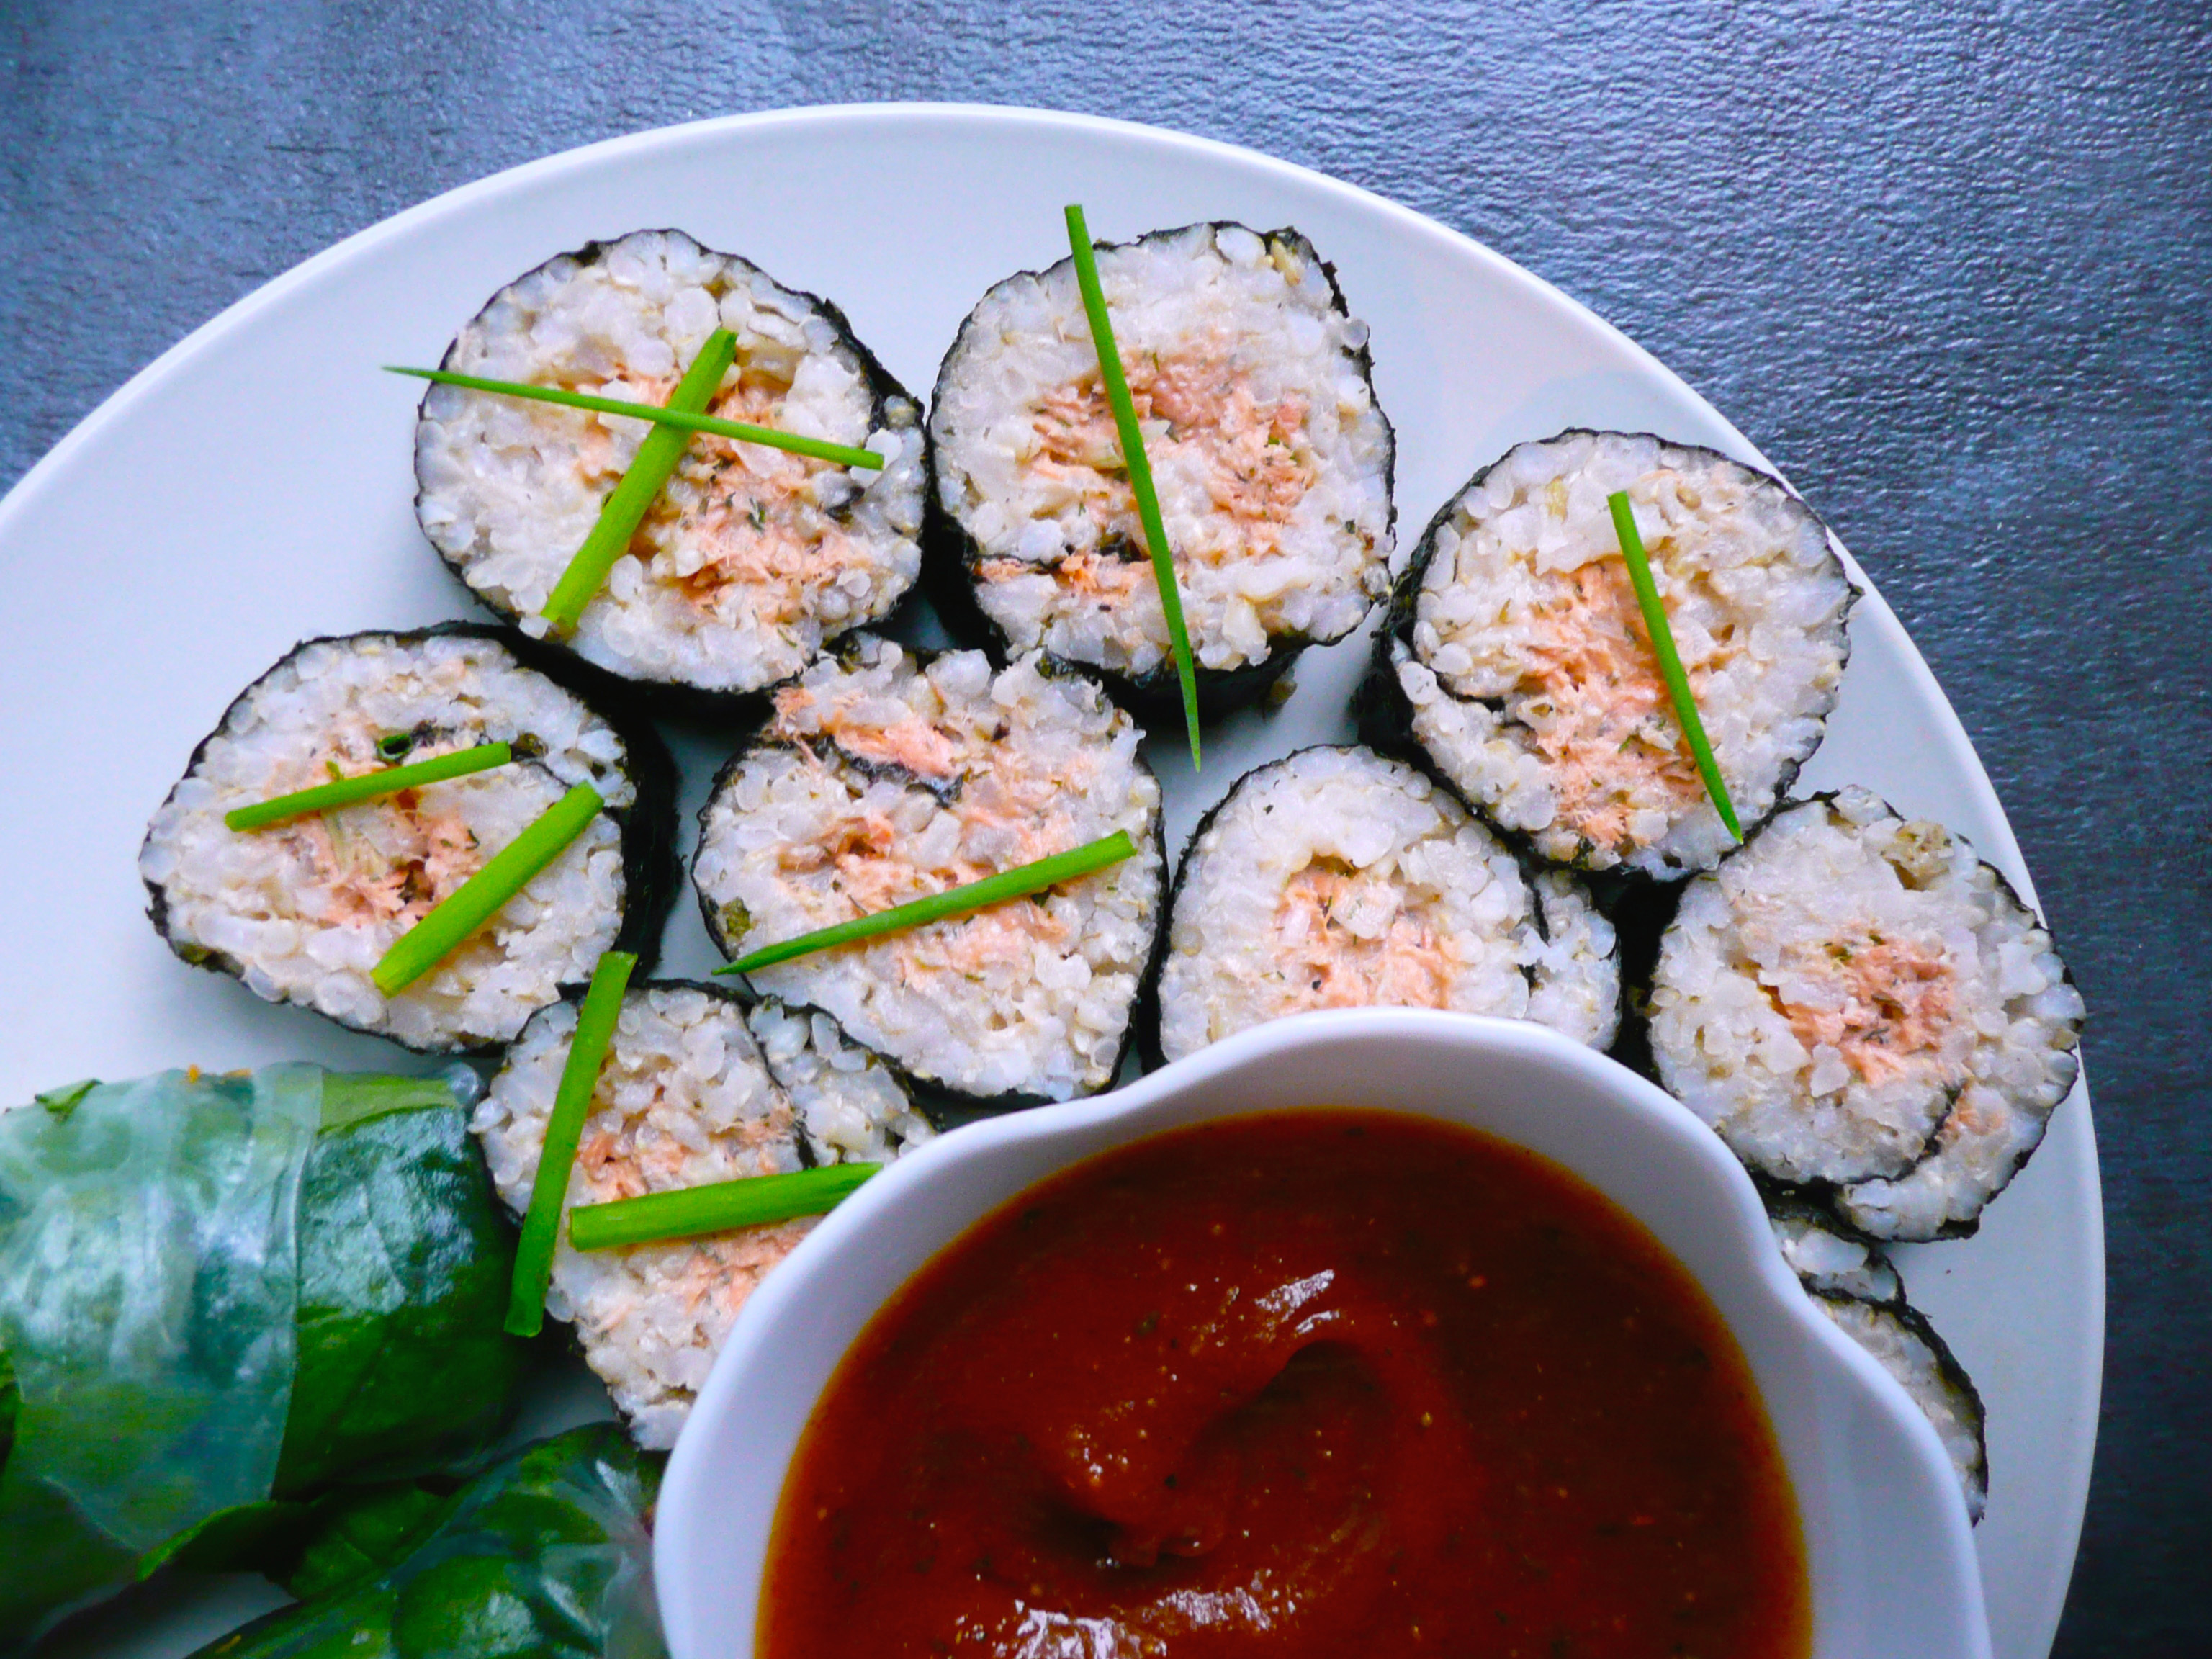
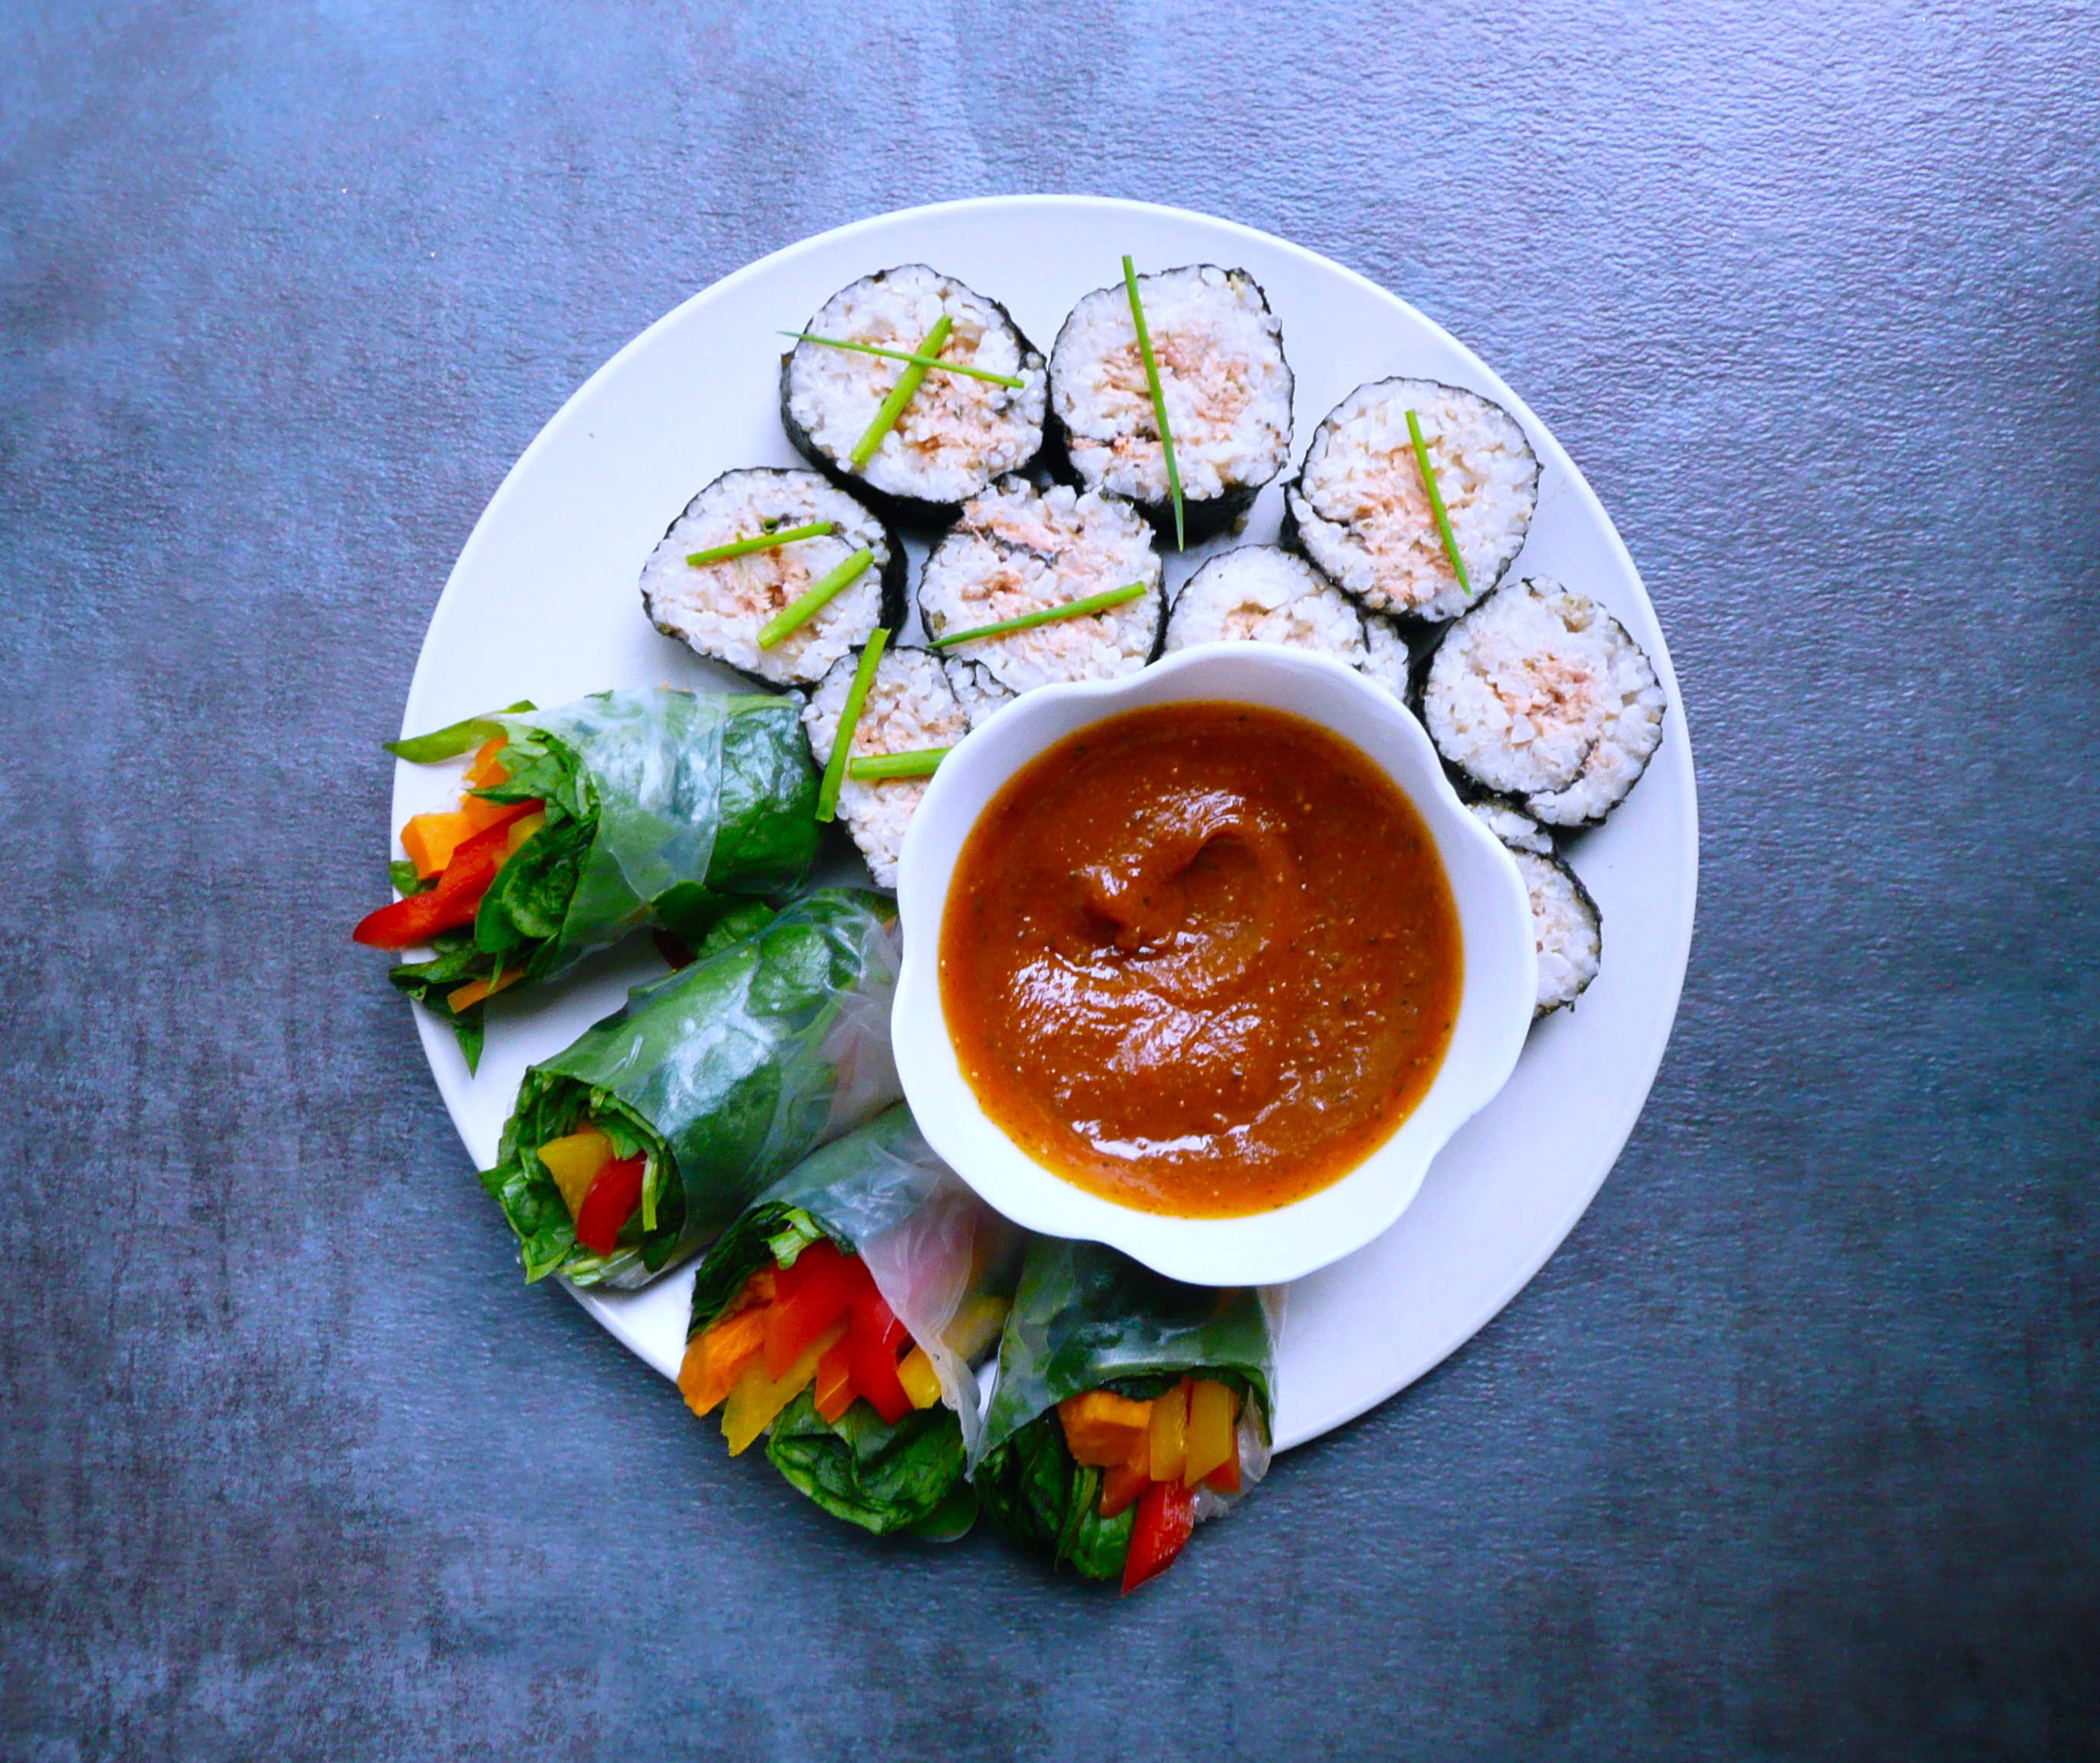
I love tuna salad, and this is a slightly fancier version but is still super simple to make. It’s perfect for a quick dinner, or an easy snack and you can use up your leftover brown rice or salmon to make this tasty dish.
Salmon Salad Sushi
Makes 8 pieces (2 snack size servings, or 1 serving for a hungry person)
Ingredients
1/3 cup cooked flaked salmon (canned salmon is fine too)
2 ½ tbsp. mayo (I used an avocado oil mayo)
1/8 tsp dijon mustard
2 ½ tsp finely chopped green onion
3 tsp lemon juice
tiny pinch of pepper
¼ tsp dried parsley
1/8 tsp granulated garlic
¼ tsp sea salt
1 ½ cups warm cooked brown rice (I just steam it for a few minutes in the rice cooker to warm it up if it was in the fridge)
1 sheet of nori
Instructions
1. Stir together the salmon with everything but the rice and nori.
2. Lay the nori sheet on a plastic wrap covered bamboo mat.
Wet your fingers, and spread the warm rice on the nori into a thin layer leaving about a ¾ inch of nori uncovered at the top of the sheet.
3. Spoon the salmon salad into a line at the bottom of the rice covered nori. Roll firmly into a sushi roll, and set in the fridge for 10 – 15 minutes to firm up. Cut into 8 slices and serve.
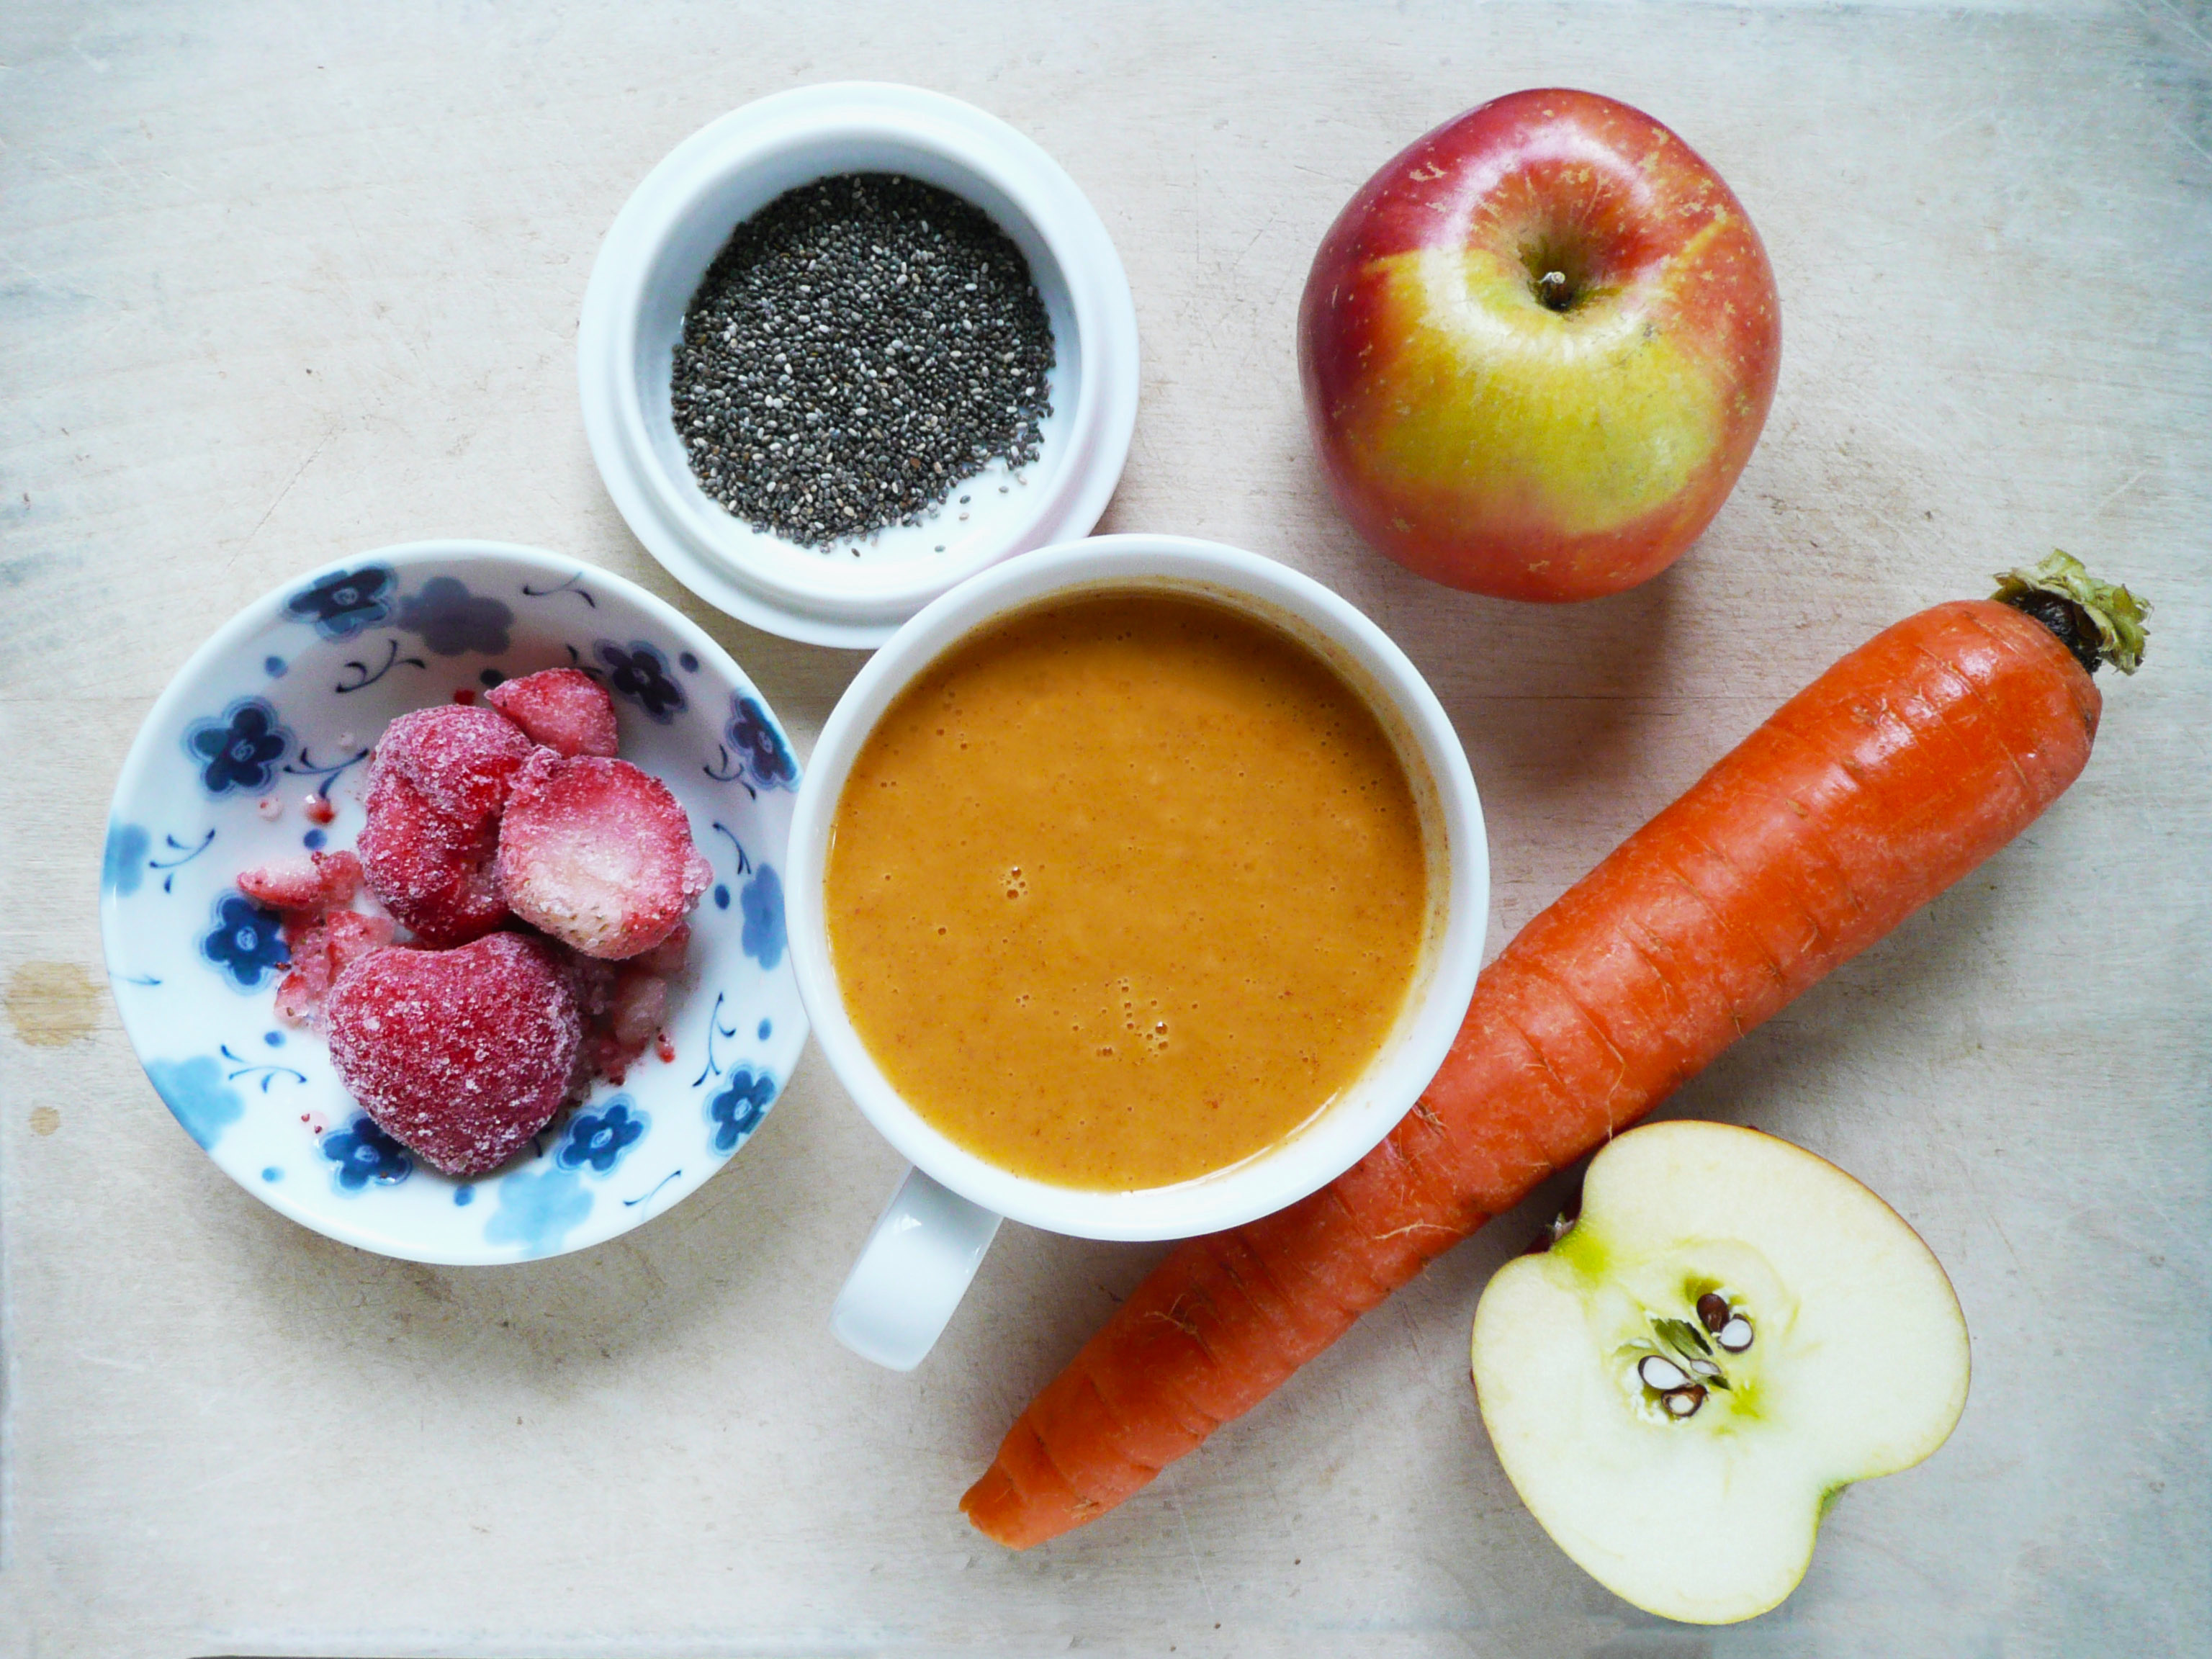
This super pretty smoothie looks like sunshine in a cup. It’s a snap to make and is not only delicious, but also full of healthy and anti-inflammatory ingredients.
Chia seeds provide omega-3 fatty acids, and avocado oil is a monounsaturated fat that helps to increase the absorption of the beta carotene from the carrots. The pineapple adds sweetness (if you use fresh pineapple then you get the benefit of an added anti-inflammatory enzyme called bromelain which helps with pain) and the strawberries add anthocyanins (the compounds that give the strawberries their color) which can help boost neurogenesis (helping your brain to produce new brain cells).
What I’ll sometimes do is pour one serving of the smoothie into a screw top jar (just an empty jar of coconut oil that I’ve washed and cleaned out) and keep it in the fridge to drink later in the day. It’s a filling smoothie and drinking this is usually satisfying enough that I can walk by the wall of chocolate candy at the grocery store and not crave any of it.
The apples, strawberries and pineapple give the smoothie a lovely sweetness, but if you want the smoothie a little sweeter, you can squeeze in a little honey to taste.
Good Morning Sunshine Smoothie
Makes 2 generous servings
Ingredients
1 1/2 fuji apples, roughly chopped
1 large carrot, but into 1/2 inch slices (about 1 cup)
1/4 cup canned pineapple + 1/4 cup of the pineapple juice*
8 strawberries (fresh or frozen) about a scant 1 cup
*If you don’t want to use canned pineapple, Trader Joe’s sells pineapple juice in a carton which tastes great. You can just add a few splashes of that to the smoothie instead of the canned pineapple for sweetness.
Instructions
Add all ingredients into a blender and blend until smooth. Pour into cups and serve.
If your blender isn’t that great at blending frozen things, you can let the strawberries thaw for 15-20 minutes before blending.
I hope that this colorful smoothie brings a little joy and sunshine to your day!
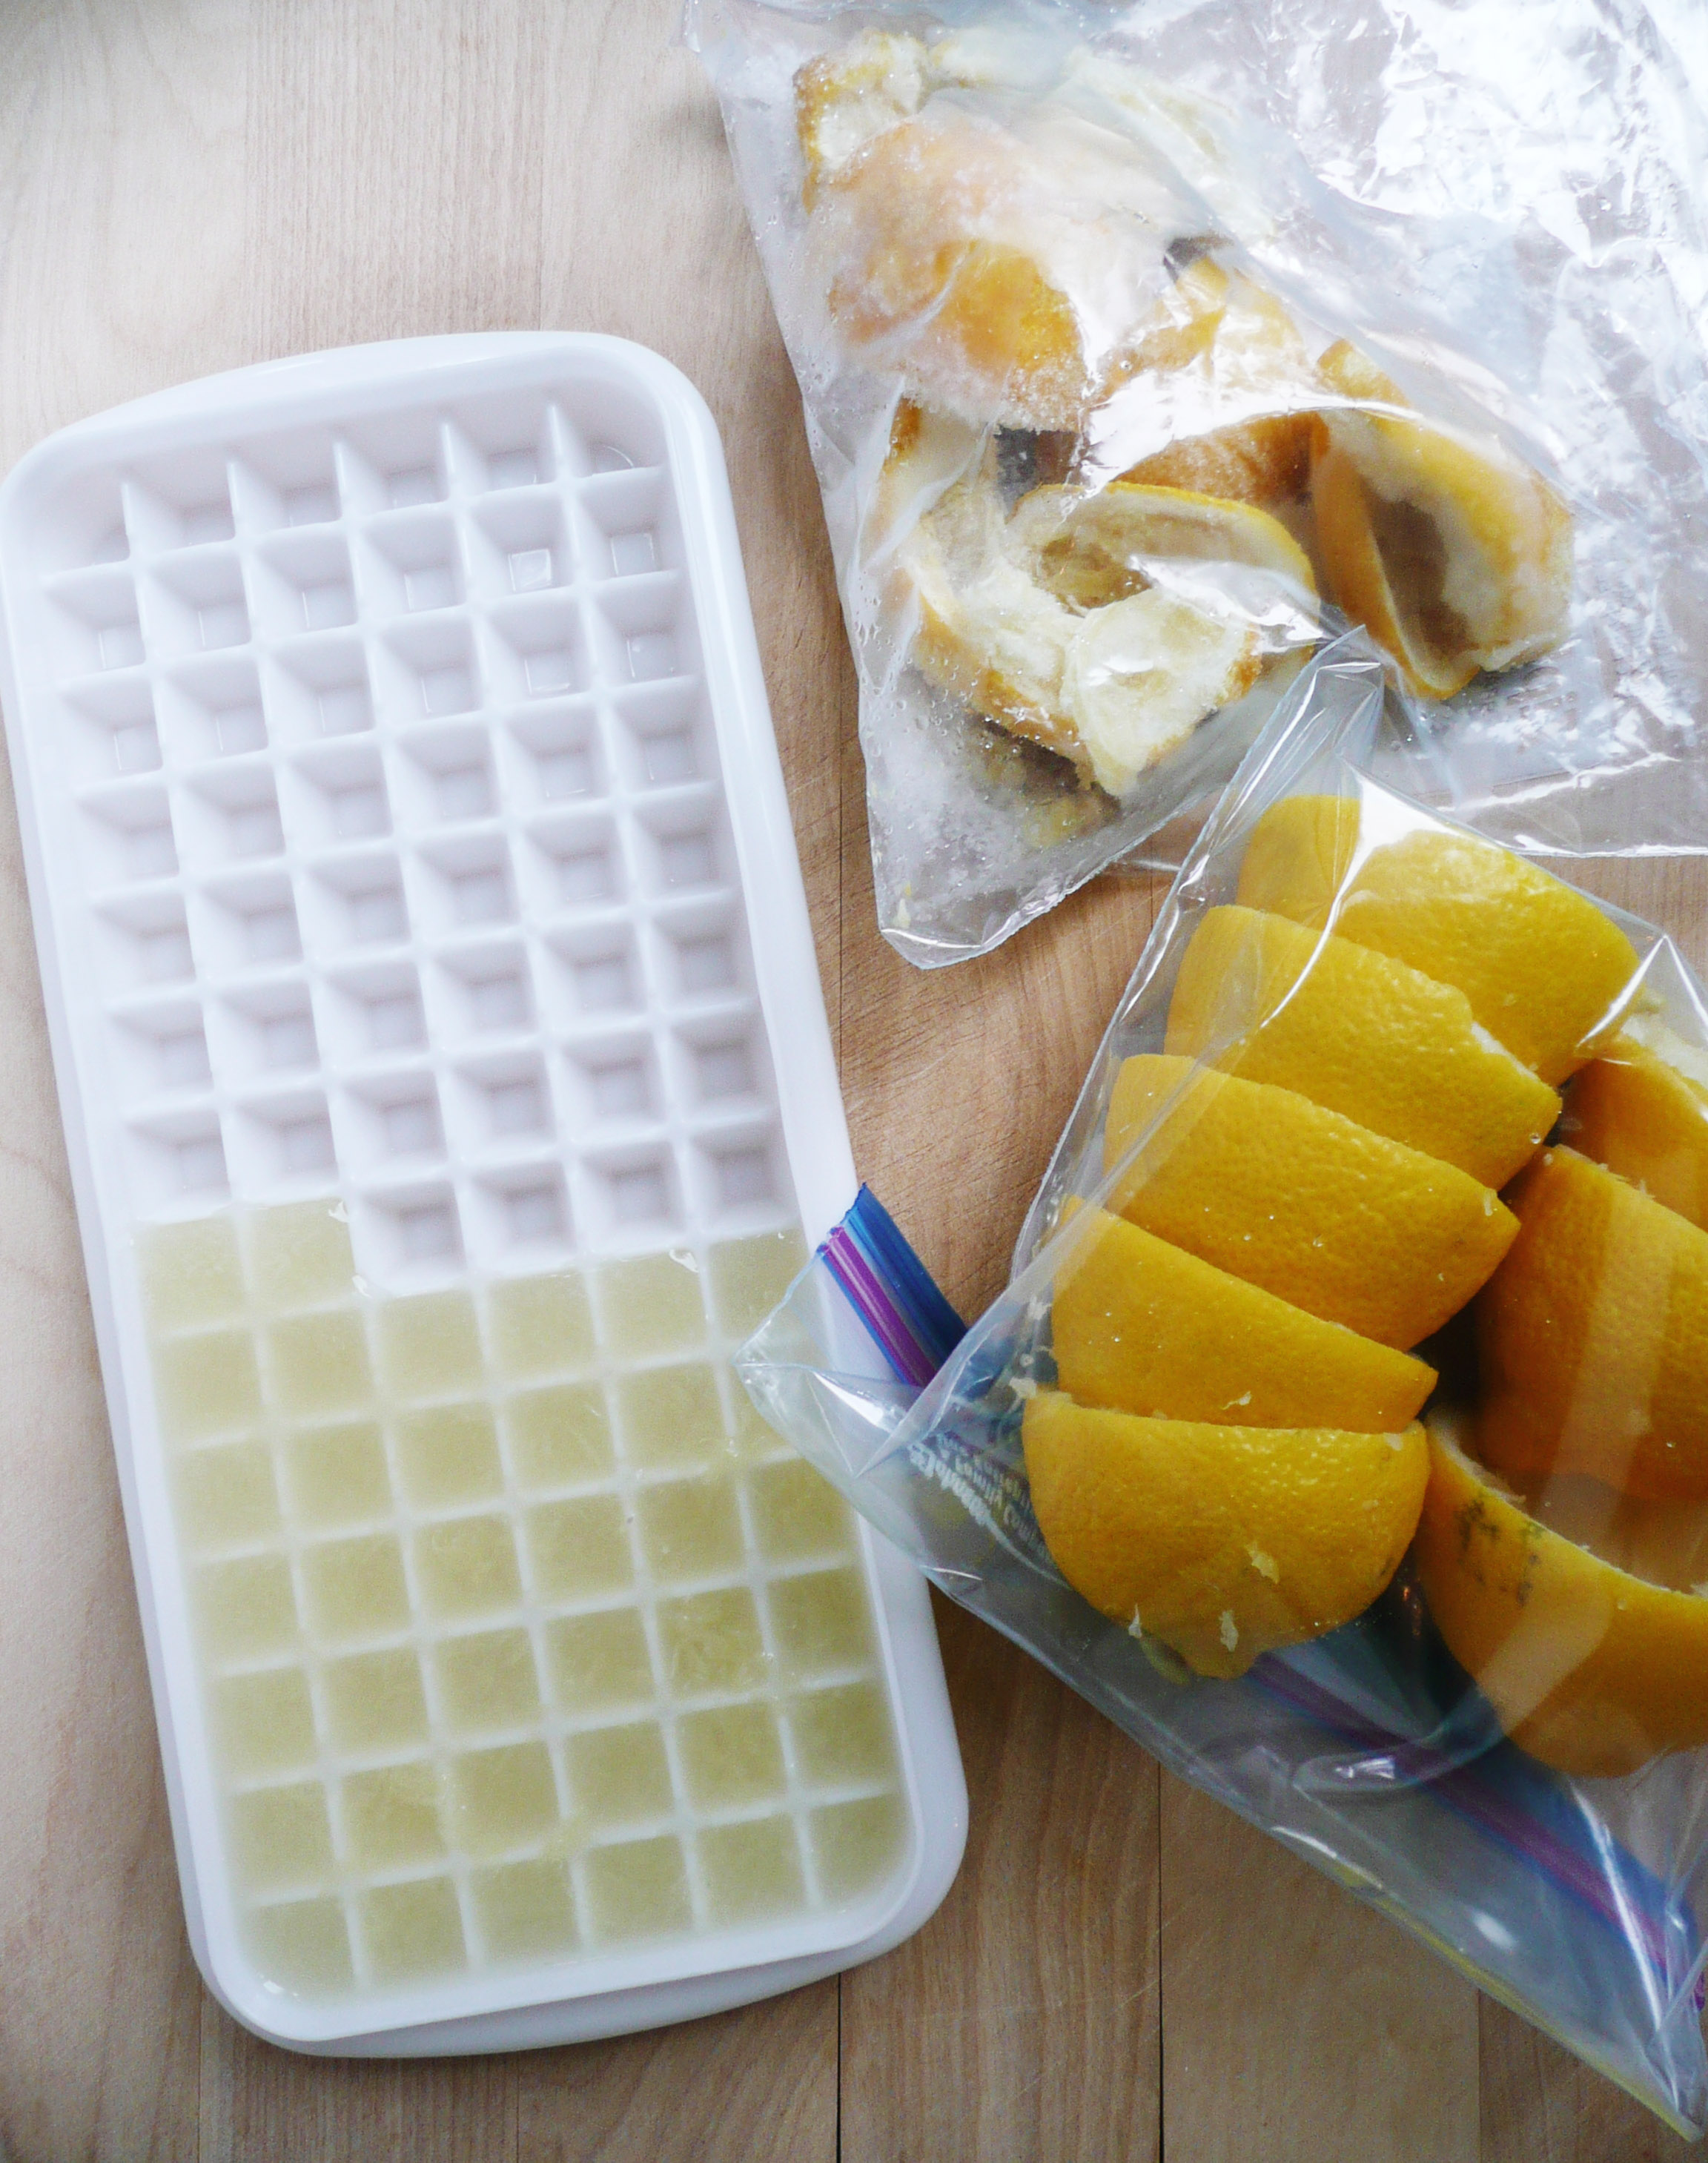
Lemons tend to be expensive. A single organic lemon can cost in the neighborhood of $1.30 – $1.70 depending on the store, so it’s usually a cheaper option to buy the 2 lb bag of organic lemons for about $5 instead.
This means that I usually end up with a bag of lemons when I only needed 1 or 2 of them.
If you’re ever in this pinch and trying to figure out what to do with the rest of your lemons before they go bad, then freezing them is a really good option.
I wash the lemons, then juice them and pour the lemon juice into an ice cube tray. Once frozen, pop the lemon juice cubes into a zip top bag and stash them in your freezer until you’re ready to use them. The lemon juice cubes melt quickly and are a great way to always have lemon juice always on hand. I used an ice cube tray from daiso, which just happens to make smaller ice cubes, but a normal ice cube tray will work just as well.
I add the lemon juice cubes to tea, or to chicken soup with brown rice and quinoa, or quinoa tabbouleh.
You can freeze the lemon rinds as well in a separate zip top bag, and grate them from frozen on a microplane to add lemon zest to your dishes.
When I have a cold, I’ll toss a few of the frozen lemon rinds into a pot and boil them with some water, ginger, turmeric, black pepper, a tablespoon of coconut oil, and honey for a soothing tea.
However you use your frozen lemons, I hope that this trick brings you many happy lemony dishes!
I know that it’s healthy, but like most people, I didn’t grow up eating it. So quinoa lacks that sense of nostalgia and comfort that many of my favorite foods have. It doesn’t have too much of a flavor, and to be honest I’m still sometimes at a loss as to what to eat with it, or lack ideas on how to make it more exciting.
I know that people say that you can swap quinoa out for rice, but honey, it ain’t the same.
Making sushi with quinoa doesn’t work that well, and when you’re eating something like Lou Rou Fan (Taiwanese Braised Pork with rice) or Taiwanese Style Scrambled Eggs with Tomatoes and Green Onion, you want rice. I can eat brown rice with both of those dishes and not feel like I’m missing out, but I don’t want to eat those dishes with quinoa.
But this is a recipe that I love to eat. This recipe makes quinoa taste (imagine Oprah saying this) amazing! I love the brightness of the lemon juice with the freshness of the mint and parsley. The quinoa has a lovely texture that really works well with this dish, and gives the tabbouleh a lot of good protein. This tabbouleh is also full of different colored vegetables and herbs, and it’s a very nutrient dense salad that just tastes great.
And it doesn’t feel like another boring old salad, it looks and tastes exciting.
So if you’re ever stumped as to what to do with leftover quinoa, make this dish and see if you don’t just eat the entire portion yourself in one sitting.
I like to make this dish a day in advance so that the lemon juice has time to mellow out the sharpness of the onion. It’s also nice to have a batch of this sitting in the fridge so that there’s always something healthy to snack on when you’re hungry.
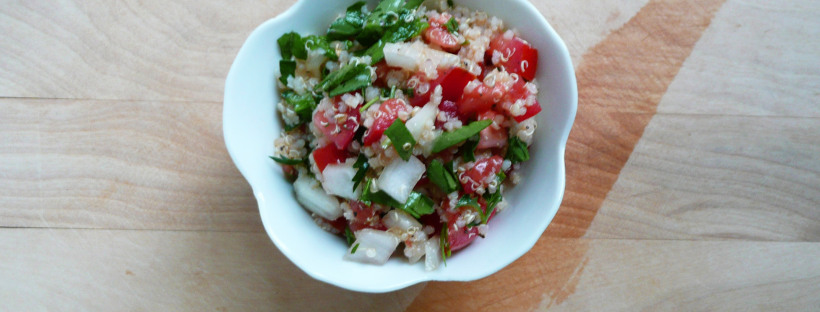
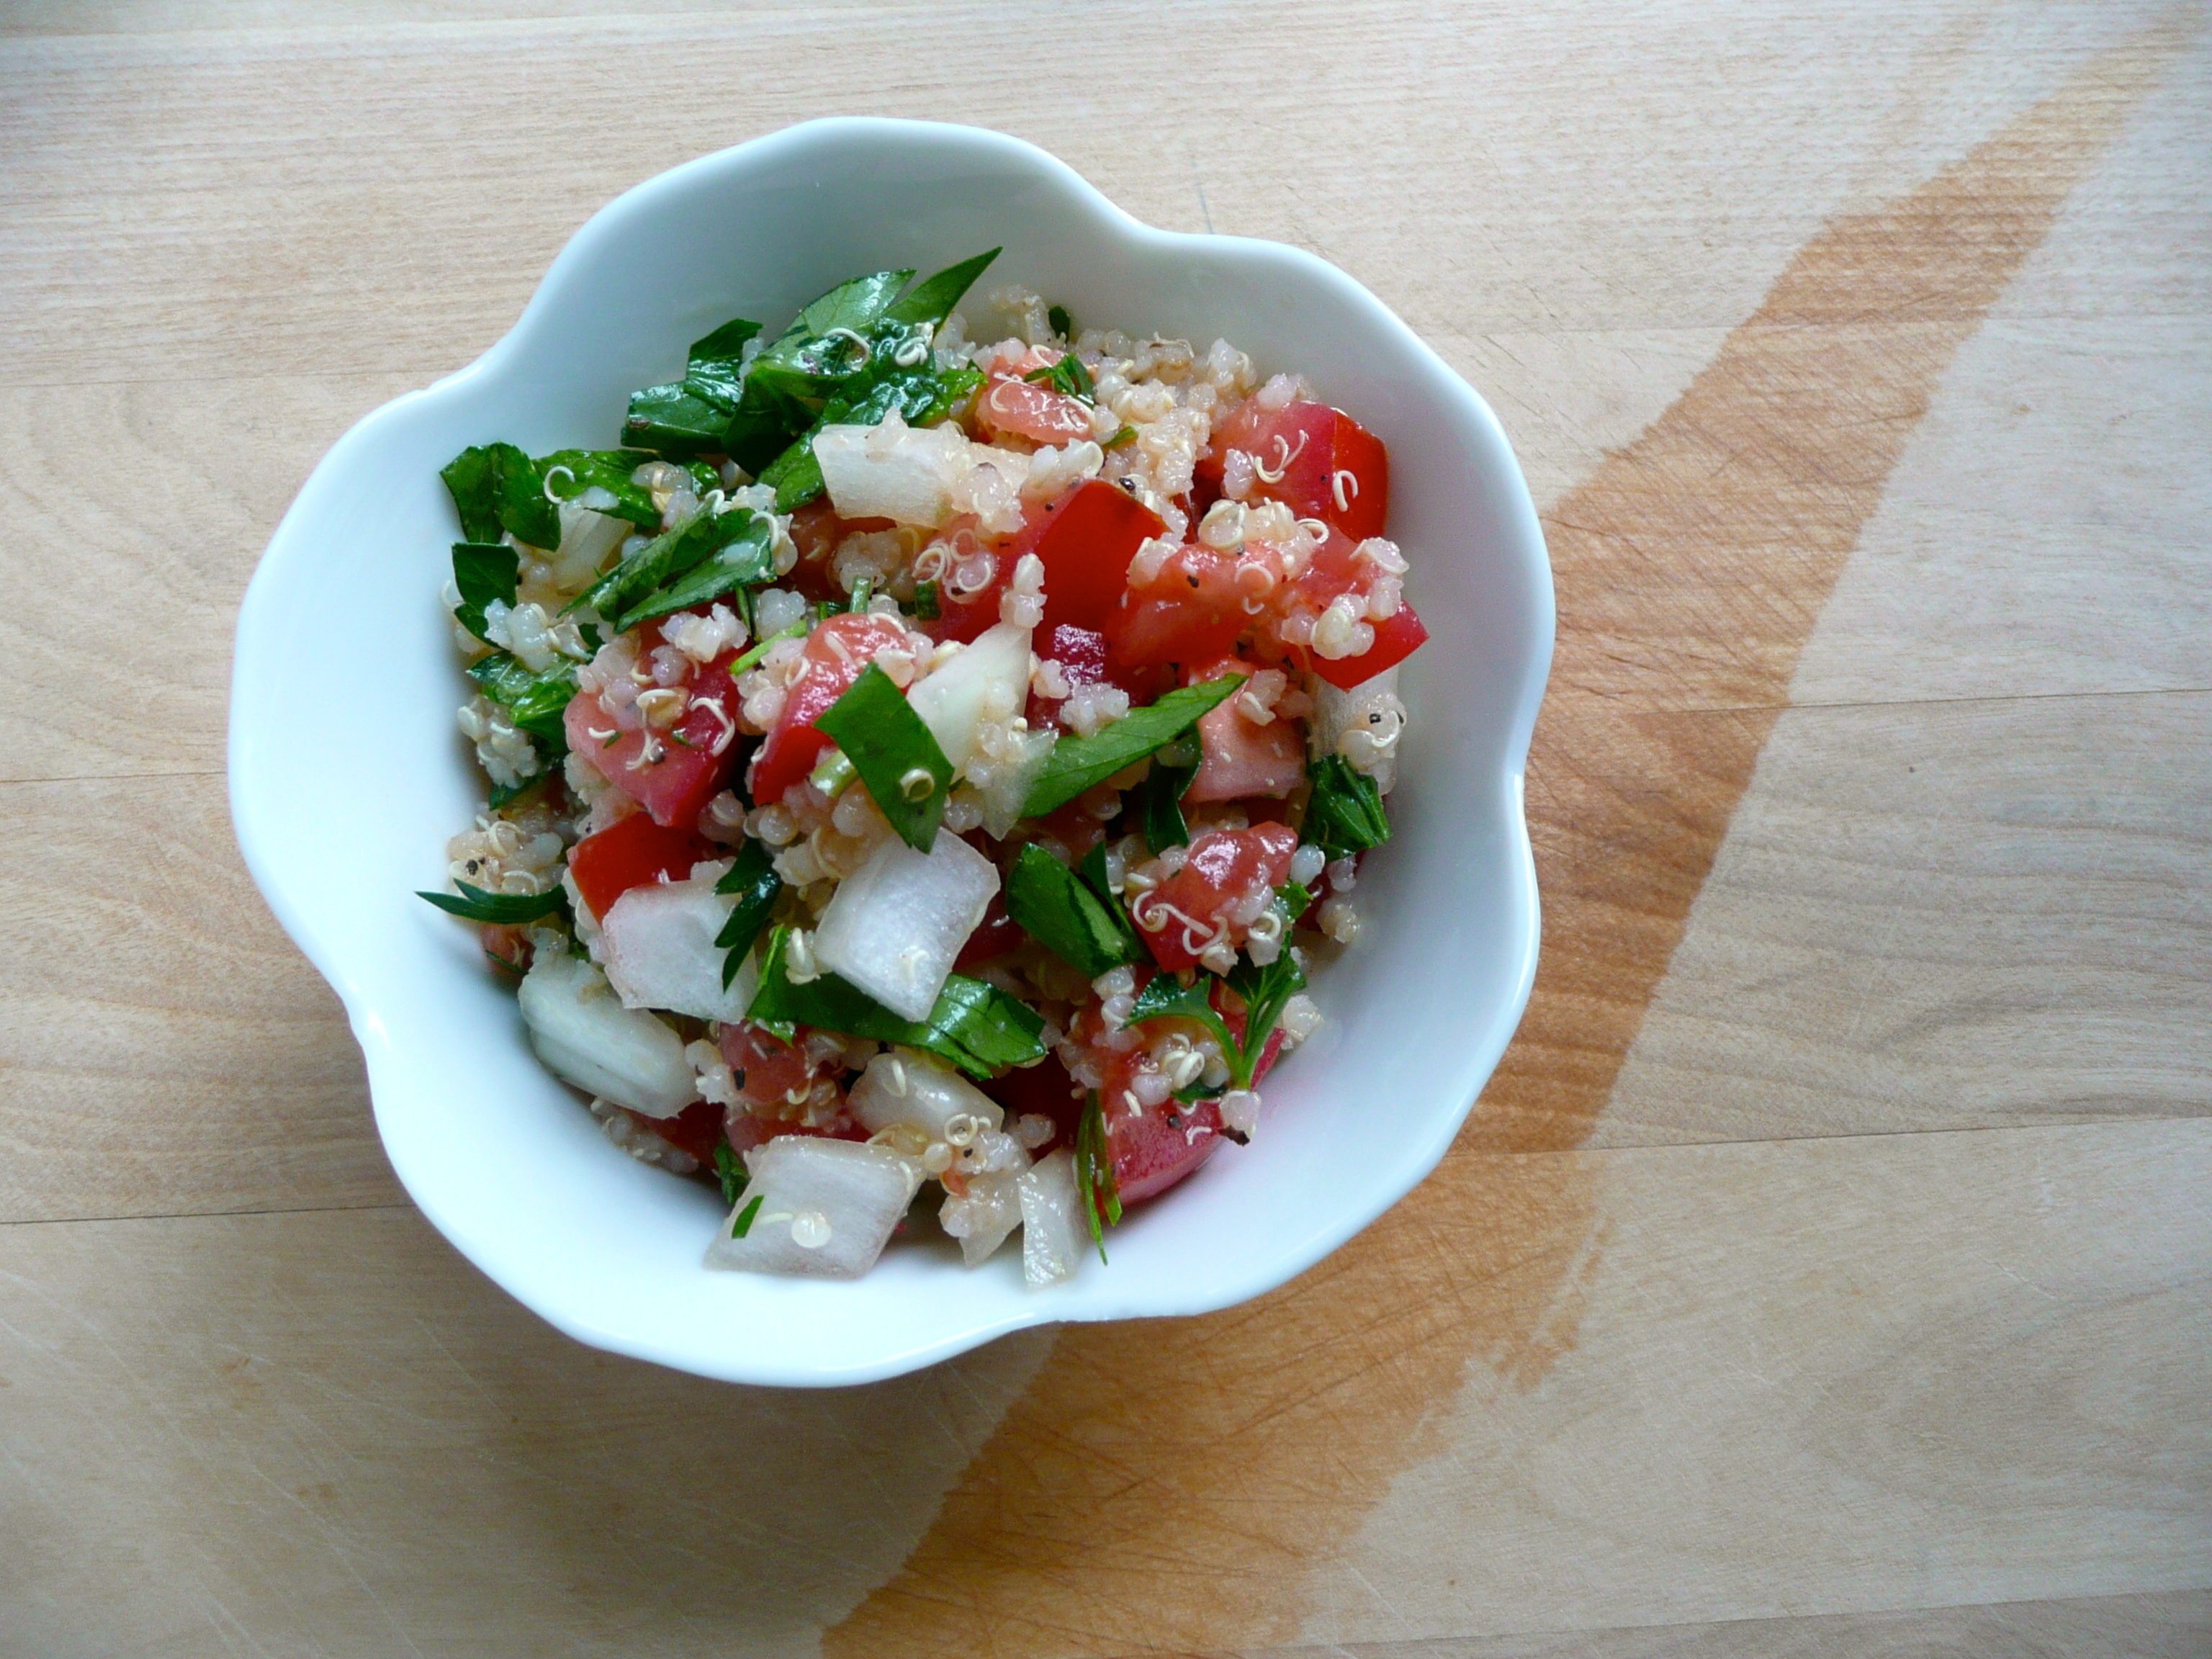
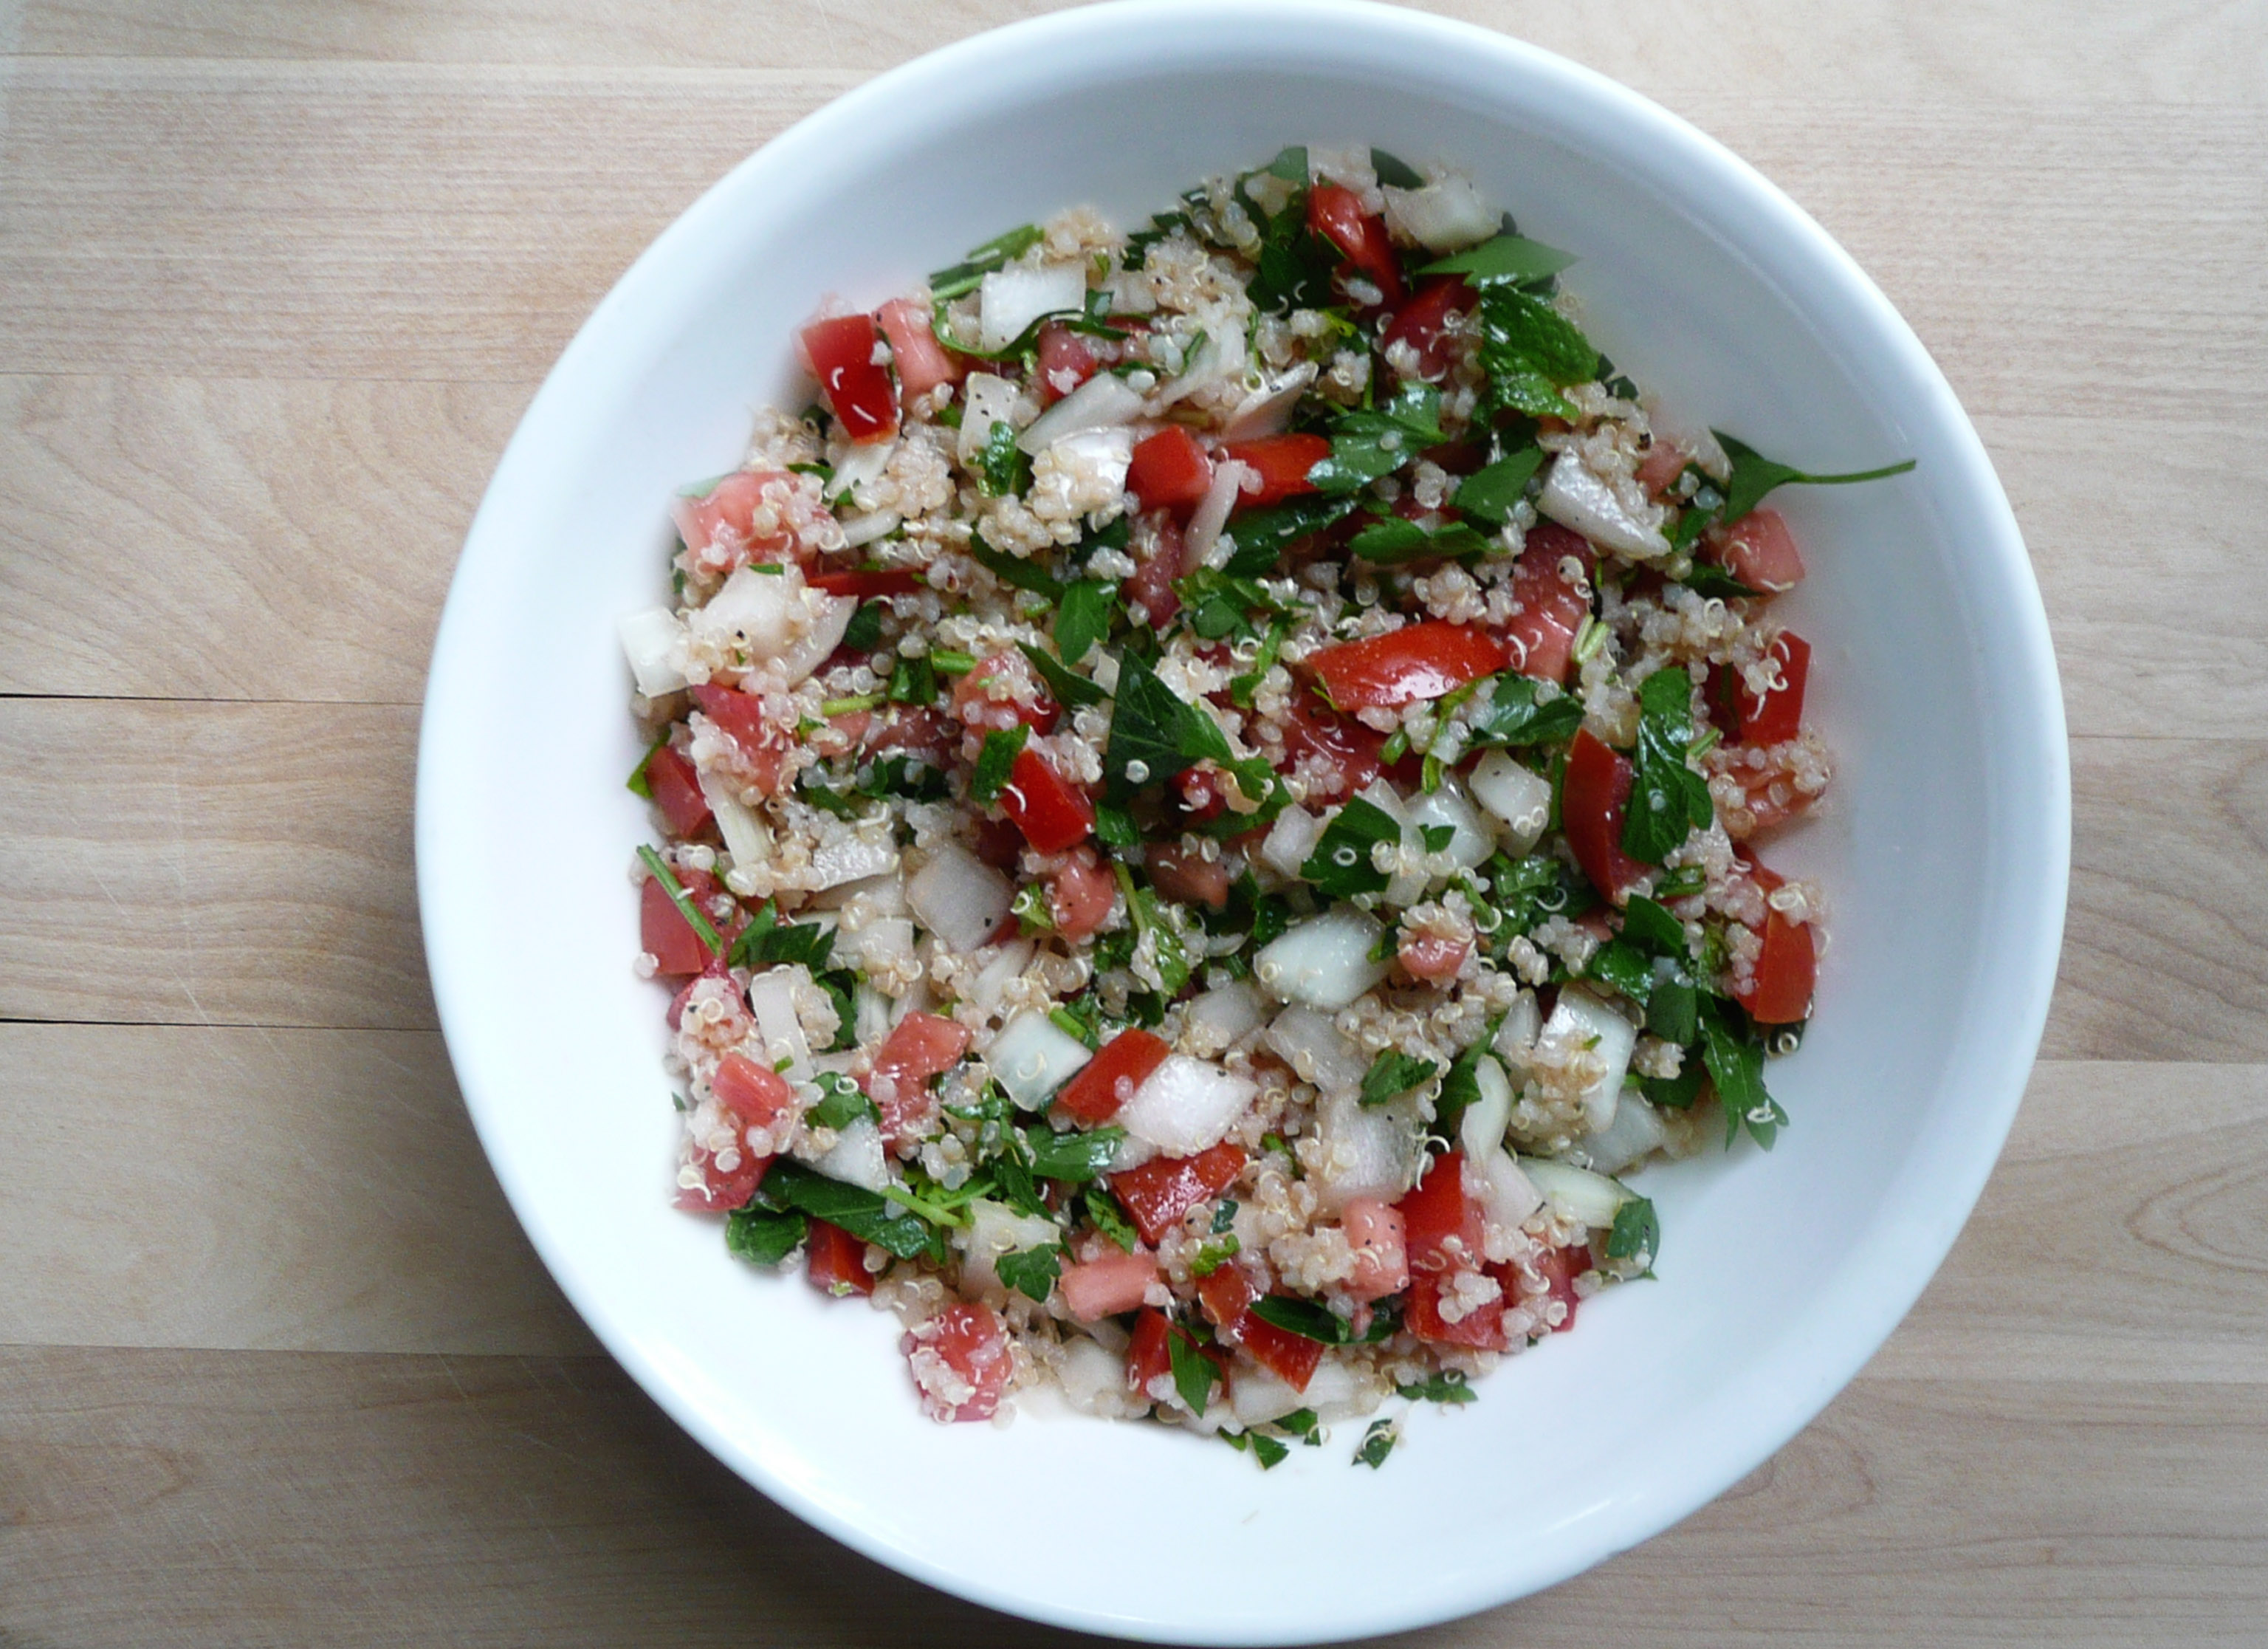
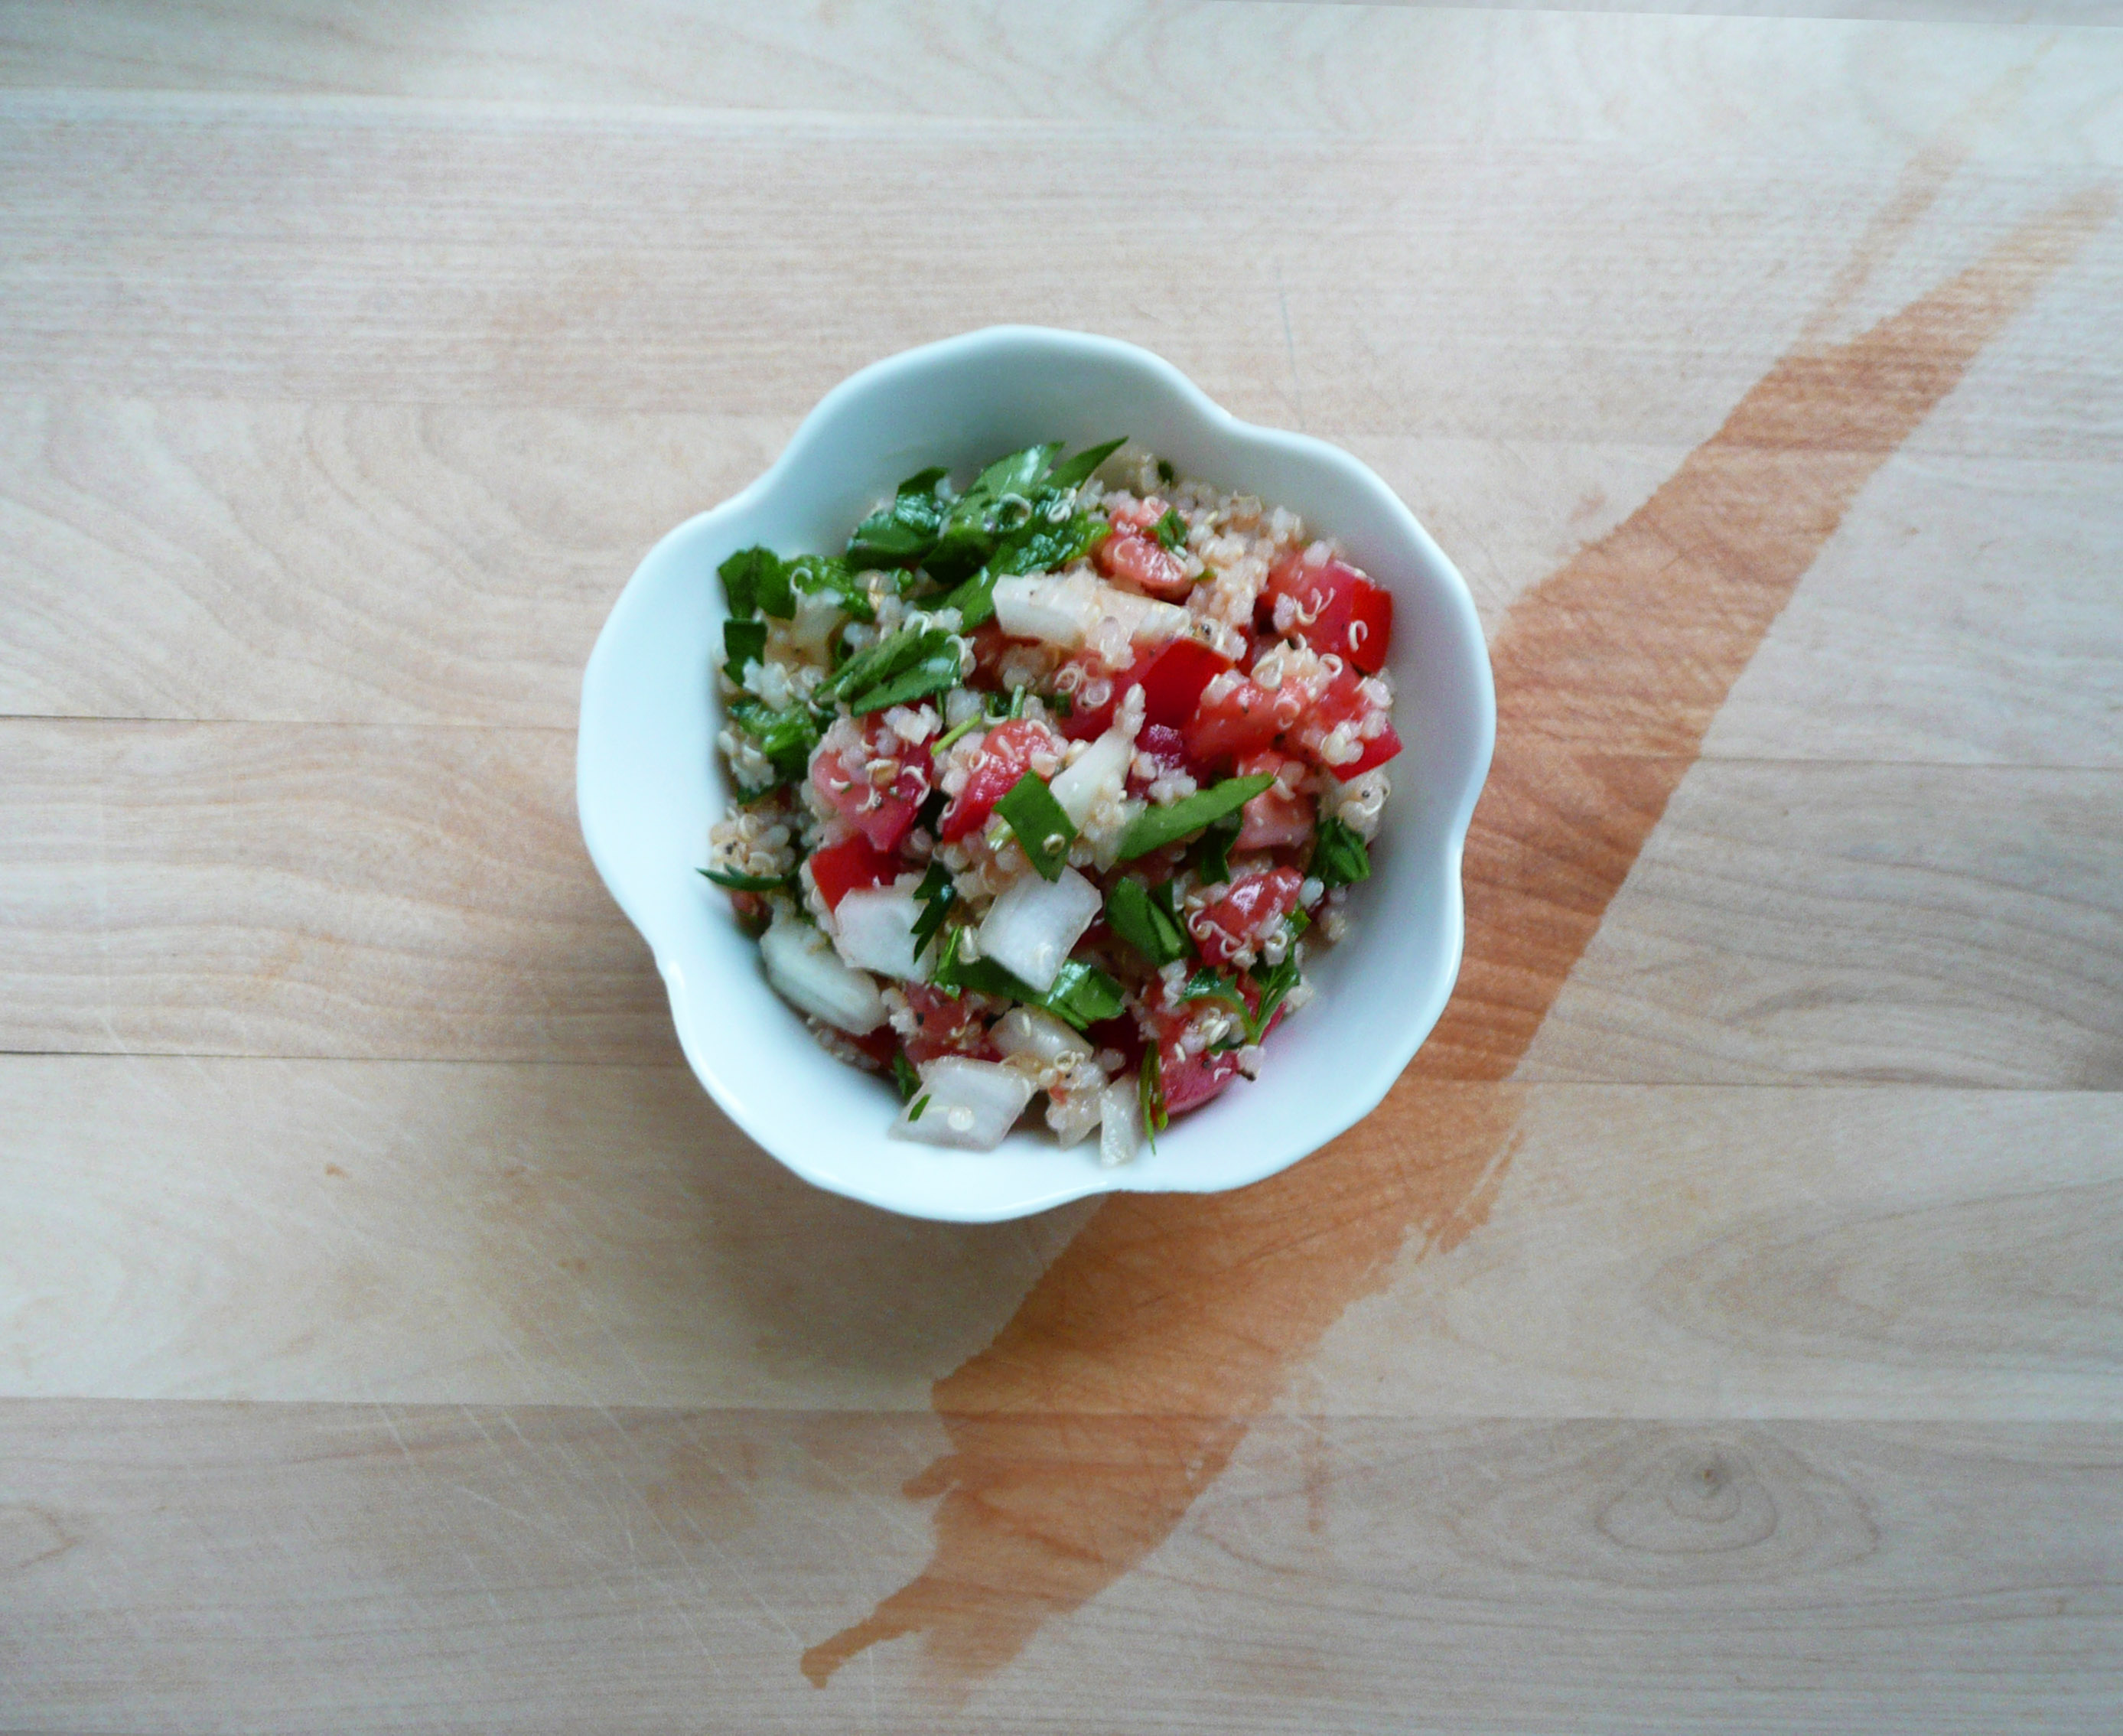
Quinoa Tabbouleh
Makes 2-3 servings
Ingredients
1 diced Roma tomato (about 2/3 cup)
½ cup diced white onion
¼ cup finely chopped parsley, loosely packed*
1 tbsp finely chopped fresh mint*
¾ cup cooked quinoa**
1 tbsp olive oil
3 tbsp fresh lemon juice***
¼ level tsp sea salt
¼ level tsp black pepper
*For tips on how to keep your excess herbs fresh, here’s a link to a post that I wrote about that.
**If at all possible, buy the quinoa in the store that doesn’t say to rinse it on the package instructions. Quinoa can be difficult to rinse if you don’t have a fine enough strainer, and life is easier if you can just scoop the dry quinoa out from the container, add it to a pot with some water and cook it in the rice cooker and not have to think to hard about it.
*** If you have any excess lemons, you can freeze them.
Instructions
Stir all ingredients together. Cover and refrigerate overnight. Taste it the next day, and adjust the seasoning if needed.
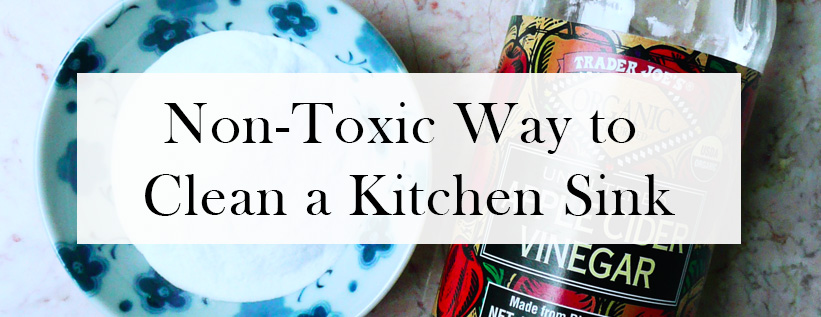
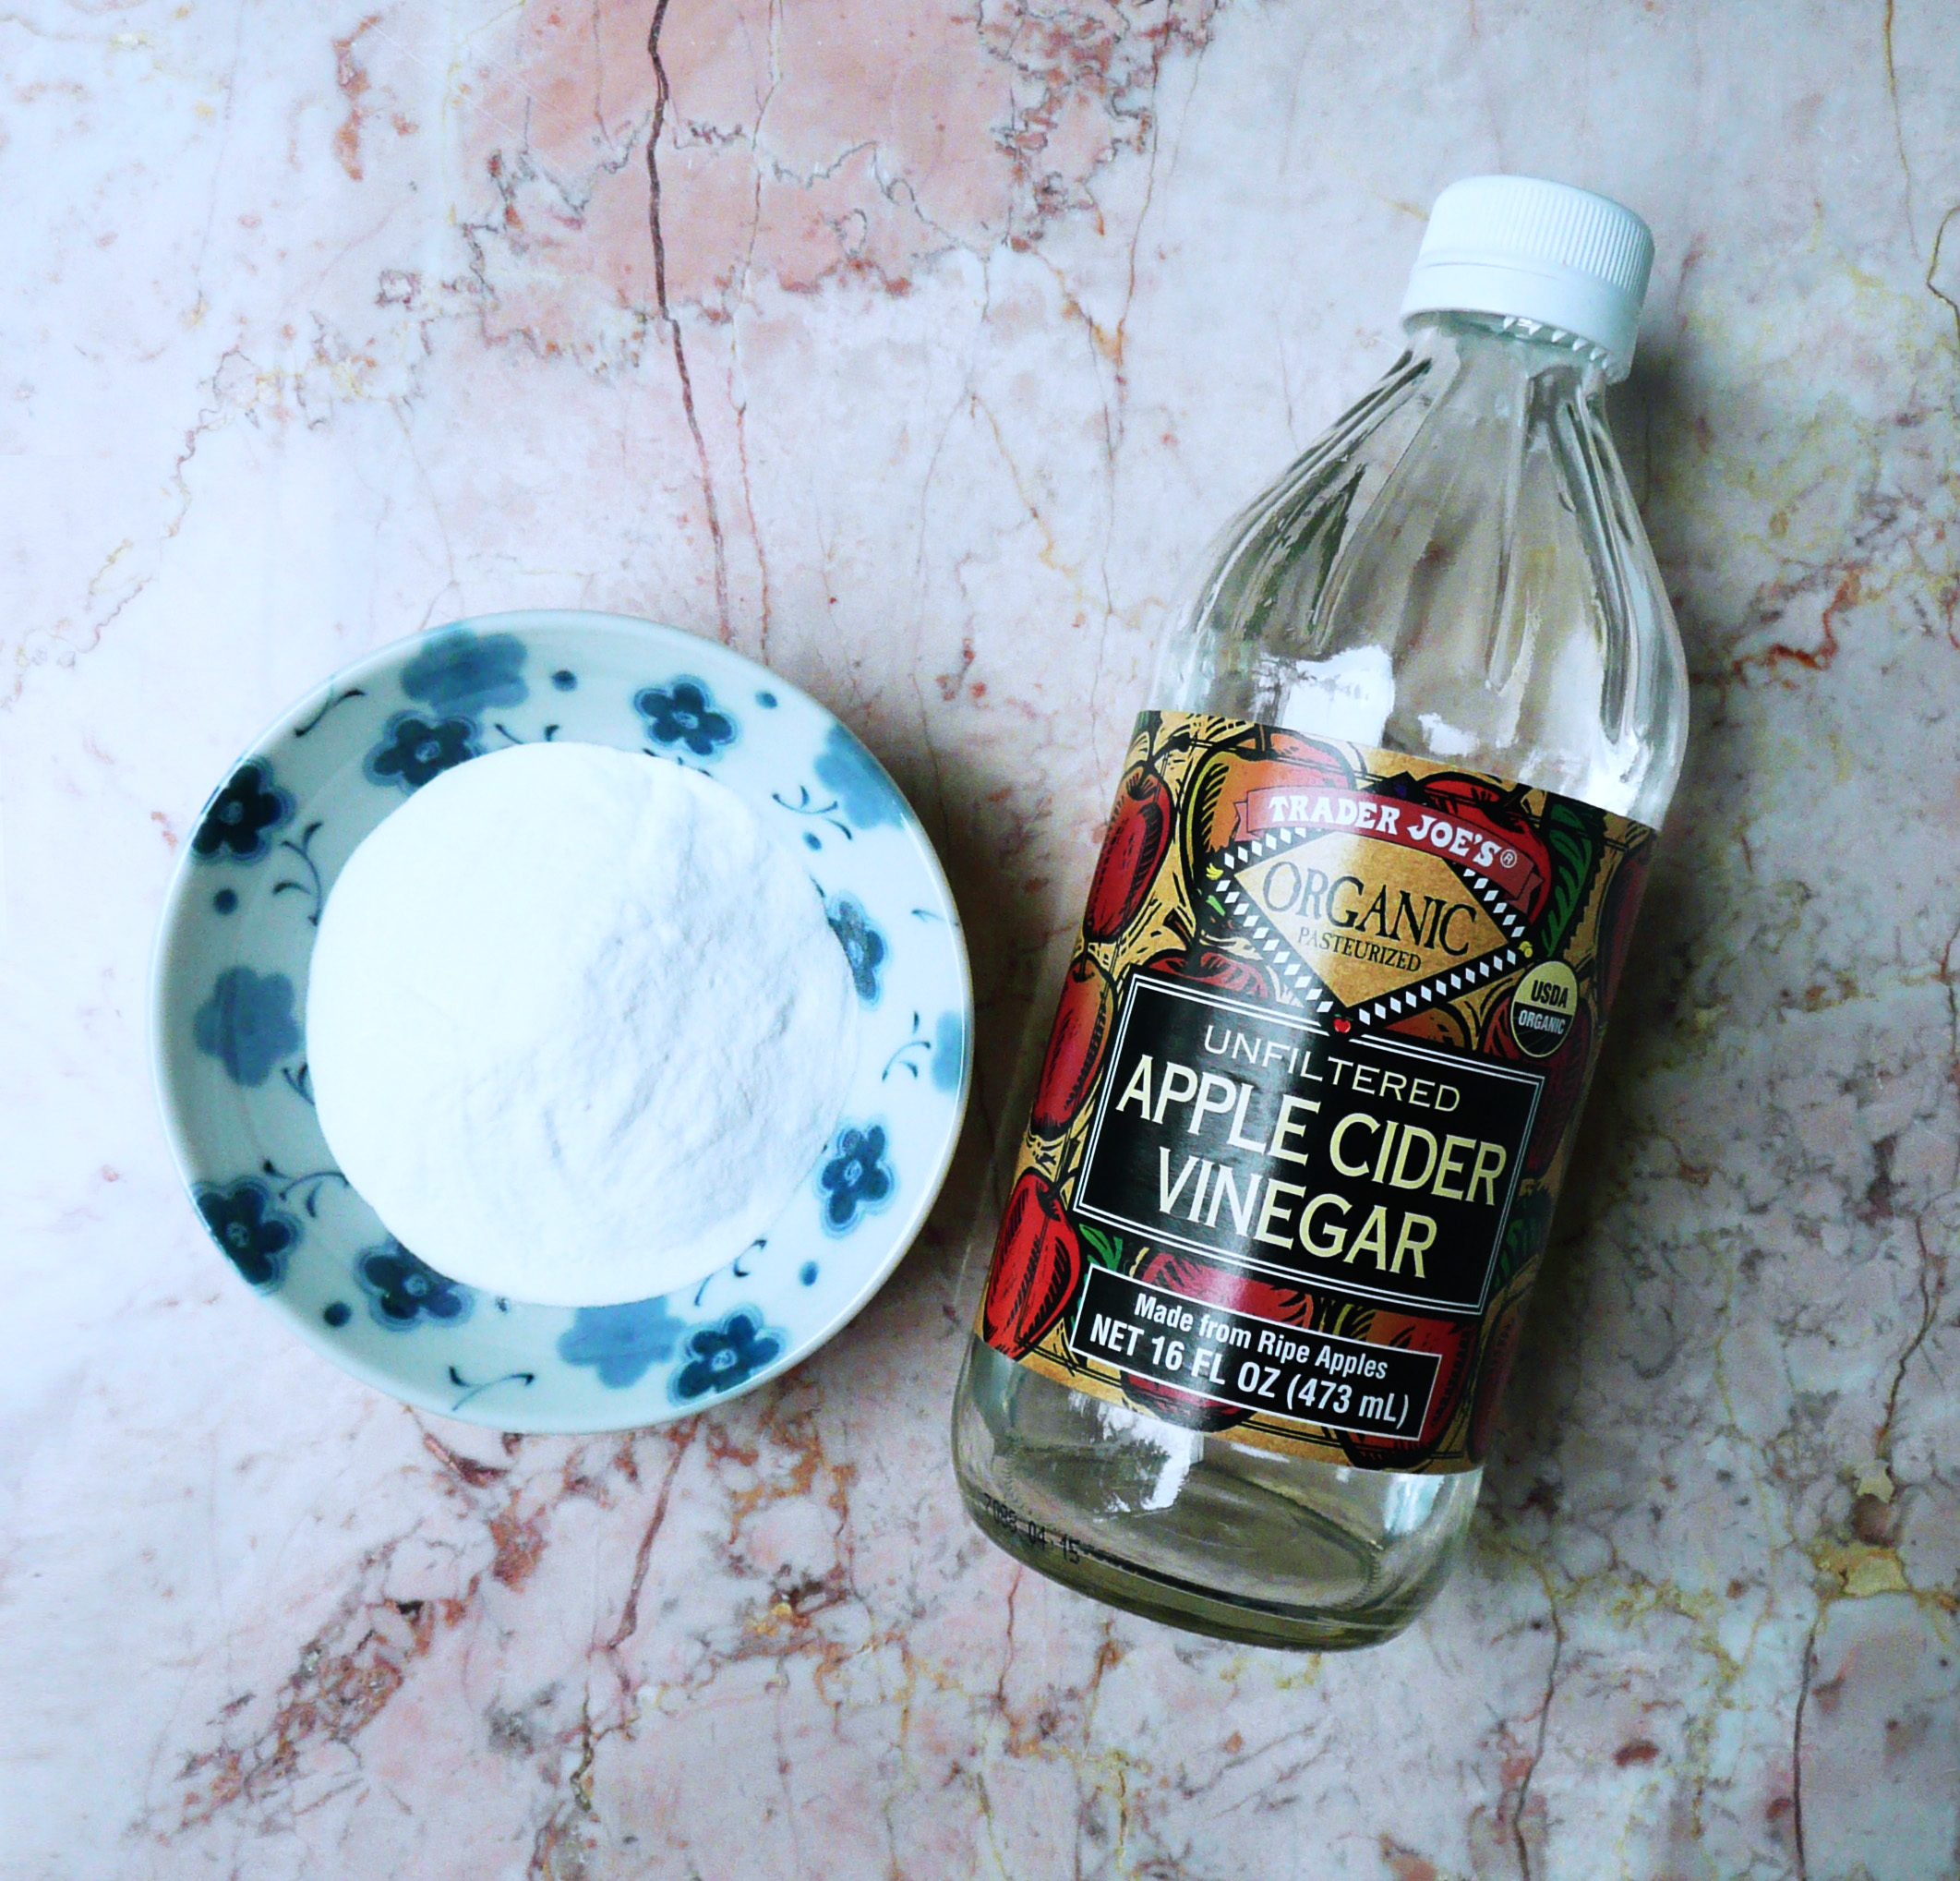
There are lots of cleaning supplies on the market, but often times, the simplest solutions are the best ones.
When I want to give my kitchen sink a good clean, I empty out the sink then pour about 1/4 to 1/2 a cup of baking soda into the side of the sink (away from the drain). There’s no need to measure this, just eyeball it.
Add a few drops of dish soap (I use a Seventh Generation Dish Soap) to the baking soda and a good glug of plain cheap white vinegar (I just poured it into an old apple cider vinegar bottle because it’s easier to keep on the counter than the 2 gallon bottle that it comes in).
The vinegar will bubble up, but add enough so that it forms a paste with the baking soda and dish soap. Use a paper towel or cloth to scrub the paste over your sink, then rinse it off with warm water. If needed, repeat with another application of the paste and scrub a little more, then rinse again.
I’m always amazed at how well this works. This tip keeps my kitchen sink super clean and it’s extra cool that it doesn’t use any harsh chemicals.
If you give this tip a try, let me know how it works for you.
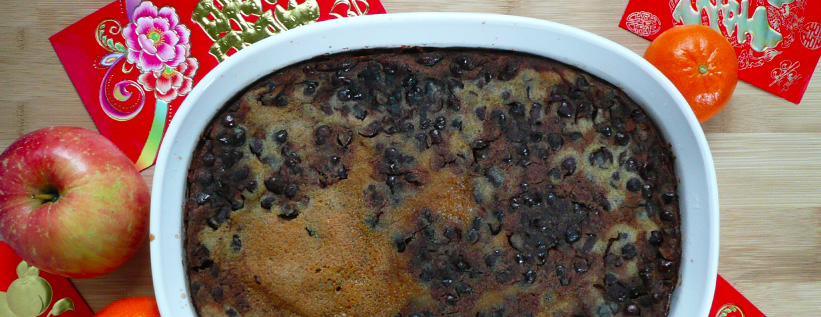
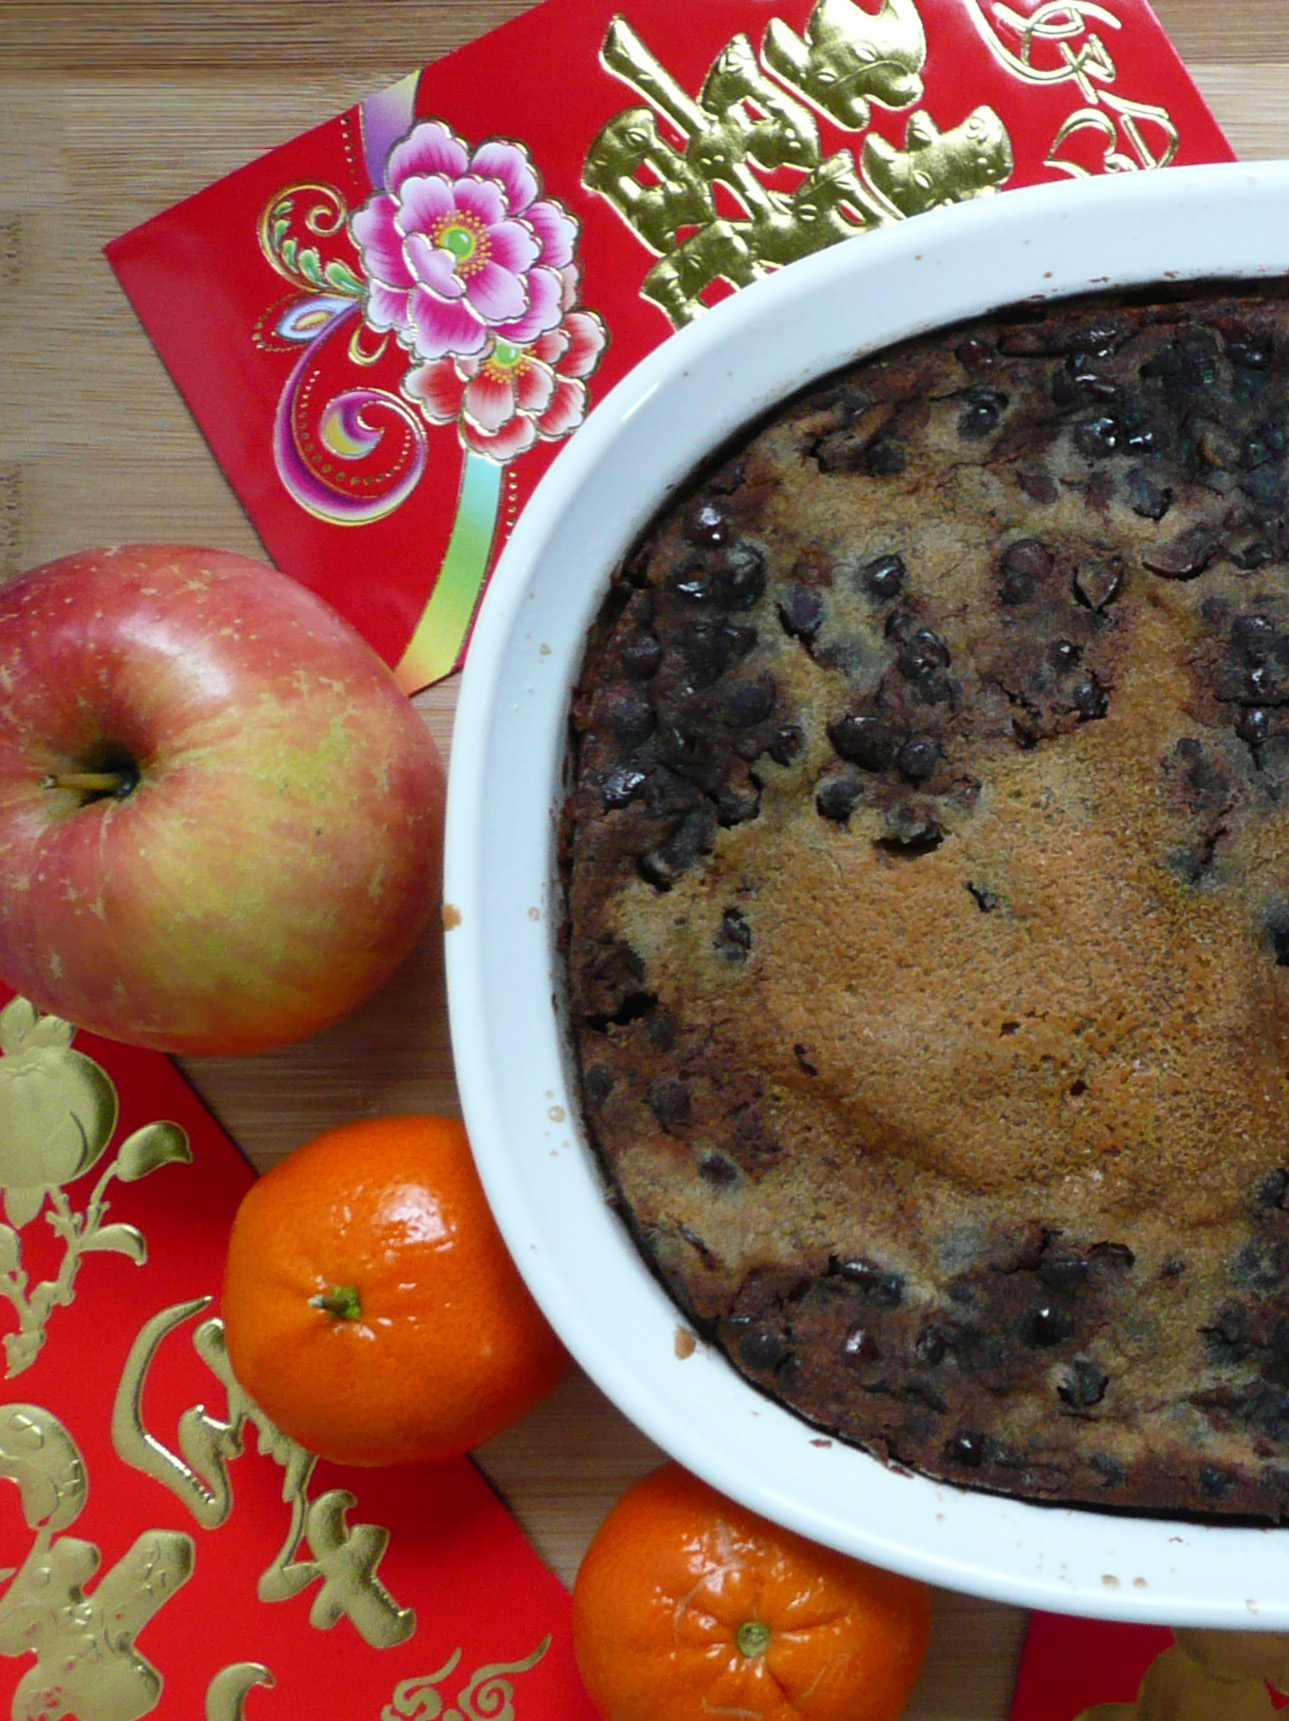
Nian Gao is a very traditional dish for Lunar New Year.
The word for “sticky” in Mandarin is a homonym for the Mandarin word for “year” so it’s considered good luck to eat nian gao, or “year cake” at Lunar New Year.
This recipe tastes identical to the version that my mom made when I was growing up, but is dairy and refined sugar free.
If you’ve never had nian gao before, think of it as basically a big baked mochi that’s slightly crisp on the outside and chewy in the middle with little pockets of sweet red bean filling.
Doesn’t that sound amazing?
This recipe is very simple to make. It’s basically pour everything into a bowl, stir and bake for a little more than an hour.
When I made a test batch I thought that it would be enough for 4-6 servings, but it’s so good that it was polished off very quickly. So, really, it will probably serve more like 2-3 people, so make extra if your family members are big eaters like mine are.
*You can replace the 1/2 egg with 1/2 tbsp ground flax seed and 3 tbsp hot water. Let the mixture stand for 10 minutes before using.
**There is the tiniest hint of coconut flavor from the coconut oil, but most people probably won’t notice. If you can’t stand coconut, you can used refined coconut oil instead. I like the Trader Joe’s one because it’s filtered to remove the coconut flavor instead of being bleached.
*** This recipe uses a lot of the red beans from the red bean soup, so if you’re planning on serving red bean soup for Lunar New Year, I would recommend making an extra batch of red bean soup just to use for the red bean filling in this Nian Gao recipe. You probably have some soup left over which you can send home with guests so it will all be eaten and people will go home happy.
Instructions
1. Preheat the oven to 350.
Grease your baking dish with either coconut oil, or a neutral flavored oil, and flour it with a few tbsp of sweet rice flour and set it to the side.
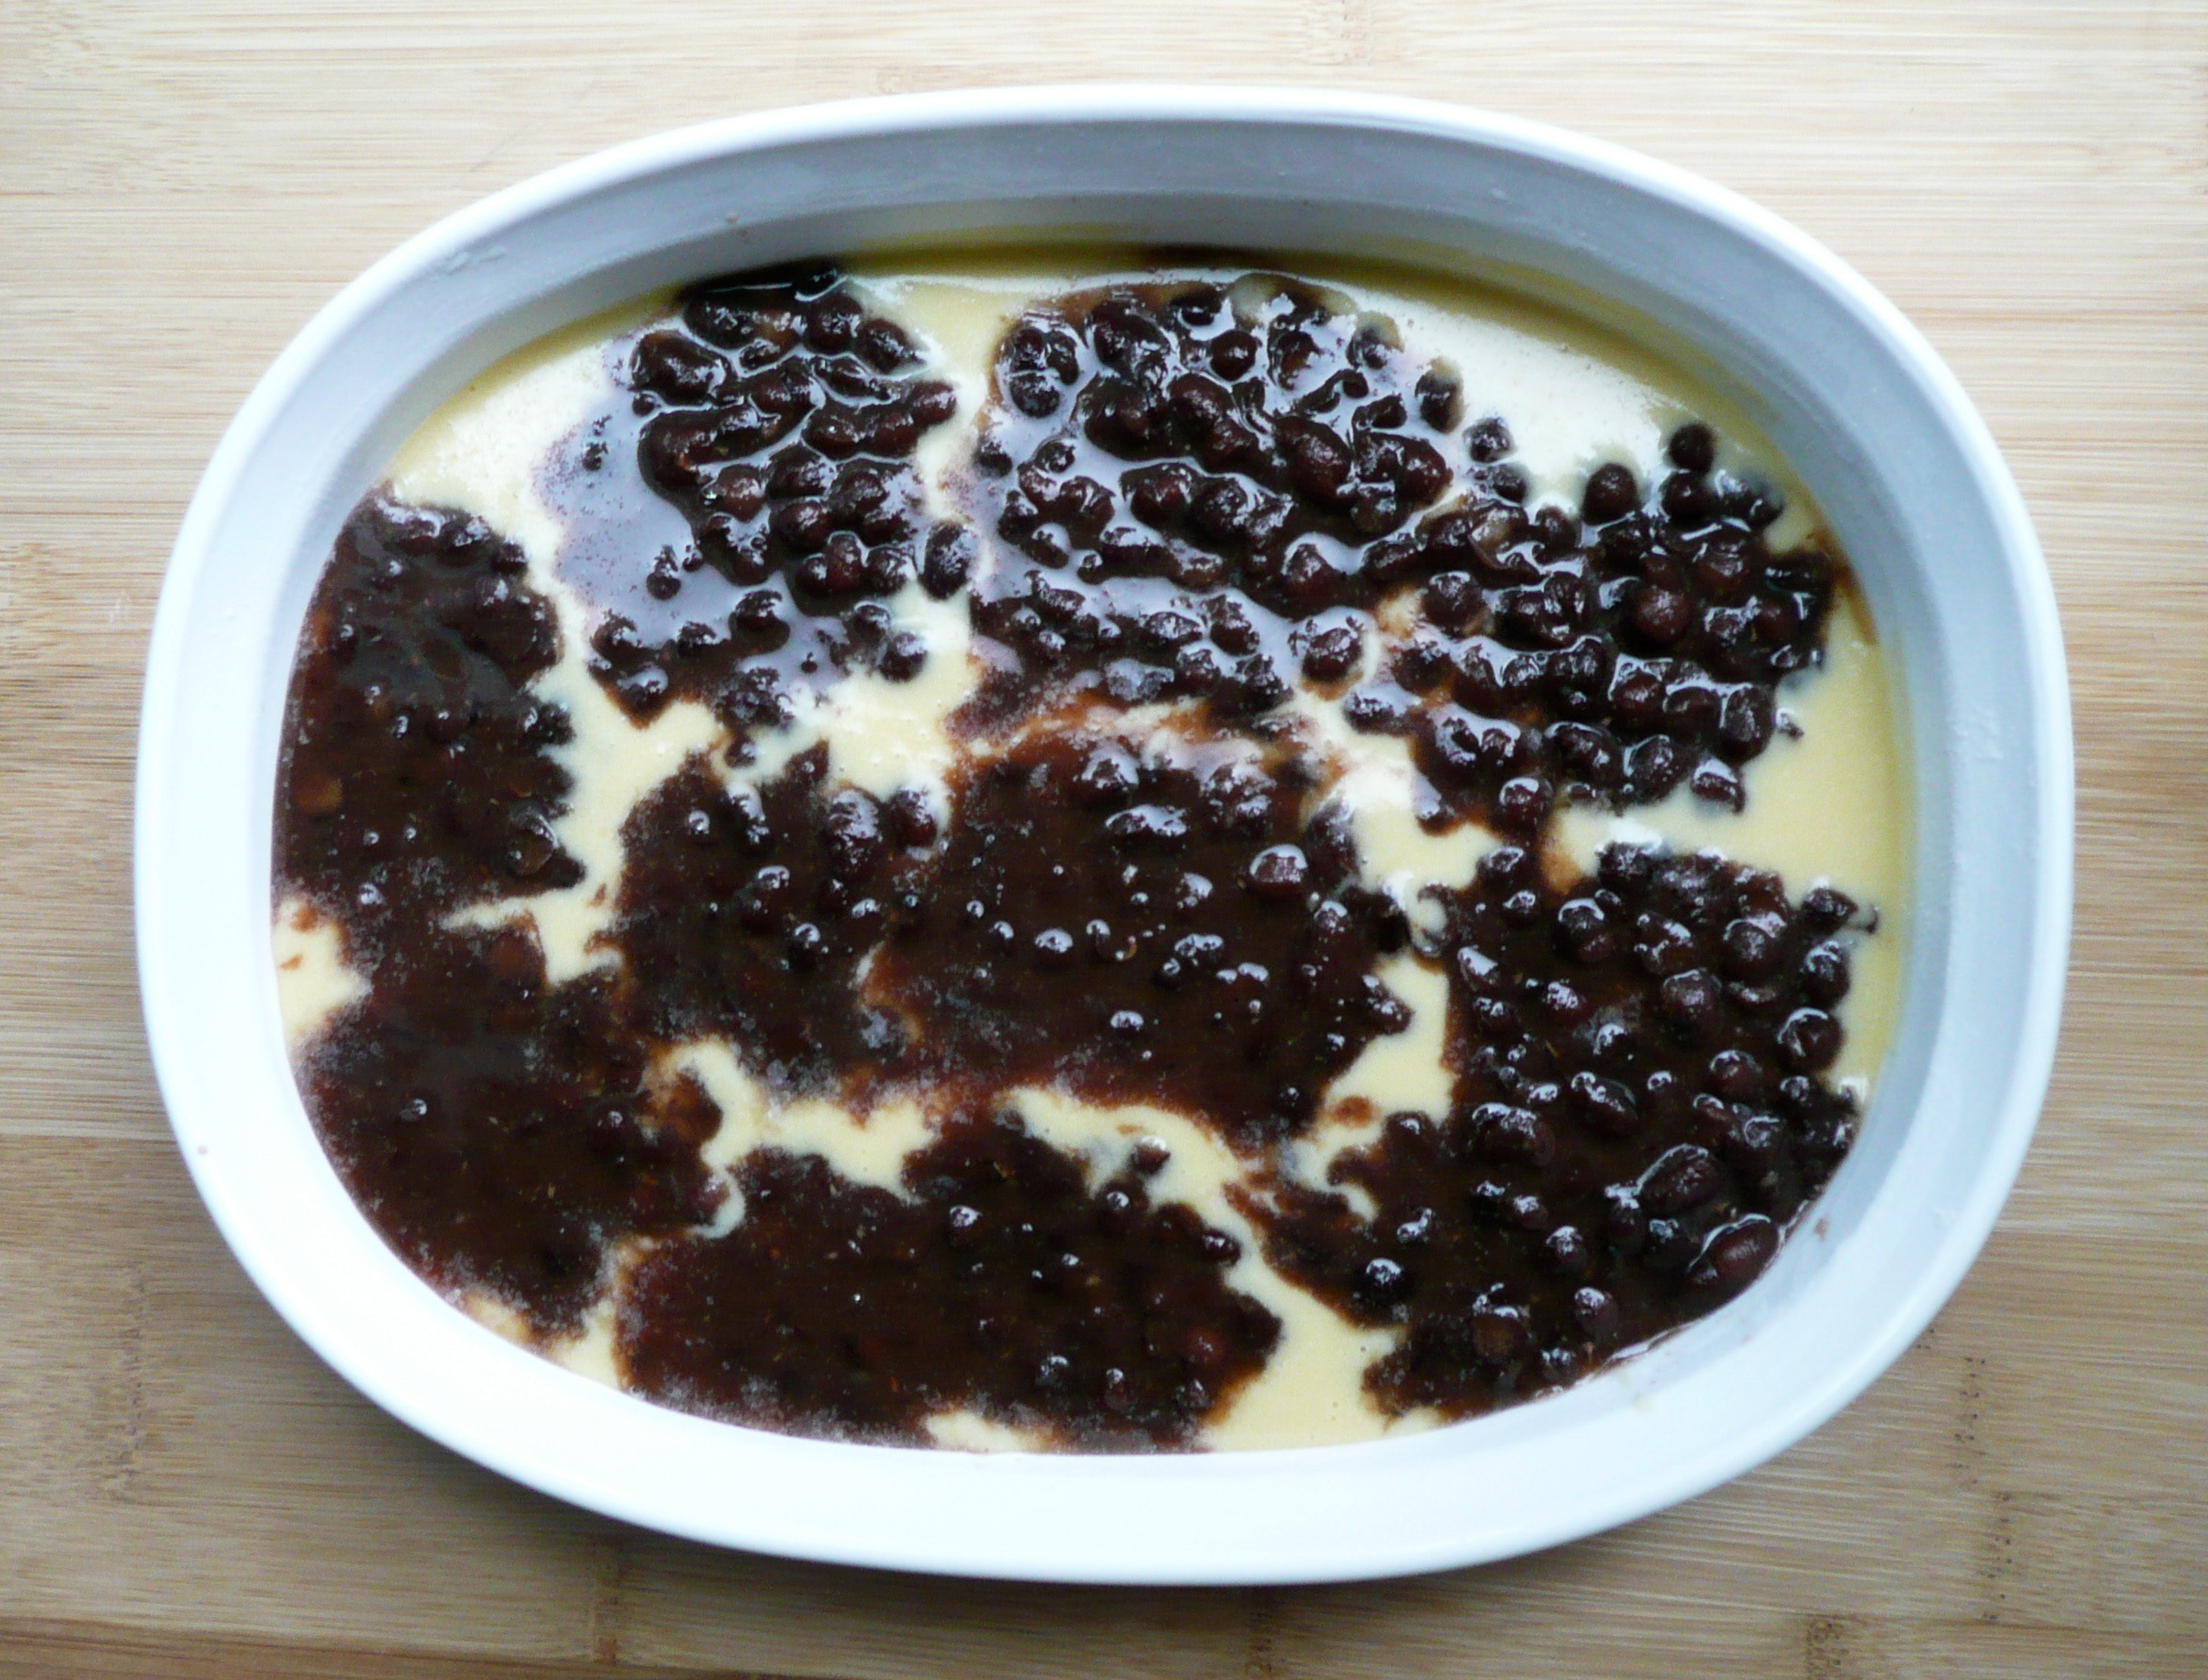
2. Stir together the 1/4 cup of maple syrup with the red beans. Use the back of a spoon to smush about 1/3 of the red beans against the side of the bowl. This took me about 20-30 seconds. You want some texture in the red bean paste when it’s baked, and some bits that are a little smooth.
3. In medium sized bowl, stir together the baking soda, sweet rice flour, melted coconut oil, egg (and the flax egg), 1/2 cup of maple syrup, and water. Stir until smooth.
4. I used a 8.5 x 11 inch oval casserole dish, but you can bake it in whatever size dish you have, just as long as the batter is an inch thick in the baking dish.
The nian gao batter plus the red bean filling is 4 1/3 cups in volume. If you want to see if your baking dish will work for this recipe, pour 4 1/3 cups of water into the baking dish and see if the layer of water is 1 inch deep. If it is, then that baking dish should work for this recipe.
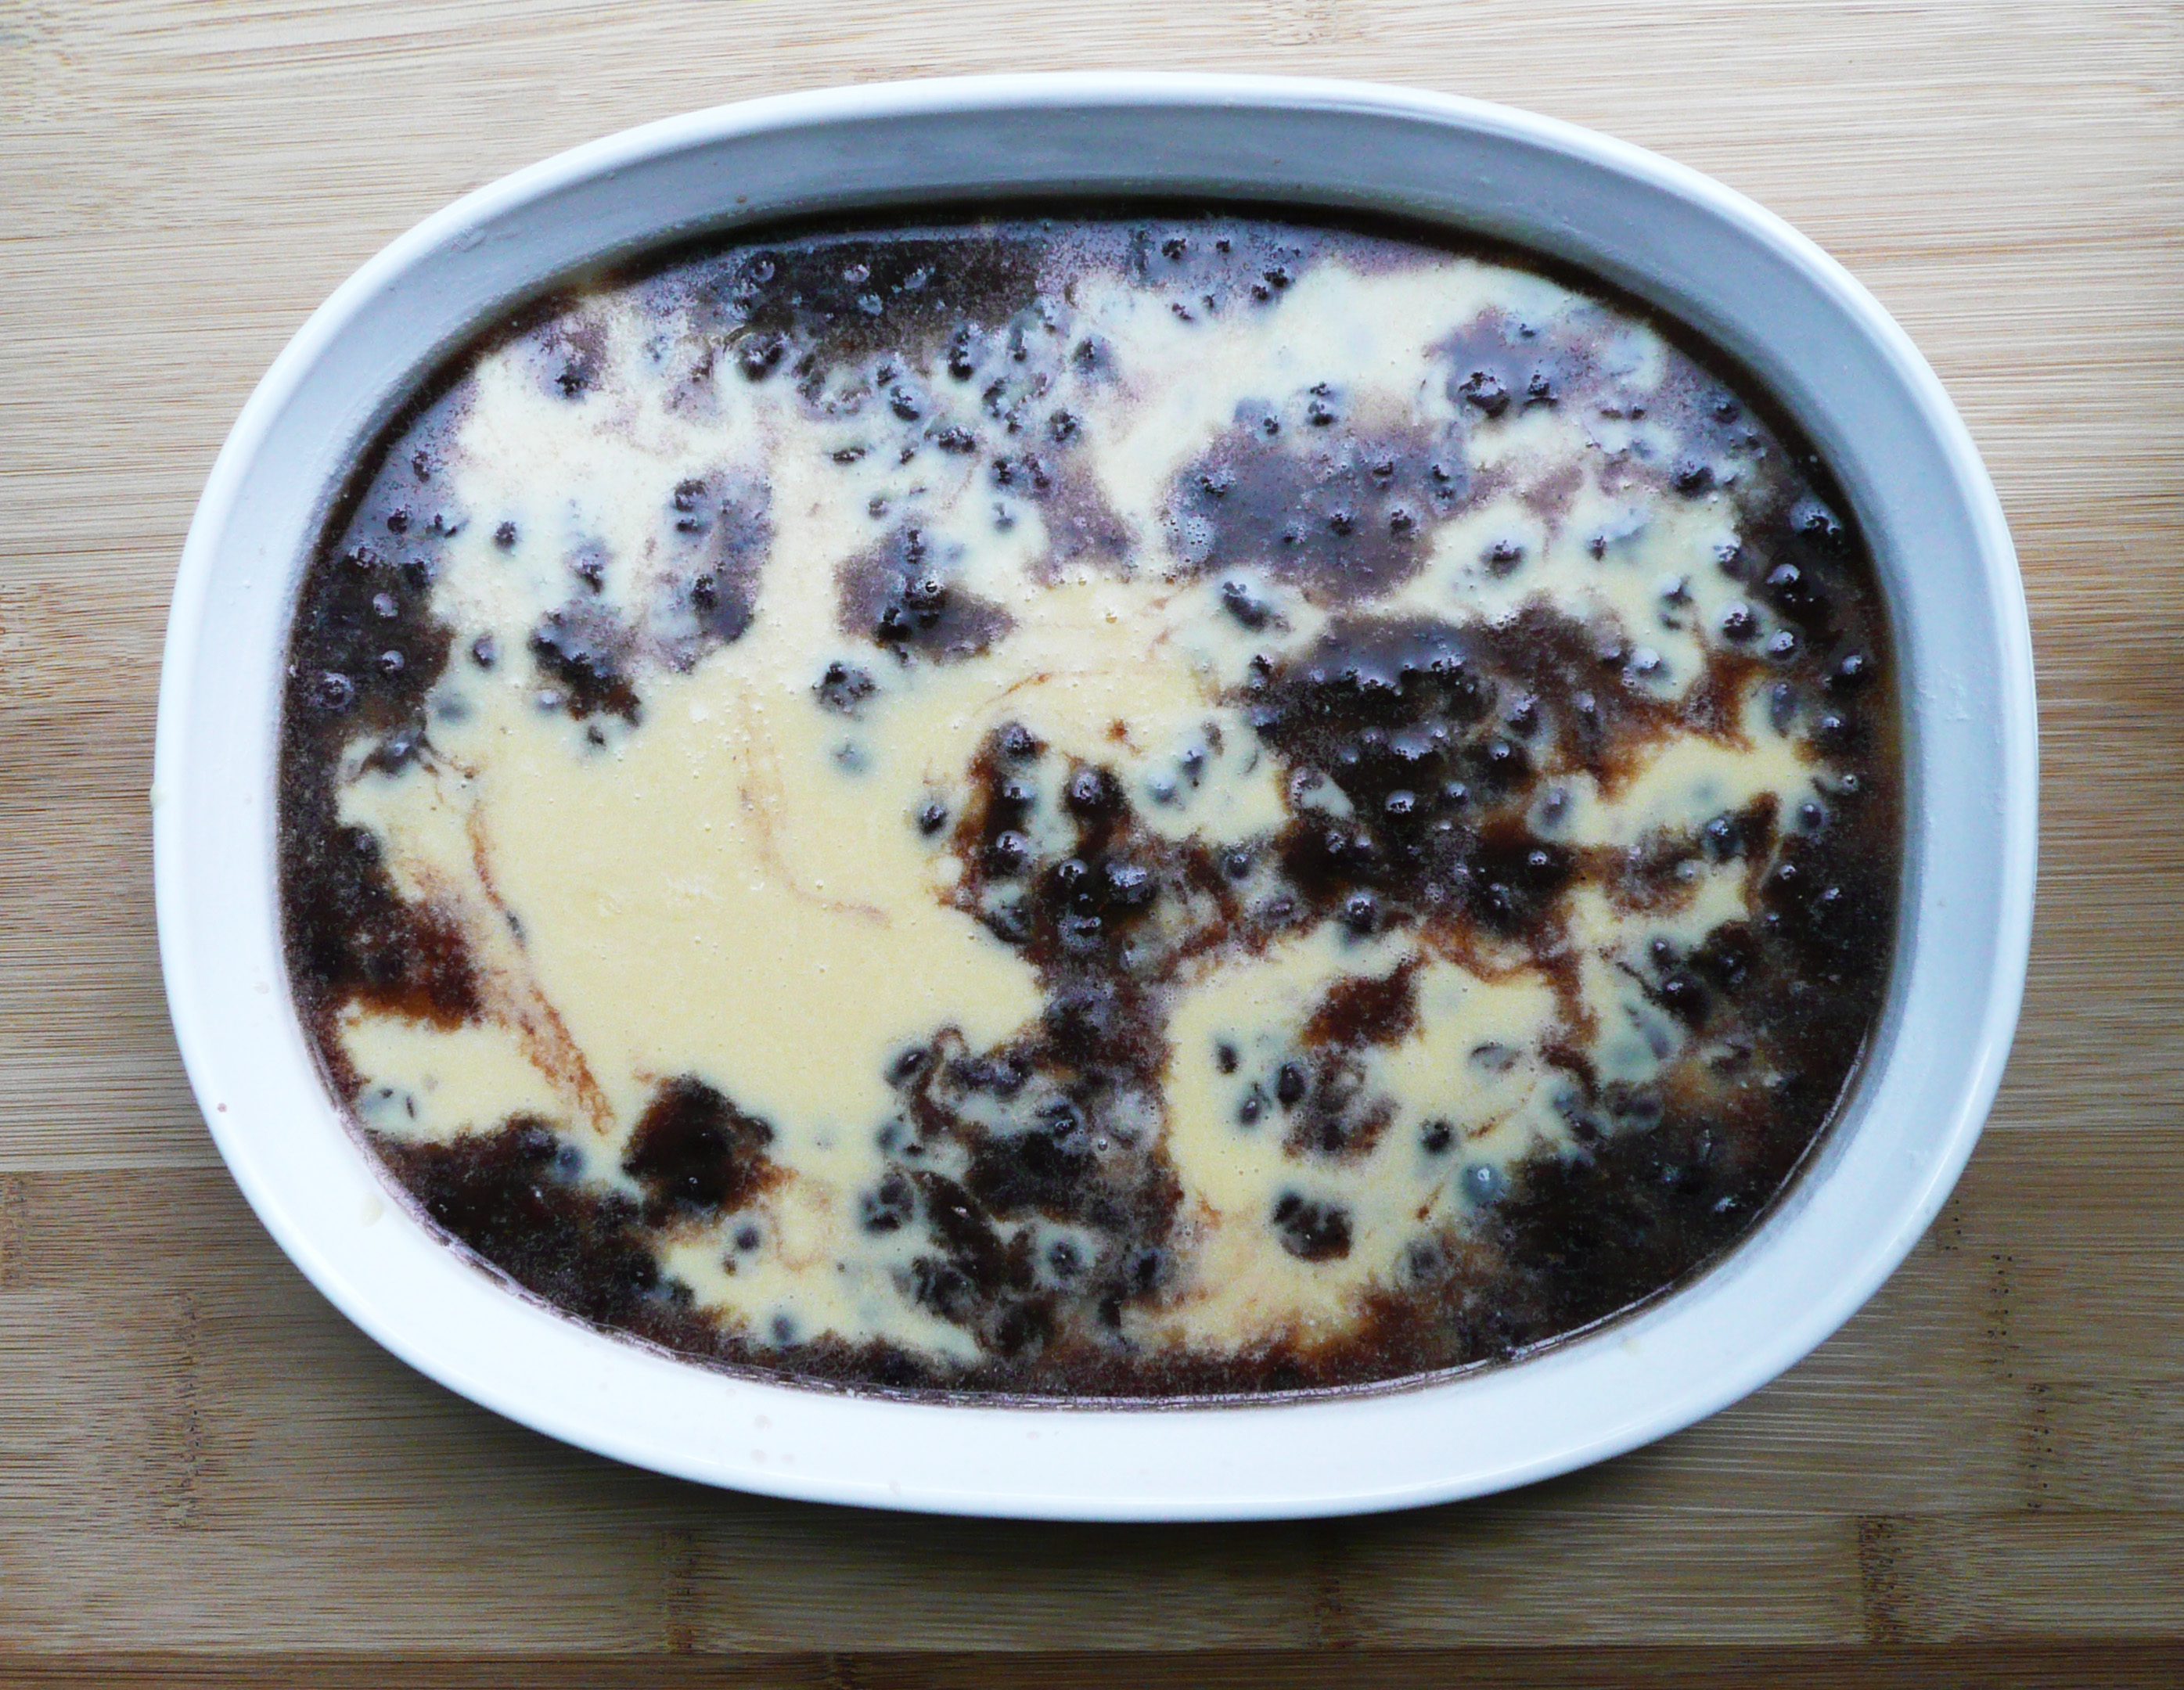
Scoop 1 1/2 cups of the nian gao batter into the baking dish so that the batter covers the entire bottom of the dish. Spoon over the red bean filling into puddles all over the batter, this doesn’t need to be perfectly even, in fact it’s better if it isn’t as the nian gao will hold together better if there isn’t a smooth layer of red bean filling separating the top and bottom of the batter.
Spoon over the rest of the remaining batter and use the back of your spoon to slightly swirl the batter and red bean filling.
5. Bake at 350 for 1 hr and 15 minutes until golden brown on top and a toothpick comes out clean. It will be slightly crispy on top.
Allow the nian gao to cool to room temperature before cutting and serving.
If you don’t want to bother with the red bean filling, you can make the cake without it. I’ve only made it with the red bean filling, but if you make the nian gao without it, it will take less time to bake.
I would bake it at 350 and start checking to see if it’s done after 30 minutes. Other nian gao recipes that I’ve seen online without red bean filling seem to take about 45-60 minutes in the oven.
Lunar New Year is always an exciting time of year. It’s a time when we all get together and eat lots of amazing food.
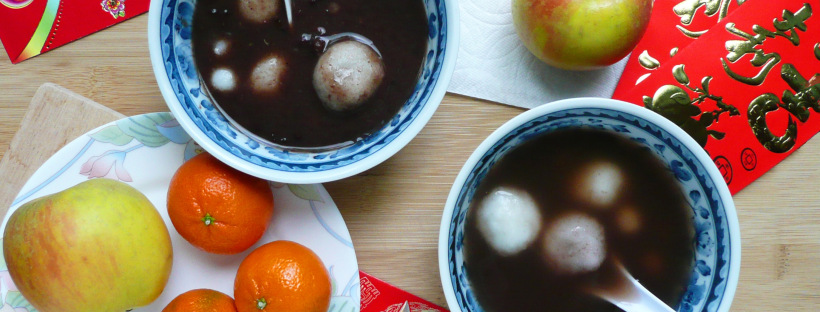
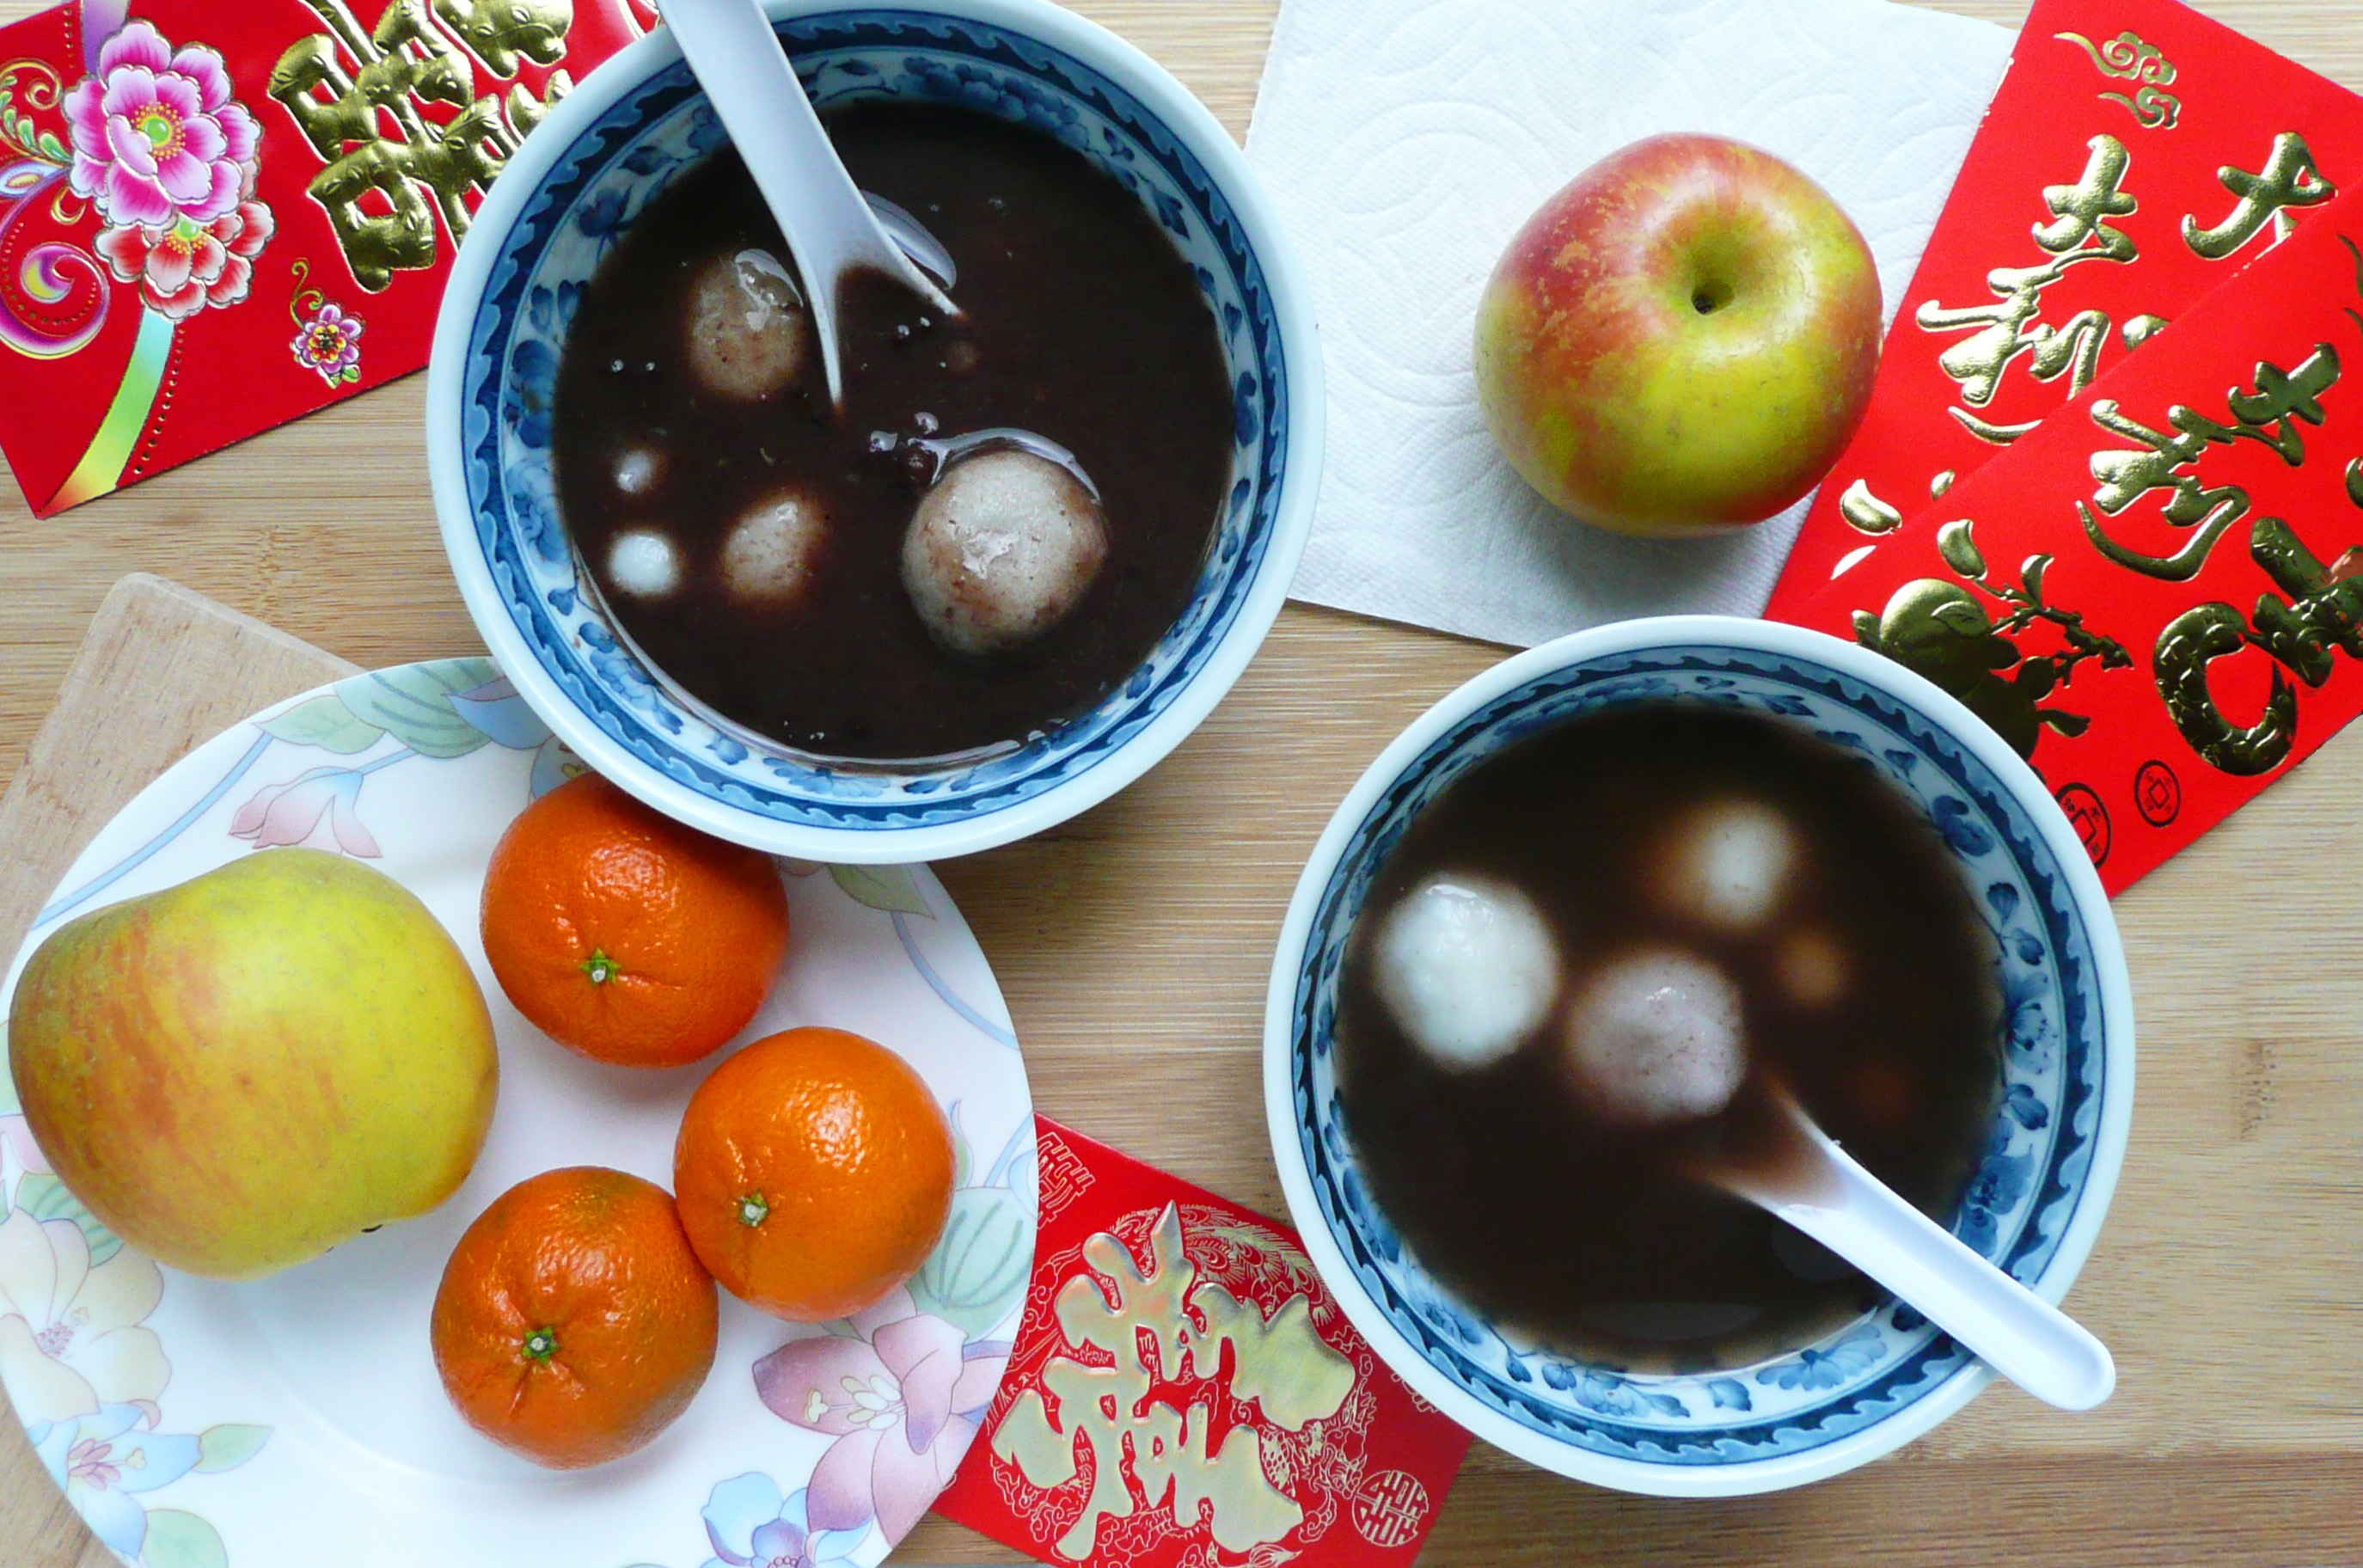
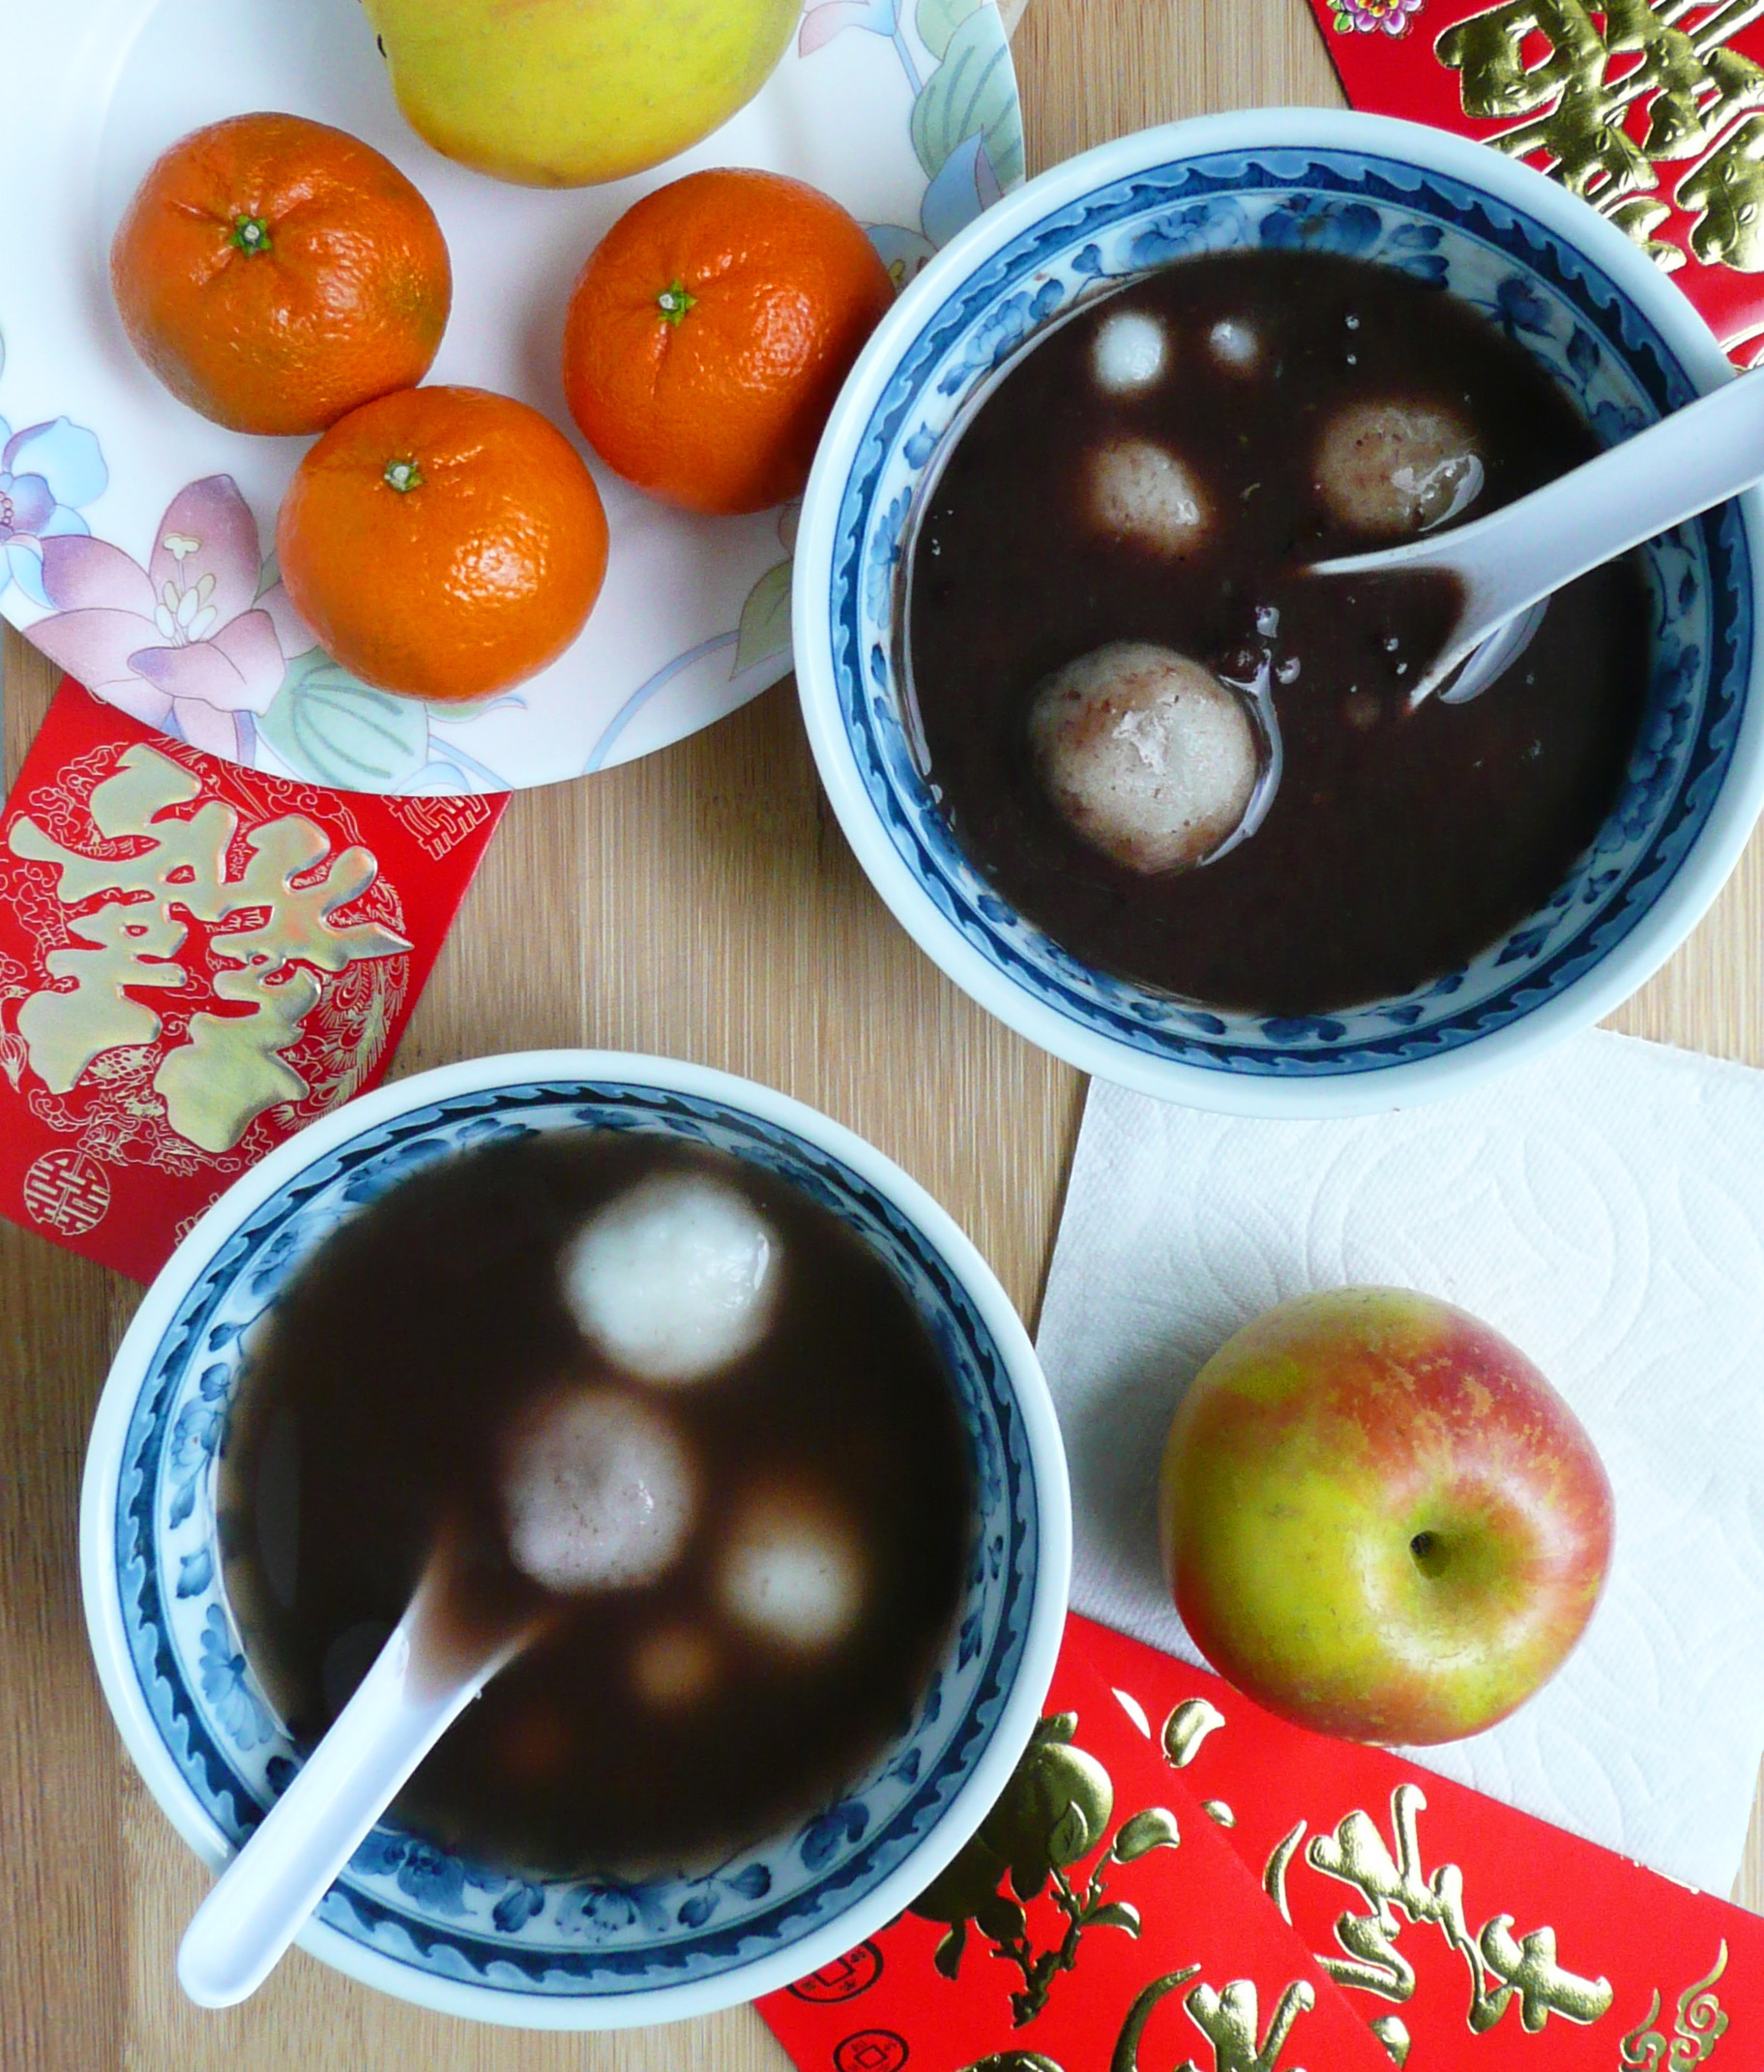
Every Asian culture celebrates Lunar New Year a little differently, but growing up Chinese American, we always made sure that we ate fish (for prosperity), noodles (for long life), oranges (for wealth), and tang yuan during the Lunar New Year feast.
“Tang” means soup, and “yuan” means round. “Yuan” also signifies a family gathering around a table, so this is why tang yuan are eaten at Lunar New Year.
Tang yuan are chewy sweet rice balls. They can be filled with anything (there are peanut butter ones, taro ones, and black sesame ones too) but these are filled with sweet red bean paste, which is one of my favorite fillings.
These tang yuan are easy to make, and refined sugar free but still taste just like the ones I grew up eating.
My family eats them with red bean soup, and this is the perfect thing to warm you right up during cold weather that we’re having.
I hope that you eat these tang yuan surrounded by lots of loved ones this Lunar New Year.
Tang Yuan (Sweet Rice Balls with Red Bean Filling)
1/2 cup sweet rice flour – 90 g (I used the Koda Farms Mochiko Sweet Rice Flour)***
1/4 cup warm water – 60 g
* 3 – 4 Tang Yuan per person should be ok if you’re eating a big meal for Lunar New Year, but my family usually eat a lot of them. Some people want 8 tang yuan in their bowl, some want 5, so it’s a good idea to make some extra ones just in case. This recipe can easily be doubled or tripled if need be, and it’s nice to have some extra tang yuan on hand in the winter months when you want a sweet warm snack.
**Make the red bean soup first, then use those some of those red beans in this recipe. drain about 1 cup of beans and liquid before you measure the 1/2 cup. You want the 1/2 of beans to be almost all beans with very little liquid. Press the red beans lightly with the back of a spoon while the red beans are in a sieve so that you get as much excess liquid out of the beans as possible. You can save the liquid and add it back into the red bean soup, or keep it to the side to and eat it with a drizzle of maple syrup if you don’t want to make the red bean soup thinner.
*** I recommend weighing the sweet rice flour if possible for the best results.
Instructions
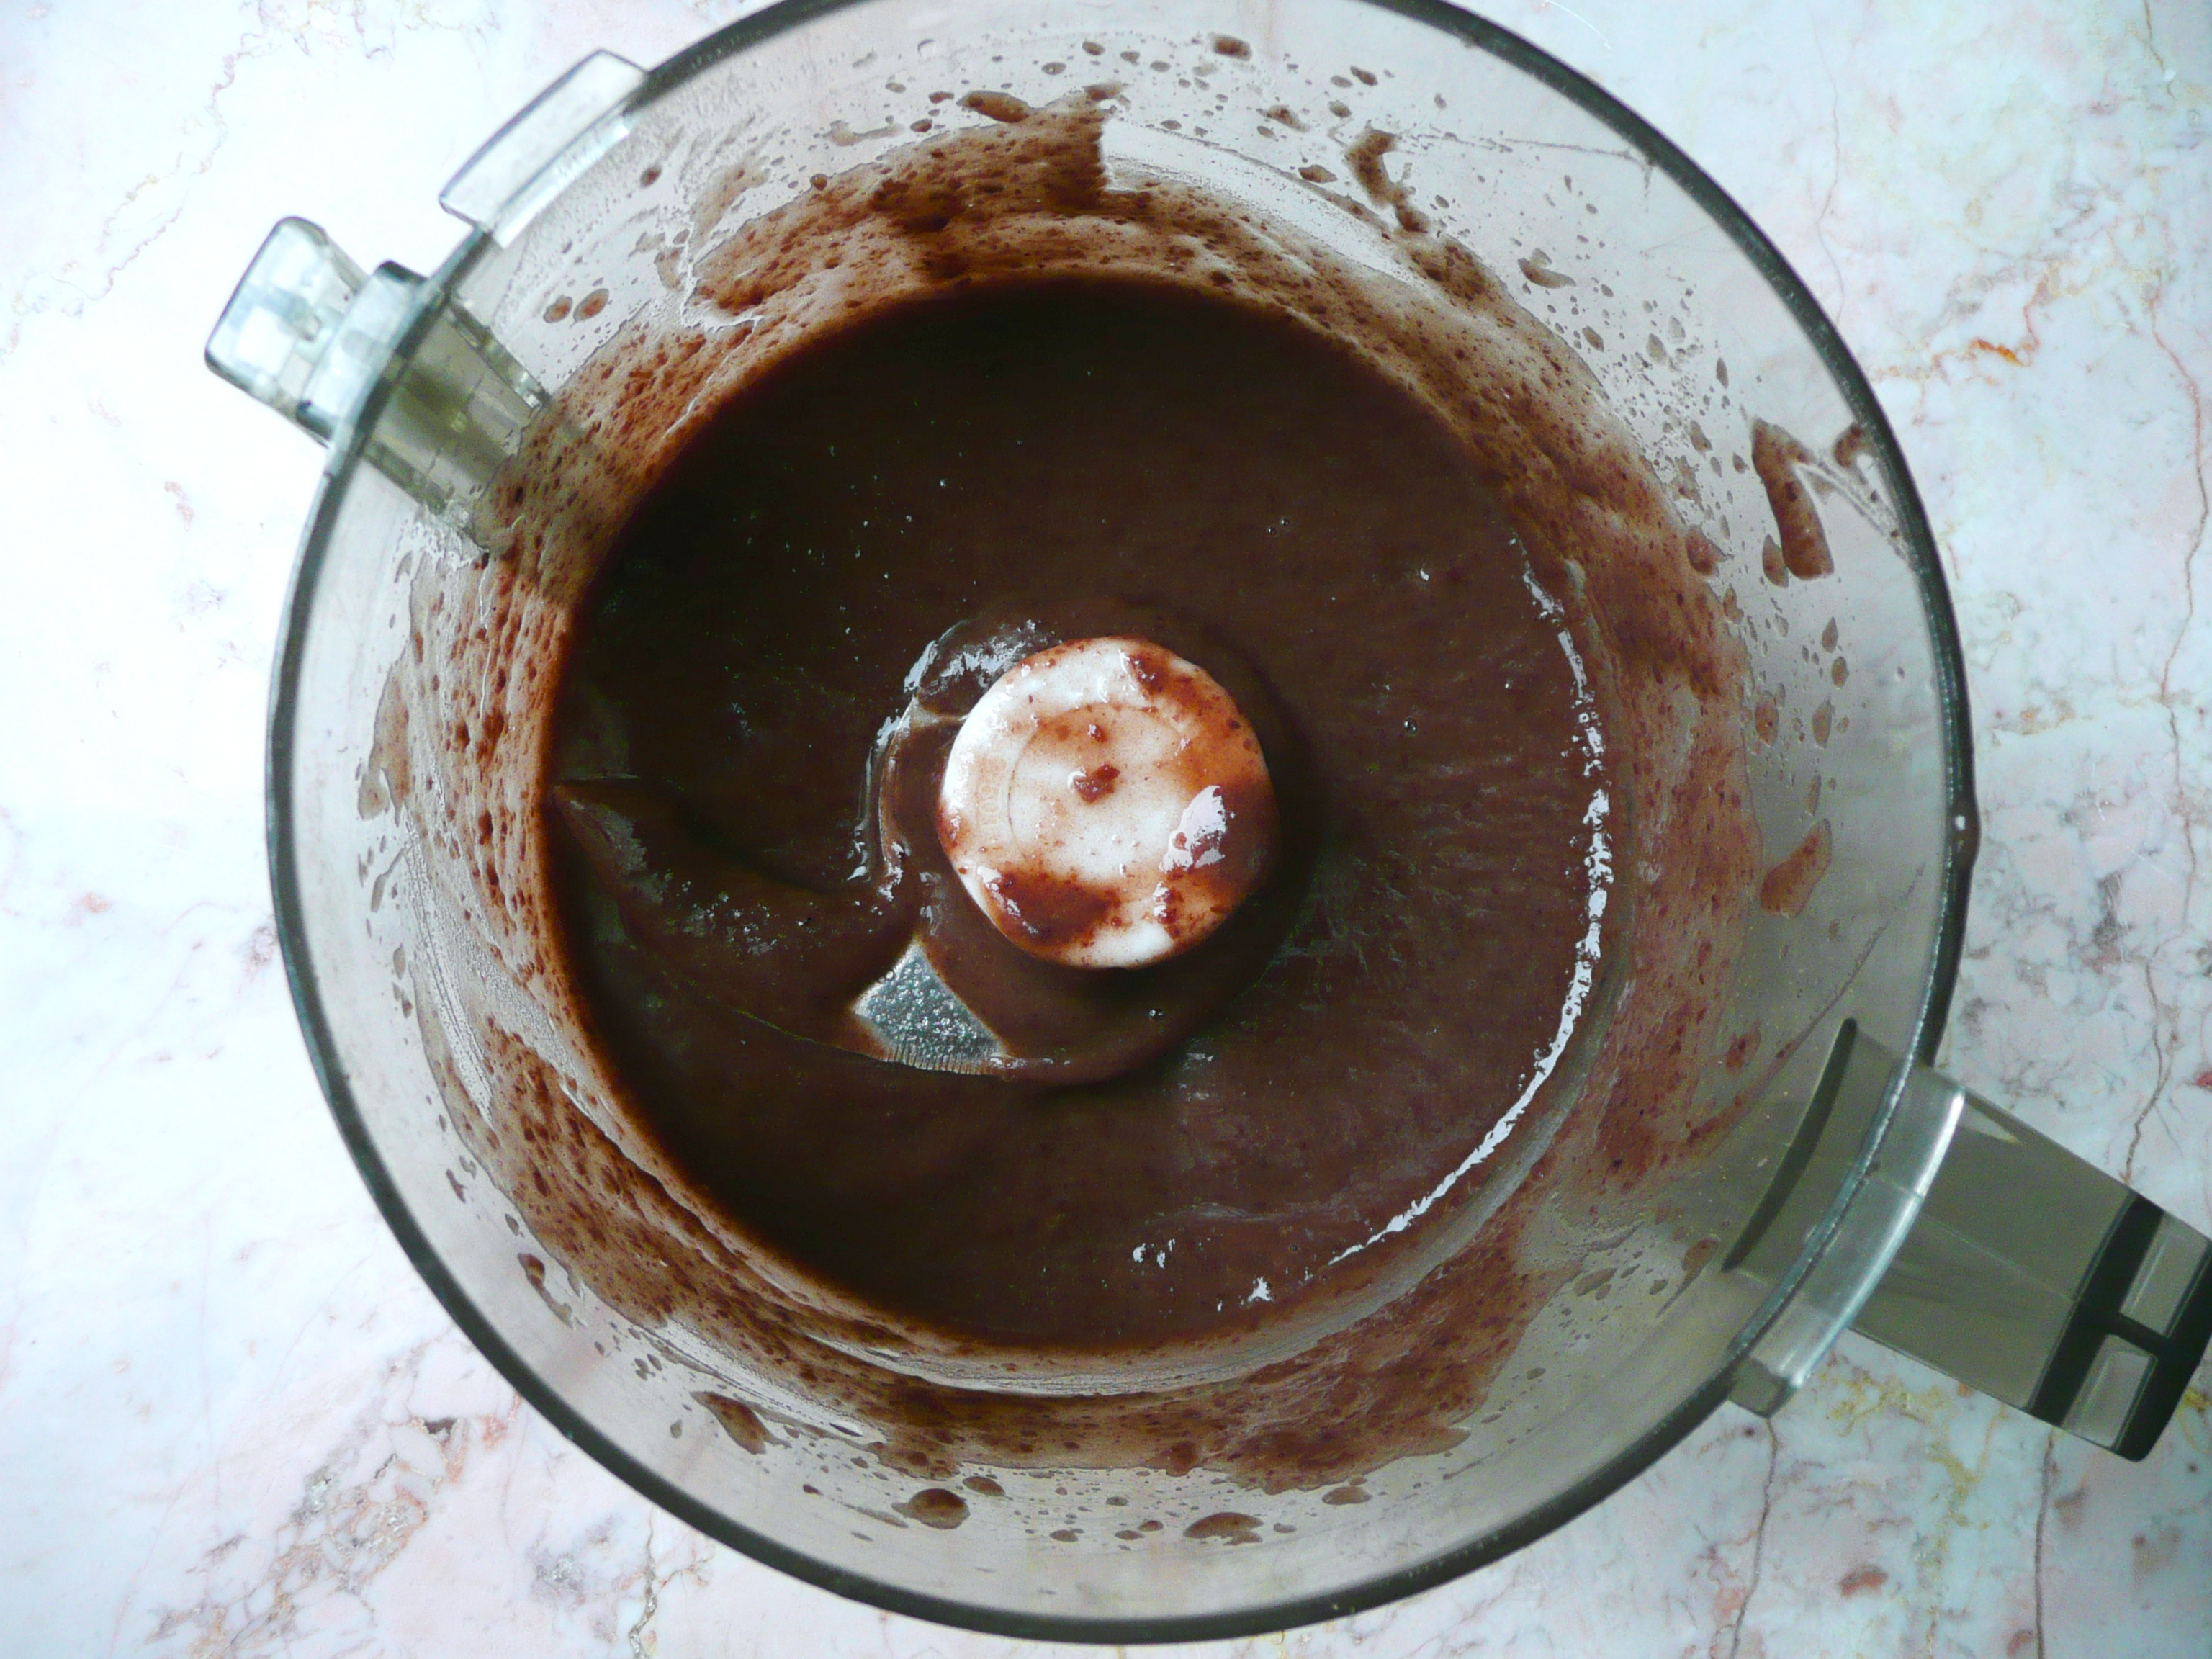
1. Add the drained red beans into a food processor with the 1/8 cup of maple syrup (I know that it doesn’t seem like much sweetener, but it gives just the right amount of sweetness to the tang yuan) and blend until smooth. It will look like this when it’s done.
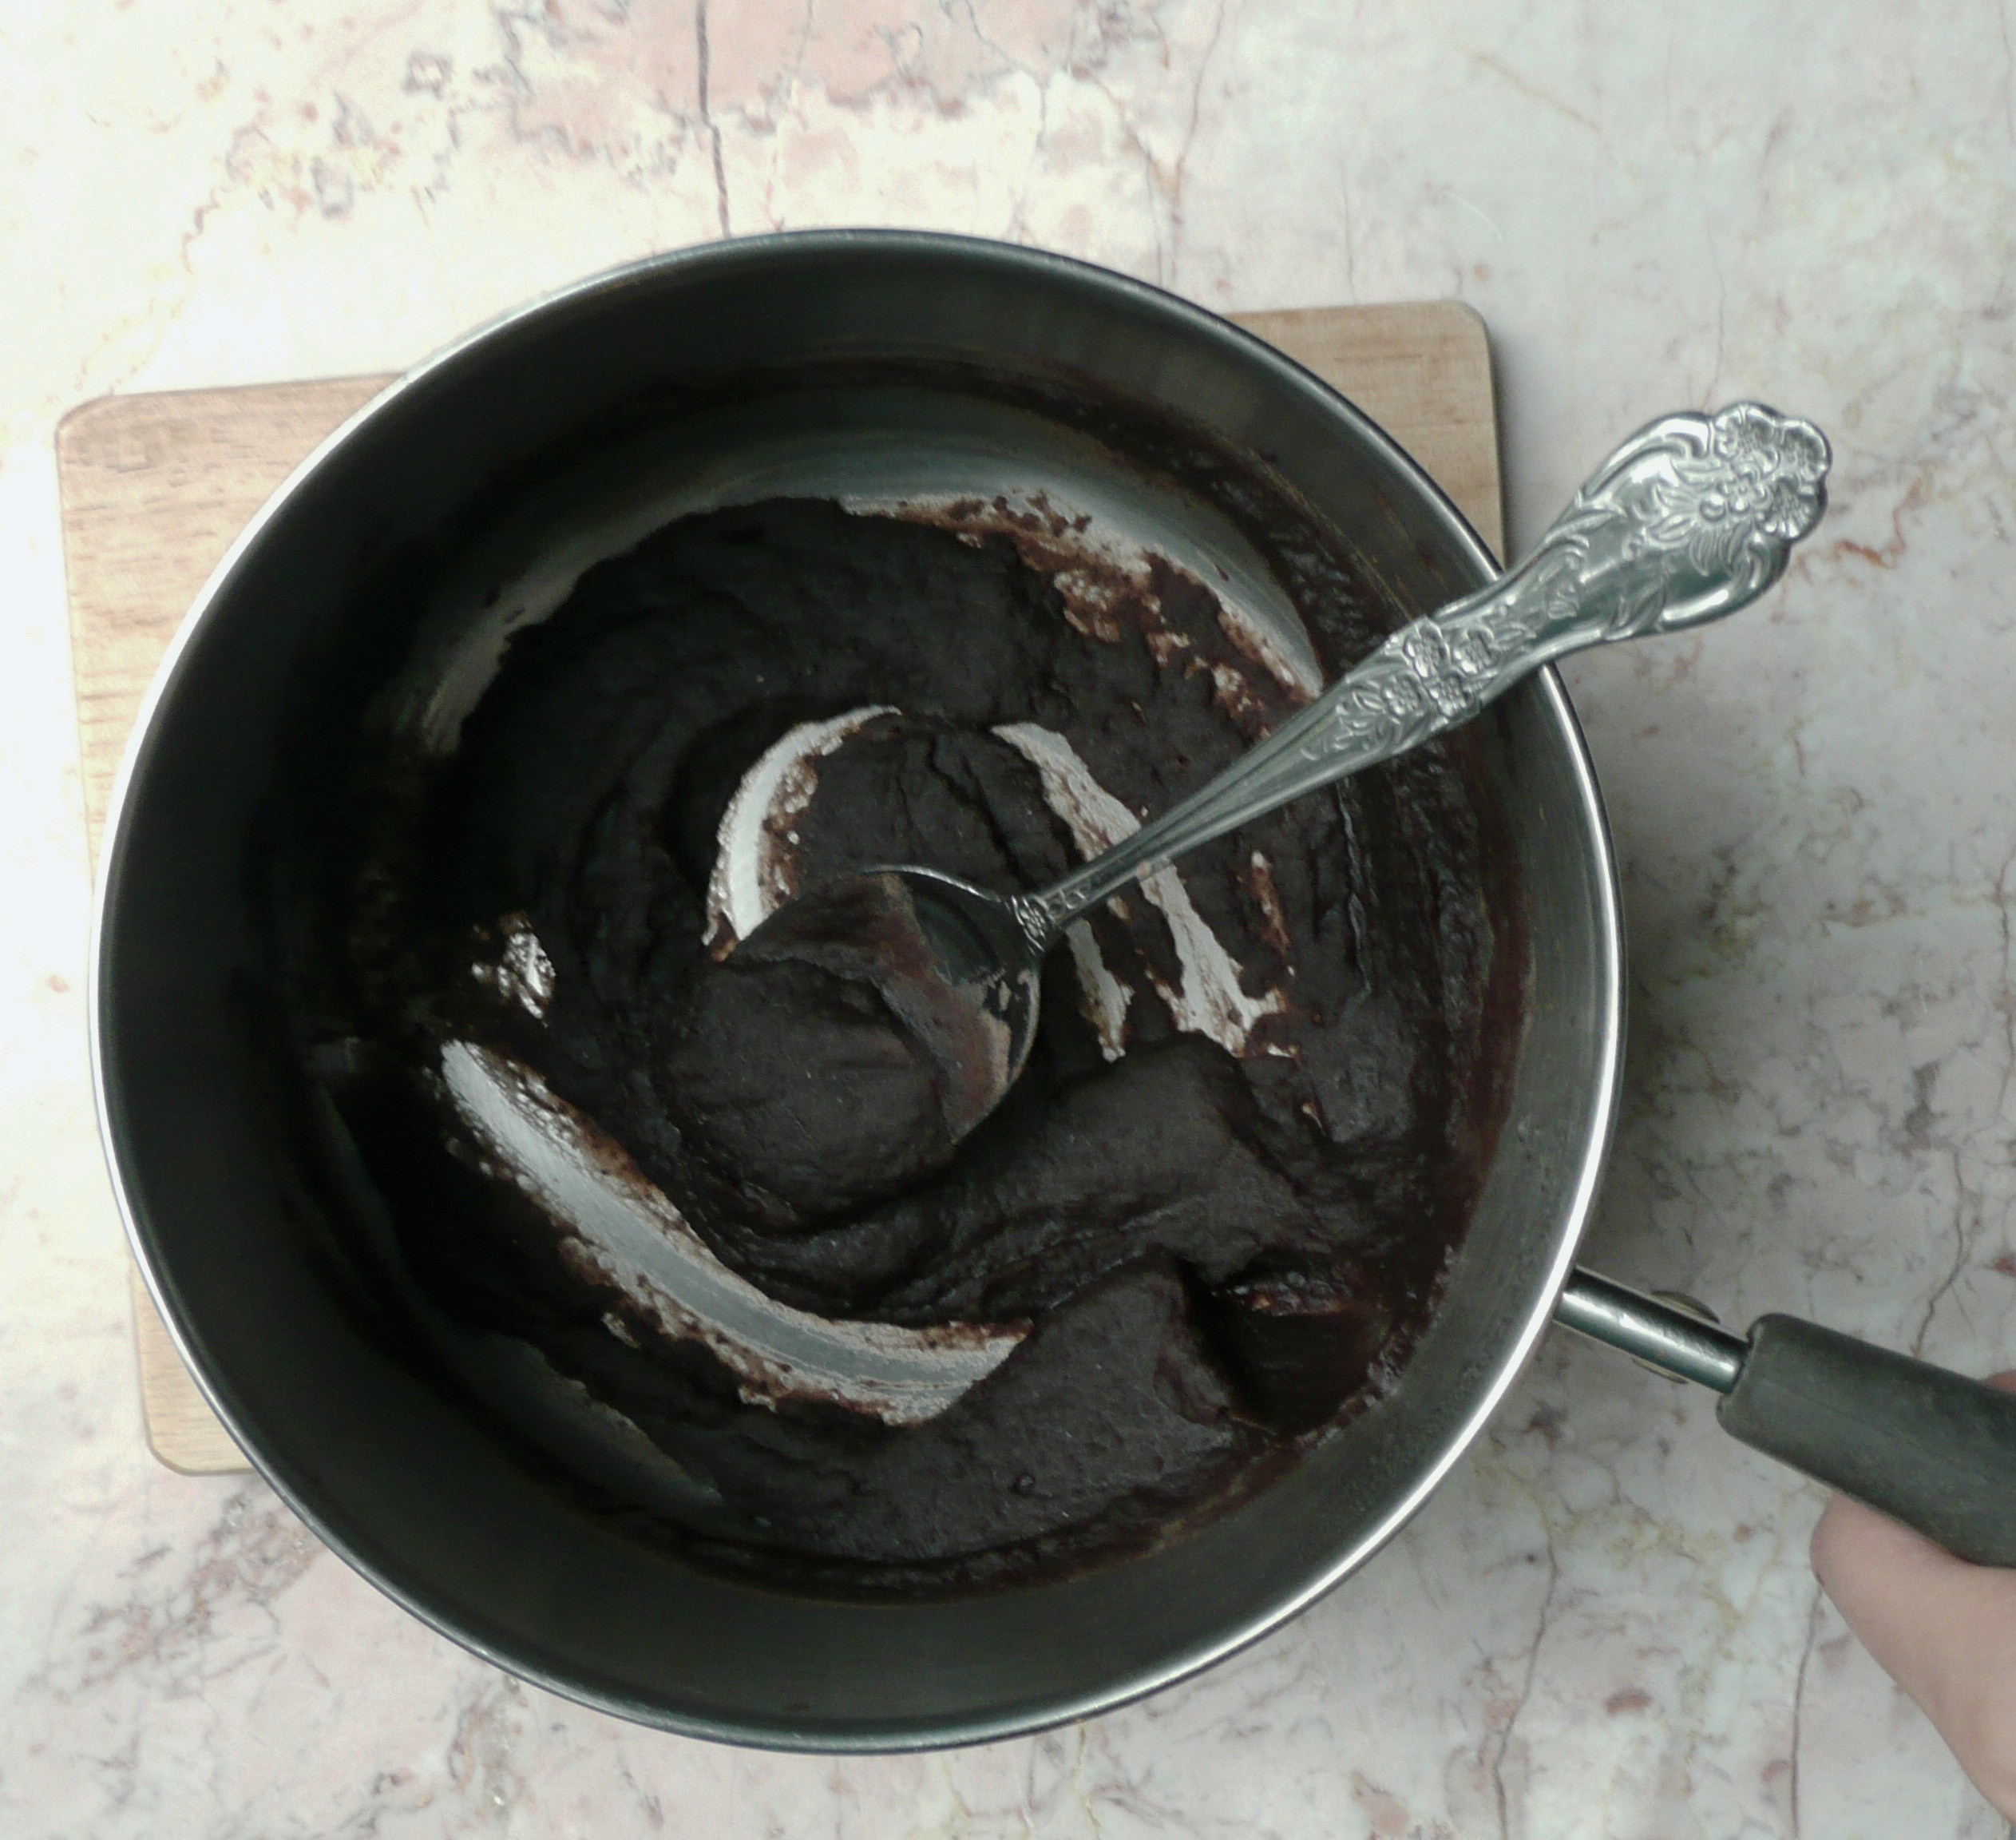
2. Cook the mixture in a small saucepan on medium high for 7-8 minutes, stirring constantly until thickened. It should be a similar texture to jam when you’re done.
3. Take the pan off the heat and allow to cool. The mixture should be reduced to just over 1/3 cup of red bean paste. Lay plastic wrap over a plate, and scoop a 1/2 tsp amount of the red bean paste into your hands and roll into a ball. Place the ball on the plate and repeat until you use up all the red bean paste. You should get about 12 little balls of paste in total. Cover lightly with plastic wrap and freeze for at least 1 hour until solid.
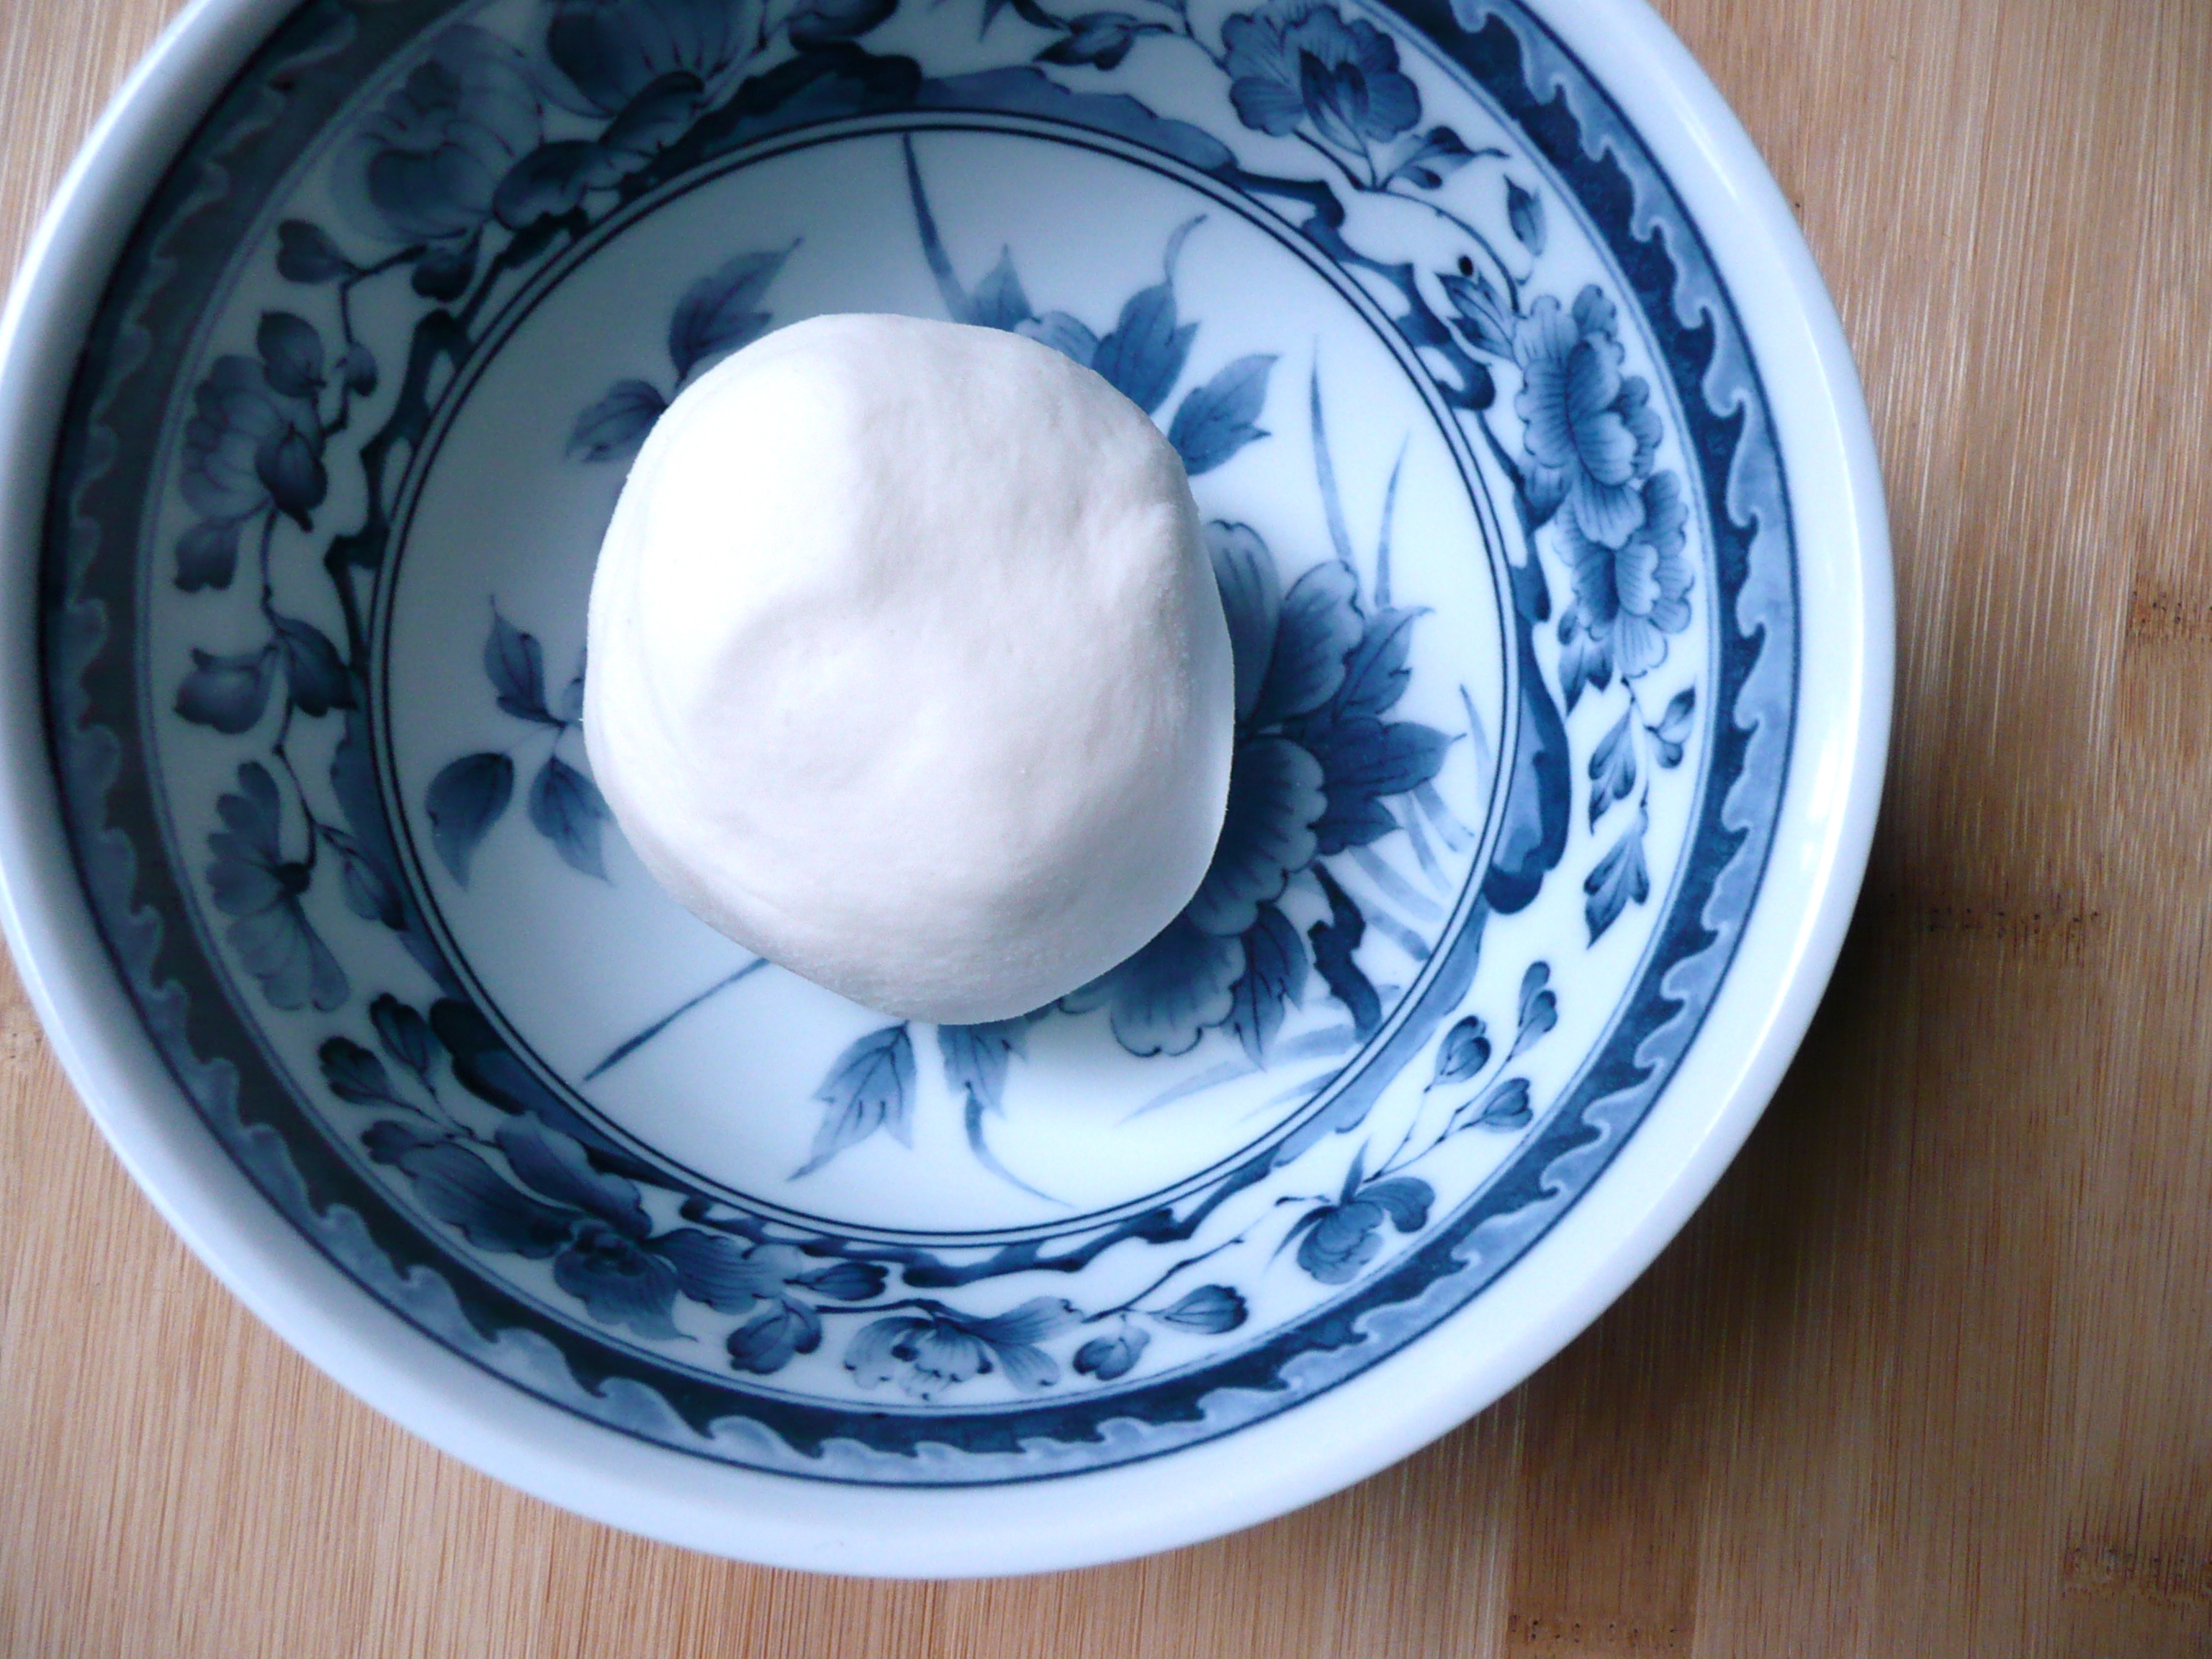
4. When the red bean balls are frozen solid, add the warm water to the sweet rice flour and stir with a fork until a shaggy dough is formed. Knead the dough together with your hands for 1-2 minutes until smooth.
5. Divide the dough into 12 pieces and keep the pieces of dough that you’re not working with covered with plastic wrap so that it doesn’t dry out.
Take the red bean paste balls out of the freezer. If you’re working with a double or triple batch, take about 12 red bean paste balls out of the freezer at a time, that way that don’t defrost before you cover them in the dough. It’s much easier to wrap the red bean paste in the dough if the red bean paste is frozen solid.
Wet your hands, and flatten each piece of dough into a small disk in your hand and pinch and fold the dough together to cover the red beans paste and roll until the ball is smooth.
If you’re a visual learner, this video shows how it’s done starting at the 2:30 min mark.
The first time I tried covering the balls in the dough, I did it with dry hands and it was much more difficult to work with than when my hands were wet. When I tried it again with wet hands, I made a double batch and only had trouble covering about 4 out of 24 of the tang yuan.
If the dough is too dry, it won’t stick to the red bean paste. You can peel off the dough and knead in a few drops of water before trying to cover the red bean paste again.
If the dough is too wet, it also won’t stick to the ball of red bean paste, but it will stick to just about everything else. In that case, just knead it with your hands for a little bit until it dries out a little and try again. Don’t worry if you can see little flecks of red bean paste on the outside of the tang yuan. No one will notice once they are in the soup.
If you get an air bubble around the red bean paste and the dough is not sticking to the ball, pull all the dough off of the ball, wet your hands, knead it the dough a little and try covering the ball again. This technique works better than trying to squeeze the air out which tends to make the rest of the dough pull away from the ball as well.
Once you’re done rolling the tang yuan, put them onto a plate lined in plastic wrap and cover lightly with another layer of plastic wrap and freeze until solid. Once frozen, transfer the tang yuan into an air-tight container and stash in your freezer until you are ready to cook them.
When you want to cook them, warm up some red bean soup (or you can also eat the tang yuan in the water that you cook them in with a little maple syrup drizzled over for sweetness).
Then bring a pot of water to the boil. Add the tang yuan (cook a few extra in case a few break open while cooking), cover with the lid and turn the heat down to medium low. Let the tang yuan cook until they float (about 6-8 minutes) lifting the lid to check on them occasionally. Once they are floating, put the lid back on and then set a timer 3 minutes let them continue cooking over medium low until the timer goes off.
If some of the tang yuan break open, don’t worry about. Just ladle those ones into your bowl (cook’s treat, you can also ask if anyone else wants the extras) and they will taste just as good as the whole ones.
For the Miniature Tang Yuan – You can also make little (non-filled tang yuan) as well, and those are even easier to make.
Stir together 1/4 cup (45g) sweet rice flour with 1/8 cup warm water (30 g) and knead until smooth. Roll the dough into a long snake and keep cutting the dough in half until you have 32 little pieces of dough about the size of a centimeter. Roll each little piece of dough into a ball and place them on a plate lined in plastic wrap. Over lightly with another piece of plastic wrap and freeze until solid.
The cooking instructions for the little tang yuan (no matter if they are freshly made or frozen) is to bring a pot of water to the boil. Add in the little tang yuan, cover, and set a time for 3 minutes.
When the timer is up, scoop out the little tang yuan with a slotted spoon and add them to the red bean soup. Ta-da! Extra adorableness for Lunar New Year!
To Serve – Ladle the red bean soup into bowls, top with your tang yuan and drizzle over some maple syrup.
What I do when I eat this soup is I’ll drizzle over about 1 tbsp of maple per bowl and don’t stir it in. That way, each time you take a bite you get a little hint of sweetness and you use less sweetener overall in the soup.
I hope that you and your family have a lucky, wonderful, safe and prosperous Lunar New Year!