How To Get A Pan Super Clean

Baking soda pan 1

Baking soda and vinegar can be your best friends in the kitchen. They help muffins to rise, can make a sink squeaky clean, or help you scrub out a pan without damaging the finish.

Here’s how I like to clean my pots and pans (if they need a little more help to get clean than the dishwasher can handle by itself).

(This is a pan that I used to sauté some baby spinach with garlic and olive oil.)

Start by sprinkling a generous amount of baking soda into your pan to absorb any leftover oil.

baking soda pan 2

Add a splash of plain white vinegar, and use a sponge to give the pan a good scrub.

baking soda pan 3

Rinse the pan out, then wash with soap and water as usual.

Ta da! A super clean pan, ready to make your next delicious dish.

Vegan Taiwanese or Chinese Sausage – “Xiang Chang”(香腸) / “Lap Chong” (臘腸)

vegan taiwanese-chinese sausage

This vegan Taiwanese / Chinese sausage is easy to make and tastes very similar to the real thing.

Spooned over noodles or a steaming bowl of rice, it’s happiness in a bowl.

Taiwanese and Chinese sausages can be found at Asian supermarkets, but I’ve never seen an organic one that’s free of added nitrates yet (here’s to hoping!). They taste amazing, and even though I’ve watched a YouTube video on how to make the sausages the traditional way, I haven’t actually made them myself yet.

This recipe is an easy way to get a similar flavor and texture without the hassle of making the sausage, or the nitrates from the store bought versions.

I used this recipe instead of real Chinese sausage when I made Turnip Cake for Lunar New Year and it worked great, so you can potentially swap this in for recipes that call for diced Taiwanese of Chinese sausage.


Vegan Taiwanese Sausage (香腸) or Chinese Sausage (臘腸)

Makes 1 serving

Ingredients

6 white or crimini mushrooms – cut into ¼ inch dice (about 1 ½ cups)

2 ½ tbsp. avocado oil (or any neutral flavored high heat oil)

¼ tsp + 1/8 tsp granulated garlic

¼ tsp + 1/8 tsp 5 spice powder

½ tsp organic red miso paste

2 – 2 ½ tsp maple syrup*

maybe a pinch of salt to taste (depending on how salty your miso is)


*Taiwanese sausage or “Xiang Chang”(香腸) is usually a little sweeter than the Chinese sausages or “Lap Chong” (臘腸), so if you’re looking for more of a Taiwanese sausage flavor, use the 2 1/2 tsp of maple, and 2 tsp of maple if your looking for more of a Chinese sausage flavor.

Instructions

1. Stir together the granulated garlic, 5 spice, miso, and maple syrup until smooth.

2. Make your pan non-stick. Add the oil and diced mushrooms to the pan and cook on medium high heat, stirring frequently, for 8-9 minutes until the mushrooms are golden brown around the edges.

3. Add the cooked mushrooms to the spice mix and stir until well combined. Give it a taste, adjust the seasoning to your liking.

You can also spoon this into romaine lettuce leaves (like vegan chicken lettuce wraps), or serve it over steamed rice or noodles.

However you eat it, I hope that you enjoy the recipe!


Note – This isn’t sponsored, but I just wanted to mention that the noodles that I used in the picture were Organic Edamame Spaghetti Noodles made by Explore Asian Authentic Cuisine (it looks like they may have changed the company’s name to “Explore Cuisine” now).

The only ingredients are water and soybeans and the noodles have a lovely flavor and texture and cook up in about 5 minutes are a good non-grain pasta alternative (if that’s something that you’re looking for). I used up the last of the box I had for this recipe (the box I had was from Costco, and they don’t carry the noodles anymore) but you can find the noodles online.

cole slaw tacos

Cole Slaw Dressing (Paleo, Refined Sugar Free, Soy Free)

cole slaw tacos

I love this creamy dressing. The dressing takes just minutes to put together and you can make it ahead of time as well and dress the cabbage and carrots when you’re ready to eat.

It’s slightly sweet from the maple syrup, and has a little bit of a bite from the apple cider vinegar and finely grated onion. And the dressing makes eating a good size serving of a cabbage (which is really good for you as it’s a cruciferous vegetable) a delicious experience.

When I first went gluten free, I experimented with a lot with different food combinations to try and come up with more exciting dishes to eat.

One of my first and favorite food combinations ones turned out to be chicken and cole slaw tacos.

I use homemade gluten free tortillas, top them with cole slaw and some leftover roasted chicken. If you’re vegan, you can use a vegan mayo and a meatless chicken subsitute (or crispy tofu would be good too).

You can also serve the dressing over a normal salad (like I did in the picture). I trimmed off the edges of the tortillas and pan fried them with a little oil until they were crispy and added them to salad as a crouton substitute.

I hope that you enjoy the dressing (and that it makes eating lots of vegetables more exciting!).

Happy Eating!


Cole Slaw Dressing

Makes 1 serving

Ingredients

1/2 tbsp finely grated white onion (I use the really small holes on my box grater for this)

3 tbsp mayo (I used an avocado oil mayo)

3/4 tsp apple cider vinegar

1- 1 1/4 tsp maple syrup

pinch of salt (to taste)

1 cup finely shredded cabbage and grated carrot mix


Instructions

Stir together the onion, mayo, vinegar, and maple syrup. Add salt to taste.

Pour over the cabbage and carrots and stir until well mixed. Serve.

salmon sushi

Salmon Salad Sushi – Super Easy

P1080078-2

I love tuna salad, and this is a slightly fancier version but is still super simple to make. It’s perfect for a quick dinner, or an easy snack and you can use up your leftover brown rice or salmon to make this tasty dish.

Salmon Salad Sushi

Makes 8 pieces (2 snack size servings, or 1 serving for a hungry person)

Ingredients

1/3 cup cooked flaked salmon (canned salmon is fine too)

2 ½ tbsp. mayo (I used an avocado oil mayo)

1/8 tsp dijon mustard

2 ½ tsp finely chopped green onion

3 tsp lemon juice

tiny pinch of pepper

¼ tsp dried parsley

1/8 tsp granulated garlic

¼ tsp sea salt

1 ½ cups warm cooked brown rice (I just steam it for a few minutes in the rice cooker to warm it up if it was in the fridge)

1 sheet of nori

Instructions

1. Stir together the salmon with everything but the rice and nori.

2. Lay the nori sheet on a plastic wrap covered bamboo mat.

Wet your fingers, and spread the warm rice on the nori into a thin layer leaving about a ¾ inch of nori uncovered at the top of the sheet.

3. Spoon the salmon salad into a line at the bottom of the rice covered nori. Roll firmly into a sushi roll, and set in the fridge for 10 – 15 minutes to firm up. Cut into 8 slices and serve.

P1080077-2

Salmon Salad Sushi and Vegan Thai Peanut Sauce with Veggie Spring Rolls

The snack plate of dreams…

Tabbouleh

Quinoa Tabbouleh – Easy, Gluten-Free, Vegan, Delicious

P1060497

I have a bit of secret…

I don’t actually love eating quinoa.

I know that it’s healthy, but like most people, I didn’t grow up eating it. So quinoa lacks that sense of nostalgia and comfort that many of my favorite foods have. It doesn’t have too much of a flavor, and to be honest I’m still sometimes at a loss as to what to eat with it, or lack ideas on how to make it more exciting.

I know that people say that you can swap quinoa out for rice, but honey, it ain’t the same.

Making sushi with quinoa doesn’t work that well, and when you’re eating something like Lou Rou Fan (Taiwanese Braised Pork with rice) or Taiwanese Style Scrambled Eggs with Tomatoes and Green Onion, you want rice. I can eat brown rice with both of those dishes and not feel like I’m missing out, but I don’t want to eat those dishes with quinoa.

But this is a recipe that I love to eat. This recipe makes quinoa taste (imagine Oprah saying this) amazing! I love the brightness of the lemon juice with the freshness of the mint and parsley. The quinoa has a lovely texture that really works well with this dish, and gives the tabbouleh a lot of good protein. This tabbouleh is also full of different colored vegetables and herbs, and it’s a very nutrient dense salad that just tastes great.

And it doesn’t feel like another boring old salad, it looks and tastes exciting.

P1060493-2

So if you’re ever stumped as to what to do with leftover quinoa, make this dish and see if you don’t just eat the entire portion yourself in one sitting.

I like to make this dish a day in advance so that the lemon juice has time to mellow out the sharpness of the onion. It’s also nice to have a batch of this sitting in the fridge so that there’s always something healthy to snack on when you’re hungry.

Quinoa Tabbouleh

Makes 2-3 servings


Ingredients

1 diced Roma tomato (about 2/3 cup)

½ cup diced white onion

¼ cup finely chopped parsley, loosely packed*

1 tbsp finely chopped fresh mint*

¾ cup cooked quinoa**


1 tbsp olive oil

3 tbsp fresh lemon juice***

¼ level tsp sea salt

¼ level tsp black pepper


*For tips on how to keep your excess herbs fresh, here’s a link to a post that I wrote about that.

**If at all possible, buy the quinoa in the store that doesn’t say to rinse it on the package instructions. Quinoa can be difficult to rinse if you don’t have a fine enough strainer, and life is easier if you can just scoop the dry quinoa out from the container, add it to a pot with some water and cook it in the rice cooker and not have to think to hard about it.

*** If you have any excess lemons, you can freeze them.

Instructions

Stir all ingredients together. Cover and refrigerate overnight. Taste it the next day, and adjust the seasoning if needed.


P1060495- 2

Happy Eating!

Oat Flour Tortillas

Gluten Free Oat Flour Tortilla Recipe – Super Easy, Cheap and Cheerful, Vegan Friendly

P1080427

Some people say “I love you” with diamonds, but personally, I’d rather have tacos for Valentine’s Day.

Nothing says “I love you” quite like a taco (and everyone loves tacos). So this Valentine’s Day, make your loved one some amazing tacos with these gluten free oat flour tortillas.

Store bought tortillas can have all kinds of fillers, and the gluten free ones can be particularly expensive. These tortillas are incredibly cheap and easy to make, and taste amazing too. Perfect for anyone who wants to eat well on a budget.

These tortillas are super flexible. Unlike normal wheat tortillas, these tortillas are actually more flexible when they aren’t piping hot, so it’s a good idea to give them a minute or two to cool once you take them out of the pan before you fill them with anything. They are also still very flexible when cold, which makes them great for packed lunches.

The dough is sturdy enough that you can make the tortillas as large as you want, and as long as you have a griddle big enough, you can make a burrito sized tortilla if you like (but you may have to adjust the cooking time).


Gluten Free Oat Flour Tortillas

Makes six 6 inch tortillas (about 2 servings)

Ingredients

1 1/4 level tsp psyllium husk powder*

1/3 cup water

1/2 tsp honey**

1 tbsp olive oil

1 cup oat flour***

1/8 tsp sea salt


Notes – *Psyllium husk powder gels like nothing else, and there’s no great substitute for it. I found mine in the bulk spice section of the local Fred Meyer, but Whole Foods, Trader Joes have been known to carry it as well. If it’s not in the natural foods, or bulk spice section, check the dietary supplement/ digestive health (where the Metamucil is) section of the store or pharmacy as it’s sometimes sold there as well.

** You can leave out the honey if you’re vegan. The tortillas will still be good, they just wont have the little brown spots when you cook them.

*** I grind oats into oat flour using a blender. Don’t grind the oats in a food processor because the flour won’t be fine enough.

Any extra oat flour I don’t use in the recipe goes into an airtight container and I use it for another recipe.

If you’re making the tortillas for someone who has celiac disease, use certified gluten free oats, as the oats from the bulk bins can sometimes be processed on the same equipment as wheat.


Instructions

1. Slowly add the water to the psyllium husk powder. Stir to combine, and don’t worry to much if it’s super clumpy. Let sit for 5 minutes

2. Add in the rest of the ingredients and stir together until a shaggy dough is formed. Knead the dough for about 1–2 minutes until the dough is fairly smooth, making sure to smush in all the little bits of psyllium husk into the dough until well combined.

The dough should look like this when you’re done kneading –

P1080403

Cover the dough with plastic wrap (or cover the bowl with a small plate) and allow the dough to sit at room temperature for 1 hour.

You can also make this dough ahead of time and keep it in the fridge for 1-2 days until you’re ready to cook the tortillas.

3. Cut the top and sides off of a gallon size Ziploc bag and open it and lay it flat to form a long rectangle.

Dip a paper towel in a little bit of oil (avocado oil, vegetable oil, or olive oil will work for this) and oil the inside of the plastic. Don’t use the coconut oil for this, it solidifies too quickly and the dough ends up sticking to it.

Cut the tortilla dough into 6 equal pieces, and keep the pieces of dough that you’re not working with covered so that they don’t dry out. If the dough is too sticky, add a little oat flour, if the dough is too dry then knead in a few drops of water into the dough. The dough should be elastic, on the firmer side, and smooth. Roll the dough into a 6 inch circle between the pieces of oiled plastic.

Peel the tortillas off the plastic and lay them on a plate. You can roll the tortillas out and overlap them on a plate as they won’t stick together, but kind of shingle them so that there are bits of each tortilla sticking out from the pile so that each tortilla will be easier to pick up when you cook them.

4. Make your pan non-stick. Cook your tortillas over medium heat. I let them cook for 1 min and 15 seconds on the first side, then flip them over and let them cook 30 seconds on the other side. They get the little brown spots this way, and are slightly crispy around the edges. If you don’t want them crispy around the edges, you can cook them for a shorter amount of time and they will still be good.

5. Stack the tortillas on a plate and fill them with whatever your heart desires. I topped mine with tomatoes, lettuce, and minced mushrooms that I’d cooked down with taco seasoning to make a vegan taco filling.

They keep great in the fridge, so you can make them ahead of time and keep them on hand for all your taco cravings.

P1080439

Enjoy!

Kitchen Tip – How to Regrow Green Onions

green onions

Green onions are used in lots of Asian recipes, and they are actually super simple to regrow on your windowsill from the trimmings that you would normally compost.

I cut the green part off the green onions so that there’s about  1.5 – 2 inches of the white part attached to the roots.  Then put the green onion roots in a little jar (old spice jars seem to work well for this) and add about 1.5 inches of cool water into the jar. I put a little piece of folded paper towel under the jar when I put it in the windowsill so that no watermarks stain the wood.

Replace the water everyday (that way the water doesn’t get slimy as quickly). I’ve been able to successfully regrow a trimmed green onion root about 2-3 times.  After that, they get a little too slimy around the roots and it’s time to compost them and wash out the jar.

The picture shows about a week of growth, and you can trim off what you need to add to dishes.

You can also plant the trimmed green onion roots in some soil, and they should regrow a few more times than if they were simply regrown in water.

I hope that this tip helps you save a little money! Let me know how this trick works for you. What would you make with your regrown green onions?

Kitchen Tips – How To Use Every Drop Of Olive Oil

P1070675

One ingredient that I use almost everyday is olive oil.

I use it in salad dressings for it’s peppery bite, drizzle it over soups and pasta sauces to give them richness, and add it to hummus for a smooth and silky texture.

Inevitably, at some point, the bottle runs empty save for a few teaspoons of that beautiful green oil that you can never seem to shake out of the bottle.

If you too can’t stand the thought of letting any food go to waste, this is my solution for getting every last drop of precious oil from the bottle.

Take a wide mouth mason jar and put it inside of a 1 quart measuring cup. Then turn the bottle of oil upside down and place the mouth of the bottle inside of the mason jar. Leave this to sit in an area where it won’t be disturbed for a day or two and all of the oil that’s left over in the bottle should drain into the mason jar.

(Putting the mason jar inside of the big measuring cup makes the bottle of oil and mason jar less likely to tip over.)

Use this reclaimed oil within a day or two, as it has been exposed to air and light and won’t keep for too long before oxidizing.

Thanks for reading!

Happy Cooking!

Shrimp Pad Thai

Weeknight Shrimp Pad Thai – Easy and Quick Recipe – Refined Sugar Free

P1080345

Pad Thai is the kind of dish that you love to eat, but are not quite sure how to make yourself.

At least that’s what I thought until I found a really easy recipe for pad thai on Goop.

What I really loved about the recipe from Night + Market on Goop was how simple the recipe was. I love pad thai, but most of the recipes that I found online had a lot of specialty ingredients that I would have to go a little out of the way to find.

I never attempted to make it myself before, but that recipe looked so easy, and with a few swaps, I knew that I could make a pad thai that would work with my dietary restrictions.

P1080307-2

This pad thai is made from ingredients that you can find at your local grocery store, and can be made in about half an hour. Perfect for a weeknight dinner.

Also great if you’re craving pad thai, but don’t live anywhere close to a Thai restaurant…

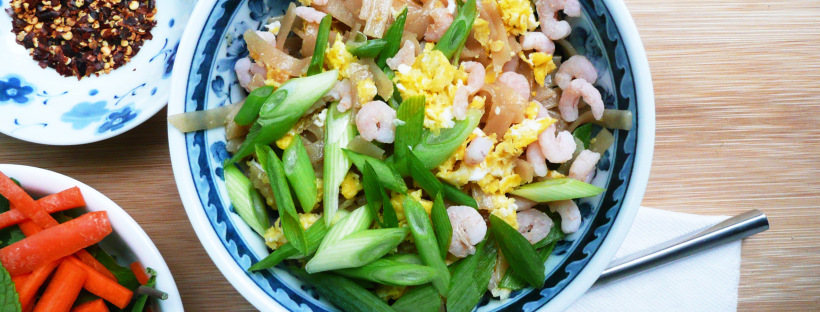
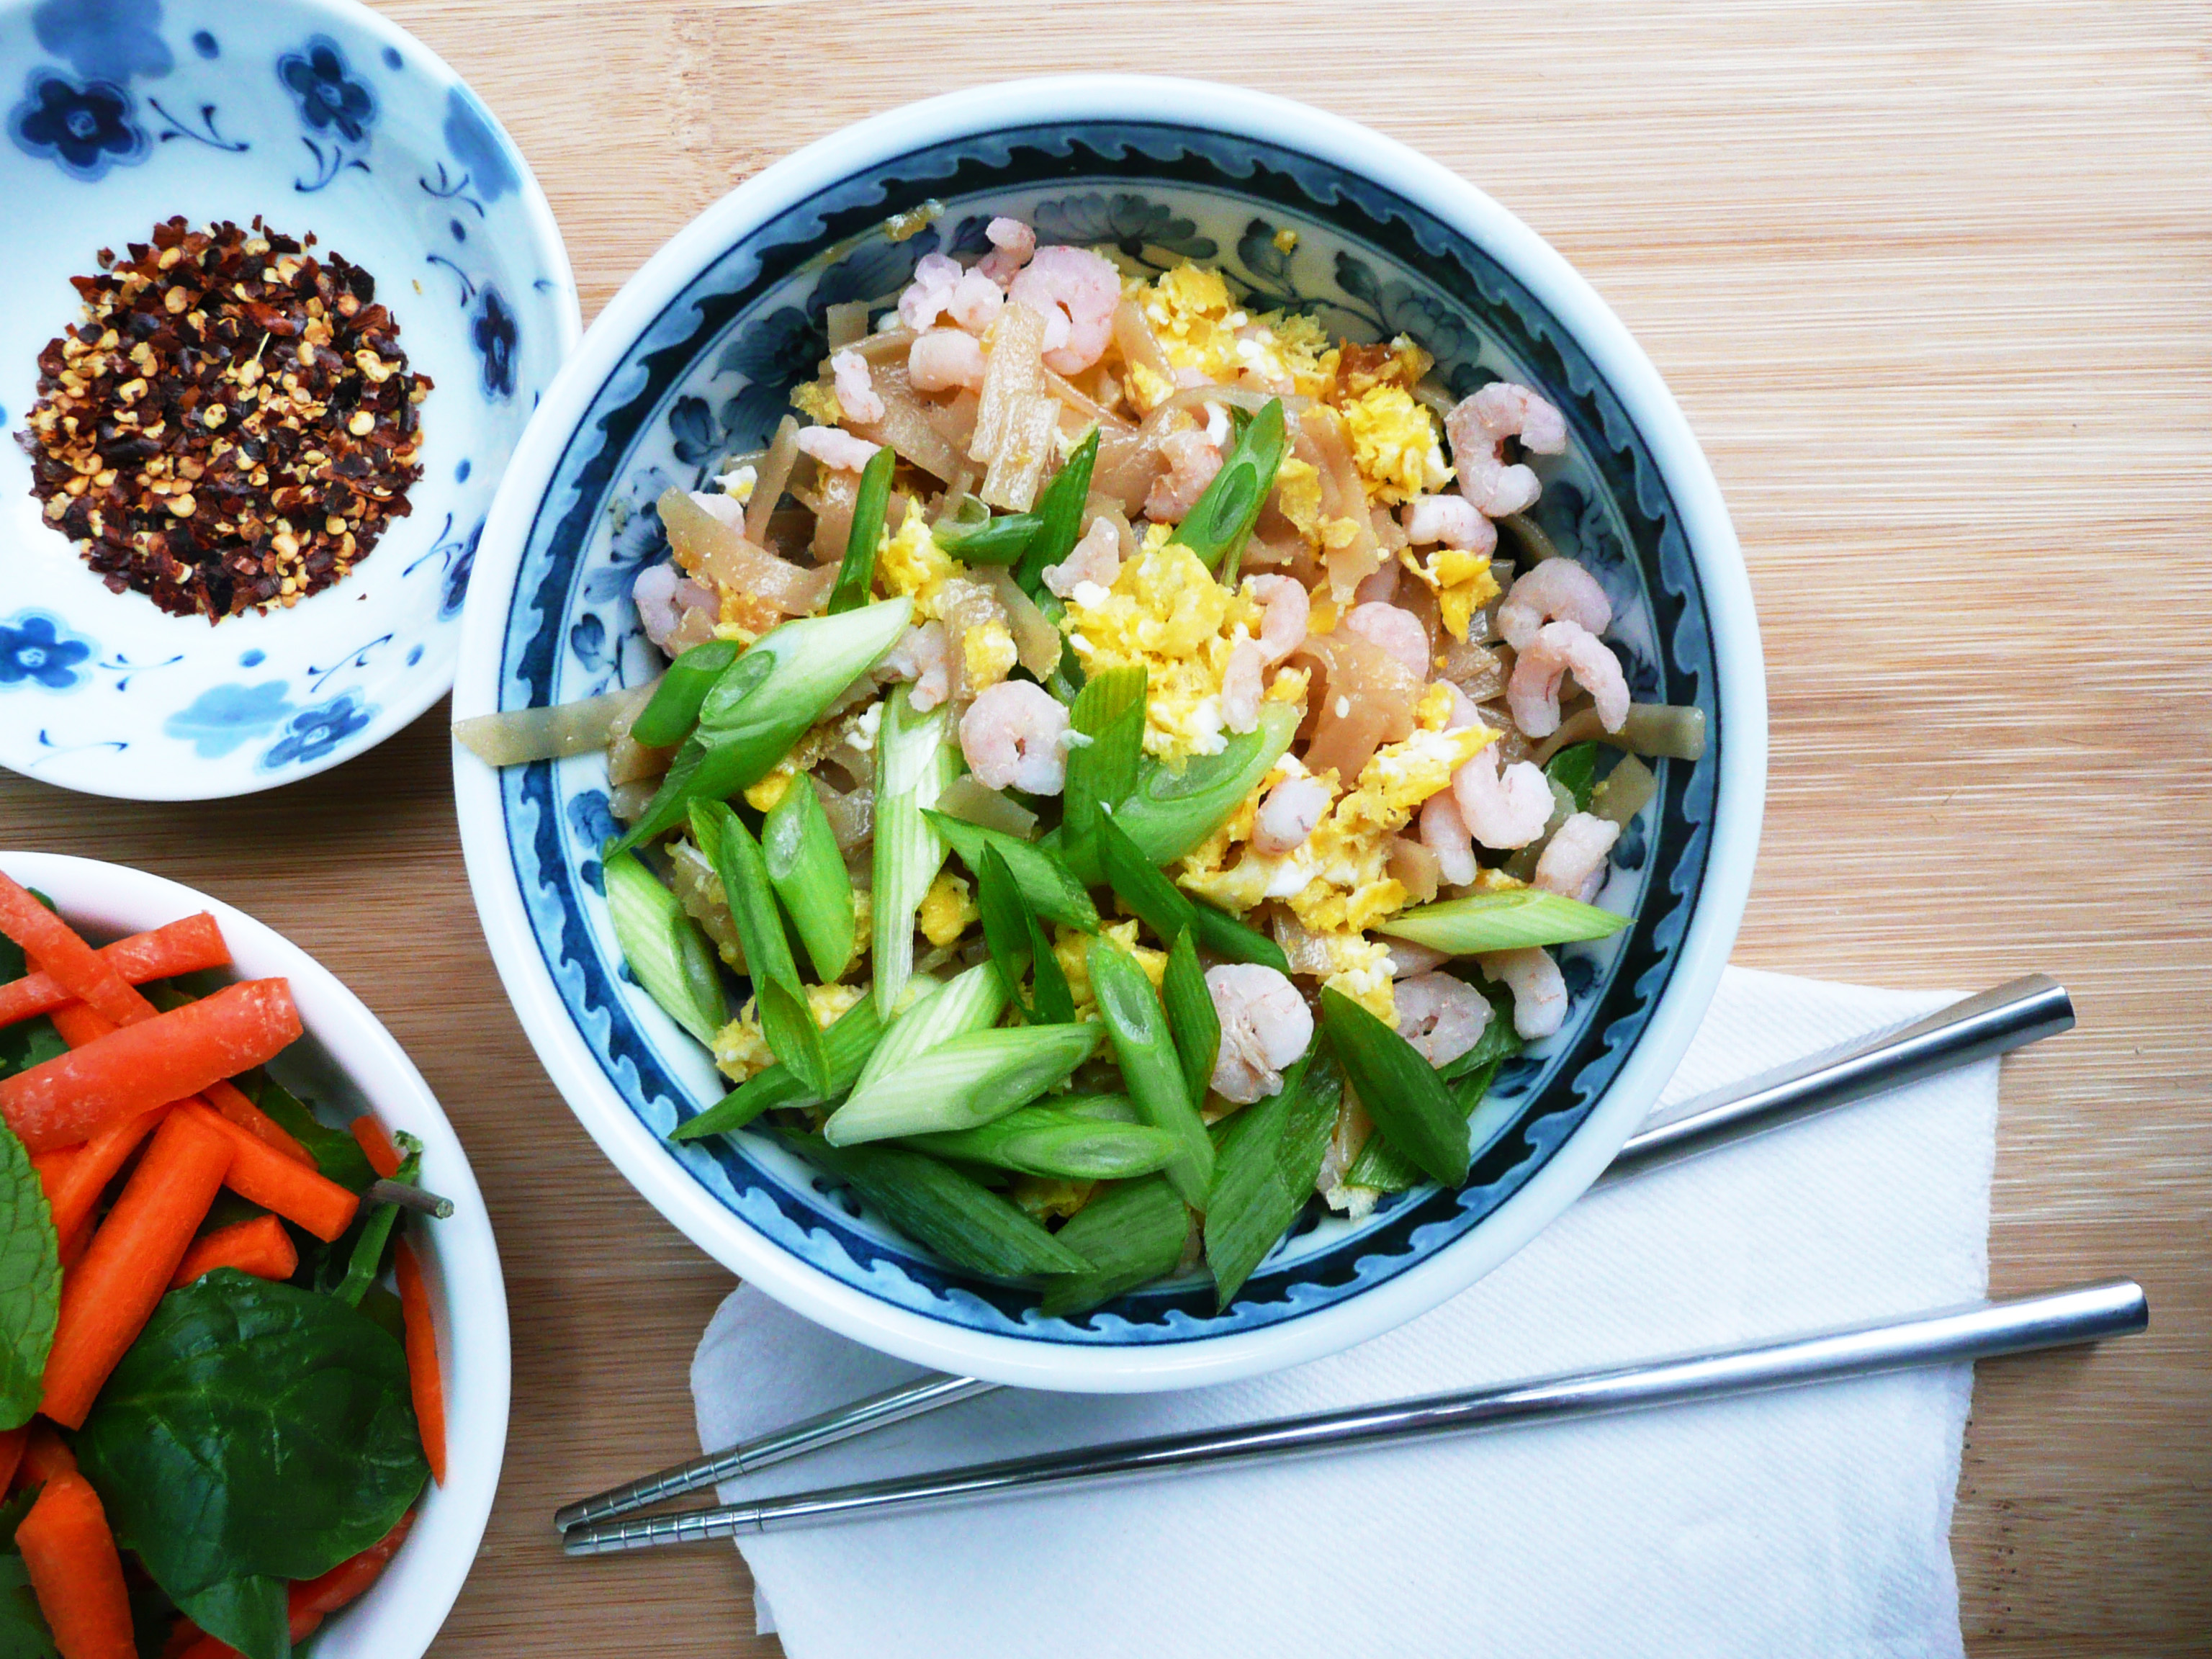
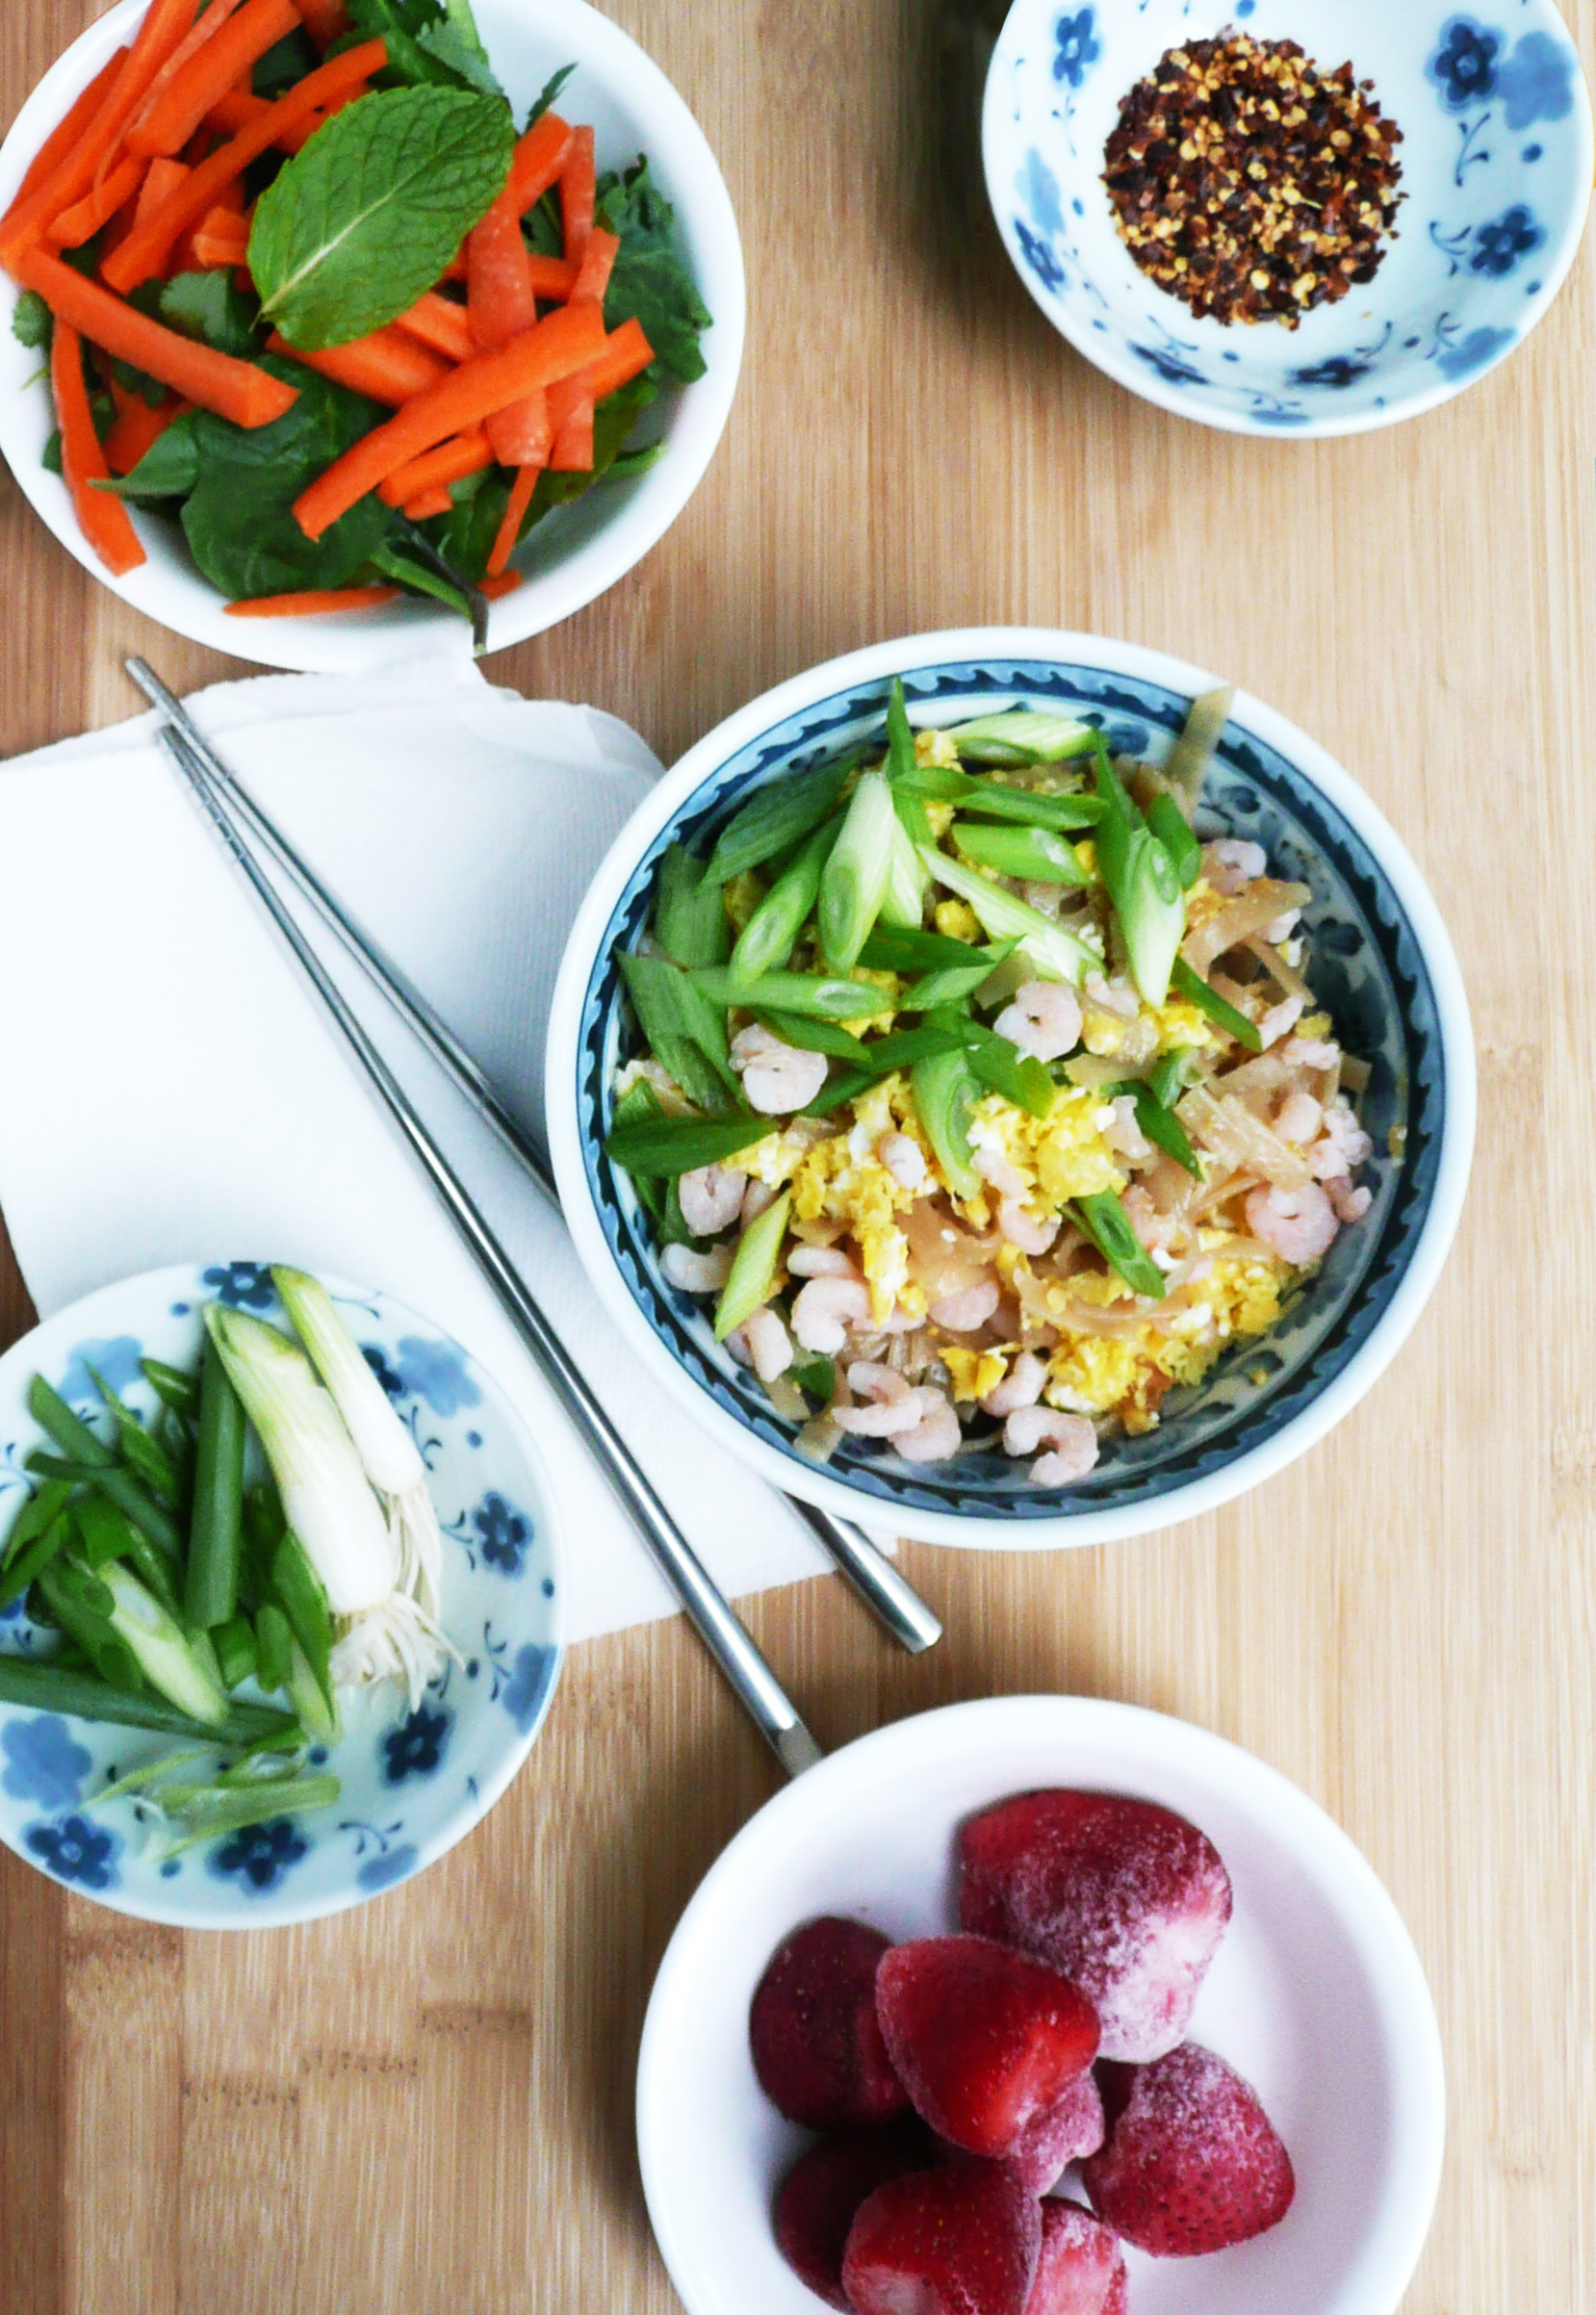
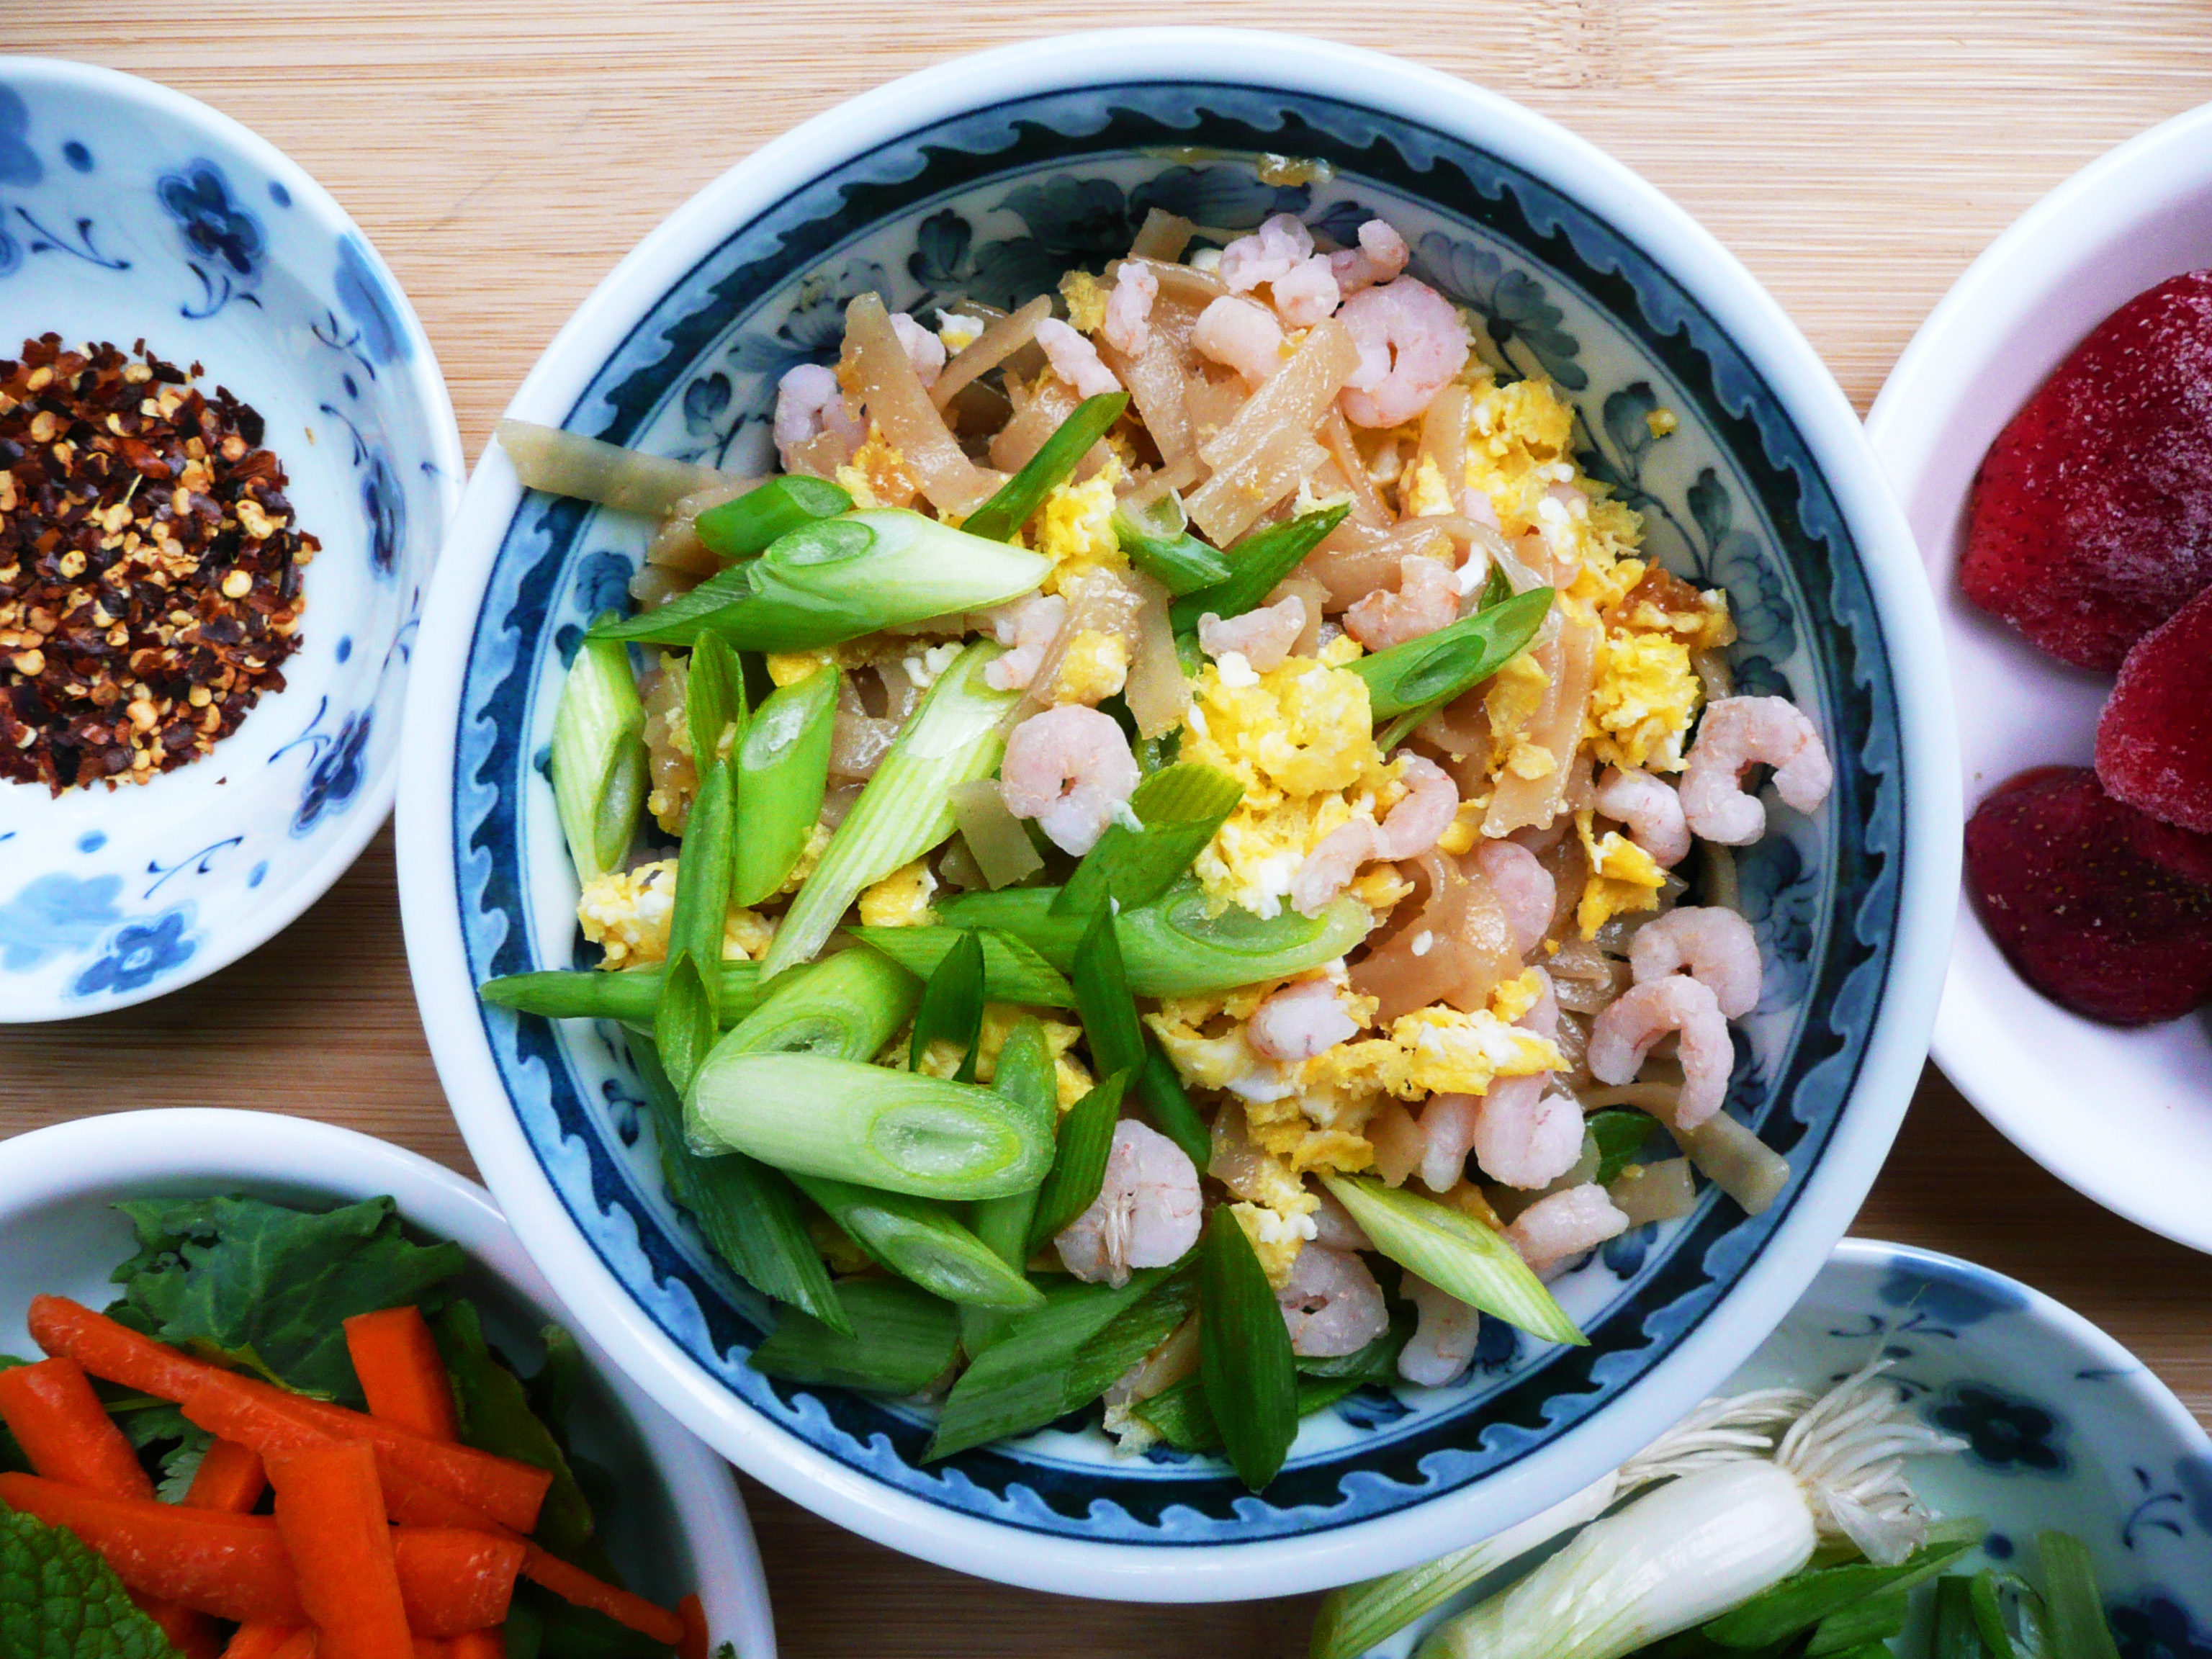
I used wild caught pink shrimp from Oregon (which I was able to find at my local supermarket in the display case at the seafood section, but I’ve also seen it sold at Costco as well). I only buy this kind of shrimp these days because it’s sustainably harvested, and also because it doesn’t contain any preservatives or ingredients that many other frozen shrimp are processed with.

The working conditions for people who catch, farm, and process shrimp around the world can also be very harsh and inhumane, so by purchasing domestically caught shrimp, I hope that I’m supporting more ethical working conditions for people who work in the shrimping industry.

You can find more information about Oregon Pink Shrimp here. This isn’t an affiliate link, just more info in case you’re curious about how the shrimp are caught.

P1080304

This type of shrimp is pretty inexpensive, at about $8 – $9 per lb, and it’s also just as tasty as the larger shrimp which makes it a good buy in my book. The amount of pink shrimp in this dish cost about $1, so while this pad thai feels very luxurious, it’s actually really budget friendly.

For more information on what to look for when buying shrimp, you can check out this article here.

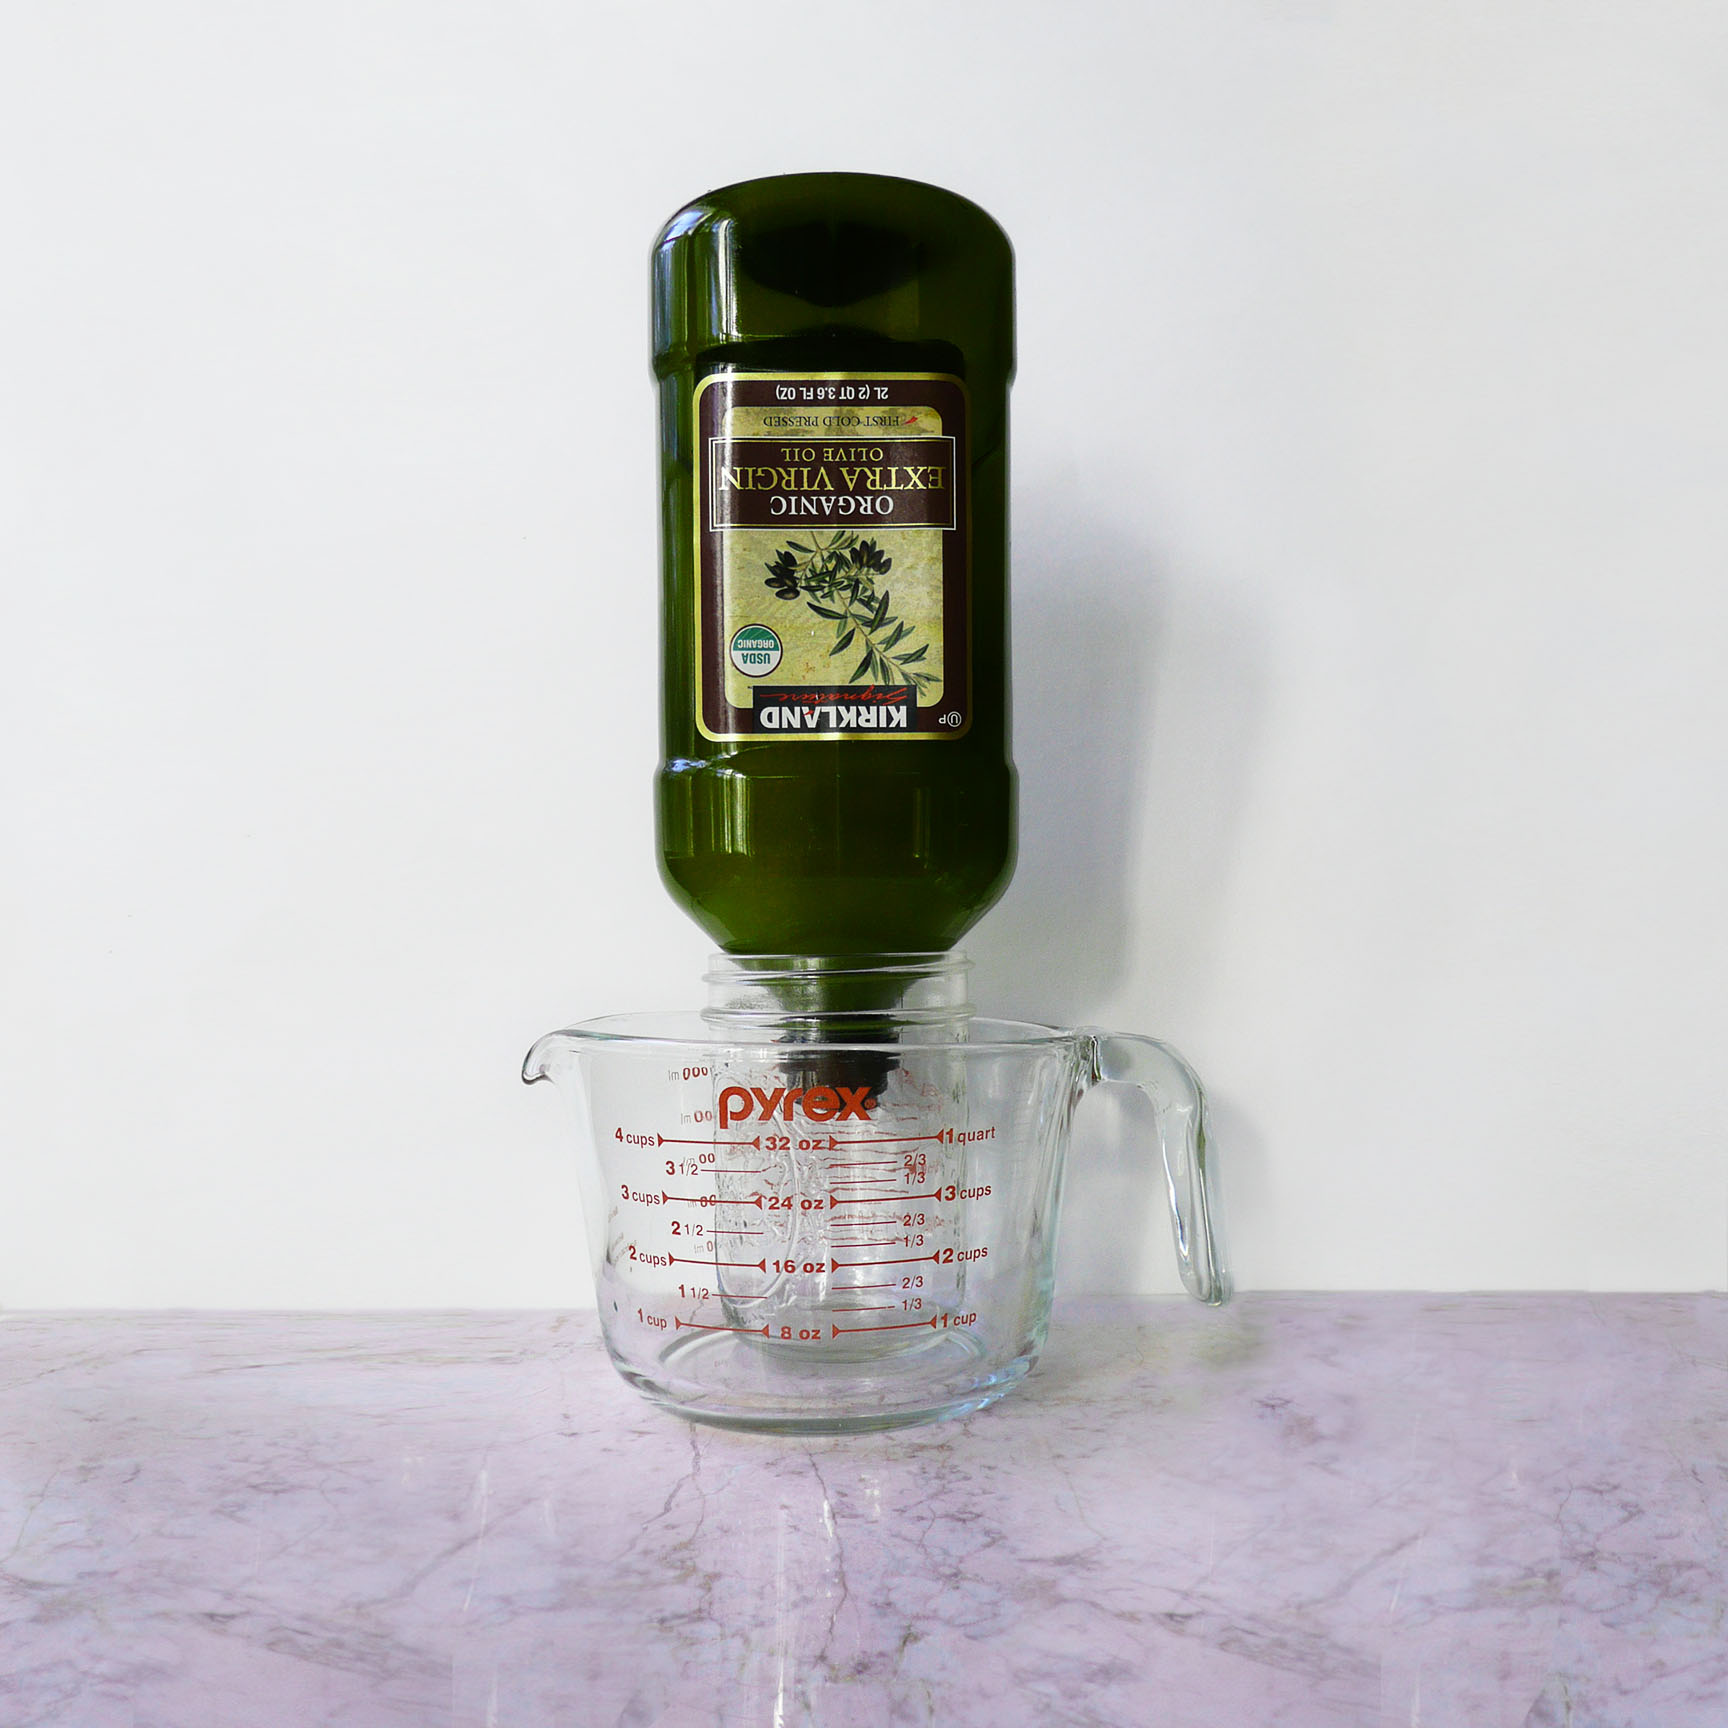
About the fish sauce, I use the Red Boat brand fish sauce, because it’s only made from anchovies and salt (and therefore paleo, and refined sugar free). You can find it online, but I managed to find a bottle of the 500 ml (17 oz.) size for about $7 at my local Asian market, so it’s worth checking out your local Asian market if you have one nearby to see if they have it cheaper than online.

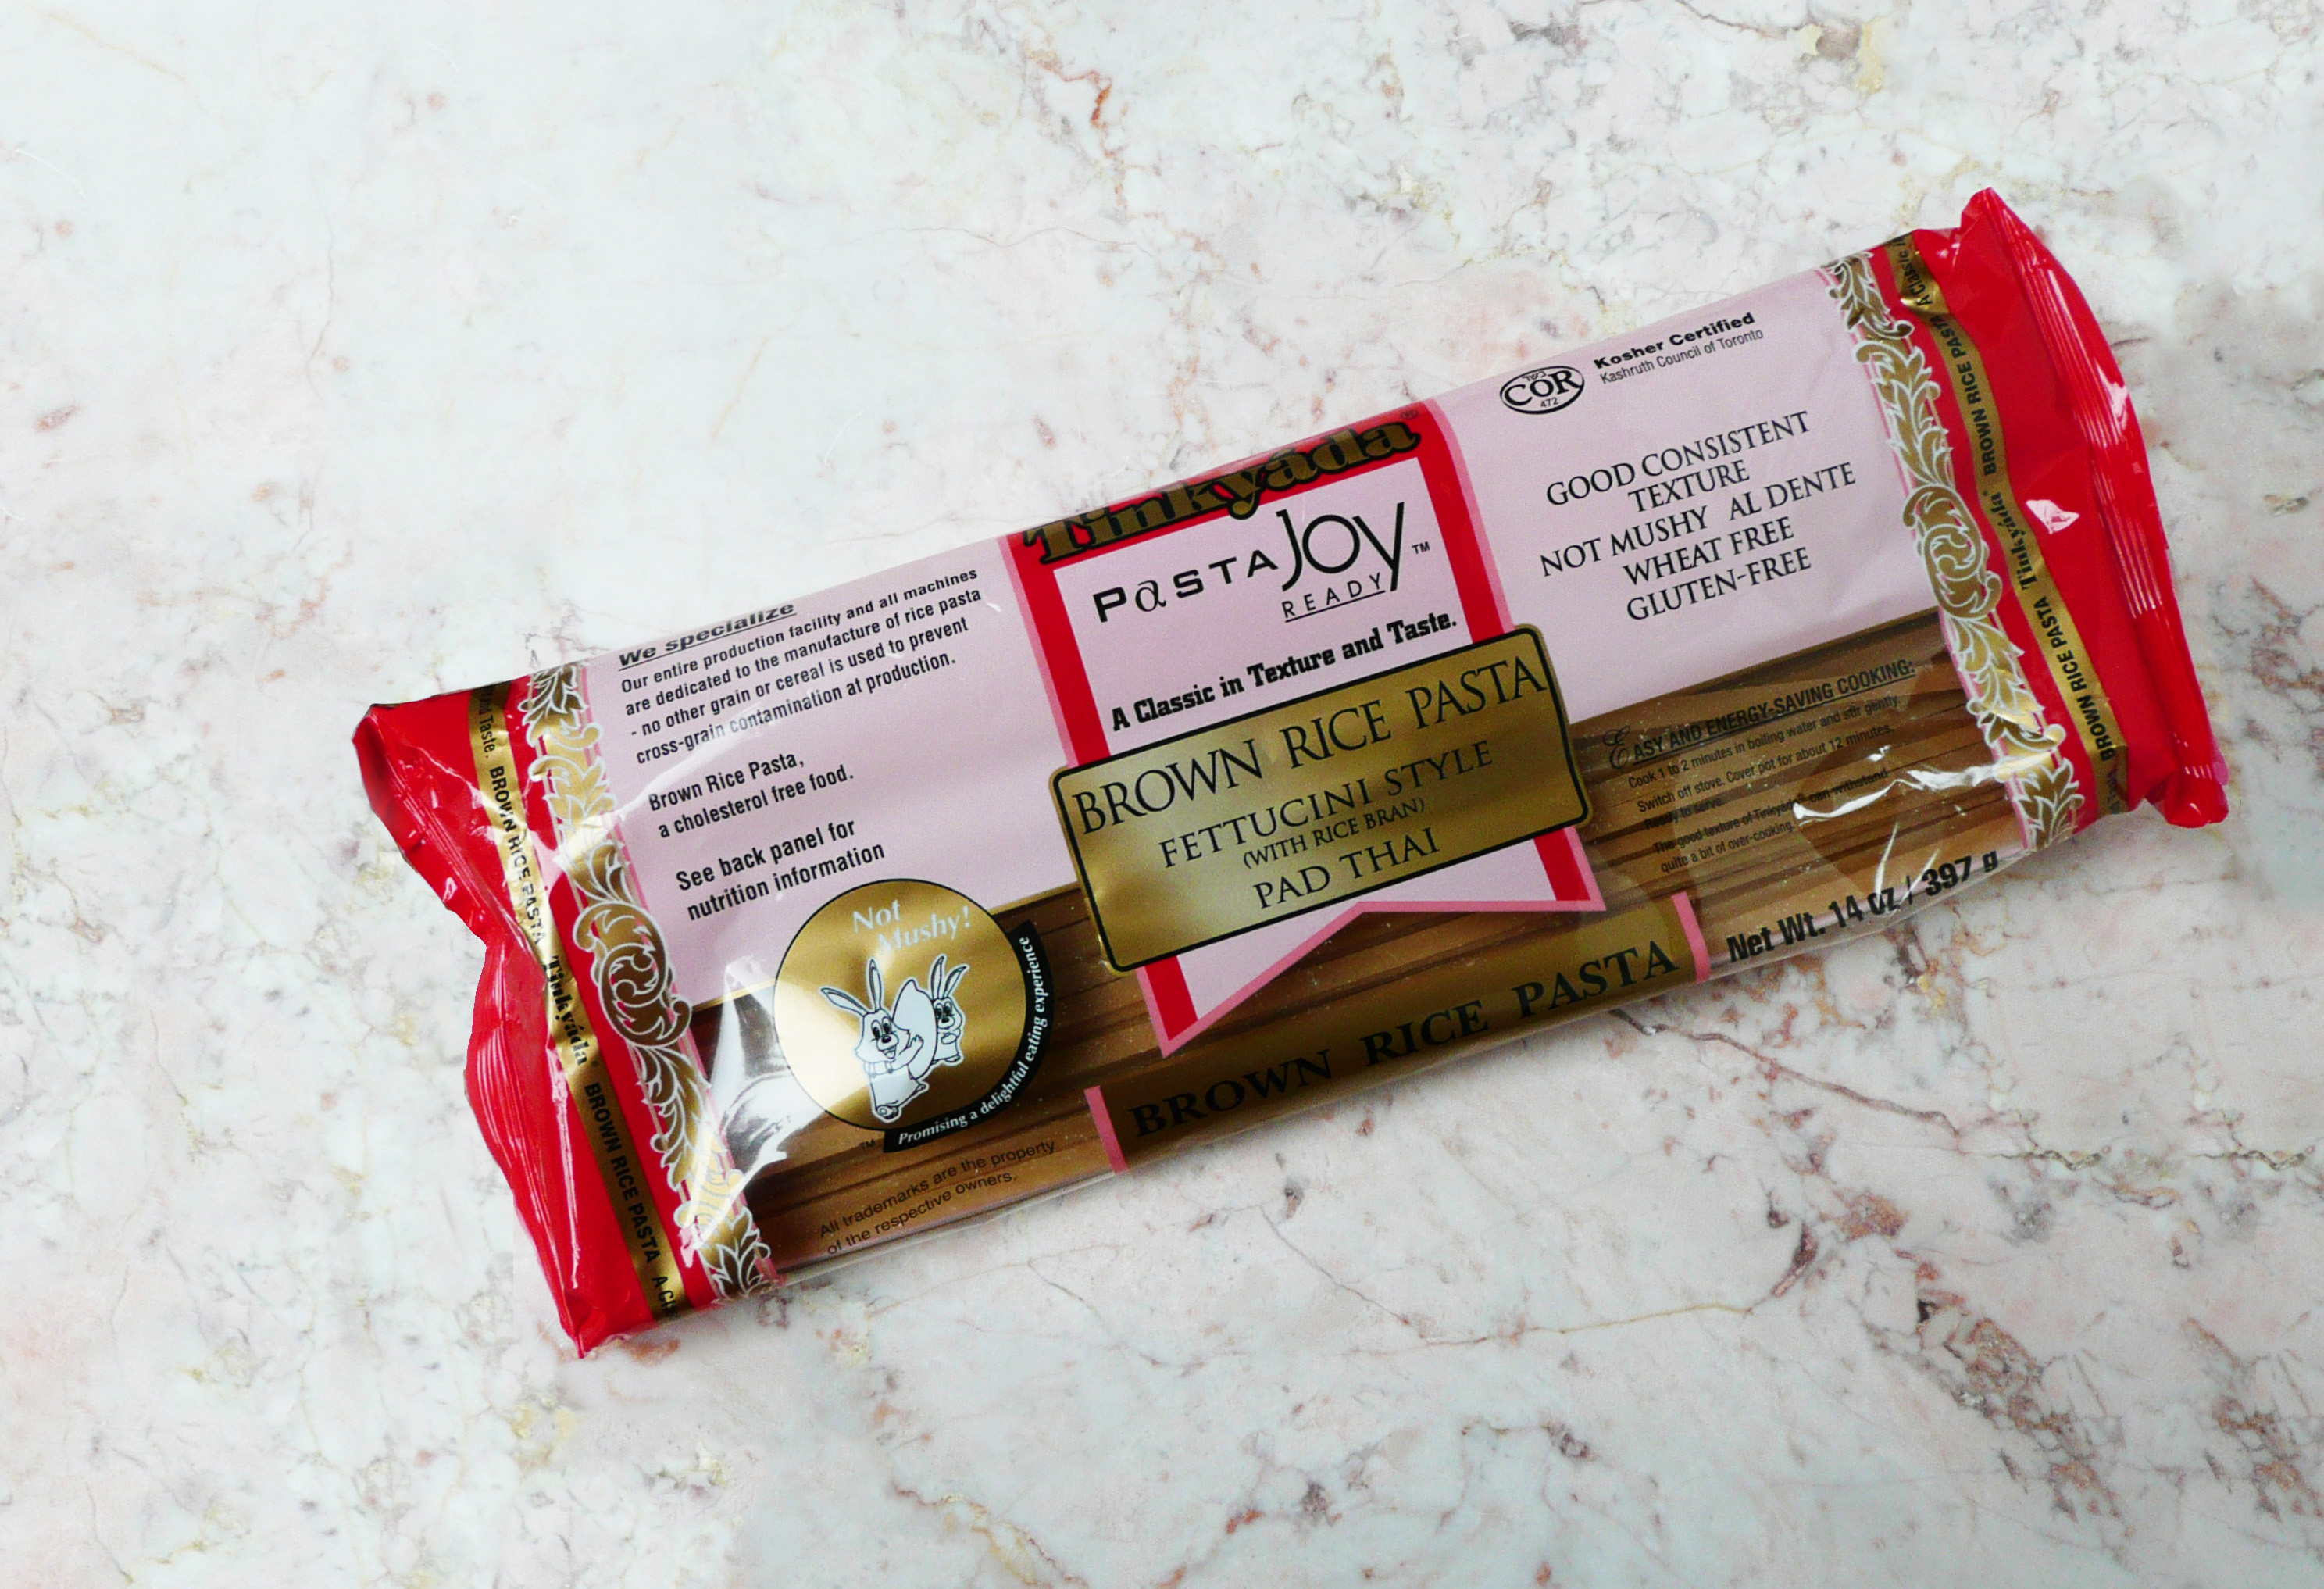
The noodles that I used were Fettuccini Style / Pad Thai noodles from Tinkyada which I found at my local grocery store. They weren’t organic, (but hey, it happens, you do the best you can). They were also on sale, which was definitely a plus, and the noodles worked great for this recipe.

brown rice noodles.jpg

There is a decent amount of maple syrup in this recipe, so if you’re watching your sugar intake, this may not be a meal that you eat every night, but it is certainly a really amazing and tasty dinner to have as a treat every once in a while.

If you’re planning on eating a few sides along with this (like a salad, fruit, etc.) this recipe makes enough for 2 smaller servings, but if you’re just eating it by itself, then it’s really just enough for one person, especially if you’re really hungry.

I hope that you give the recipe a try! It’s so good, and you’ll be super proud that you made a dish that you once thought that you could only enjoy in restaurants.


P1080350

Weeknight Shrimp Pad Thai

Adapted from this recipe.

Makes 2 servings, or 1 larger serving for a very hungry person.


Ingredients

4-5 oz of dried brown rice noodles *

4 tbsp of maple syrup

2 tbsp of fish sauce

2 tbsp of apple cider vinegar

1/3 cup of frozen pink shrimp

1-2 eggs (depending on how hungry you are)

2 green onions, thinly sliced


1 lime, cut into wedges for serving


* Note – If you hold the noodles between your thumb and forefinger, the circle that 4-5 oz. of noodles should make will be about the size of a quarter.

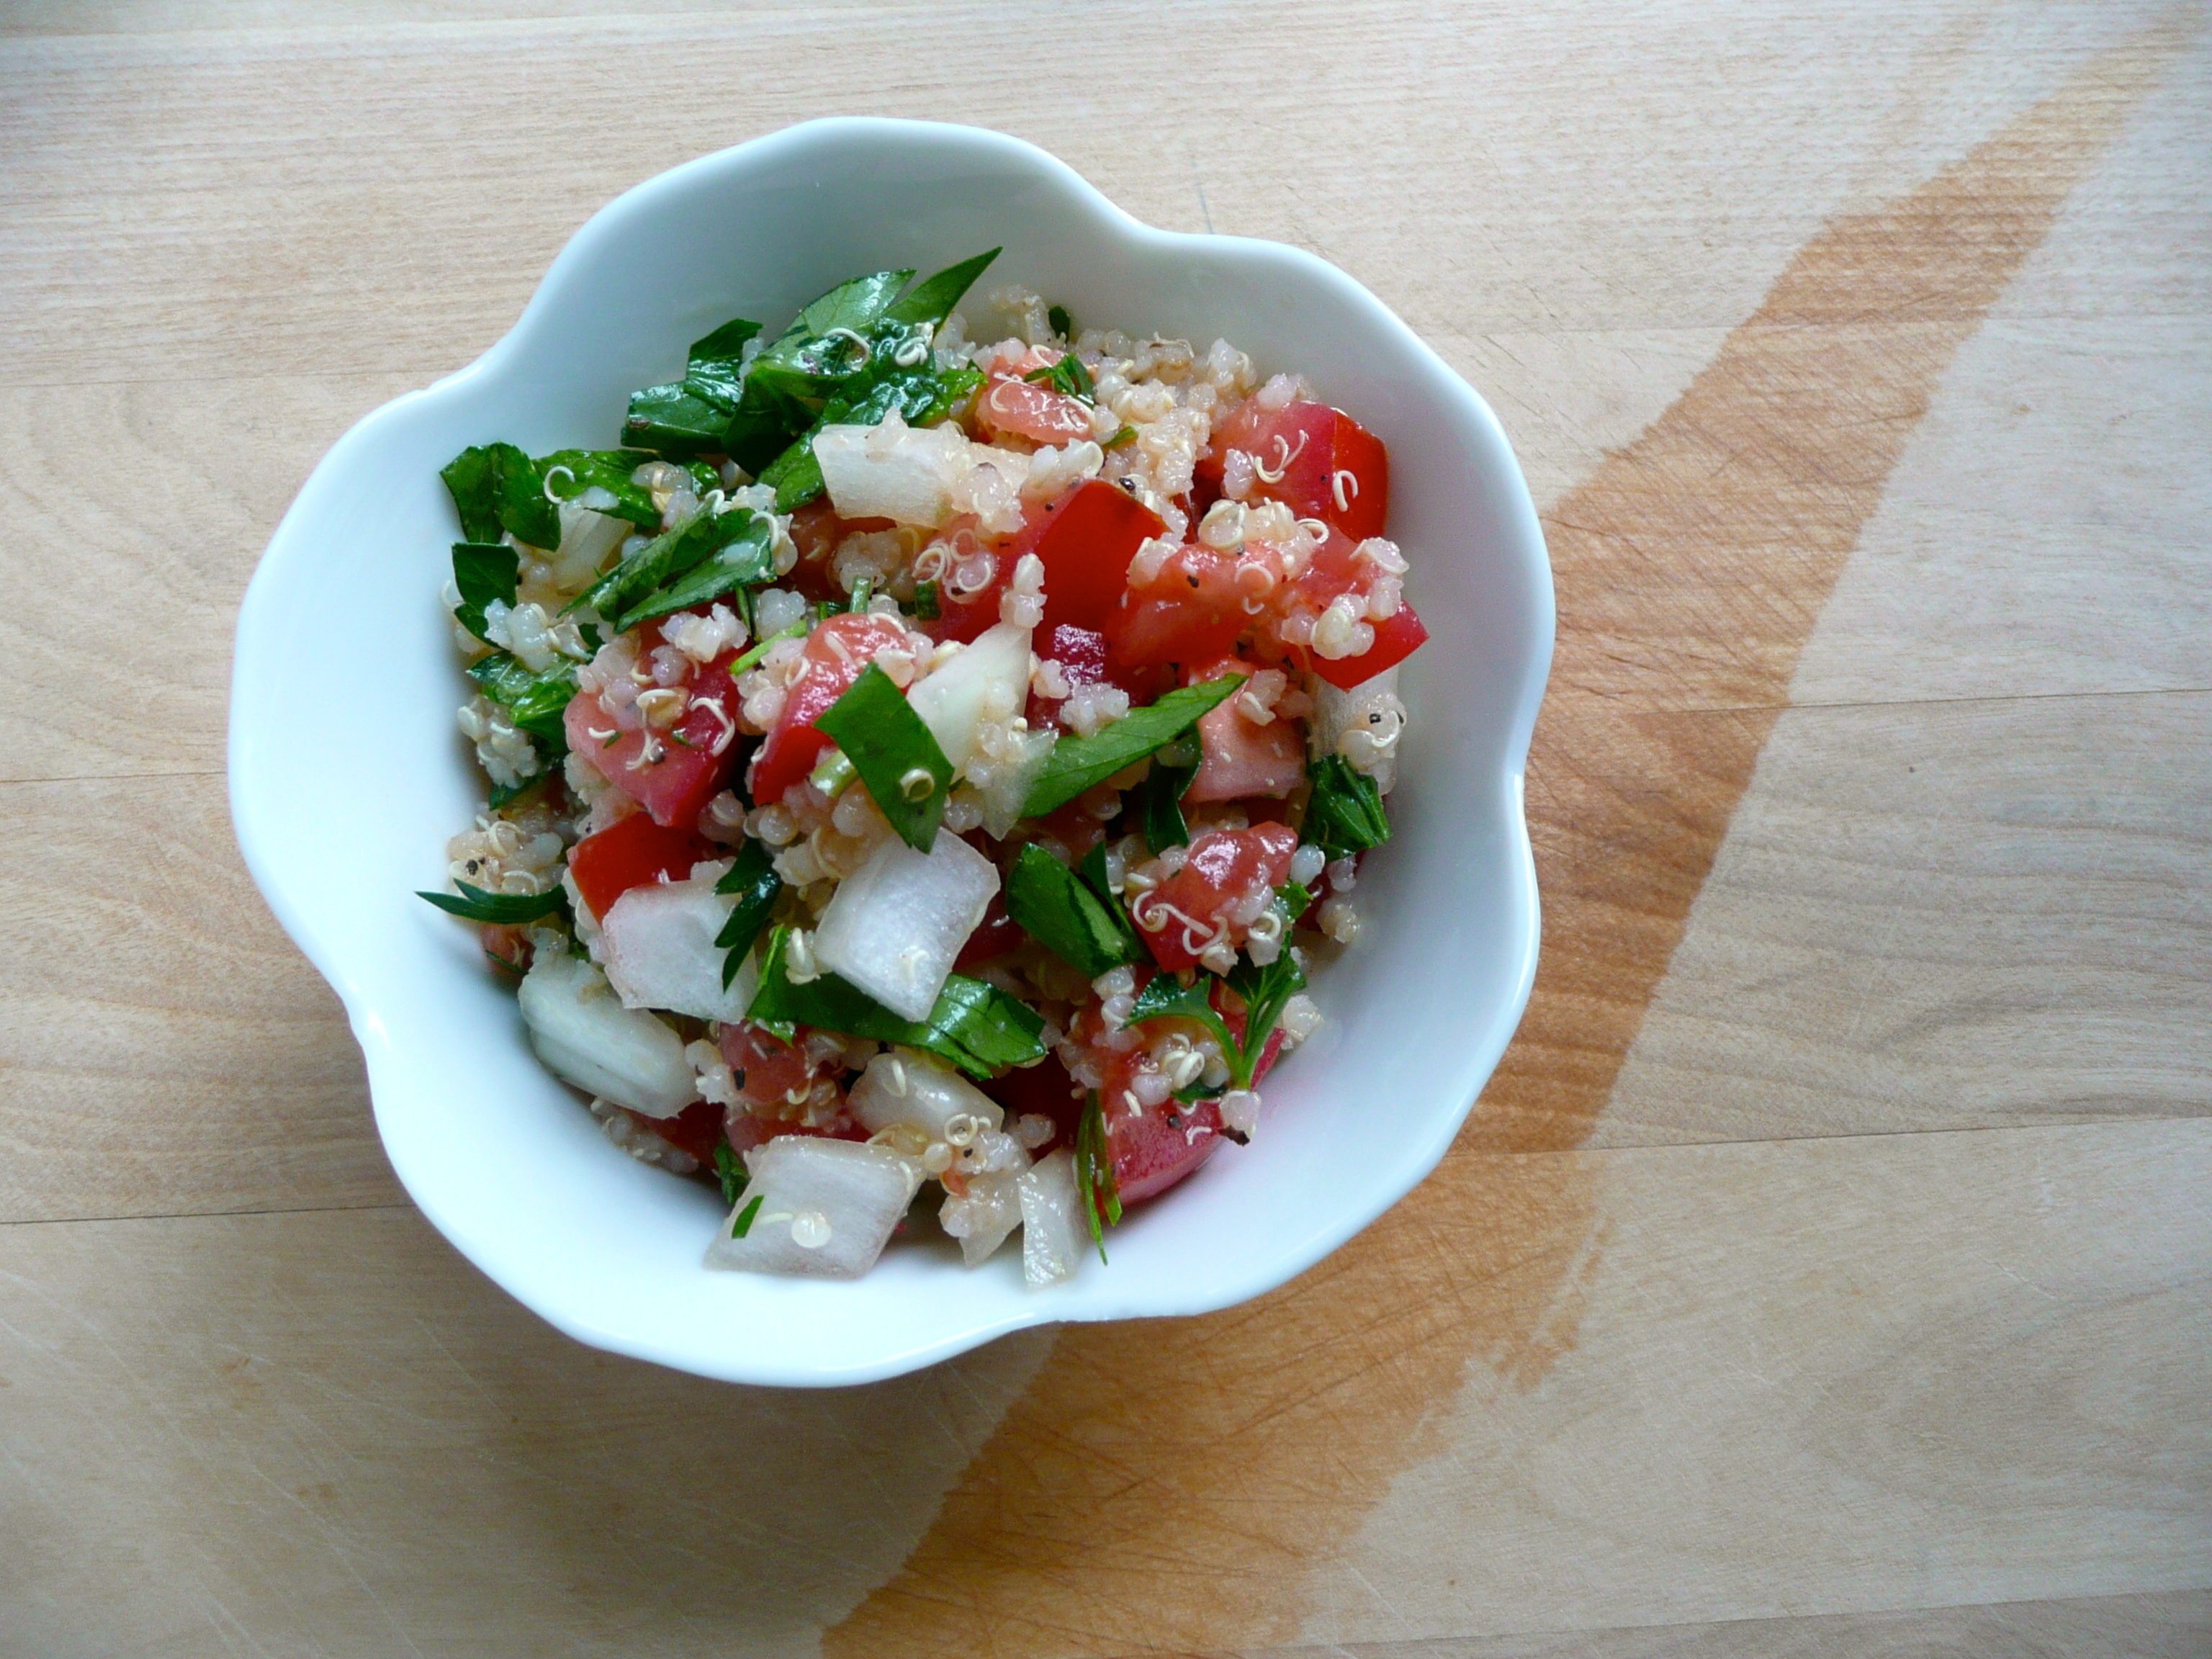
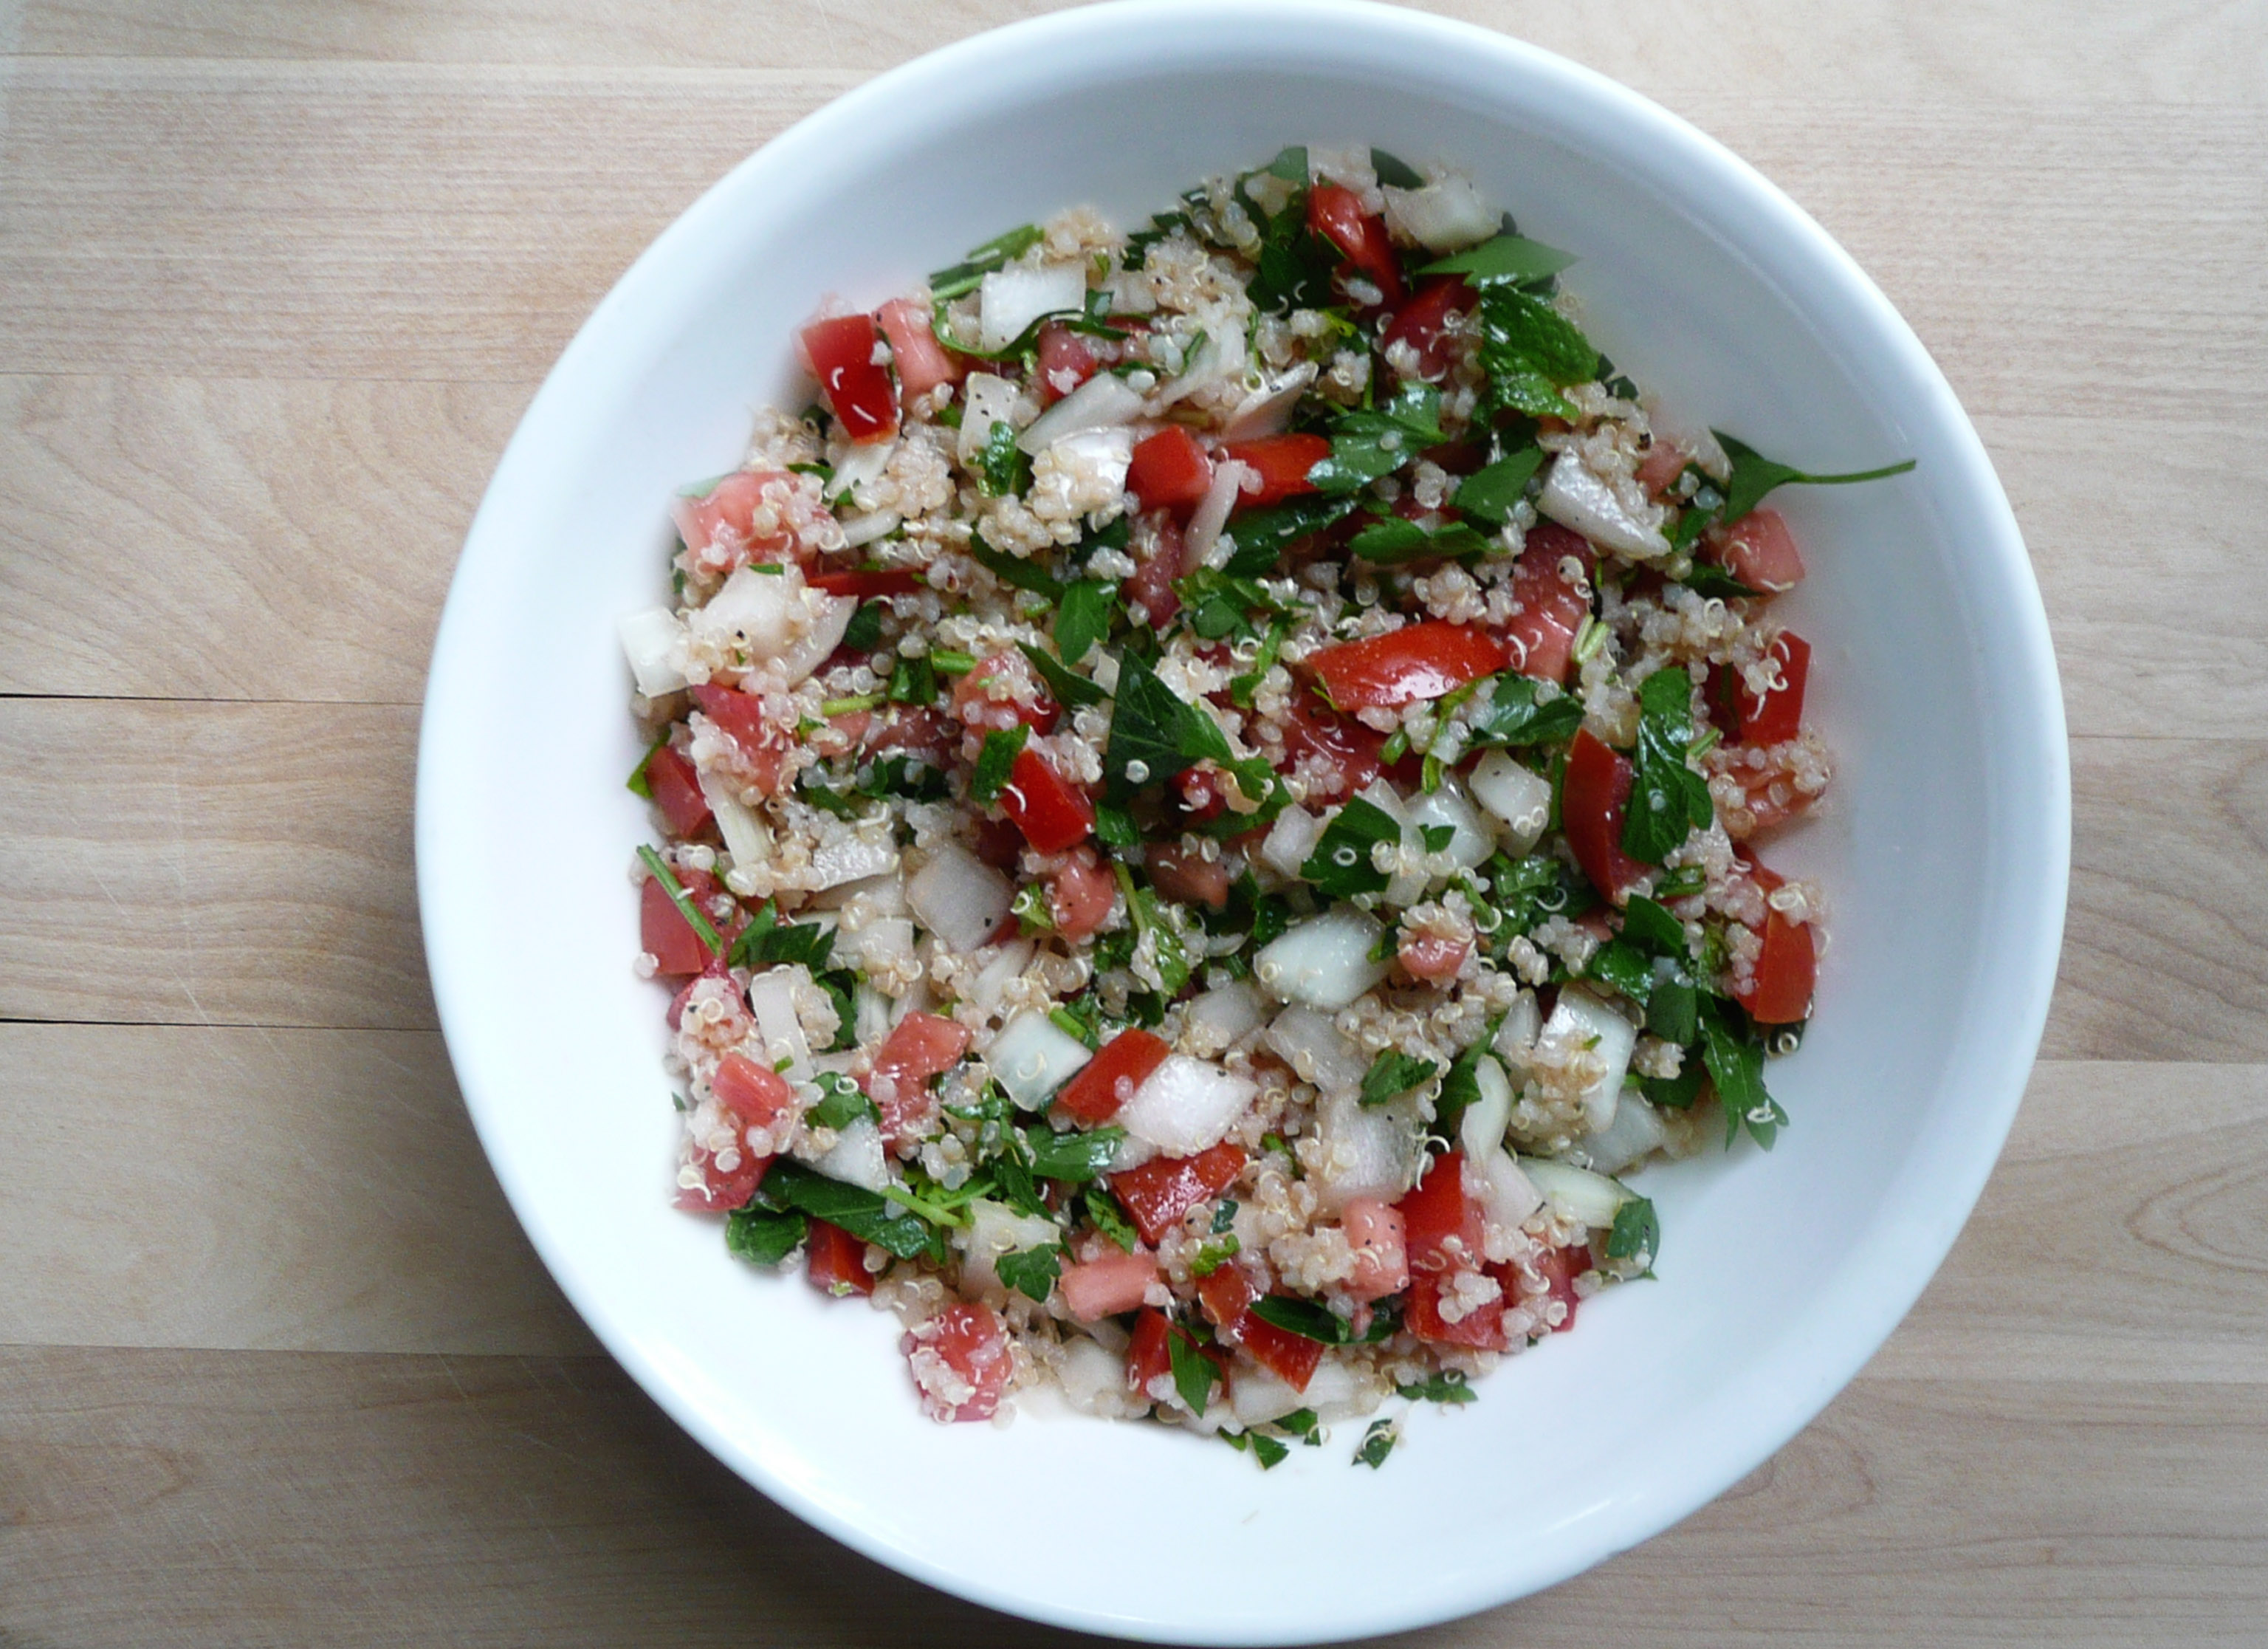
If you can get your hands on some bean sprouts, then definitely add those in too, as they add a nice crunch to the dish. I just couldn’t find any at my local grocery store, but the dish was still incredibly tasty.


Instructions

1. Make a skillet non-stick, and scramble your eggs. Tip the cooked eggs onto a plate and set aside.

2. Put the shrimp into a strainer and rinse under cool water. Place the shrimp into a medium size saucepan and cover them with about an inch of water. Bring the water to a boil and let the shrimp cook for a minute or two before draining. Set the shrimp aside.

The shrimp is already cooked, I just do this because it brings the shrimp up to temperature, but also kills off any potential pathogens that it may have picked up while it was sitting in the display case with raw fish.

3. Fill the medium saucepan with water and then cook your noodles. The directions for this package of noodles said to cook them for 10 -11 minutes, but I only cooked them for 6-7 minutes. You want to undercook your noodles a bit, as you’re going to finish cooking the noodles in the pad thai sauce. Drain the noodles and set aside.

4. Stir together the apple cider vinegar, fish sauce, and maple syrup. Add the sauce to the skillet along with the cooked noodles and cook over medium heat, stirring frequently until the noodles have absorbed all the sauce.

5. Add in the green onions, cooked eggs, and shrimp and stir them through the noodles, and continue to cook them for another 30 seconds or so until the eggs and shrimp are warmed through.

6. Spoon the noodles into a bowl (or two bowls) and serve with lime wedges, and a little bowl of red pepper flakes on the side.


P1080354

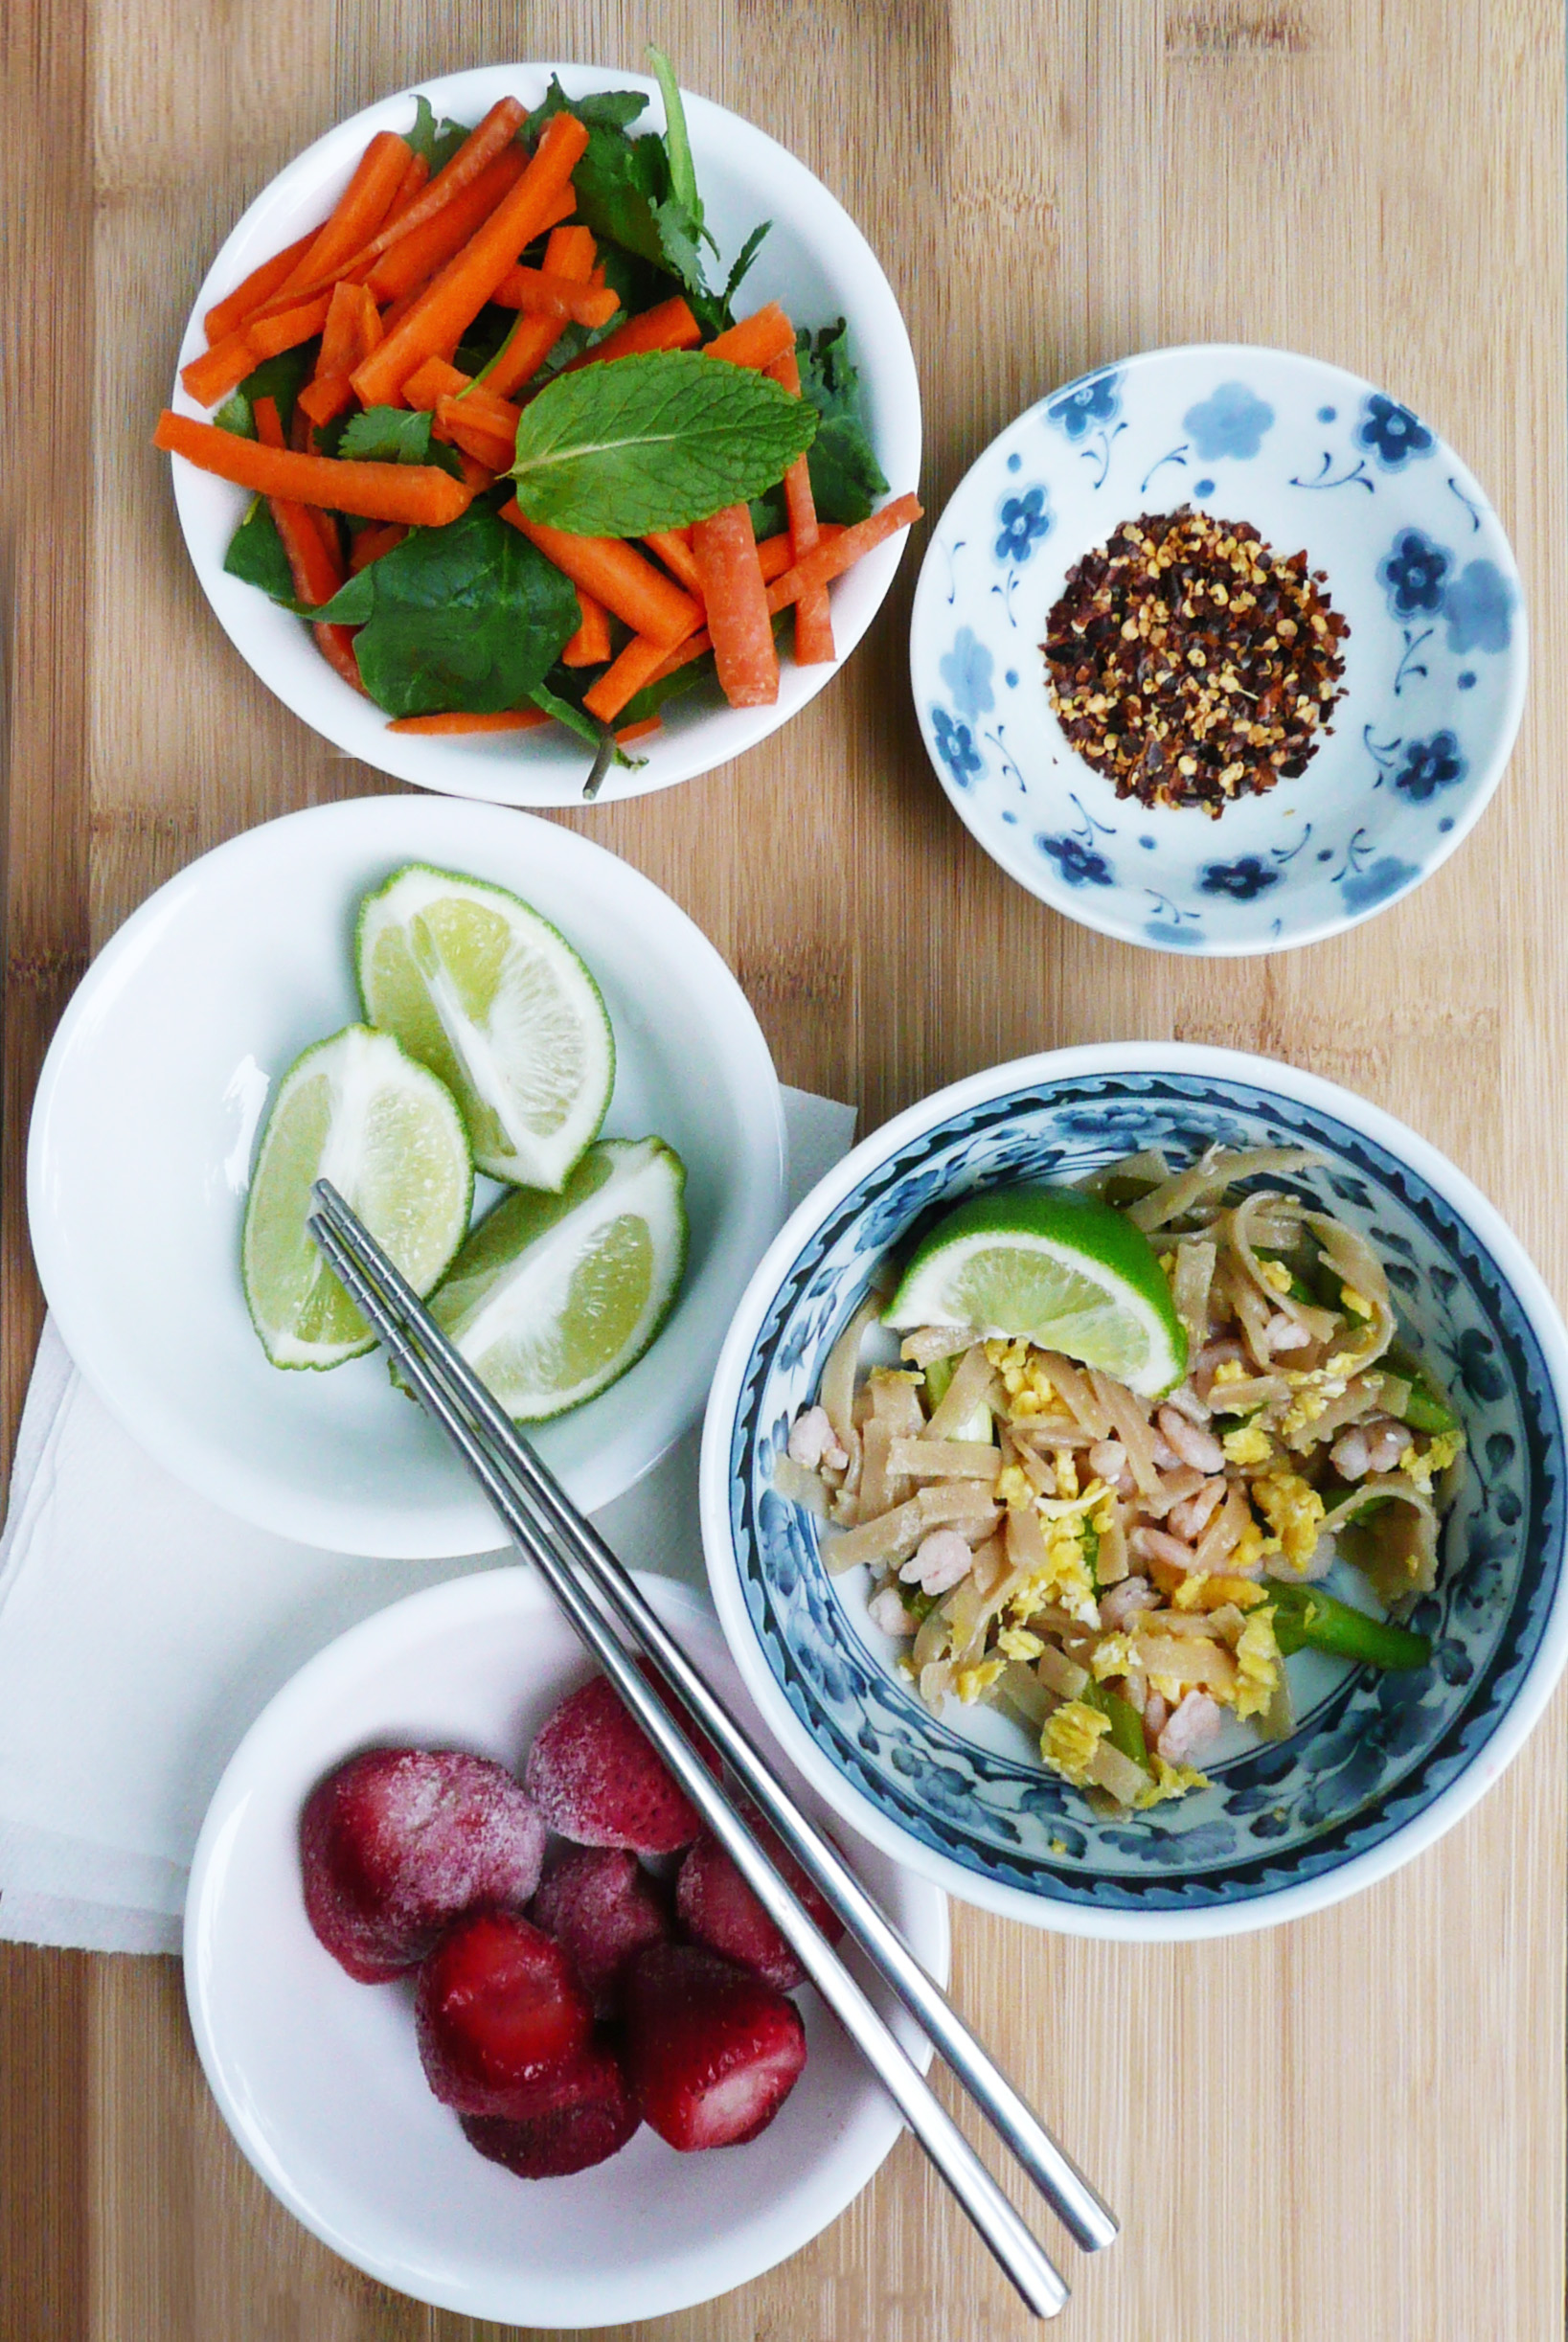
(I ate half of the pad thai before I realized that I had forgotten to photograph the lime wedges as well… Whoops. It was so good…)

cornbread dressing - stuffing

Southern Style Cornbread Dressing – Gluten and Dairy Free Stuffing Recipe

P1060540- 2

There are many types of incredible stuffing, but Southern Style Cornbread Dressing is my absolute favorite. The taste of this brings back so many happy memories of friends and family over the years, and always brings a smile to my face. It’s slightly crispy on the top and moist and creamy in the middle, and it’s definitely a crowd-pleaser.

P1060543-2

You can either bake this in a muffin tin (will make 12 muffin size portions of stuffing) or bake it in a 13 x 9 casserole dish. The baking time will be the same either way. I would use the muffin pan if you’re planning on making the stuffing ahead or want to freeze individual portions to enjoy later.

Southern Style Cornbread Dressing – Gluten Free
Makes 4-6 servings

Adapted from this recipe.

For the Cornbread

Ingredients

¼ level cup + 1/3 level cup of oat flour*

1 level cup + 3 tbsp. of cornmeal **

¾ level tsp. baking soda

1 tbsp. ground flax seed (or add another ½ a beaten egg to the wet ingredients)

4.5 tbsp. avocado oil – or any neutral flavored oil

2 tbsp. apple cider vinegar (or white vinegar)

1 ½ tsp. maple syrup

1 cup of water

1 egg


Instructions

1. Preheat the oven to 425. Grease and flour a 8 x 8 baking dish with oat flour and any neutral flavored oil.

2. Sift the cornmeal, oat flour, baking soda, and ground flax seed in a large mixing bowl.

3. Stir together the wet ingredients until well combined. Add the wet into the dry and stir to combine. Pour into the 8×8 baking dish.

4. Bake at 425 for 30 minutes until golden brown. Set the cornbread aside to cool.

Notes – * I grind oats into oat flour using a blender. Don’t grind the oats in a food processor because the flour won’t be fine enough.

Any extra oat flour (or ground flax seed) I don’t use in the recipe goes into an airtight container and I use it for another recipe.

**If you’re allergic to corn, you could try substituting brown rice flour for the cornmeal at a 1:1 ratio. I didn’t test this recipe specifically with this substitution, so I’m not 100% sure this will work, but last year I made a cornbread dressing with brown rice flour instead of cornmeal and it came out great. You couldn’t tell the difference at all.


For the Cornbread Dressing

3 tbsp. olive oil

½ cup diced onion

¾ cup diced celery

1 egg

2 cups of chicken broth (homemade or store bought)

¾ tsp. pepper

¾ tsp. dried rubbed sage

¼ + 1/8 tsp. sea salt

Instructions

1. Sauté the diced onion and celery in the olive oil over medium heat until tender, about 12 minutes.

2. Add the sage and sauté 1 minute longer.

3. Crumble the cornbread into a large mixing bowl. Add the cooked vegetables, salt, pepper, sage and chicken broth to the mixture. Taste for seasoning, and add more salt and pepper if needed.

4. Stir in the beaten egg, then cover and chill the mixture overnight (at least 8 hours).

5. Preheat the oven to 375. Grease and flour your muffin tin or 13 x 9 baking dish with oil and oat flour. Pour the mixture into the pan and bake uncovered for 30-40 minutes until golden brown on top.

If your making this in a muffin pan, let the stuffing cool in the muffin pan for 30 -45 minutes so that the stuffing has some time to firm up and hold it’s shape. Run a butter knife around the edges to loosen them, pop the stuffing muffins out and refrigerate. Reheat them to serve.

If you’re putting a dish straight from the fridge into the oven, put the fridge-cold dish into the cold oven (so that the ceramic dish does shatter from the temperature change between the cold fridge and the hot oven). Then preheat your oven with the dish inside so that it warms up with the oven and bake as usual.

You can reheat any leftover stuffing by covering the dish tightly with foil, and baking at 300 degrees for 45 minutes until warmed through.