Thanksgiving Chicken

clone tag: 1738347936203128812

I love Thanksgiving! It’s one of my favorite holidays of the year.

Friends, family, good food. What’s not to love?

One funny thing about Thanksgiving in my family is that I’m the only one that really loves turkey. Everyone else prefers chicken.

But that actually works out ok (even on Thanksgiving)! Most of the turkeys at the local supermarket are really big 20 lb birds, which is way too much turkey for our family to finish, so a 4-5 lb chicken is the perfect size for us. With all the side dishes and desserts (cornbread dressing, mashed potatoes, pumpkin tarts, apple tarts, and pecan tarts), everyone ends up very happy and full by the end of Thanksgiving dinner.

Also, those turkeys are expensive. Even if you buy a conventionally raised turkey, a 20 lb turkey is going to be about $50. This chicken was $8, and it was free-range and organic to boot.

How did I get a free-range organic chicken for $8? I just bought it on the sell by date and it was marked 50% off.

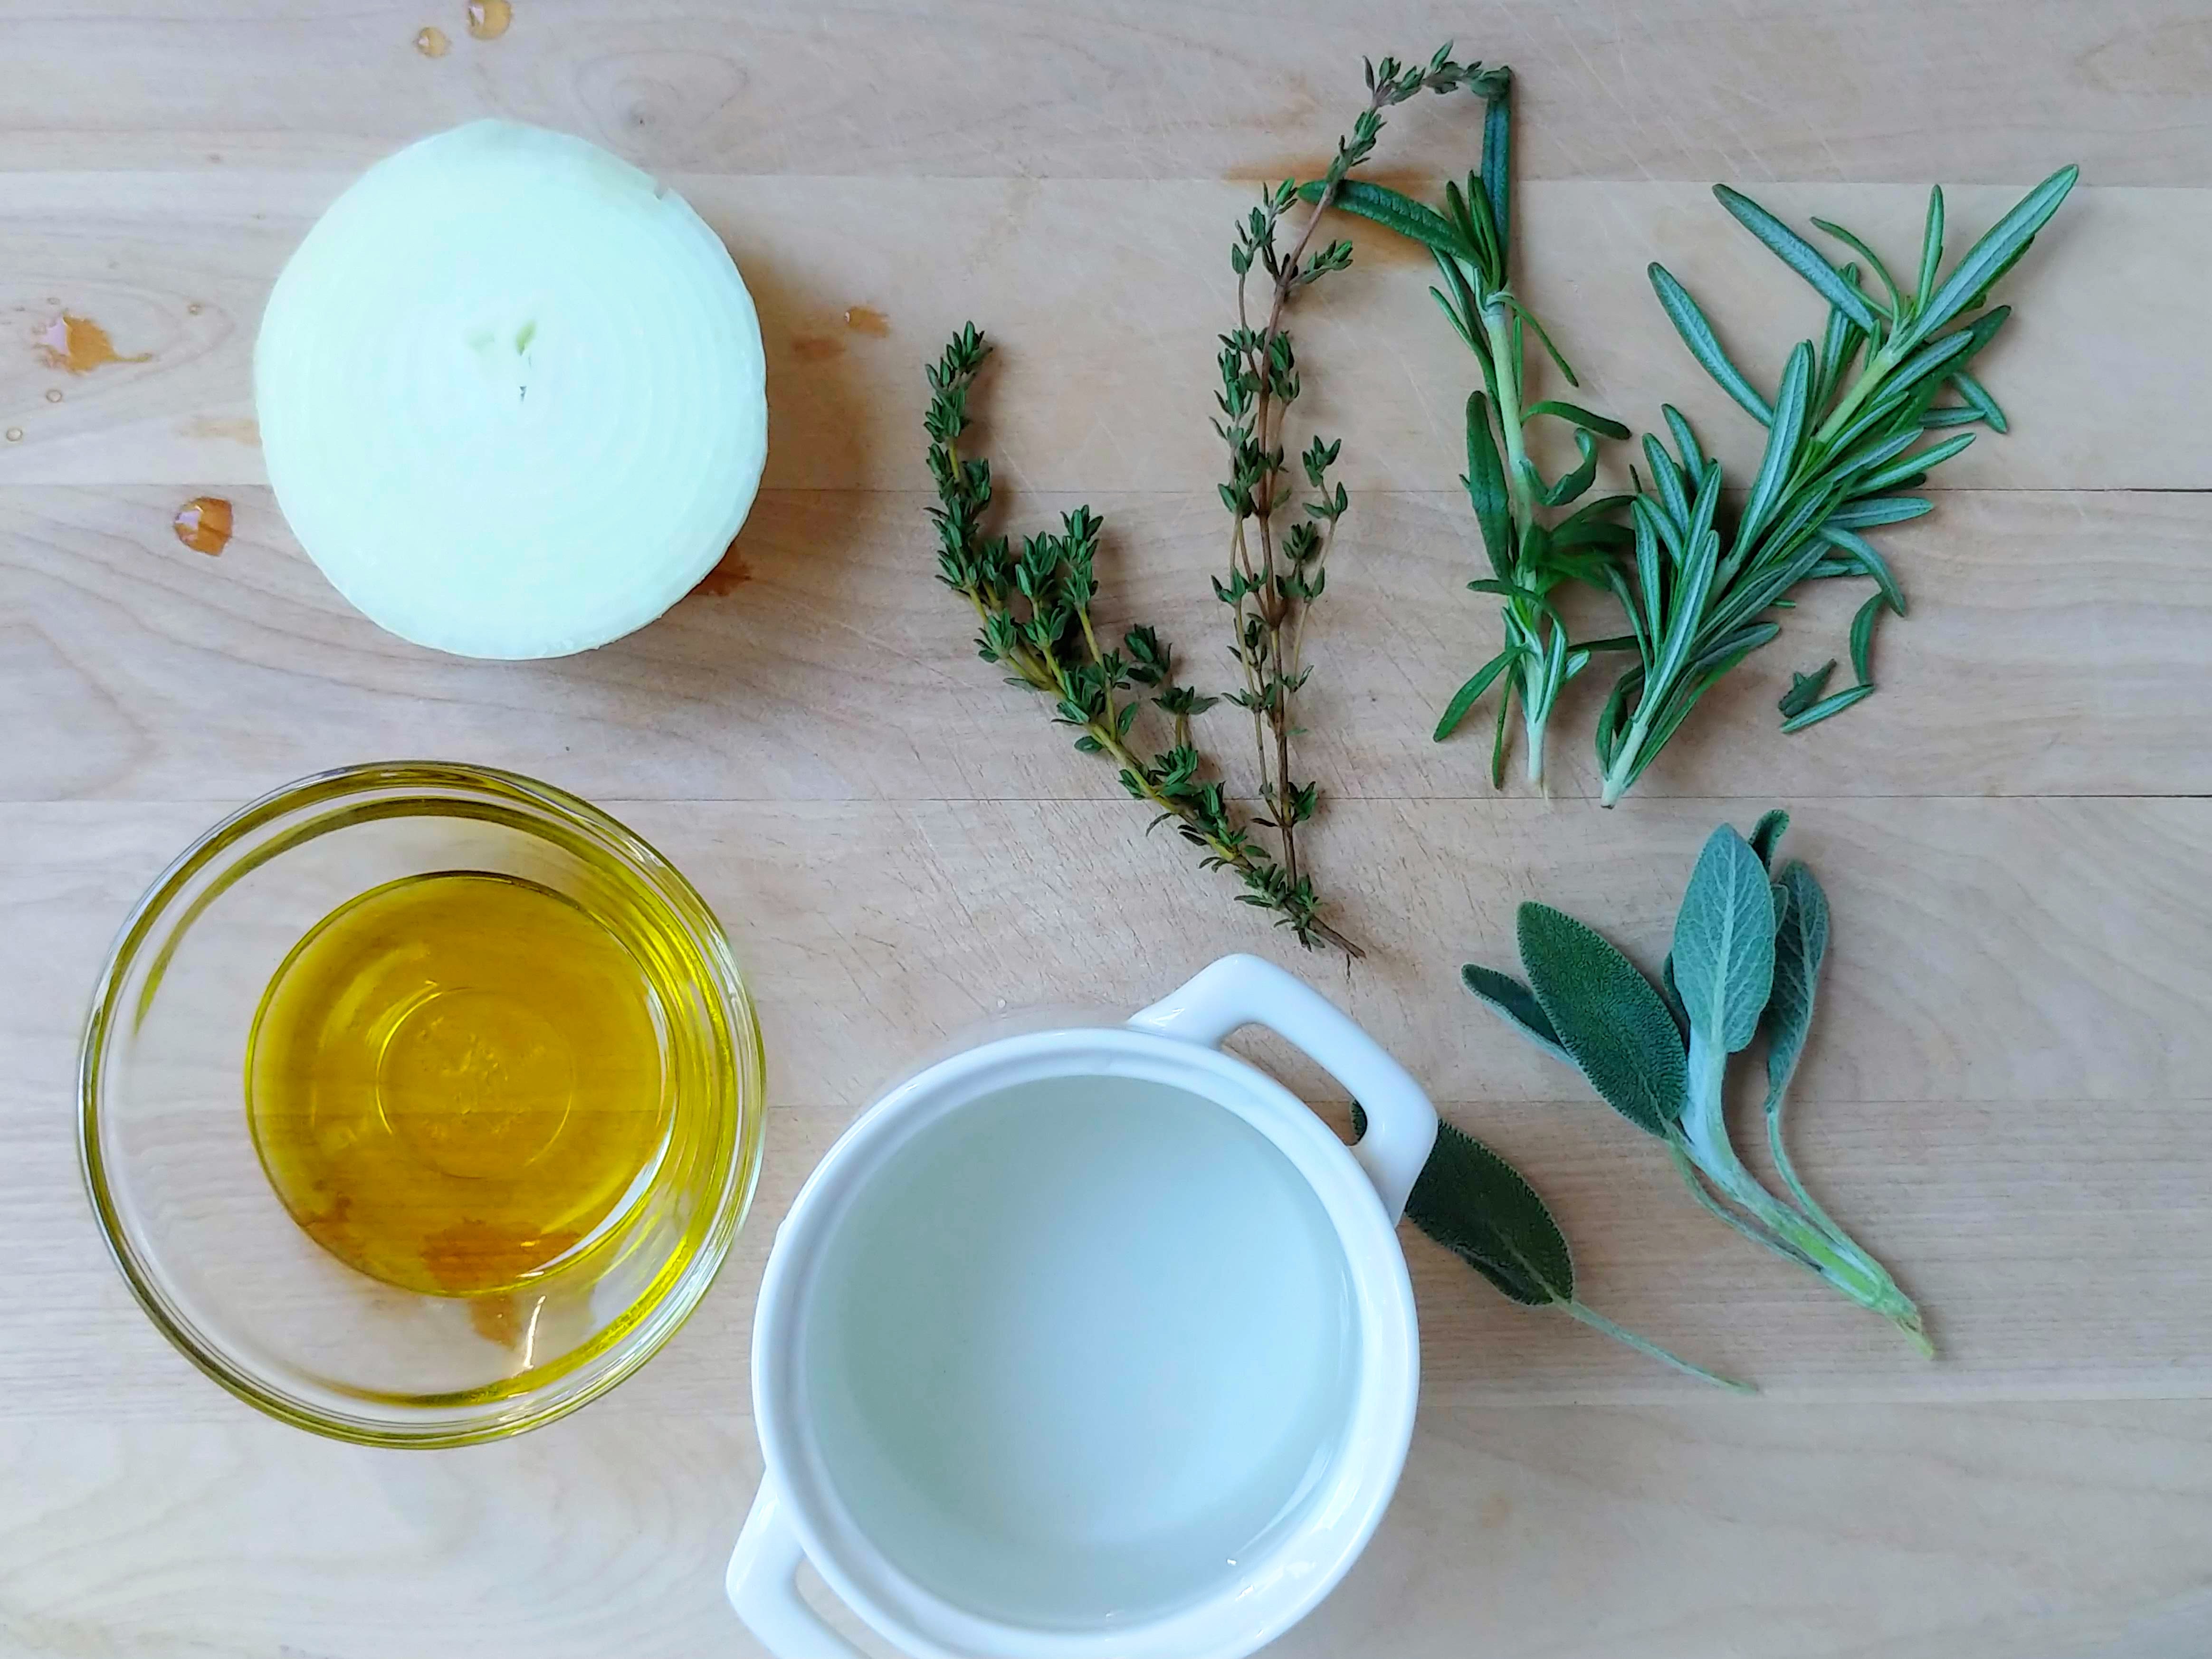
The grocery store also sold a little packet of mixed fresh herbs (thyme, sage, and rosemary) for $2.50, that plus an onion and some frozen celery (that I had stashed in the freezer from about a month ago) meant that this beautiful roast chicken added up to about $11-$12 for 4-6 servings. Much more affordable than $50.

And if you’re far from home this Thanksgiving, and you’re making dinner for two, you can make this chicken and have some great leftovers to pack for lunch.

Some great things about this recipe are that it still has all those rich flavors that we associate with a Thanksgiving turkey, AND you don’t even need to make a gravy! You can spoon the rich pan juices from this chicken over mashed potatoes and cornbread dressing to your heart’s content. It will be just as delicious as any gravy, (with less work) promise.

clone tag: 2934890611313498100

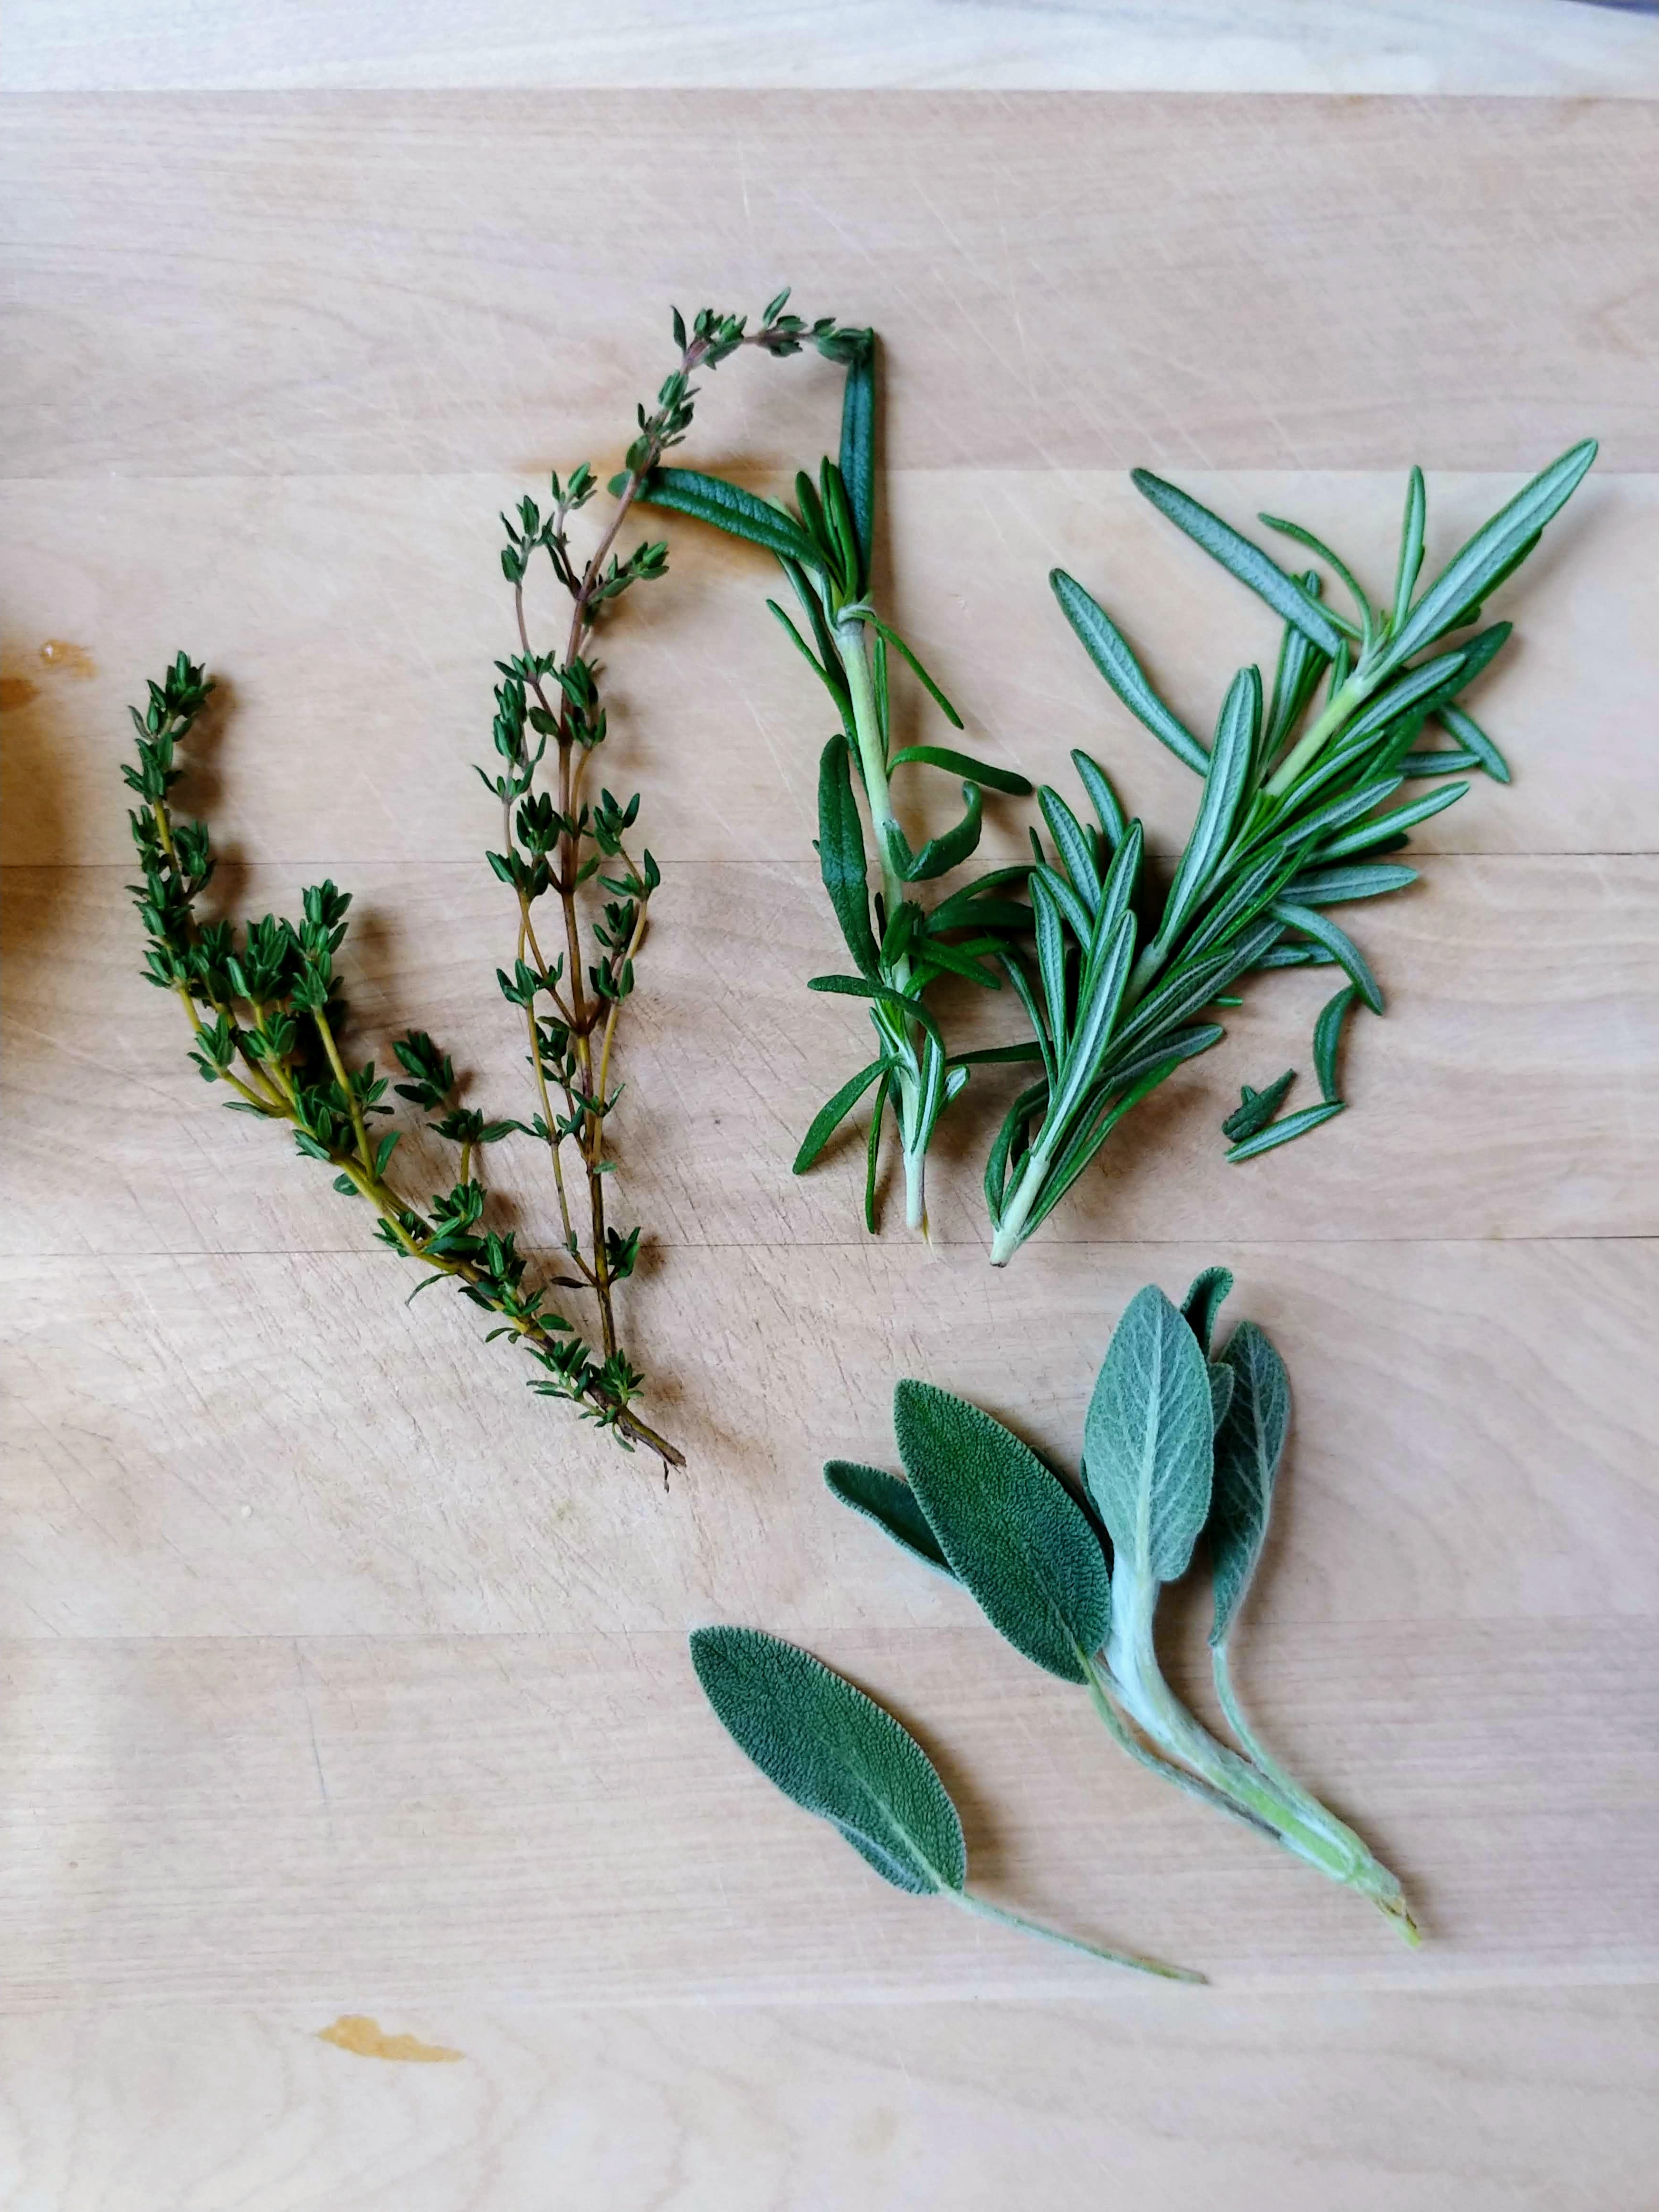
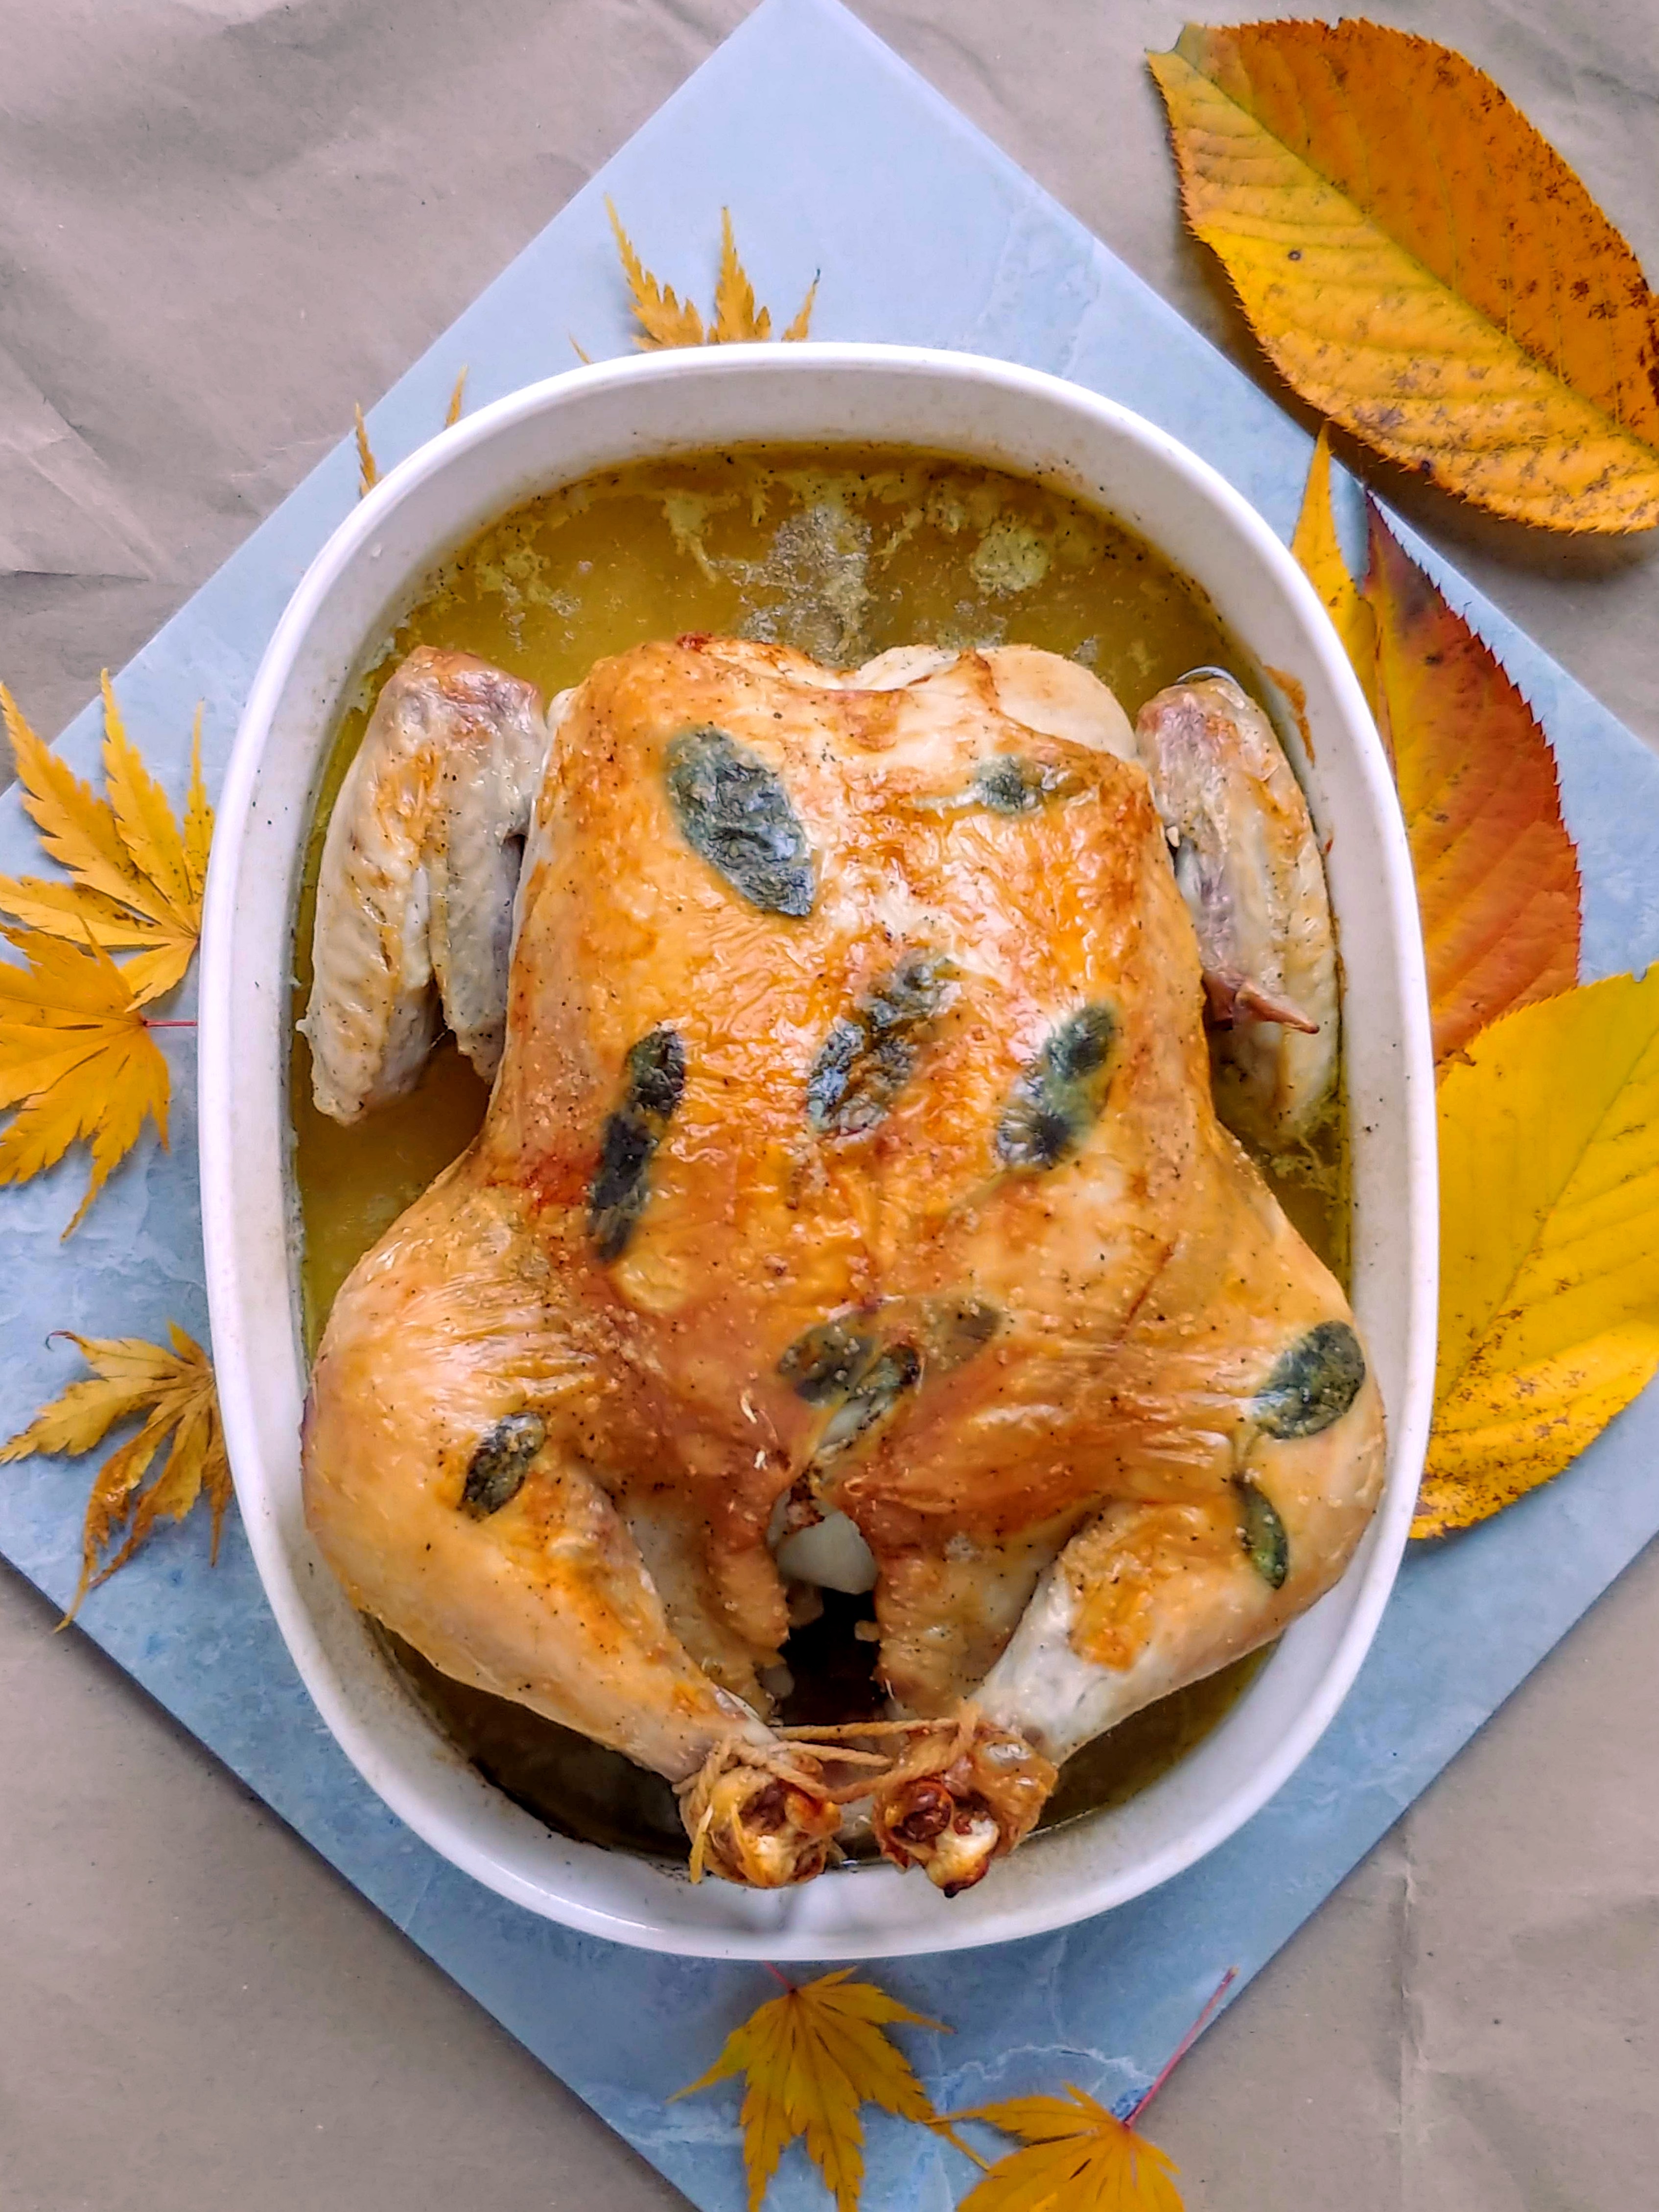
Sprigs of rosemary and thyme flavor the chicken from the inside out, and I tuck sage leaves under the skin for some color and extra flavor. The most delicious parts of that chicken are right under those leaves, so make sure to get some chicken with a sage leaf or two!

Thanksgiving Chicken

Makes 4-6 delicious servings

Ingredients

4 lb chicken


1/2 an onion (cut into 4 wedges)

2 sprigs of thyme

2 4 inch sprigs of rosemary

8 inch stalk of celery (cut into 1/2 inch slices)


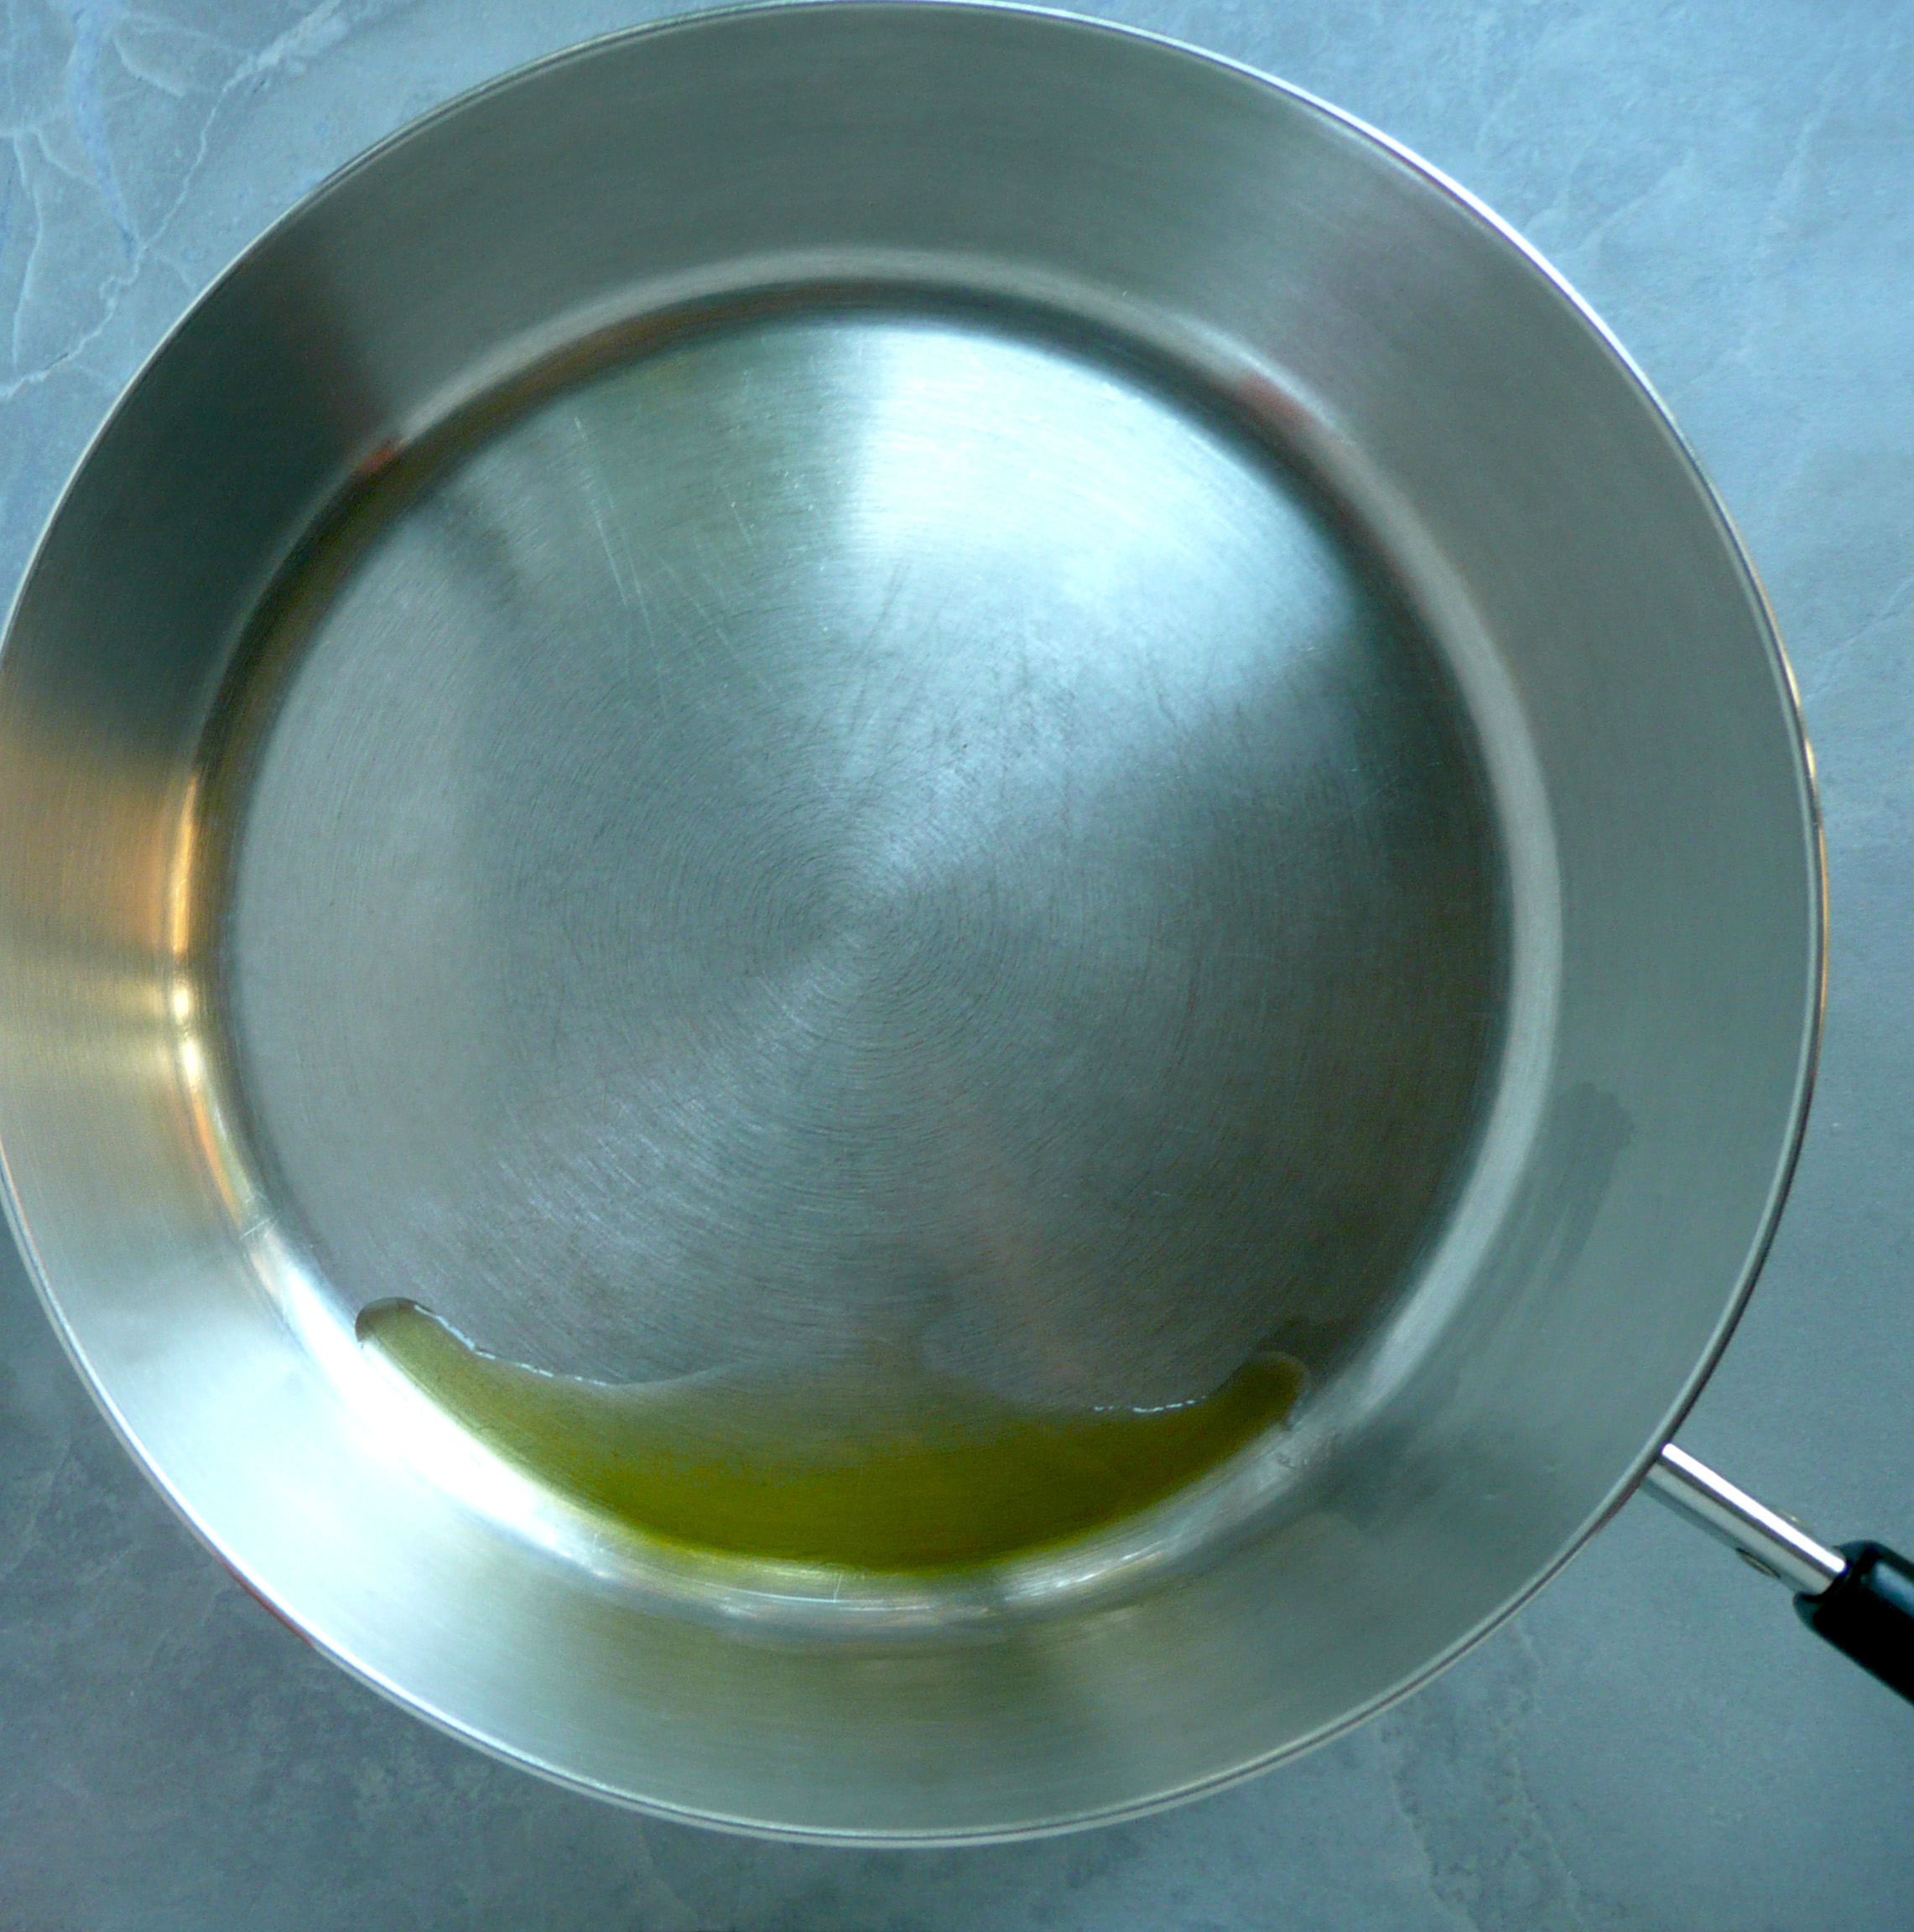
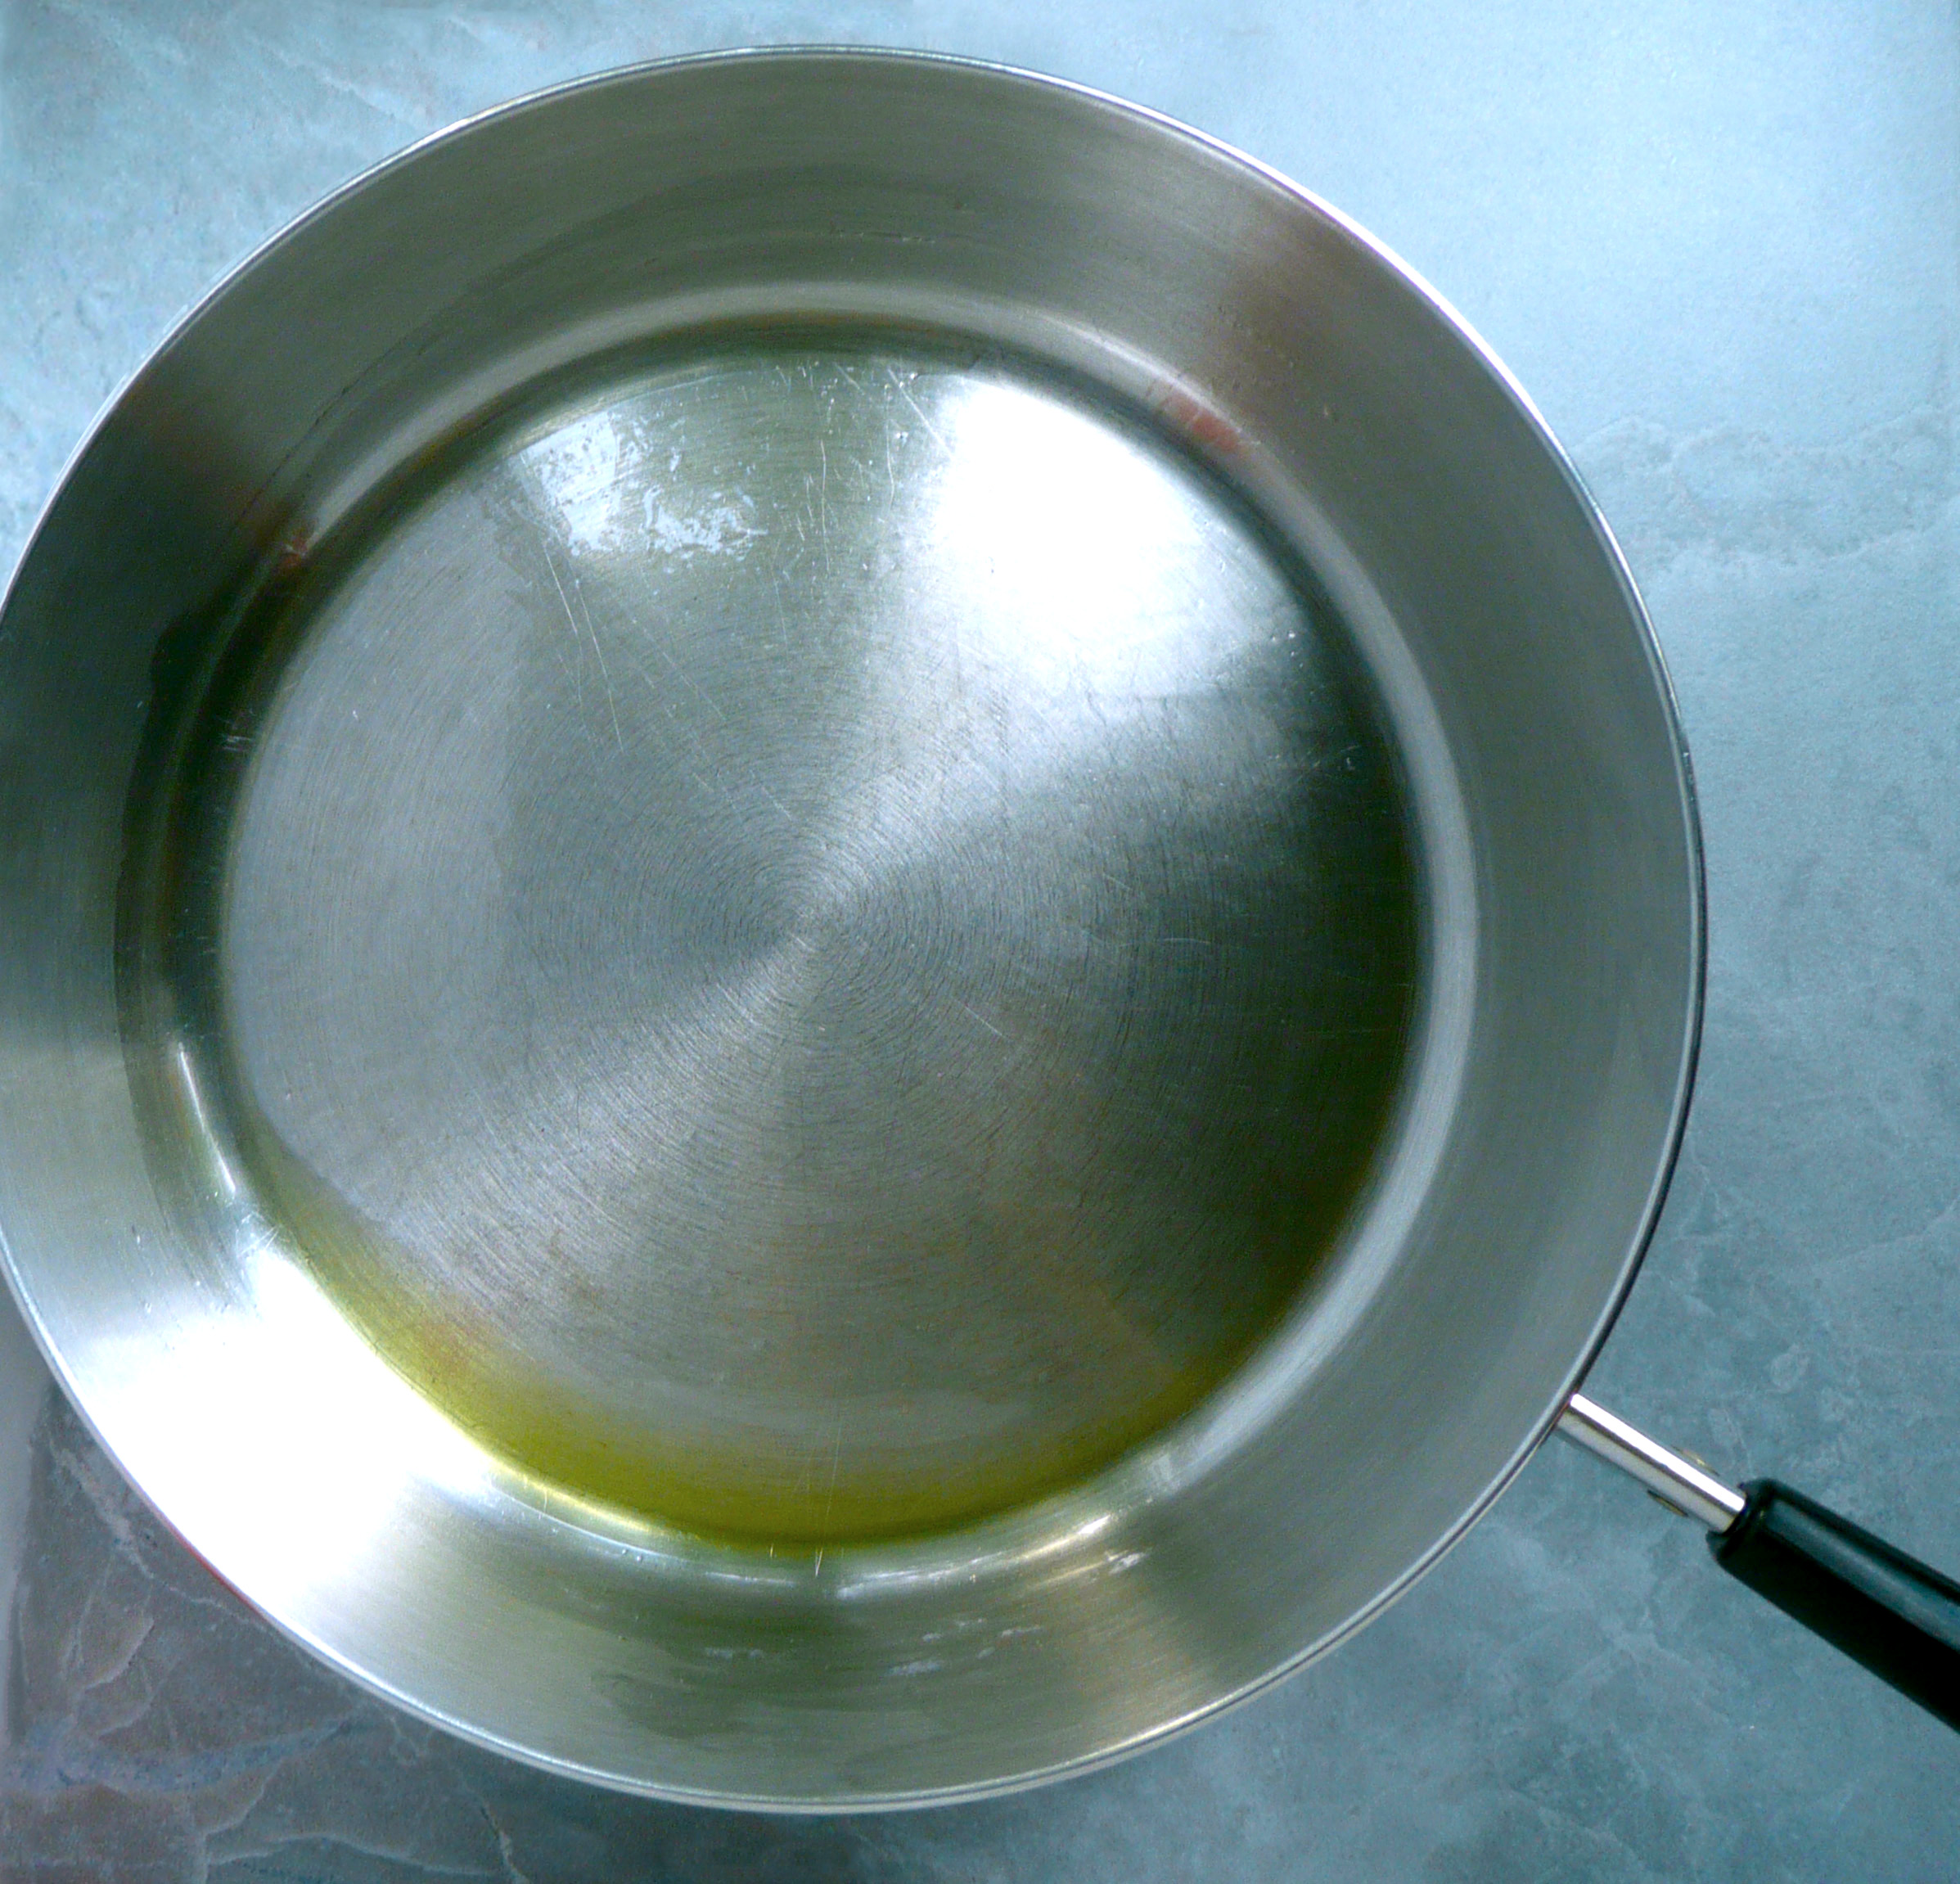
2 1/2 tbsp olive oil

9-10 fresh sage leaves
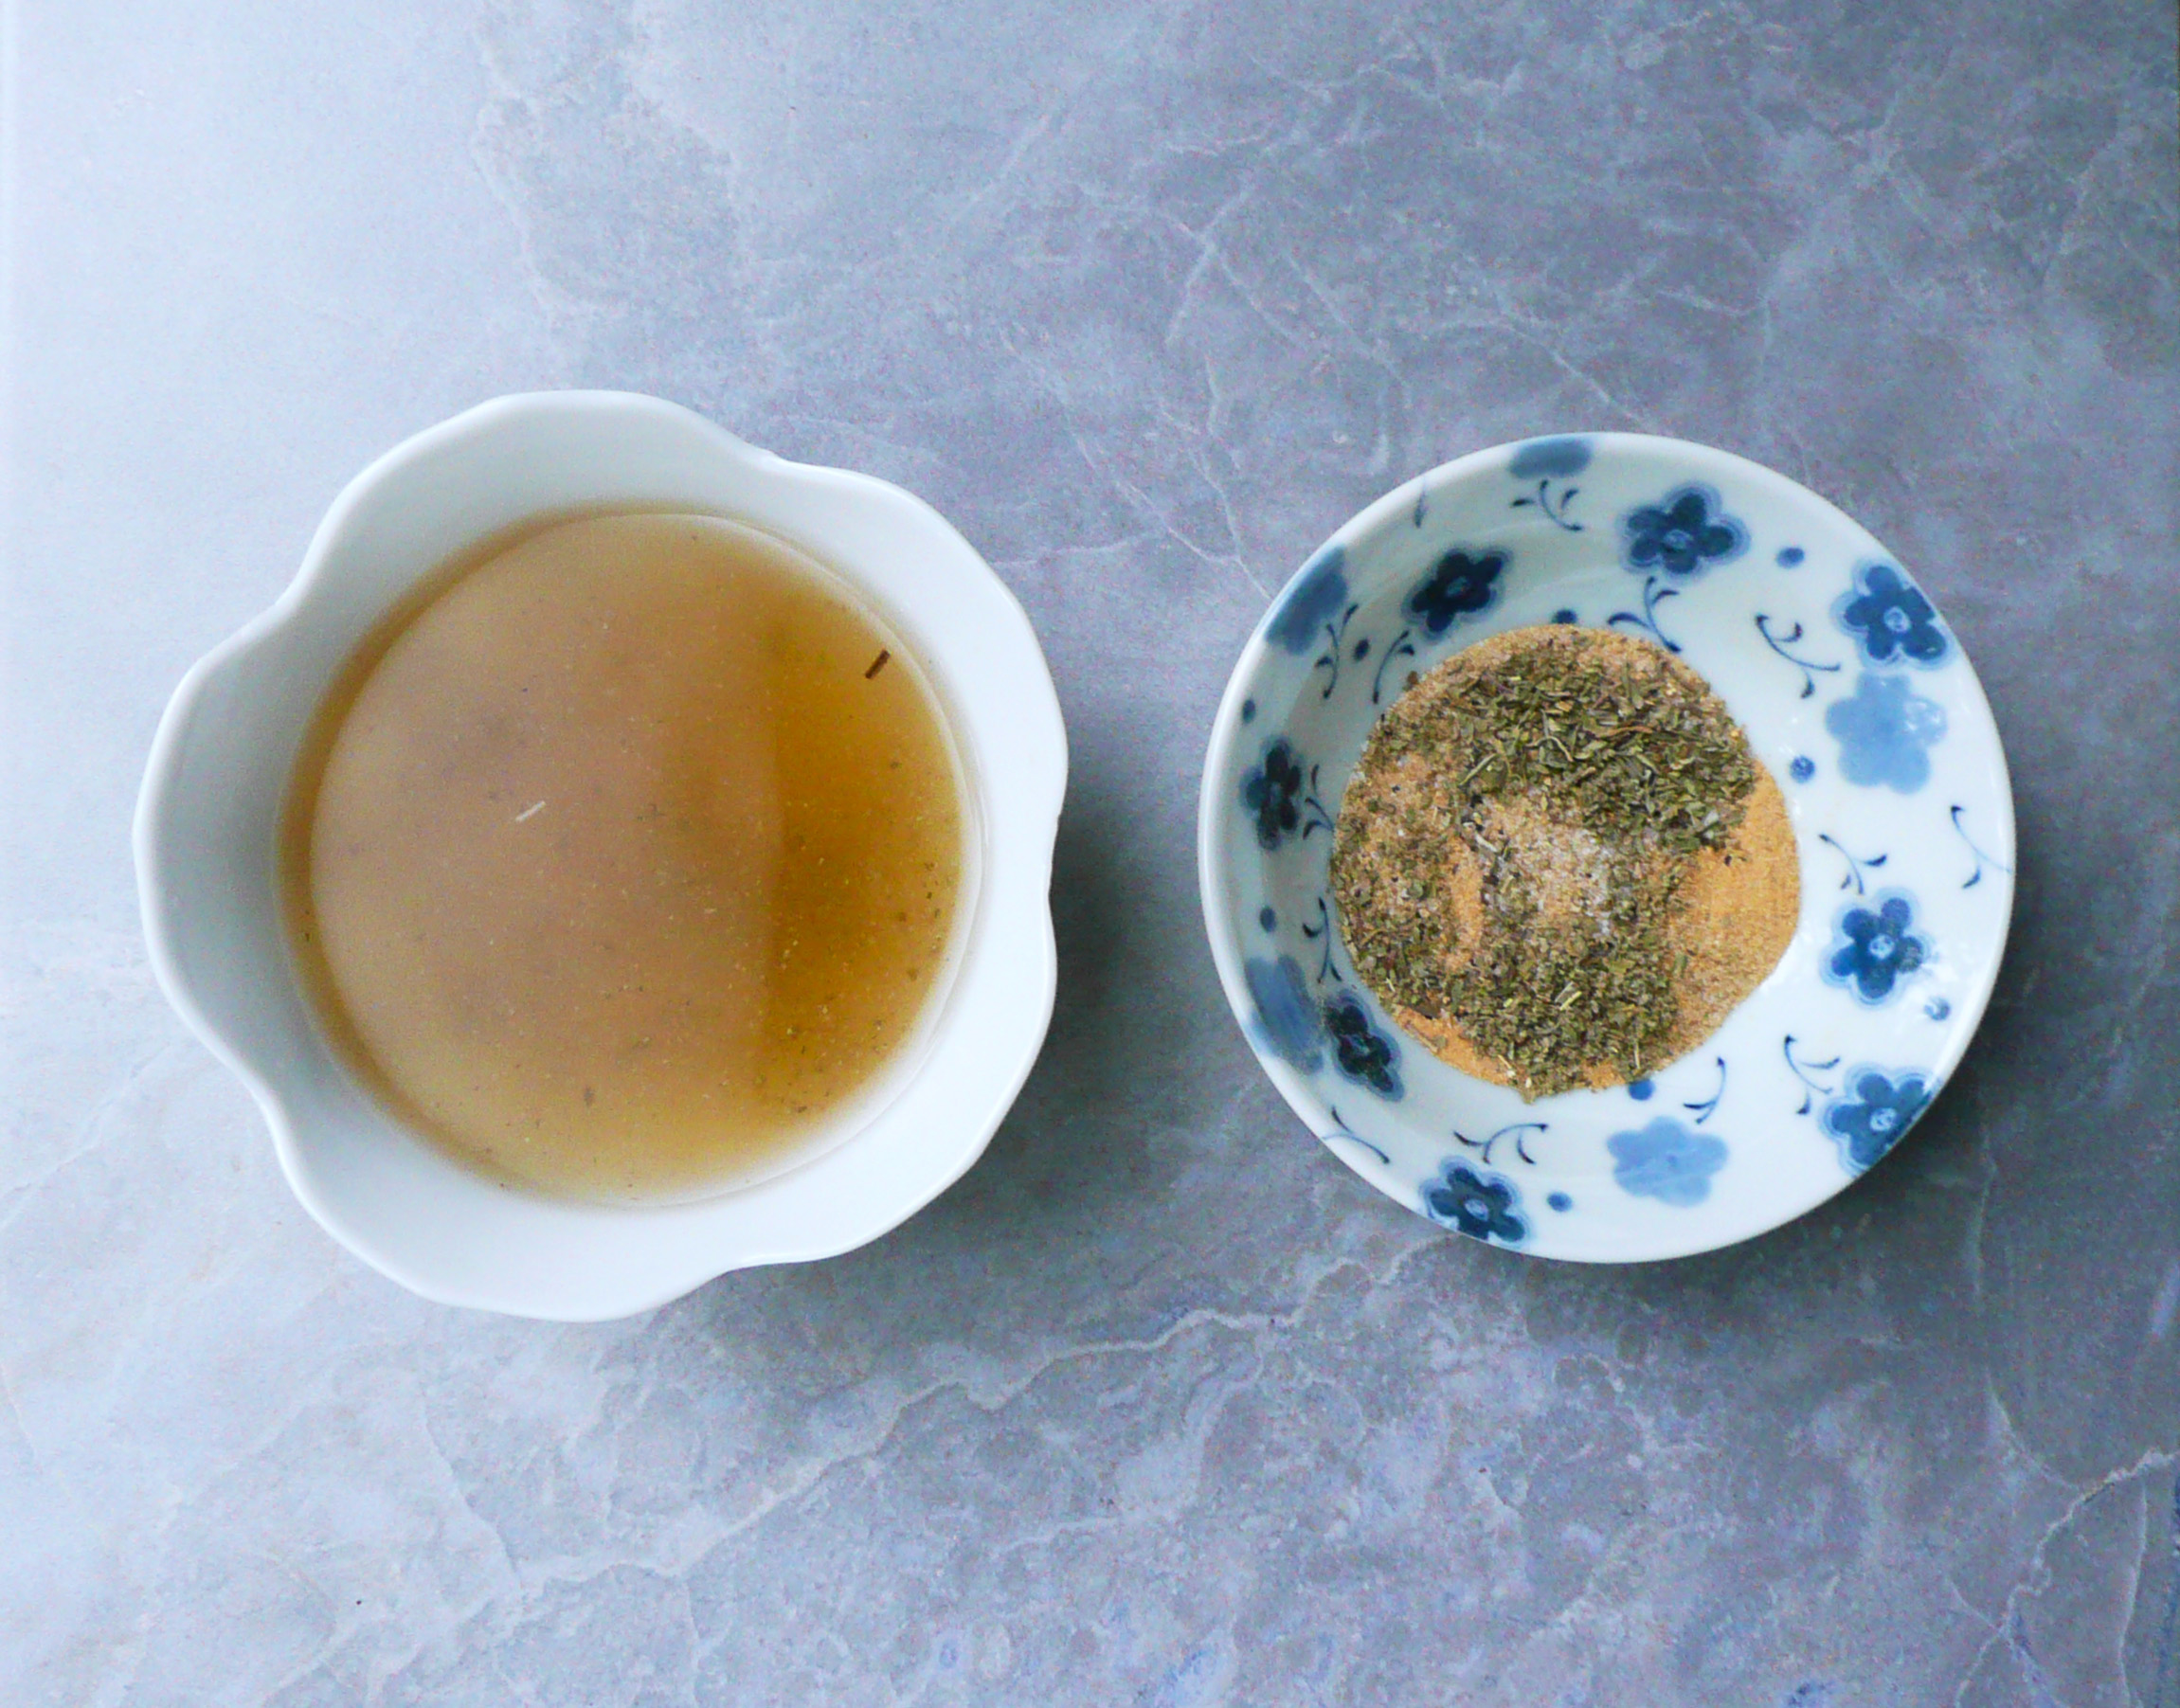
sea salt

black pepper


1 cup of water


Instructions

1. Preheat the oven to 425 degrees F.

2. Wash your herbs, measure out the olive oil and water, and cut up your onion and celery and set all of this aside onto a separate plate along with some salt and pepper and a few toothpicks.

3. Whether or not your wash your chicken is completely up to you. There’s some controversy about if you should do it or not.

Personally, I do wash chicken before cooking it. I fill a big bowl of water in the sink and submerge the chicken, then pour out the water (this way the water doesn’t splash off the chicken). I do this a few times until the water runs clear. The chicken then goes into your roasting dish (I’m using a 12 inch oval CorningWare casserole dish) and the big bowl goes straight into the dishwasher.

Once the chicken goes into the oven, I sanitize the sink and any surfaces that the raw chicken may have touched.

clone tag: 4547346532438281968

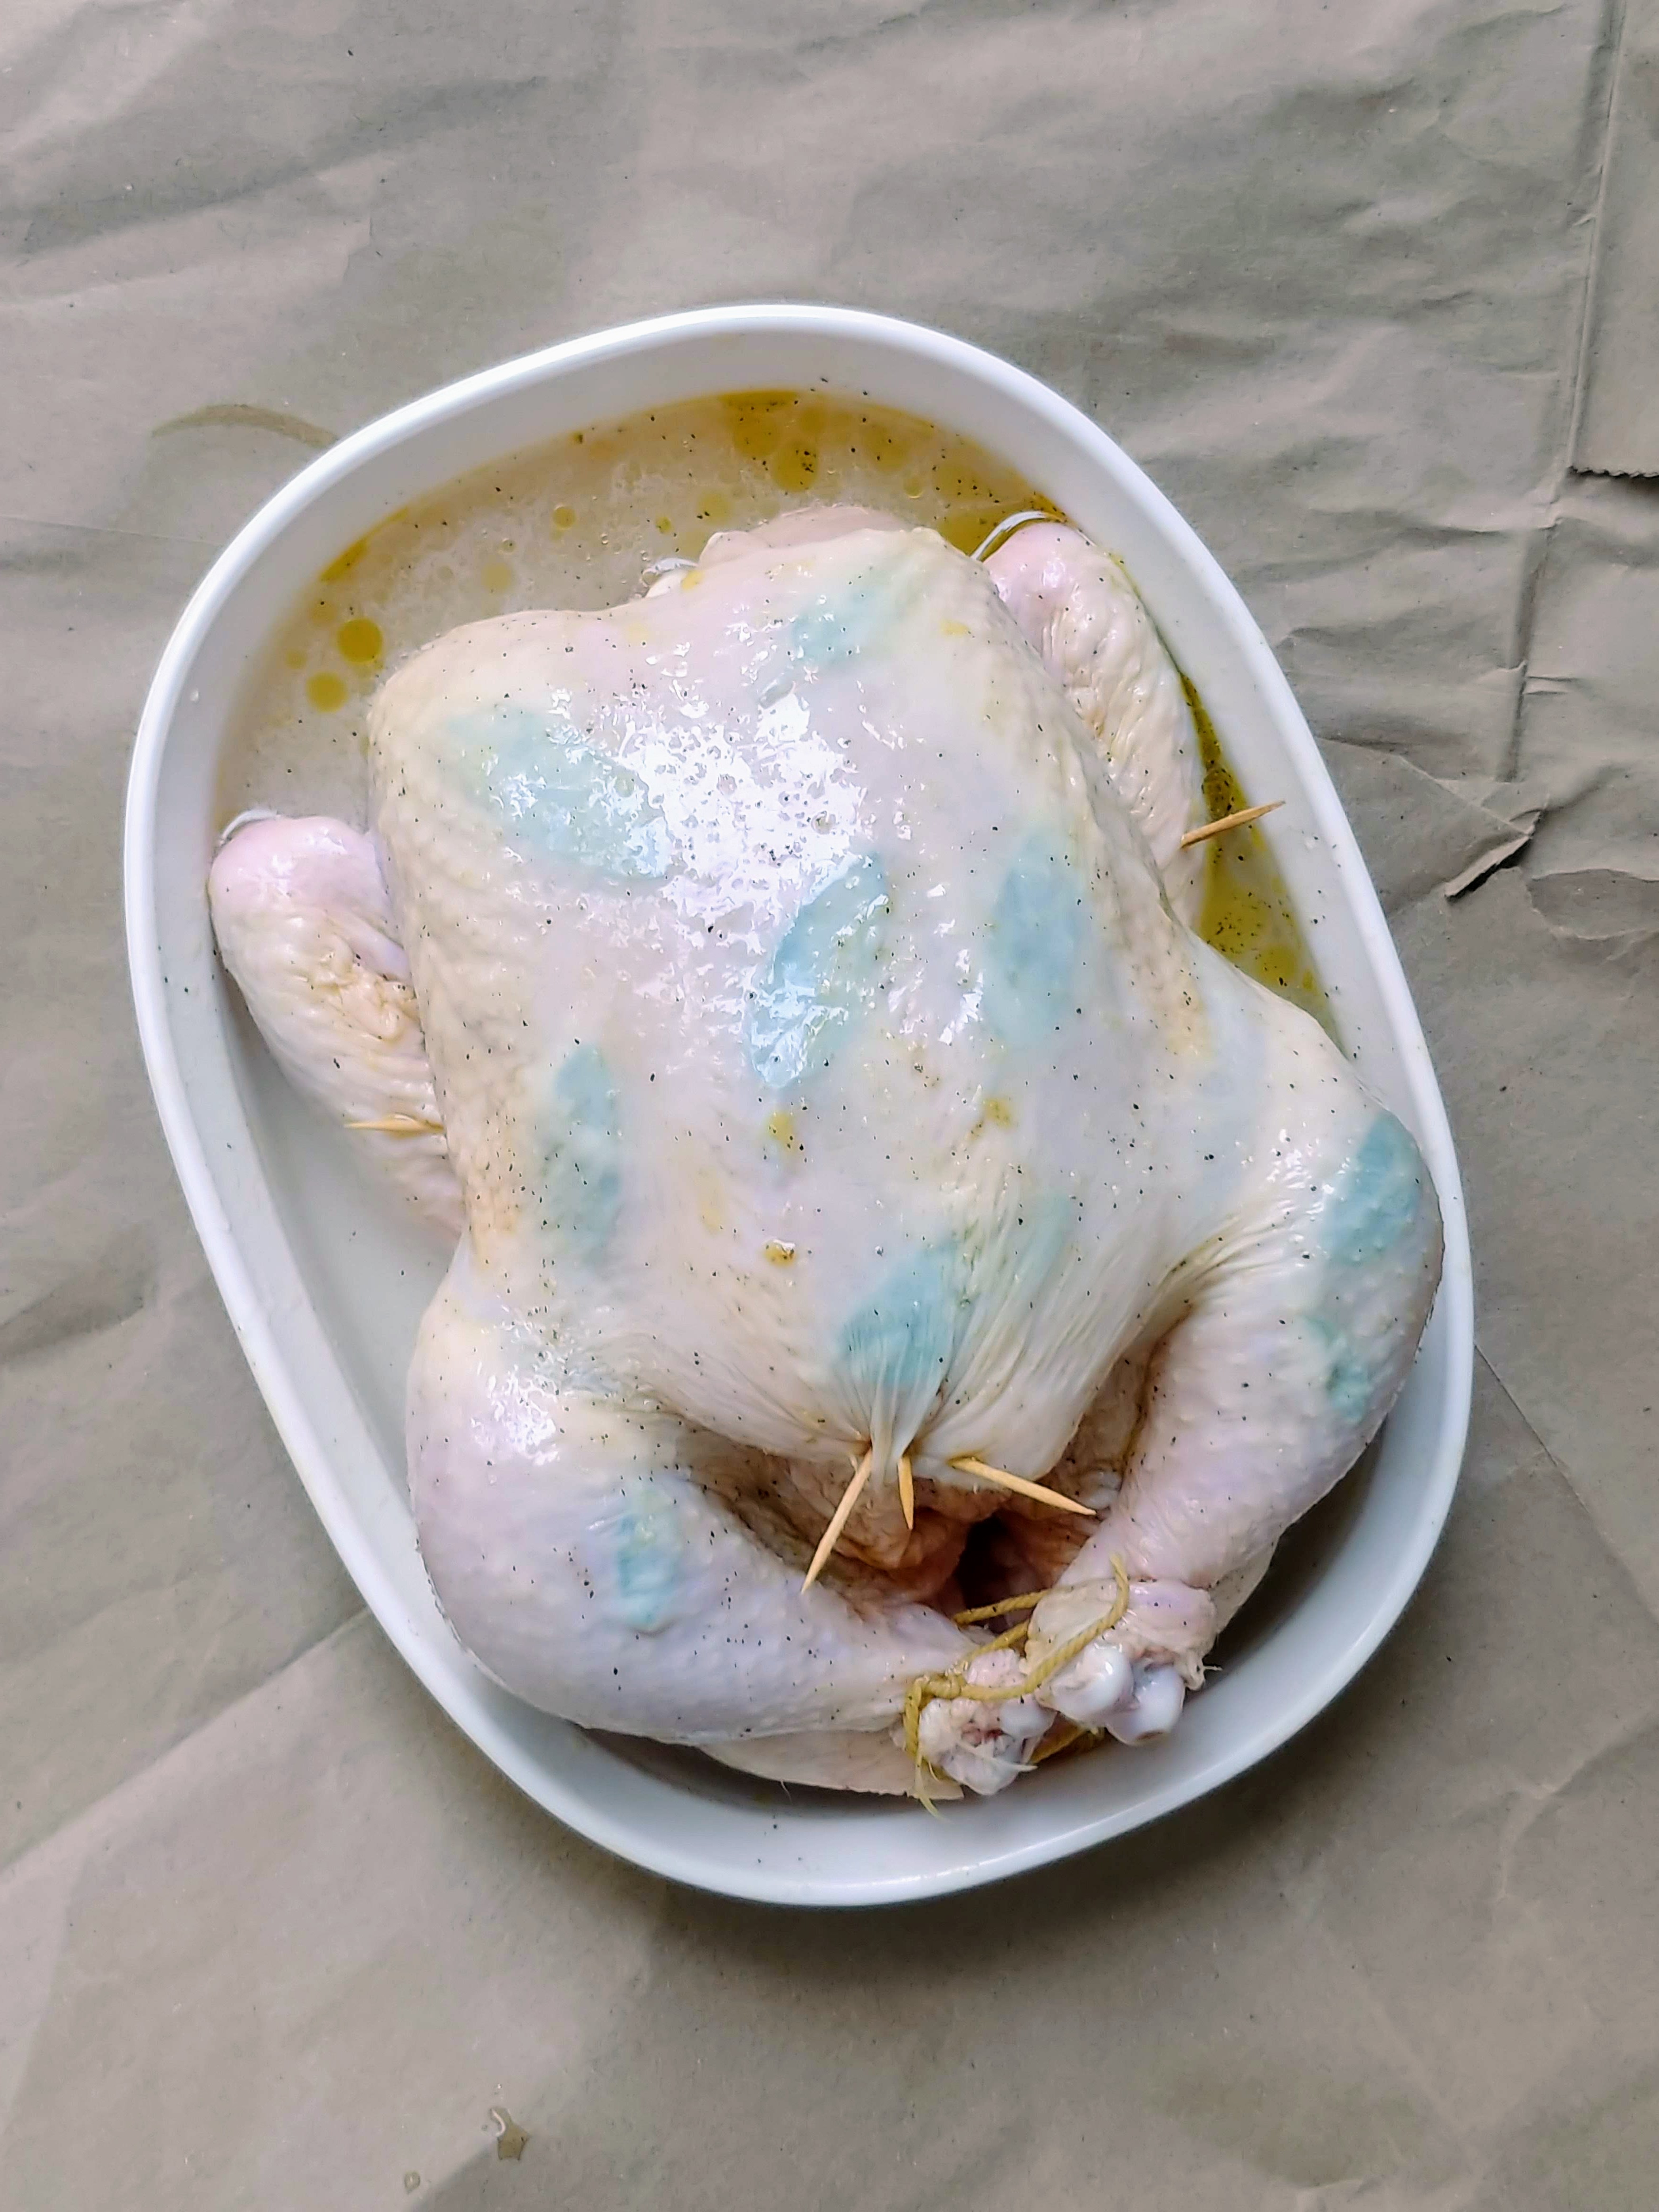
4. Dry the chicken off with a paper towel. Put the onion wedges, thyme, rosemary, and celery inside the chicken and tie the legs together with some kitchen twine.

Gently separate the chicken skin from the chicken breast and tuck the sage leaves around under the skin. If the skin tears, don’t worry about it. The chicken will still be golden brown and amazing! Just use a few toothpicks to arrange the chicken skin back into place.

Rub the skin with olive oil, sprinkle over salt and pepper, and tuck in the wingtips using a few toothpicks to hold them in place while the chicken is roasting.

Pour the water into the bottom of the baking dish.

clone tag: 3141653108858848348


5. Roast the chicken for 50 min – 1 hr 15 minutes, or until the chicken is golden brown and a thermometer measures 165F in the thickest part of the thigh.


clone tag: -7849446987528649024

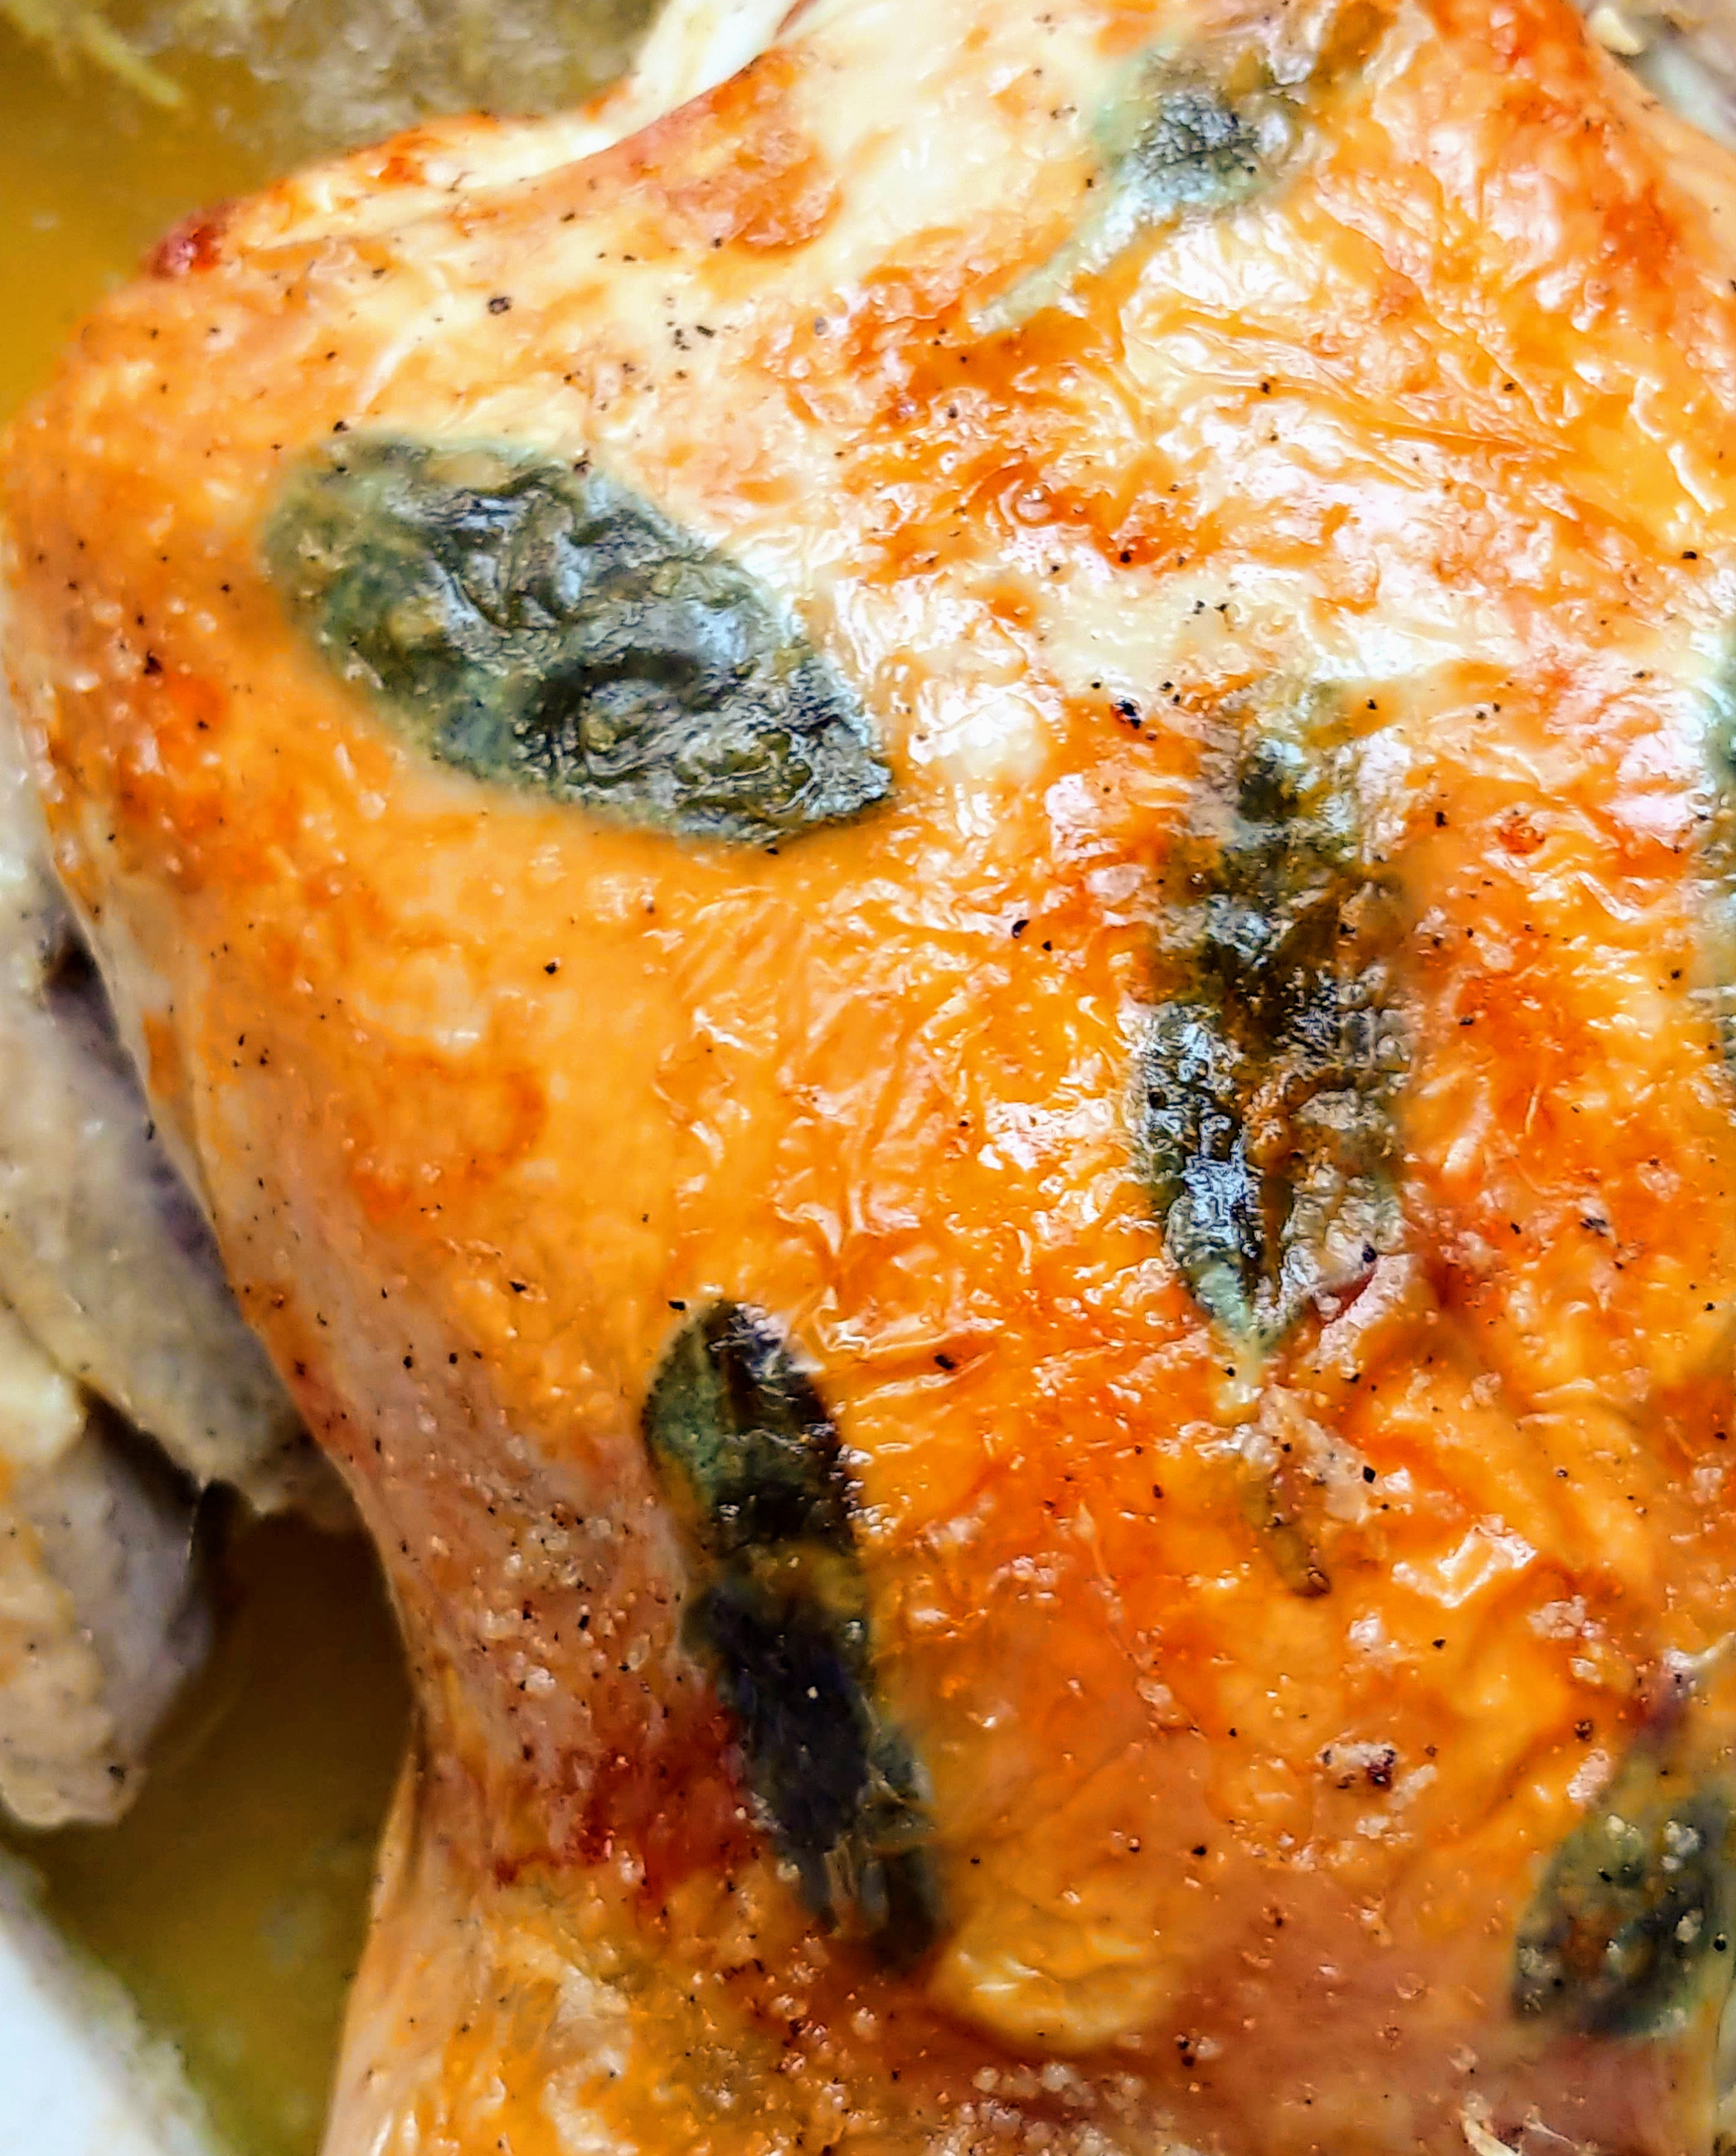
Look at that crispy skin! Yum.

Let the chicken rest 10-20 minutes before carving. Pull out the toothpicks and serve the chicken with the delicious pan juices.

clone tag: 708306459663070278

Ta-da! You just made a glorious roast chicken for Thanksgiving!

One more thing – this chicken still has a little magic left.

After dinner, pull the meat off the bones stash it in the fridge for later. Put the carcass with all the herbs and vegetables still inside of it into a slow cooker with a splash of apple cider vinegar and fill the pot with water (I cut off the kitchen twine before I put the bones into the slow cooker but I’m not sure if it’s really necessary). Turn the heat to low and cook for 24-48 hours.

Strain out the solids, and you will be left with an incredible and flavorful bone broth!

Add in some of your leftover chicken along with some vegetables and you will have a beautiful soup to warm you up on a cold day.

Wishing you and your family a very Happy Thanksgiving!

Elaine

lamb lettuce cups

Easy Weeknight Cumin Lamb Lettuce Cups

Lamb lettuce cups 2

These easy cumin lettuce cups are super delicious and budget friendly.

I used lamb and garlic that I had frozen previously. Adding those ingredients to a few spices, a carrot, along with some diced tomato and romaine leaves makes for a quick and healthy meal, perfect for a busy weeknight dinner.


Easy Weeknight Cumin Lettuce Cups

Makes 1 serving

Ingredients

1 tbsp olive oil

3-4 cloves of garlic, finely chopped (I used frozen garlic that I had, but fresh works great too)

1/2 cup cooked ground lamb *

1/3 cup finely diced carrot (about 1 small carrot)

4 tbsp water


1/2 tsp granulated onion

1/4 tsp ground cumin

pinch of salt and pepper (add more to taste)


romaine lettuce leaves and diced tomato (for serving)

Notes – * The lamb that I used was frozen solid in a 1/2 cup portion. I added that to the pan without defrosting it (it defrosted in the pan while the other ingredients were cooking).

If you use cooked lamb that is defrosted, you may have to adjust your cooking time slightly (and probably add a little more water so that the carrots have a little more time to cook through).


Instructions

1. Add the lamb, spices, olive oil, garlic, carrots and water to a medium sauce pan and cook the mixture over medium heat for about 7 minutes until the water has cooked off.

2. Turn the heat to medium high and sauté the mixture for another 3 minutes or so until the meat has browned and the carrots can be pierced with a fork without resistance.

3. Allow the mixture to cool for a few minutes, add more salt and pepper to taste and serve on romaine lettuce leaves and top with diced tomato.

Lamb lettuce cups 1

Happy Eating!


grass fed meat banner

How I Save Money On Grass Fed Meat (Without Coupons!)

Grass Fed Meat 1

I stumbled upon this money saving tip this past Father’s Day.

I was at my local grocery store early in the morning and on a whim decided to check out the meat section. It was a nice surprise to see that they had started carrying grass fed lamb (it used to be that in my area only Whole Foods carried grass fed lamb).

The grass fed lamb ribs were pretty expensive though, about $15 / lb and I wasn’t quite in the mood to spend that much. So I kept browsing and saw that they also had grass fed ground lamb.

Then I looked at the price – $6.99 / lb. Eh, not cheap but not too terrible either.

Then I saw the 50% off stickers.

Huh?

Grass fed lamb for $3.50 / lb? That is a great deal!

As it turns out, the sell by date was June 17th (which was the same day as Father’s Day this year) and that’s why the ground lamb was 50% off. That was the last day that they could sell the lamb before they took it off the shelves.

One of my family members told me later that grocery stores also do the same thing with dairy products (they discount them on the sell by date).

The sell by date is not the same as the expiration date. There’s more info on this here.

Obviously, if you’re going to buy meat on the sell by date, you do that at your own risk (’cause no one can completely guarantee the safety of raw meat).

Personally though, I looked for packages where the plastic wrap wasn’t puffy and the meat still smelled ok.

I wouldn’t use this meat for anything like a rare burger, and I would make sure to cook it thoroughly.

I ended up buying 4 lbs of grass fed meat for about $14. The ground lamb was packaged in those vacuum packed blocks and looked just as good as the ground beef that was packaged the same way (but was a week or two away from the sell by date).

So I took it all home, cooked it off in a big pot, drained off the excess fat and spooned the cooked lamb into muffin pans and froze it. I then transferred the blocks of ground lamb into ziptop bags.

The little individual portions of frozen lamb are really convenient and make life a lot easier as they defrost quickly and you can add them to anything for a quick dinner.

So far, I’ve tossed these little blocks of ground lamb into pasta sauce and paleo chili, used them to make Cumin Lamb Lettuce Cups, and made them into a soup with leftover greens and vegetables that I had in my fridge.

Altogether I got 24 half cup servings of ground lamb for $14, which works out to $0.58 per serving. This amount of meat will last me about 2 months (I tend not to eat meat every day).

If I were to do this again – (which I definitely will – saving money is pretty awesome!)

– I would go to my local grocery store and make a note of the sell by dates of the meat was I interested in buying. (This is pretty easy to do during my weekly shopping trip.)

– I would either go to the grocery store the night before the sell by date (sometimes grocery stores will put the discount stickers on the meat the night before) or early in the morning the day of (like before 8:30 am).

– I would cook the meat off that day and freeze it.

I hope that this tip helps to save you some money too!


salmon sushi

Salmon Salad Sushi – Super Easy

P1080078-2

I love tuna salad, and this is a slightly fancier version but is still super simple to make. It’s perfect for a quick dinner, or an easy snack and you can use up your leftover brown rice or salmon to make this tasty dish.

Salmon Salad Sushi

Makes 8 pieces (2 snack size servings, or 1 serving for a hungry person)

Ingredients

1/3 cup cooked flaked salmon (canned salmon is fine too)

2 ½ tbsp. mayo (I used an avocado oil mayo)

1/8 tsp dijon mustard

2 ½ tsp finely chopped green onion

3 tsp lemon juice

tiny pinch of pepper

¼ tsp dried parsley

1/8 tsp granulated garlic

¼ tsp sea salt

1 ½ cups warm cooked brown rice (I just steam it for a few minutes in the rice cooker to warm it up if it was in the fridge)

1 sheet of nori

Instructions

1. Stir together the salmon with everything but the rice and nori.

2. Lay the nori sheet on a plastic wrap covered bamboo mat.

Wet your fingers, and spread the warm rice on the nori into a thin layer leaving about a ¾ inch of nori uncovered at the top of the sheet.

3. Spoon the salmon salad into a line at the bottom of the rice covered nori. Roll firmly into a sushi roll, and set in the fridge for 10 – 15 minutes to firm up. Cut into 8 slices and serve.

P1080077-2

Salmon Salad Sushi and Vegan Thai Peanut Sauce with Veggie Spring Rolls

The snack plate of dreams…

Tabbouleh

Quinoa Tabbouleh – Easy, Gluten-Free, Vegan, Delicious

P1060497

I have a bit of secret…

I don’t actually love eating quinoa.

I know that it’s healthy, but like most people, I didn’t grow up eating it. So quinoa lacks that sense of nostalgia and comfort that many of my favorite foods have. It doesn’t have too much of a flavor, and to be honest I’m still sometimes at a loss as to what to eat with it, or lack ideas on how to make it more exciting.

I know that people say that you can swap quinoa out for rice, but honey, it ain’t the same.

Making sushi with quinoa doesn’t work that well, and when you’re eating something like Lou Rou Fan (Taiwanese Braised Pork with rice) or Taiwanese Style Scrambled Eggs with Tomatoes and Green Onion, you want rice. I can eat brown rice with both of those dishes and not feel like I’m missing out, but I don’t want to eat those dishes with quinoa.

But this is a recipe that I love to eat. This recipe makes quinoa taste (imagine Oprah saying this) amazing! I love the brightness of the lemon juice with the freshness of the mint and parsley. The quinoa has a lovely texture that really works well with this dish, and gives the tabbouleh a lot of good protein. This tabbouleh is also full of different colored vegetables and herbs, and it’s a very nutrient dense salad that just tastes great.

And it doesn’t feel like another boring old salad, it looks and tastes exciting.

P1060493-2

So if you’re ever stumped as to what to do with leftover quinoa, make this dish and see if you don’t just eat the entire portion yourself in one sitting.

I like to make this dish a day in advance so that the lemon juice has time to mellow out the sharpness of the onion. It’s also nice to have a batch of this sitting in the fridge so that there’s always something healthy to snack on when you’re hungry.

Quinoa Tabbouleh

Makes 2-3 servings


Ingredients

1 diced Roma tomato (about 2/3 cup)

½ cup diced white onion

¼ cup finely chopped parsley, loosely packed*

1 tbsp finely chopped fresh mint*

¾ cup cooked quinoa**


1 tbsp olive oil

3 tbsp fresh lemon juice***

¼ level tsp sea salt

¼ level tsp black pepper


*For tips on how to keep your excess herbs fresh, here’s a link to a post that I wrote about that.

**If at all possible, buy the quinoa in the store that doesn’t say to rinse it on the package instructions. Quinoa can be difficult to rinse if you don’t have a fine enough strainer, and life is easier if you can just scoop the dry quinoa out from the container, add it to a pot with some water and cook it in the rice cooker and not have to think to hard about it.

*** If you have any excess lemons, you can freeze them.

Instructions

Stir all ingredients together. Cover and refrigerate overnight. Taste it the next day, and adjust the seasoning if needed.


P1060495- 2

Happy Eating!

Oat Flour Tortillas

Gluten Free Oat Flour Tortilla Recipe – Super Easy, Cheap and Cheerful, Vegan Friendly

P1080427

Some people say “I love you” with diamonds, but personally, I’d rather have tacos for Valentine’s Day.

Nothing says “I love you” quite like a taco (and everyone loves tacos). So this Valentine’s Day, make your loved one some amazing tacos with these gluten free oat flour tortillas.

Store bought tortillas can have all kinds of fillers, and the gluten free ones can be particularly expensive. These tortillas are incredibly cheap and easy to make, and taste amazing too. Perfect for anyone who wants to eat well on a budget.

These tortillas are super flexible. Unlike normal wheat tortillas, these tortillas are actually more flexible when they aren’t piping hot, so it’s a good idea to give them a minute or two to cool once you take them out of the pan before you fill them with anything. They are also still very flexible when cold, which makes them great for packed lunches.

The dough is sturdy enough that you can make the tortillas as large as you want, and as long as you have a griddle big enough, you can make a burrito sized tortilla if you like (but you may have to adjust the cooking time).


Gluten Free Oat Flour Tortillas

Makes six 6 inch tortillas (about 2 servings)

Ingredients

1 1/4 level tsp psyllium husk powder*

1/3 cup water

1/2 tsp honey**

1 tbsp olive oil

1 cup oat flour***

1/8 tsp sea salt


Notes – *Psyllium husk powder gels like nothing else, and there’s no great substitute for it. I found mine in the bulk spice section of the local Fred Meyer, but Whole Foods, Trader Joes have been known to carry it as well. If it’s not in the natural foods, or bulk spice section, check the dietary supplement/ digestive health (where the Metamucil is) section of the store or pharmacy as it’s sometimes sold there as well.

** You can leave out the honey if you’re vegan. The tortillas will still be good, they just wont have the little brown spots when you cook them.

*** I grind oats into oat flour using a blender. Don’t grind the oats in a food processor because the flour won’t be fine enough.

Any extra oat flour I don’t use in the recipe goes into an airtight container and I use it for another recipe.

If you’re making the tortillas for someone who has celiac disease, use certified gluten free oats, as the oats from the bulk bins can sometimes be processed on the same equipment as wheat.


Instructions

1. Slowly add the water to the psyllium husk powder. Stir to combine, and don’t worry to much if it’s super clumpy. Let sit for 5 minutes

2. Add in the rest of the ingredients and stir together until a shaggy dough is formed. Knead the dough for about 1–2 minutes until the dough is fairly smooth, making sure to smush in all the little bits of psyllium husk into the dough until well combined.

The dough should look like this when you’re done kneading –

P1080403

Cover the dough with plastic wrap (or cover the bowl with a small plate) and allow the dough to sit at room temperature for 1 hour.

You can also make this dough ahead of time and keep it in the fridge for 1-2 days until you’re ready to cook the tortillas.

3. Cut the top and sides off of a gallon size Ziploc bag and open it and lay it flat to form a long rectangle.

Dip a paper towel in a little bit of oil (avocado oil, vegetable oil, or olive oil will work for this) and oil the inside of the plastic. Don’t use the coconut oil for this, it solidifies too quickly and the dough ends up sticking to it.

Cut the tortilla dough into 6 equal pieces, and keep the pieces of dough that you’re not working with covered so that they don’t dry out. If the dough is too sticky, add a little oat flour, if the dough is too dry then knead in a few drops of water into the dough. The dough should be elastic, on the firmer side, and smooth. Roll the dough into a 6 inch circle between the pieces of oiled plastic.

Peel the tortillas off the plastic and lay them on a plate. You can roll the tortillas out and overlap them on a plate as they won’t stick together, but kind of shingle them so that there are bits of each tortilla sticking out from the pile so that each tortilla will be easier to pick up when you cook them.

4. Make your pan non-stick. Cook your tortillas over medium heat. I let them cook for 1 min and 15 seconds on the first side, then flip them over and let them cook 30 seconds on the other side. They get the little brown spots this way, and are slightly crispy around the edges. If you don’t want them crispy around the edges, you can cook them for a shorter amount of time and they will still be good.

5. Stack the tortillas on a plate and fill them with whatever your heart desires. I topped mine with tomatoes, lettuce, and minced mushrooms that I’d cooked down with taco seasoning to make a vegan taco filling.

They keep great in the fridge, so you can make them ahead of time and keep them on hand for all your taco cravings.

P1080439

Enjoy!

Shrimp Pad Thai

Weeknight Shrimp Pad Thai – Easy and Quick Recipe – Refined Sugar Free

P1080345

Pad Thai is the kind of dish that you love to eat, but are not quite sure how to make yourself.

At least that’s what I thought until I found a really easy recipe for pad thai on Goop.

What I really loved about the recipe from Night + Market on Goop was how simple the recipe was. I love pad thai, but most of the recipes that I found online had a lot of specialty ingredients that I would have to go a little out of the way to find.

I never attempted to make it myself before, but that recipe looked so easy, and with a few swaps, I knew that I could make a pad thai that would work with my dietary restrictions.

P1080307-2

This pad thai is made from ingredients that you can find at your local grocery store, and can be made in about half an hour. Perfect for a weeknight dinner.

Also great if you’re craving pad thai, but don’t live anywhere close to a Thai restaurant…

I used wild caught pink shrimp from Oregon (which I was able to find at my local supermarket in the display case at the seafood section, but I’ve also seen it sold at Costco as well). I only buy this kind of shrimp these days because it’s sustainably harvested, and also because it doesn’t contain any preservatives or ingredients that many other frozen shrimp are processed with.

The working conditions for people who catch, farm, and process shrimp around the world can also be very harsh and inhumane, so by purchasing domestically caught shrimp, I hope that I’m supporting more ethical working conditions for people who work in the shrimping industry.

You can find more information about Oregon Pink Shrimp here. This isn’t an affiliate link, just more info in case you’re curious about how the shrimp are caught.

P1080304

This type of shrimp is pretty inexpensive, at about $8 – $9 per lb, and it’s also just as tasty as the larger shrimp which makes it a good buy in my book. The amount of pink shrimp in this dish cost about $1, so while this pad thai feels very luxurious, it’s actually really budget friendly.

For more information on what to look for when buying shrimp, you can check out this article here.

About the fish sauce, I use the Red Boat brand fish sauce, because it’s only made from anchovies and salt (and therefore paleo, and refined sugar free). You can find it online, but I managed to find a bottle of the 500 ml (17 oz.) size for about $7 at my local Asian market, so it’s worth checking out your local Asian market if you have one nearby to see if they have it cheaper than online.

The noodles that I used were Fettuccini Style / Pad Thai noodles from Tinkyada which I found at my local grocery store. They weren’t organic, (but hey, it happens, you do the best you can). They were also on sale, which was definitely a plus, and the noodles worked great for this recipe.

brown rice noodles.jpg

There is a decent amount of maple syrup in this recipe, so if you’re watching your sugar intake, this may not be a meal that you eat every night, but it is certainly a really amazing and tasty dinner to have as a treat every once in a while.

If you’re planning on eating a few sides along with this (like a salad, fruit, etc.) this recipe makes enough for 2 smaller servings, but if you’re just eating it by itself, then it’s really just enough for one person, especially if you’re really hungry.

I hope that you give the recipe a try! It’s so good, and you’ll be super proud that you made a dish that you once thought that you could only enjoy in restaurants.


P1080350

Weeknight Shrimp Pad Thai

Adapted from this recipe.

Makes 2 servings, or 1 larger serving for a very hungry person.


Ingredients

4-5 oz of dried brown rice noodles *

4 tbsp of maple syrup

2 tbsp of fish sauce

2 tbsp of apple cider vinegar

1/3 cup of frozen pink shrimp

1-2 eggs (depending on how hungry you are)

2 green onions, thinly sliced


1 lime, cut into wedges for serving


* Note – If you hold the noodles between your thumb and forefinger, the circle that 4-5 oz. of noodles should make will be about the size of a quarter.

If you can get your hands on some bean sprouts, then definitely add those in too, as they add a nice crunch to the dish. I just couldn’t find any at my local grocery store, but the dish was still incredibly tasty.


Instructions

1. Make a skillet non-stick, and scramble your eggs. Tip the cooked eggs onto a plate and set aside.

2. Put the shrimp into a strainer and rinse under cool water. Place the shrimp into a medium size saucepan and cover them with about an inch of water. Bring the water to a boil and let the shrimp cook for a minute or two before draining. Set the shrimp aside.

The shrimp is already cooked, I just do this because it brings the shrimp up to temperature, but also kills off any potential pathogens that it may have picked up while it was sitting in the display case with raw fish.

3. Fill the medium saucepan with water and then cook your noodles. The directions for this package of noodles said to cook them for 10 -11 minutes, but I only cooked them for 6-7 minutes. You want to undercook your noodles a bit, as you’re going to finish cooking the noodles in the pad thai sauce. Drain the noodles and set aside.

4. Stir together the apple cider vinegar, fish sauce, and maple syrup. Add the sauce to the skillet along with the cooked noodles and cook over medium heat, stirring frequently until the noodles have absorbed all the sauce.

5. Add in the green onions, cooked eggs, and shrimp and stir them through the noodles, and continue to cook them for another 30 seconds or so until the eggs and shrimp are warmed through.

6. Spoon the noodles into a bowl (or two bowls) and serve with lime wedges, and a little bowl of red pepper flakes on the side.


P1080354

(I ate half of the pad thai before I realized that I had forgotten to photograph the lime wedges as well… Whoops. It was so good…)

spring rolls and peanut sauce

Vegan Thai Peanut Sauce and Veggie Packed Spring Rolls – Vegan, Gluten Free, Dairy Free, Refined Sugar Free, Peanut Satay Sauce

P1080067-2

When I was in high school, our “wild night out” on the weekends (more often during the summer) was going bowling, and then going to eat shrimp spring rolls at the Thai restaurant that my friend’s family owned.

The spring rolls were actually a Vietnamese dish, but I didn’t know that at the time. All I knew was that these spring rolls were amazing! They were one of the best things that I’d ever eaten, and we always ate them with the Thai peanut satay sauce.

When I moved away, the shrimp spring rolls and peanut sauce was the dish that I most associated with that time in my life.

I absolutely loved eating those spring rolls, and I could never find a restaurant that made them the same way. I wanted to make them myself, but the most difficult part of recreating that dish was trying to get the peanut sauce right.

I never did get the recipe for that peanut sauce. I managed to recreate the sauce a few years later through trial and error, but it did have a lot white sugar in it, so I wanted to create a version that was refined sugar free.

And this version is vegan to boot.

P1080074-2

It tastes very similar to that peanut sauce that I first had all those years ago, sweet and mildly spicy, rich with the flavors of ginger and chili, with just a hint of salt to round out the flavor. The extra salt replaces the savoriness of the fish sauce, and the sauce is so good that you won’t miss the fish sauce.

This peanut sauce is also easier to make than the traditional version (this one you don’t have to cook, just stir it all together), but still tastes incredibly similar.

You can make this peanut sauce in advance, and it will thicken and become creamier in the fridge as it chills.

I usually make extra sauce, as you can dip vegetables in it, or spread it over noodles, and I usually eat more than one serving of spring rolls at a time, so having extra sauce on hand is great.

Vegan Thai Peanut Sauce

Makes ¼ cup of peanut sauce (1 serving)

Ingredients

3 tbsp. + 1 tsp unsweetened natural peanut butter

1 level tsp of red curry paste (most supermarkets carry it these days, I used the Thai Kitchen Brand)

3 tbsp maple syrup

4 tbsp hot water

¼ tsp – ½ tsp sea salt (to taste)


¼ tsp. crushed dried mint* (optional)

1/8 tsp ground coriander seed* (optional)


*If you don’t have a few leaves of fresh mint and cilantro to put into your spring rolls, you can add these spices to the peanut sauce to give it a similar herby brightness.


Instructions

Ideally, your peanut butter would be room temperature, but if it’s cold from the fridge, that’s ok too. It will just take a little more mixing to get everything to combine.

Stir together the peanut butter, curry paste, maple syrup and optional spices until smooth. Add in the 4 tbsp of hot water, and still until well combined. Add salt to taste (I added ½ level tsp of sea salt).


P1080069-2

Veggie Packed Spring Rolls

For the spring rolls, I wanted to make a more colorful version, because it’s January, and spring rolls are a good way to eat lots of vegetables without having to think too hard about it. You can fill them with whatever you like really, that peanut sauce tastes amazing on pretty much everything.

I’d count on making about 4-5 spring rolls per person if you’re want to make them a main course, and 2-3 spring rolls per person if you want to make them as an appetizer.

You can cut them in half on an angle if you want to show off the colorful vegetables inside, or just leave them whole (which does make them a little easier to dip into the sauce, or you can spoon the sauce over the spring rolls instead).

I used Three Ladies Brand of rice paper wrapper in the 25 cm size (which is non-GMO and gluten free), but feel free to use your favorite brand of rice paper wrapper.

I would make the spring rolls right before you plan to eat them. They texture of rice paper wrapper changes after it’s been refrigerated, so it’s better to make them fresh. You can also pre-cut your vegetables in advance and assemble them right before serving to save time.


P1080070-2


Ingredients

(For each spring roll)

1 rice paper wrapper

¼ cup lightly packed baby spinach leaves

4-5 slices bell peppers

1-2 pieces of roasted sweet potato (cut into ½ inch thick strips)


2-3 mint leaves (if you have them)

3-4 cilantro leaves (if you have them)


To make the spring rolls, dip one rice paper wrapper into warm water for about 20-30 seconds. It should just begin to feel like silk between your fingertips. Spread the rice paper onto a plate, place the mint and cilantro leaves on first, followed by the baby spinach, then the bell peppers, and roasted sweet potato.

Wrap each roll like a burrito, so the sides get folded in first, then the fold the edge closest to you over the vegetables, and roll until the spring roll is closed, and then set the spring roll aside onto another plate, and start the next one.

Here’s a good visual lesson on how to do it.

https://www.youtube.com/watch?v=IfI1wMeDXhg


Before I moved away, I did have the foresight to buy some spring rolls from my friend’s restaurant, and take one home. Here’s what was in it:
1 1/2 teaspoons of bean sprouts

1 Sprig of Cilantro

2 one inch long pieces of mint leaves

3 pieces of Halved Shrimp (shrimp cut in half length ways)

3 teaspoons of rice noodles (possibly cooked in chicken broth, as they were light brown in color, I seem to remember my friend mentioning that they may have mixed the noodles with a bit of oyster sauce).

6 teaspoons of shredded romaine lettuce

1/2 teaspoons shredded carrots


My friend’s family has since sold the restaurant, and I make simpler version of these spring rolls now at home (which I will post on the blog another day), but I thought that I’d include the recipe just in case you were curious.

Happy Eating!

Instant Homemade Vegetable Stock

Instant Homemade Vegetable Stock Mix – Vegan, Soy-free, Gluten-Free

P1080022-2

Vegetable stock is easy to make, but can be a little bit of hassle, and takes up a lot of space in the freezer. Store bought veggie stock can be expensive, and it can have a lot of added ingredients that leave you wondering “What is organic caramel coloring?” and “Why does it need to be in vegetable stock?” I find myself asking the same questions when I read the back of soup bouillon labels as well.

If you too have these questions (and are wondering if there is an easier way to make vegetable stock with less additives) this might be the answer that you’ve been looking for.

This is a super simple and easy recipe to always have vegetable stock on hand. This recipe is soy free, thrifty and easy to customize.

We’re going to basically make a spice mix that contains a lot of flavors that you would normally find in vegetable stock. You can almost think of it as a tea. Admittedly, it takes 10 minutes to steep (so not quite “instant”) but it’s still pretty quick.

You can also make a large batch of this veggie stock mix and put it into a little jar to use as needed.

If you don’t like the little bits of dried spices in your soup, you can strain the broth through a coffee filter, or place the spices in some layers of cheese cloth, tie it up with some kitchen twine and place it into your soup pot (basically like a tea bag) to fish out later once the flavors of the broth have infused.

I hope that this recipe helps you make lots of wonderful soups in the future. I plan on making a noodle soup with this pretty soon. Perfect for the cold weather.


Makes a scant 2 tbsp of veggie stock mix = 4 cups of vegetable stock

Ingredients

1 tsp granulated onion

3/4 tsp + 1/8 tsp celery salt

1/4 tsp + 1/8 tsp of granulated garlic

1/4 tsp dried rubbed sage

1/4 tsp dried parsley

1/4 – 1/2 tsp sea salt

1/8 tsp black pepper


Instructions

Stir all the spices together. Add the mixture to 4 cups of boiling water and allow to steep for 5-10 minutes. You can strain the mixture at this point or leave the spices in the stock depending on your preference.

Use in your favorite soup recipes, or add some noodles, and some veggies for a quick and filling lunch or dinner.

Enjoy!

stainless steel pan

How to Make a Stainless Steel Pan Non-stick (non-toxic)

stainless steel pan 1

(This is what the pan looks like before the coating of oil).

When I decided to stop using non-stick cookware, one of the hardest thing to get my head around was how I was going to be able to cook things like pancakes and sunny-side up eggs.

I googled “how to make a stainless steel pan non-stick” and wasn’t able to find an answer.

So after much trial and error, I finally figured it out. And it’s actually super simple to do.

By heating the oil in a pan this way, the oil binds to the surface of the steel (forming a polymer – whatever that means…), creating a temporary non-stick coating. I’ve used this method with olive oil, coconut oil, and avocado various times and all have worked great.

Instructions

1. Start with a cool stainless steel pan. Rub the bottom of the inside of the pan with probably about ½ tsp (maybe less) of olive oil with either your fingertips or a paper towel. You only need a thin layer, but want to coat the entire bottom of the pan so that there are no gaps in where you put the oil.

2. This can get a little smelly so, I’d turn on the cooking fan for this.

Put the pan onto a cold burner and turn the heat up to medium. Hover your hand a few inches above the pan. When the air over the pan feels about as warm as a warm bath you’d give a baby (so not too hot) then turn the burner off, and leave the pan to cool on the burner while you prep your veggies for your stir-fry, or your pancake batter.

3. Then just cook as usual.

The non-stick coating is temporary, but you should be able to get through cooking a batch of pancakes, or fry a few eggs on this surface just fine before you need to add a little more oil.

When you’re done cooking, you can scrub this non-stick surface off with some baking soda mixed into a paste with a little dish soap and a scrubby sponge. When I need a non-stick surface next time, I just repeat the process.

stainless steel pan 2

(This is what the pan looks like after it’s been heated with the oil).

For me, I cook on an electric stove, and I’ve done this enough times now that I know that if I start with a cold pan, it takes 5 minutes to heat to the baby bath level of warmth. Now I can just rub the pan’s surface in oil, put it onto the burner, turn on the stove, turn on the fan, and set a timer for 5 minutes.

You may have to adjust the timer for your stove, as you may find that your stove heats up more quickly or more slowly than mine does.

I always stay in the kitchen as I do this, just in case the pan starts to smoke.

If you see the pan start to smoke, pull the pan off the hot burner right away (also turn off the burner) and put the pan on one of the cold burners to cool. Once cool, it should still have created a non-stick surface and you can just cook on this pan as usual.

If you fry an egg sunny side upon this surface, I’d cover the pan with a plate or a lid while the egg is cooking. The egg white cooks through more evenly with a lid on the pan.

What would you cook using this trick? Let me know in the comments below.

Happy Cooking!