Iced Apple Green Tea – Easy, Paleo, Refined Sugar Free

apple tea 4

If you love Southern Style Sweet Tea and are looking for something that is refined sugar free, this is a great alternative. This Iced Apple Green Tea is just as refreshing, and the apple juice gives this green tea a lovely fruity sweetness, perfect for warm weather and sunshine.

I have a friend who is Japanese who has the most beautiful and extensive tea collection. She has an amazing cabinet filled with teas from all over the world.

During one of our visits we drank a Pink Lady Apple Green Tea, from The Republic of Tea brand. I loved that tea, and for years I would always try and look for it in any grocery store that carried that brand of tea. As it turns out, that particular tea was a limited edition and has since been discontinued, but that’s ok!

As long as you have some apples, apple juice, green tea, and a little honey, you can make a tea as delicious as that one was.

I enjoy drinking it iced (it’s good warm too), which is great for this time of year, as the weather is turning a bit warmer now (which is really exciting!).

apple tea 5

Iced Apple Green Tea

Makes about 4-6 servings


Ingredients

5 1/4 cups of water

5 green tea bags (I used the Organic 365 brand ones)

2 1/2 cups of apple juice **

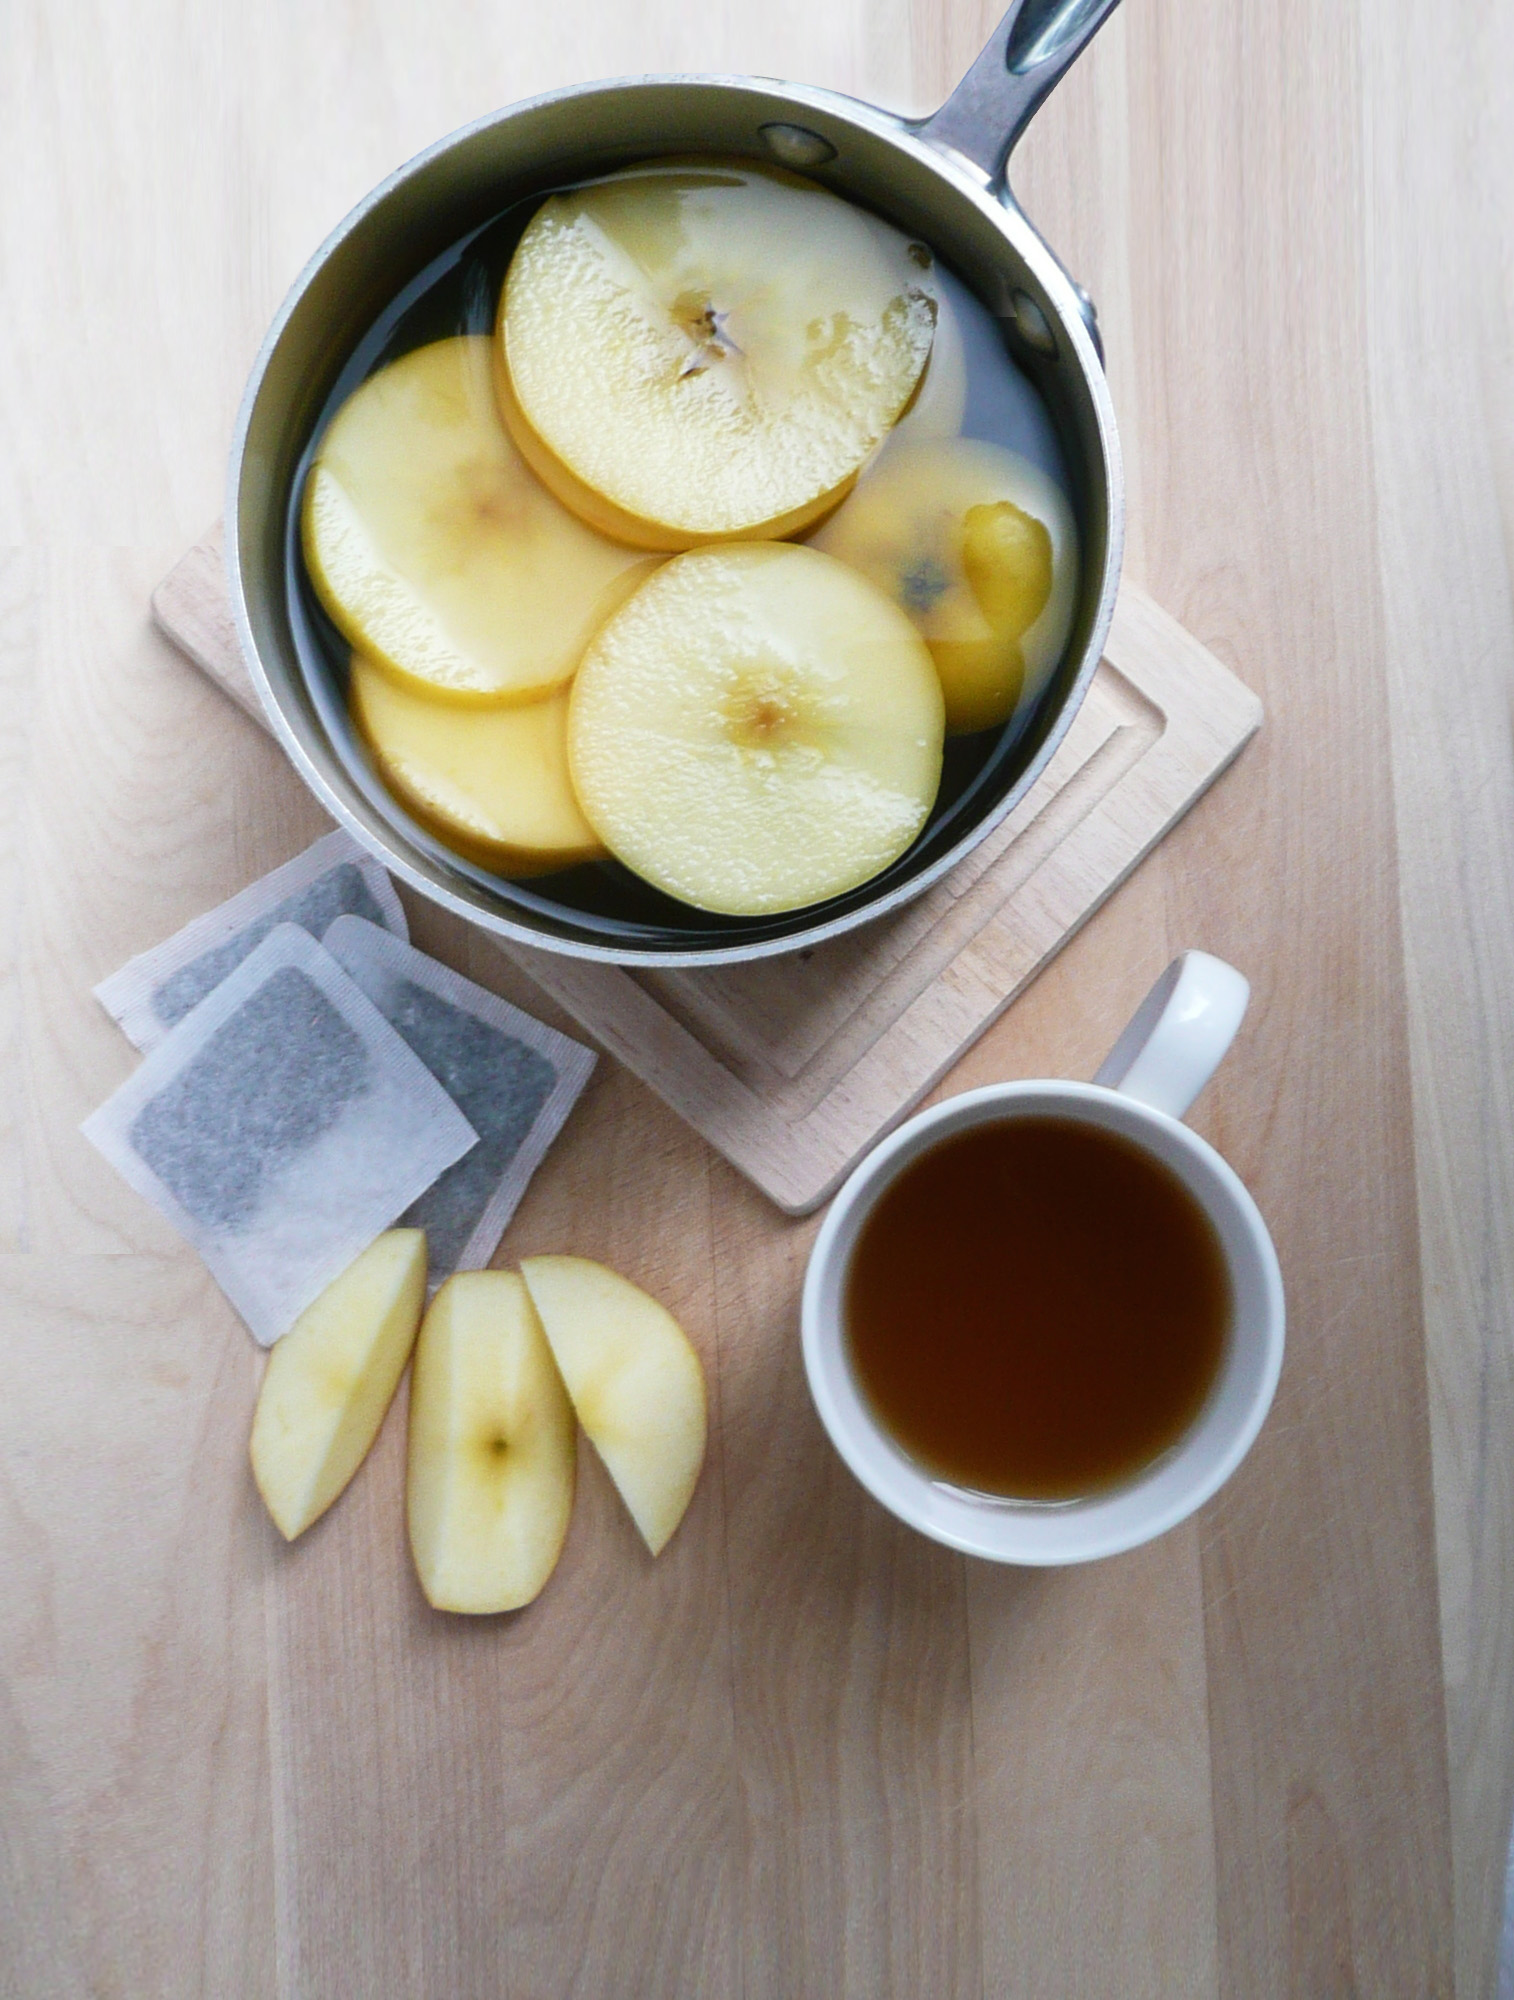
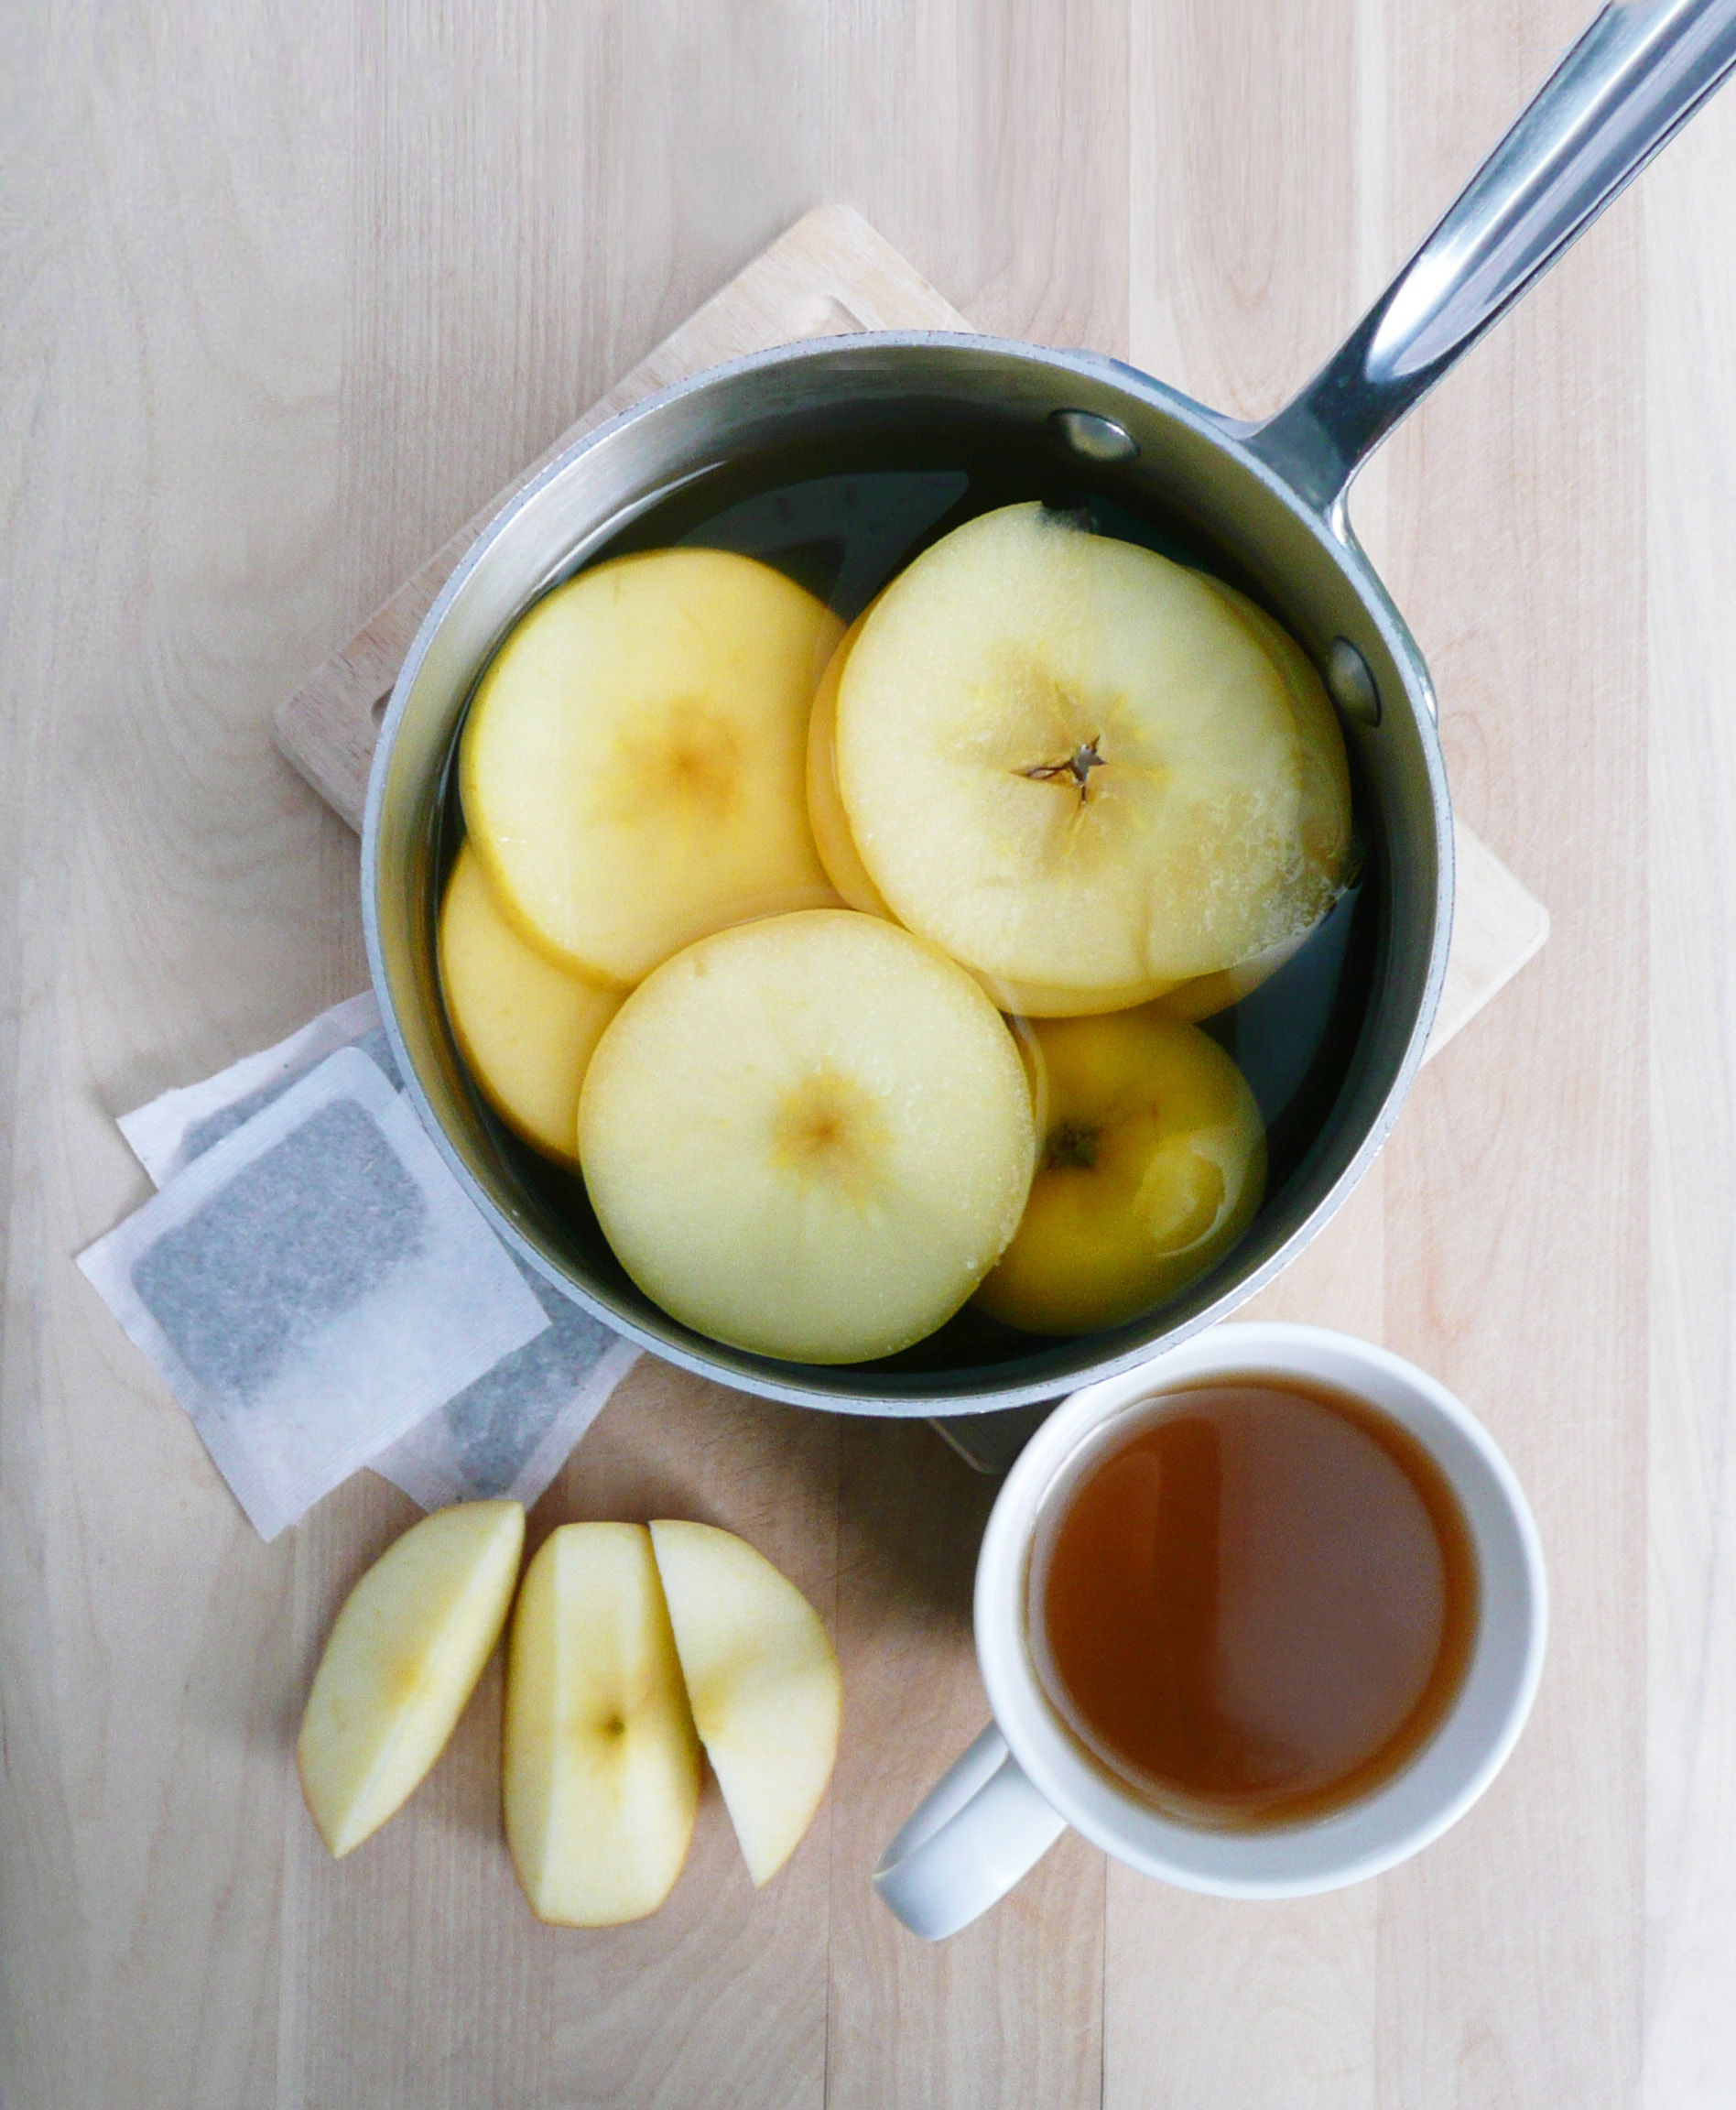
2/3 of a fuji apple, cut into 1/4 inch slices

2 tbsp honey

Notes – ** I used the Martinelli’s brand of apple juice because it tastes wonderful, but please feel free to use your favorite brand of apple juice.


Instructions

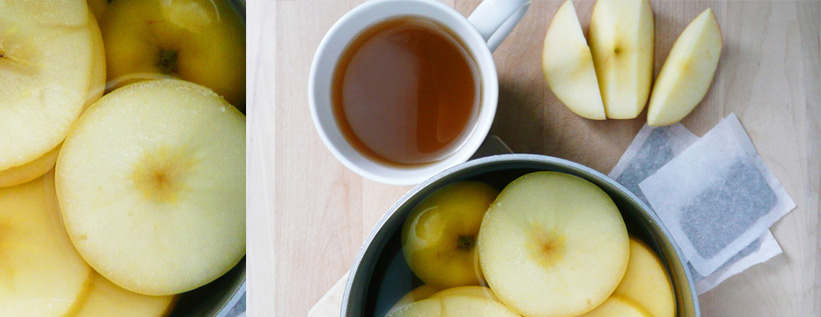
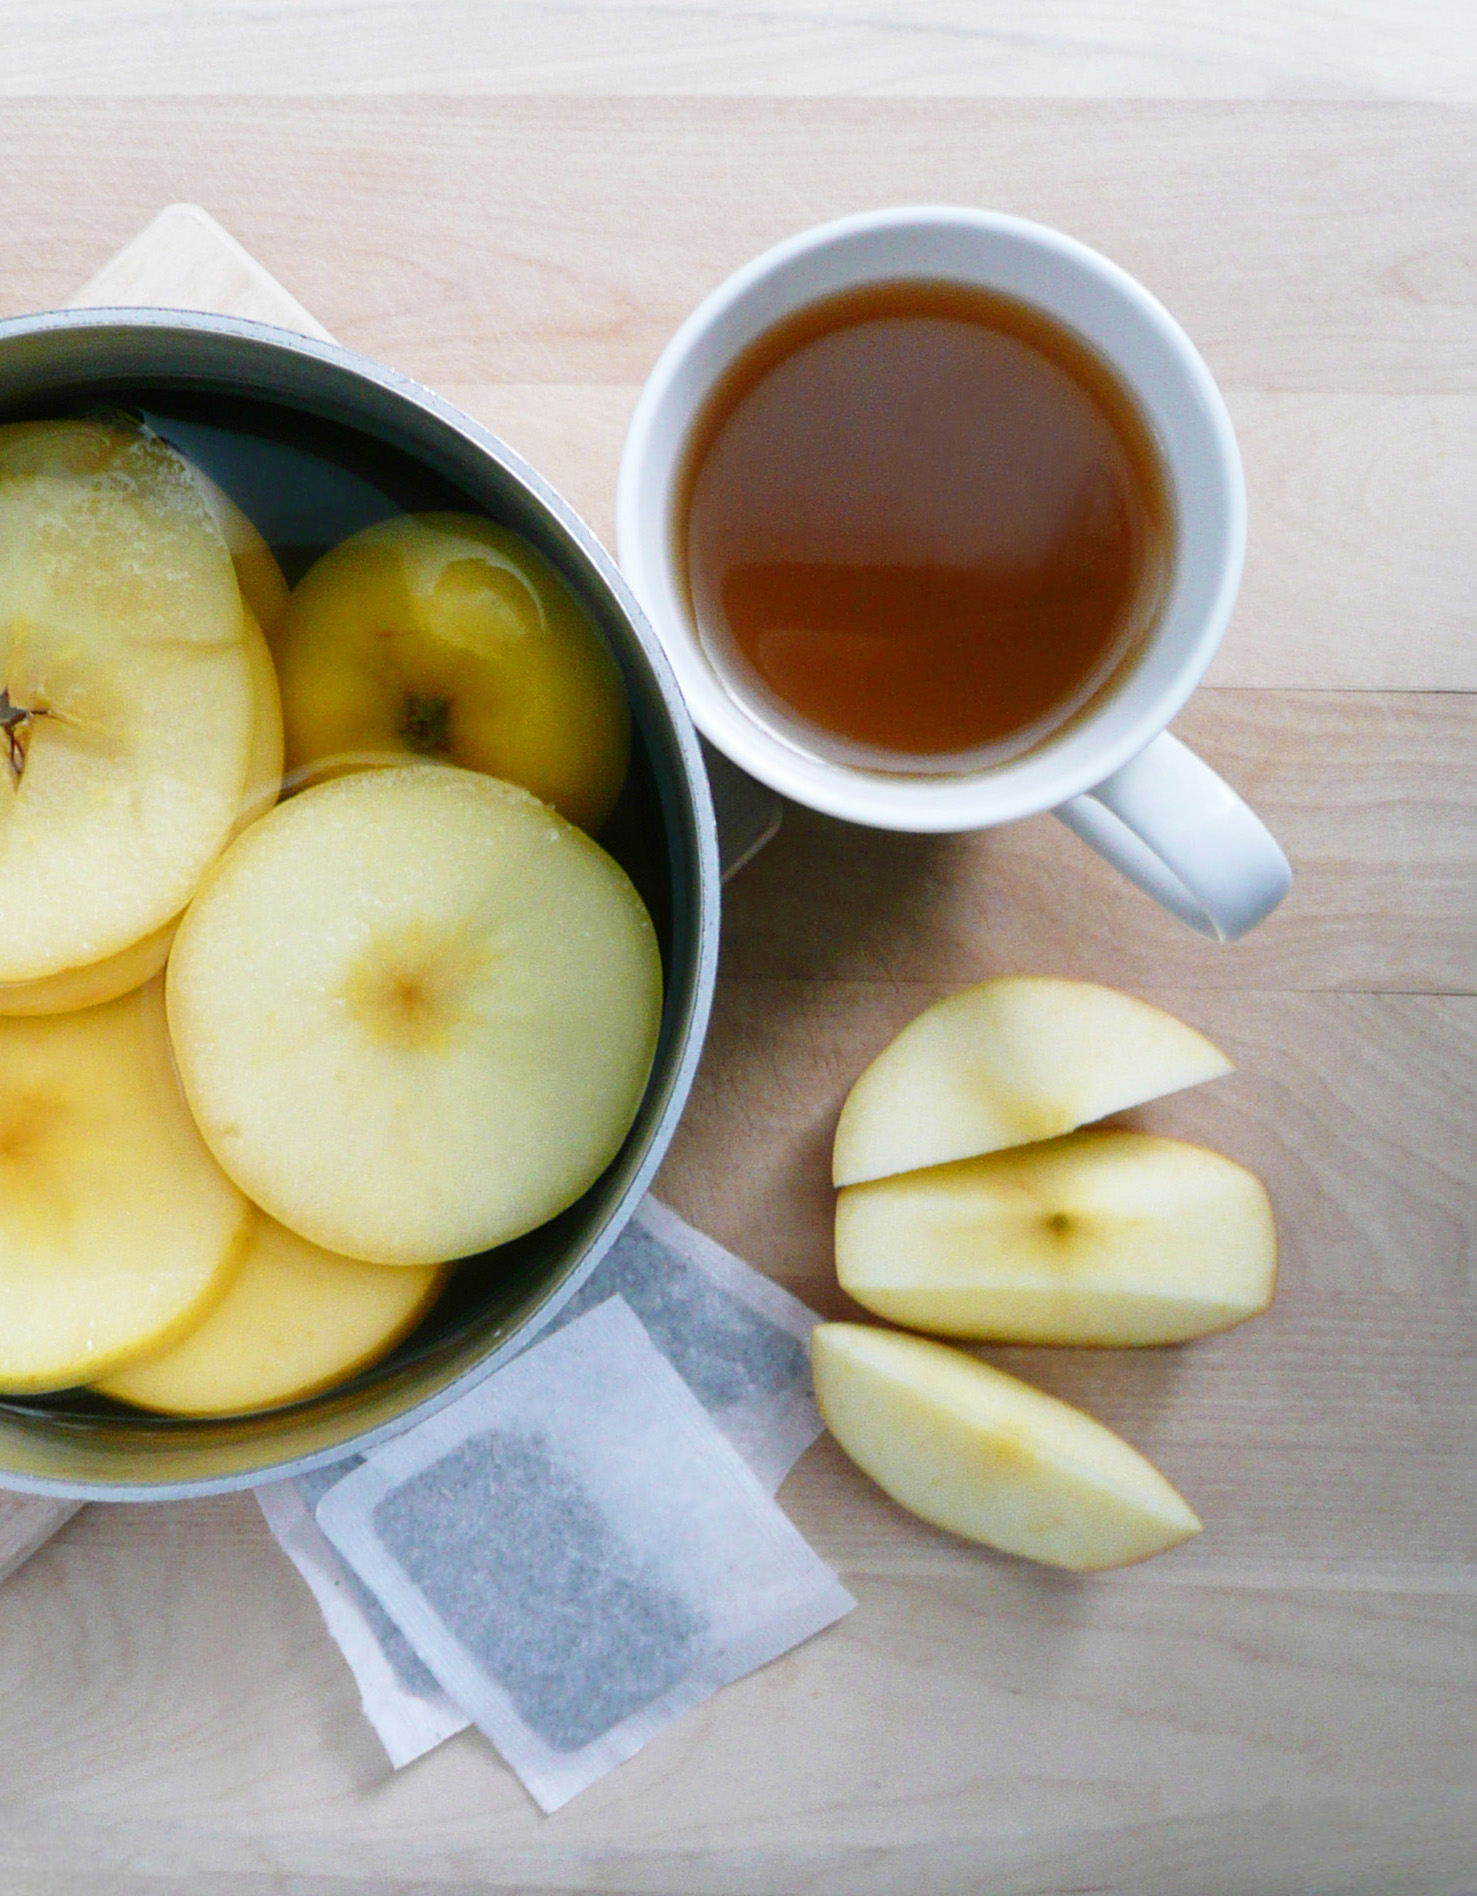
1. Bring your water to a boil. Add in the tea bags and the sliced apples. Allow the tea bags to steep for 3 minutes, and then remove the tea bags. Add your apple juice and allow the apple slices to steep in the tea for 1 hr.

You don’t have to do this but I save the tea bags and put them in cold filtered water (3 cups) and allow them to steep overnight in the fridge with some lavender (1/2 tsp dried lavender). This cold brew lavender tea has a very light subtle flavor.

The flavor will get stronger the longer that you allow the tea to steep, and I sometimes will add that cold brew lavender tea to the apple tea as well, which tastes great too.

2. Remove the apples from the tea, and stir in your honey.  You can save these apples slices to blend into a smoothie later.

Allow the tea to cool, transfer to an airtight container and refrigerate until well chilled.

apple tea 1

I hope that you enjoy the tea!

Tea is just one of those great things that brings people together. Do you have any favorite memories around drinking tea?


What To Do With Leftover Limes

P1080003-2

Limes are a great way to add zip and flavor to all kinds dishes from tacos, to pho, or sorbets, or pad thai. The the little burst of bright sourness that they give can instantly make a dish go from “good” to “Wow! This tastes AMAZING!”

Organic limes can be a little hard to find at my local grocery store. They also tend to be expensive if I don’t buy them in bulk. The cheapest place that I’ve seen them is at Trader Joe’s for about $2 for a bag for 4 -5 organic limes, so that’s where I tend to buy them from.

Limes are also not an ingredient that I tend to use very often, so before I figured out that there was a way to freeze them, I tended to buy a bag of limes when I really only needed one or two, and then forget that I had them at the back of the fridge until eventually I had to throw them out.

But no more! If you ever find yourself with leftover limes, here’s how to freeze them so that you have them on hand whenever you need them.

Instructions

1. Give your limes a good scrub with a vegetable brush. Juice them, and pour the juice into ice cube trays (any ice cube tray will do, this is just a circular one). Once the juice is frozen, transfer the lime juice cubes into a ziploc bag and keep in the freezer until ready to use.

You can set a few of the lime juice cubes in a little bowl on the counter to defrost, and then use the juice as needed.

2. Take the lime rinds and freeze them in a separate ziploc bag. You can zest the lime rinds from frozen when you need lime zest. The zest will defrost almost instantly once grated, and you can use it the same way that you would fresh lime zest.

If you find that the lime juice is a little bitter (some limes are bitter and some aren’t, I’m not entirely sure why) you can add a little maple syrup (if you’re vegan) or honey to your dish and it should balance out the bitterness.

I did this recently when I was making pico di gallo for a family get together and found the the limes that I had were a little bitter. So I added a little honey to the pico, and that smoothed out the bitterness and the bright flavor of the lime still came through. The pico came out great, and everyone happy ate their tacos and even went for seconds.

I hope that this helps you make the most of the times when you have fresh limes! If you use this tip, let me know what dishes you used your frozen limes for. It would be great to see all the different dishes that everyone was able to make with limes that they saved.


Mango Lemon Sorbet (No Churn) – Quick and Easy, Vegan, Paleo

mango 4

Sometimes the best kinds of foods are the ones that remind you of what you ate when you were growing up.

When I was a kid, we would often get takeout pasta and pizza from a local family owned Italian restaurant. The food was always good, but for me the highlight was getting to eat Italian ices anytime we ordered from that restaurant. This Mango Lemon Sorbet reminds me eating those Italian ices out of paper cups on hot summer days.

mango sorbet 2

Mango Lemon Sorbet is incredibly simple to make, and you don’t even need an ice cream maker! The mango gives the sorbet a joyful tropical flavor, and the lemon zest gives it a brightness and zing. Each bite just tastes incredible.

This recipe would also work well if you have a number of ripe mangoes that you don’t quite know what to do with before they become overripe.

mango sorbet 3

You can cut them into 1 inch chunks, freeze them, and make this mango sorbet anytime you like! It’s a delicious and satisfying way to cut down on food waste.

Mango Lemon Sorbet

Makes 1 generous serving (about 3 scoops)

Ingredients

2 cups frozen mango (1 inch chunks)

2 tbsp maple syrup*

1/2 tsp lemon zest (lime zest also works well)**

4 tbsp avocado oil (or any neutral flavored oil)***

1/4 cup water

Notes –

* The store bought frozen mango that I used wasn’t very sweet, so if your frozen mango is naturally very sweet, you can probably add less maple syrup. Just add a little at a time until you’re happy with the sweetness of the sorbet.

You can also omit the maple syrup entirely, and replace the water with 1/4 cup of apple juice instead if you’re trying avoid added sweeteners. The sorbet won’t be quite as sweet as it would be with the maple syrup, but will still taste really good.

**I actually used the frozen lemon rinds from this post for the lemon zest I used in this recipe.

** There is a part of the brain that lights up in the presence of a fat and sugar, so adding that little bit of fat makes the sorbet taste better, and helps to increase the absorption of the vitamin A from the frozen mango.

Instructions

1. Lay your mango pieces onto a plate in a single layer, giving a little space between each piece of frozen mango if possible. Allow the mango to defrost for 15-20 minutes until you can pierce the cubes of mango with a fork with little resistance.

2. Transfer the mango to a food processor and add in the water, avocado oil, lemon zest and maple syrup to taste.

Blend until smooth, stopping to occasionally scrape down the sides of the food processor with a spatula.

3. Serve immediately, or you can make a big batch of this and freeze it it for later in an airtight container. Allow to defrost for a bit before scooping and serving.

mango sorbet 5

So good… and so simple to make! I’ll definitely be making this more often come summertime.

Happy Eating!

Joyful Fruit Salad – Vegan, Paleo

fruit salad

There’s a really funny writer/actor/comedienne extraordinaire named Tiffany Haddish who has a dish called “Joyful Greens.” She says that they are “Joyful Greens” because she smiles when she picks the collard greens from her garden, she smiles when she washes them, and she smiles when she cooks them. All that joy, love and care that she puts into growing and preparing the greens make them extra delicious.

Taylor Swift also loves Tiffany’s Joyful Greens. Tiffany brought them with her to one of Taylor’s dinner parties and where they also dined on homemade barbecue chicken, potato salad, and cornbread (don’t we all wish that we could have been at that dinner party? It’s sounds amazing.)

Here’s a video of Tiffany teaching Oprah and Ellen how to make them.


While I didn’t grow these fruits myself, this is my joyful fruit salad. It’s joyful because you smile while you’re picking out the fruit (you smile at how wonderful and sweet that ripe mango smells), you smile when you see how bright and happy the different colors of the fruits are together, and you smile when you eat it (because it tastes so good…)

It’s super quick to put together, and I like packing it in a lunch because the colors look so cheerful together that I always look forward to eating it. This combination of fruits taste lovely together, and eating it feels like a real treat.


Fruit Salad 3


Joyful Fruit Salad

Makes 1 generous serving

Ingredients

1 ripe mango*

1 ripe kiwi**

1/3 cup blueberries (fresh or frozen)


Notes – *Ripe mangoes smell very sweet and fragrant. Mangoes that aren’t ripe won’t smell much like anything.

** Ripe kiwis are soft, but not squishy. If you have one that’s really firm, go ahead and leave alone for a couple days and it will ripen up.


Instructions

1. Cut the mango into 3/4 inch cubes (or cut it up however you like, this is just how I do it).

There are many ways to cut up a mango. I slice the cheeks off either side of the seed, then try and carefully slice off any remaining mango flesh that I can off of the seed. Then I cut the mango cheeks into 3/4 inch strips and use a paring knife to carefully separate the peel from the mango flesh (kind of like how you would peel an apple with a paring knife). I then cut the peel away from the slices of mango that I cut away from the seed into rough chunks and add them to a bowl with the rest of the cubed mango.

I’ve also seen people use a potato peeler to peel the mango and then slice the mango cheeks off either side of the seed, but I don’t do it that way because I find that the mango gets really slippery to hold while you’re trying to make your initial cuts.

All this is to say, cut up your mango in a way that works for you. The fruit salad will still be awesome.

2. Peel your kiwi and slice it into 1/4 inch slices.

How I peel a kiwi – Cut 1/4 inch off the top and bottom of your kiwi. Sit it flat on your cutting board and make 1/2 inch slices down the sides of the kiwi, cutting as close to the peel as you can until you’ve cut off all the kiwi peel.

You can also cut 1/4 inch off the top and bottom of a kiwi and slide spoon between the kiwi peel and the green flesh. Rotate your spoon under the peel until the peel has completely separated from the fruit.

3. Add your kiwi to the bowl of cubed mango along with the blueberries.

Enjoy!


fruit salad empty

What the bowl looks like once I packed the rest of it into a mason jar for tomorrow’s lunch. This is what was leftover, which looks very pretty on it’s own.

No worries, this didn’t go to waste. I ate it right after I took the picture, and I felt very happy and grateful.

Chocolate Banana Soft Serve Ice Cream – Refined Sugar Free, Dairy Free, Vegan, Paleo

P1080366

When I think of chocolate desserts, I want something really decadent and rich, with a deep chocolatey flavor.

This Chocolate Banana Soft Serve Ice Cream definitely fits the bill. It’s super easy to make, and takes almost no time or effort. It’s so creamy and delicious, and it’s pretty incredible that blended up frozen bananas can turn into such an amazing treat!

When I was working on this recipe, I thought about the rich and creamy chocolate ice cream that would occasionally eat before I went dairy and refined sugar free.

I really tried to get a similar flavor with this recipe, so it does have more cocoa powder and vanilla extract than you would expect it to have, which gives the banana ice cream a similar flavor to the store bought chocolate ice creams of my younger days.

Banana ice cream also cuts down on food waste because it’s the perfect thing to make when you have overripe bananas that you don’t know what to do with. No need to throw them away! Just peel them, and freeze them, and you can have ice cream whenever you want. How cool is that?

You can also adjust the flavor of the ice cream to your liking really easily. If you want it a little sweeter (or if your bananas could have used a little more ripening before you froze them) you can add a little more maple syrup, or more cocoa if you want a deeper chocolate flavor.

However you make it, I hope that this ice cream brings a little more joy to your day.


Chocolate Banana Soft Serve Ice Cream

Makes 1 serving (about 3/4 cup)

Ingredients

1 thawed frozen banana

3 1/2 tbsp unsweetened cocoa powder *

2 1/2 tbsp + 1 tsp maple syrup

2 tbsp + 2 tsp water

1 tsp vanilla extract

tiny tiny pinch of salt


*I didn’t use a heaped tbsp, just sort of slightly higher than a level tbsp. The cocoa powder that I used was the Ghirardelli unsweetened cocoa powder.

Instructions

1. Cut the thawed banana into half inch slices with a paring knife. If the banana is too hard to cut, then let it thaw for another 5 minutes or so before trying to cut it again.

2. Add all the ingredients into a food processor and process until smooth, scraping down the sides of the bowl occasionally.

If you want a firmer texture, you can spoon the mixture into a bowl and put it into a freezer for another 15-20 minutes.

For garnish, I just used a paring knife to shave pieces off a slightly thawed frozen strawberry. It gives it a nice color and a bit of little flair, and the strawberry flavor goes well with the banana and chocolate flavors of the ice cream.

P1080371

Happy Eating!


Vanilla Extract

Kitchen Tip – Easy Way To Get The Cap Off A Vanilla Extract Bottle

vanilla


If you’ve ever known the struggle of baking cookies and not being able to get the little cap off of the vanilla extract bottle, this one’s for you.

Here’s the secret –

Wrap a few thin rubber bands around the cap of the vanilla extract. The rubber bands make the smooth metal of the cap easier to grip. The bottle of extract should be a breeze to open after that.

I use the rubber bands that come wrapped around vegetables like kale, or green onions, or bunches of cilantro or parsley. It’s a thrifty solution, and makes baking with vanilla extract much much easier.

This idea for this came to me when I was testing the recipe for the maple vanilla sugar cookies. For a moment I was concerned that I was not going to be able to get the cap off of the bottle of extract, and I actually thought for a second “Do I really need vanilla in this recipe?”

The answer was “Yes. You do need vanilla in maple vanilla sugar cookies.” So I had to come up with a solution pretty quickly, and here we are!

I hope that this kitchen tip helps you to never again be held back from your baking dreams by another difficult to open vanilla extract cap!

Happy Baking!


Instant Homemade Vegetable Stock

Instant Homemade Vegetable Stock Mix – Vegan, Soy-free, Gluten-Free

P1080022-2

Vegetable stock is easy to make, but can be a little bit of hassle, and takes up a lot of space in the freezer. Store bought veggie stock can be expensive, and it can have a lot of added ingredients that leave you wondering “What is organic caramel coloring?” and “Why does it need to be in vegetable stock?” I find myself asking the same questions when I read the back of soup bouillon labels as well.

If you too have these questions (and are wondering if there is an easier way to make vegetable stock with less additives) this might be the answer that you’ve been looking for.

This is a super simple and easy recipe to always have vegetable stock on hand. This recipe is soy free, thrifty and easy to customize.

We’re going to basically make a spice mix that contains a lot of flavors that you would normally find in vegetable stock. You can almost think of it as a tea. Admittedly, it takes 10 minutes to steep (so not quite “instant”) but it’s still pretty quick.

You can also make a large batch of this veggie stock mix and put it into a little jar to use as needed.

If you don’t like the little bits of dried spices in your soup, you can strain the broth through a coffee filter, or place the spices in some layers of cheese cloth, tie it up with some kitchen twine and place it into your soup pot (basically like a tea bag) to fish out later once the flavors of the broth have infused.

I hope that this recipe helps you make lots of wonderful soups in the future. I plan on making a noodle soup with this pretty soon. Perfect for the cold weather.


Makes a scant 2 tbsp of veggie stock mix = 4 cups of vegetable stock

Ingredients

1 tsp granulated onion

3/4 tsp + 1/8 tsp celery salt

1/4 tsp + 1/8 tsp of granulated garlic

1/4 tsp dried rubbed sage

1/4 tsp dried parsley

1/4 – 1/2 tsp sea salt

1/8 tsp black pepper


Instructions

Stir all the spices together. Add the mixture to 4 cups of boiling water and allow to steep for 5-10 minutes. You can strain the mixture at this point or leave the spices in the stock depending on your preference.

Use in your favorite soup recipes, or add some noodles, and some veggies for a quick and filling lunch or dinner.

Enjoy!

stainless steel pan

How to Make a Stainless Steel Pan Non-stick (non-toxic)

stainless steel pan 1

(This is what the pan looks like before the coating of oil).

When I decided to stop using non-stick cookware, one of the hardest thing to get my head around was how I was going to be able to cook things like pancakes and sunny-side up eggs.

I googled “how to make a stainless steel pan non-stick” and wasn’t able to find an answer.

So after much trial and error, I finally figured it out. And it’s actually super simple to do.

By heating the oil in a pan this way, the oil binds to the surface of the steel (forming a polymer – whatever that means…), creating a temporary non-stick coating. I’ve used this method with olive oil, coconut oil, and avocado various times and all have worked great.

Instructions

1. Start with a cool stainless steel pan. Rub the bottom of the inside of the pan with probably about ½ tsp (maybe less) of olive oil with either your fingertips or a paper towel. You only need a thin layer, but want to coat the entire bottom of the pan so that there are no gaps in where you put the oil.

2. This can get a little smelly so, I’d turn on the cooking fan for this.

Put the pan onto a cold burner and turn the heat up to medium. Hover your hand a few inches above the pan. When the air over the pan feels about as warm as a warm bath you’d give a baby (so not too hot) then turn the burner off, and leave the pan to cool on the burner while you prep your veggies for your stir-fry, or your pancake batter.

3. Then just cook as usual.

The non-stick coating is temporary, but you should be able to get through cooking a batch of pancakes, or fry a few eggs on this surface just fine before you need to add a little more oil.

When you’re done cooking, you can scrub this non-stick surface off with some baking soda mixed into a paste with a little dish soap and a scrubby sponge. When I need a non-stick surface next time, I just repeat the process.

stainless steel pan 2

(This is what the pan looks like after it’s been heated with the oil).

For me, I cook on an electric stove, and I’ve done this enough times now that I know that if I start with a cold pan, it takes 5 minutes to heat to the baby bath level of warmth. Now I can just rub the pan’s surface in oil, put it onto the burner, turn on the stove, turn on the fan, and set a timer for 5 minutes.

You may have to adjust the timer for your stove, as you may find that your stove heats up more quickly or more slowly than mine does.

I always stay in the kitchen as I do this, just in case the pan starts to smoke.

If you see the pan start to smoke, pull the pan off the hot burner right away (also turn off the burner) and put the pan on one of the cold burners to cool. Once cool, it should still have created a non-stick surface and you can just cook on this pan as usual.

If you fry an egg sunny side upon this surface, I’d cover the pan with a plate or a lid while the egg is cooking. The egg white cooks through more evenly with a lid on the pan.

What would you cook using this trick? Let me know in the comments below.

Happy Cooking!


Cashew Whipped Cream

Cashew Whipped Cream – Dairy Free, Gluten Free, Vegan

P1060684-2.jpg

This cashew whipped cream is a great alternative to store bought whipped topping, and it’s super easy to make.

On it’s own, this cashew whipped cream isn’t super flavorful, but poured over a fresh summer peach it is absolutely spectacular, and it gives a wonderful creaminess when dolloped over mini pecan tarts, or pumpkin tarts at Thanksgiving.

Once it’s blended, you can add another tsp. of maple syrup, or a little more vanilla to taste, but the pie fillings will already be quite sweet, so try the cashew cream on a tart with some pie filing before adjusting the flavor of the cashew cream.

The oil may seem like a little bit of an odd addition, but it gives the cashew cream a little extra richness, and rounds out the flavor of the cashew whipped cream along with the sweetness of the maple syrup.

If you’re making a lot of tarts, you can easily double this recipe if need be. You can make this in advance and then keep it in an airtight container in the fridge until you’re ready to serve.

P1060787

Cashew Whipped Cream

Makes about ¾ cup.

Ingredients

½ tsp vanilla extract

1 tsp maple syrup

½ cup raw cashews (soaked overnight)

5 ½ tbsp. water

1 -1 ½ tsp avocado oil, or any neutral flavored oil (optional)


Instructions

1. Soak the cashews overnight, and drain. Add the cashews to a blender along with the rest of the ingredients and blend until smooth and creamy.

2. Spoon over fresh fruit or mini tarts. Serve.

Note – If you forget to soak the cashews, you can boil them for 50 minutes (it’s a long time I know, but they plump right up), adding water the pot occasionally if the water runs low. Drain them and allow them to cool to room temp before using

roasted sweet potatoes

Roasted Sweet Potatoes

P1060409

Roasted sweet potatoes are surprising versatile and super simple to make.

I roasted sweet potatoes a number of ways until I found Gwyneth Paltrow’s recipe for roasted sweet potatoes in her book It’s All Good.

This is a version of her recipe. I added the olive oil to crisp up the skin, and also put the sweet potatoes on a sheet pan (instead of roasting them directly on a baking rack) just for the sake of easy clean up.

I usually roast 4-5 of them at a time on a stainless steel baking sheet or a large glass pyrex dish, and they make a quick snack when I’m hungry but a little too tired to think to hard about what I want to eat. They usually get sweeter when they are refrigerated overnight. For a quick snack, I sprinkle them with a little cinnamon, and maybe a drizzle of little maple syrup if I’m craving something sweet

The cheapest place that I found organic sweet potatoes was at Costco (they don’t always have them) but you can get a 10 lb bag of them for around $11. Trader Joes almost always have them year round, and they are a little more expensive than Costco, but much cheaper than anywhere else.

You can puree them and use them to make my pumpkin tarts, mash them with some cinnamon and maple syrup, or add them to my vegan cheddar bay biscuits (recipe coming soon!).

Ingredients

4-5 sweet potatoes

½ – 1 tsp olive oil

Instructions

1. Preheat the oven to 425.

2. Give the sweet potatoes a good scrub. Pat them dry with a paper towel and prick them 4-5 times with a fork.

3. Rub the olive oil over the sweet potatoes, place them on a baking sheet or pyrex dish and roast for 1 hr.

4. If the sweet potatoes are thicker than 2 inches in diameter, cook them for an addition 15 -30 minutes until cooked through and you can pierce them with a paring knife with no resistance.

To clean up the caramelized/ blackened sweet potato goo, soak the pan or baking sheet overnight. Pour off the water and make paste from a little baking soda and dish soap. Use a scrubby sponge and baking soda paste to scrub off any of the remaining sweet potato goo.