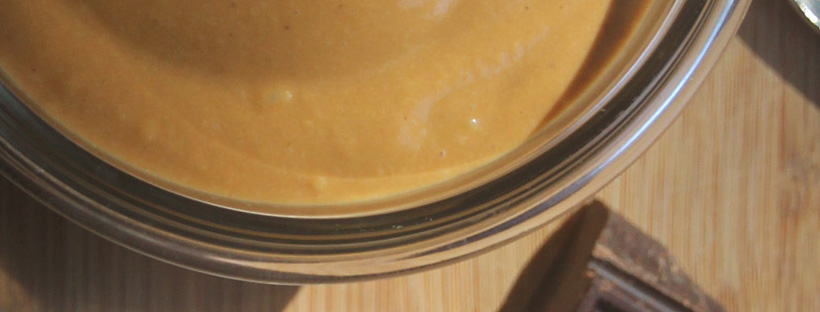
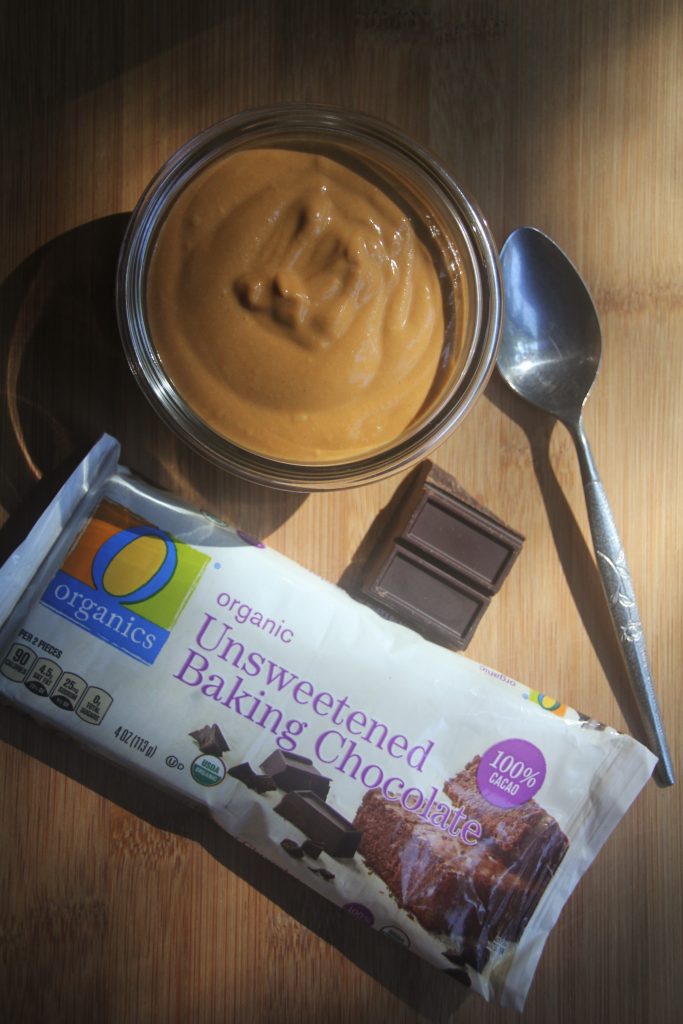
This is my super easy recipe for chocolate pudding! Eating this reminds me of eating those chocolate pudding cups when I was a kid. I like to make a big batch of this and stash it in the fridge for a quick snack and it keeps for about 5 days in fridge.
This pudding is lovely and thick, and has a rich and decadent chocolate flavor but no added sweeteners. The pudding still tastes sweet (it gets is sweetness from the milk, coconut oil and sweet potatoes) and it’s a nice treat for days when you want to eat something that tastes delicious but also helps you get in an extra serving of vegetables.
You can make it with any kind of milk that you like (the milk that I use for this recipe is the organic lactose free 2% milk from Costco which tastes very sweet without any added sugar, but you can use coconut milk for a vegan version). Feel free to play around with the flavors of this pudding. You can add a bit of peppermint extract for a mint chocolate pudding, or swap out some of the milk with a little coffee for a slightly deeper chocolate flavor.
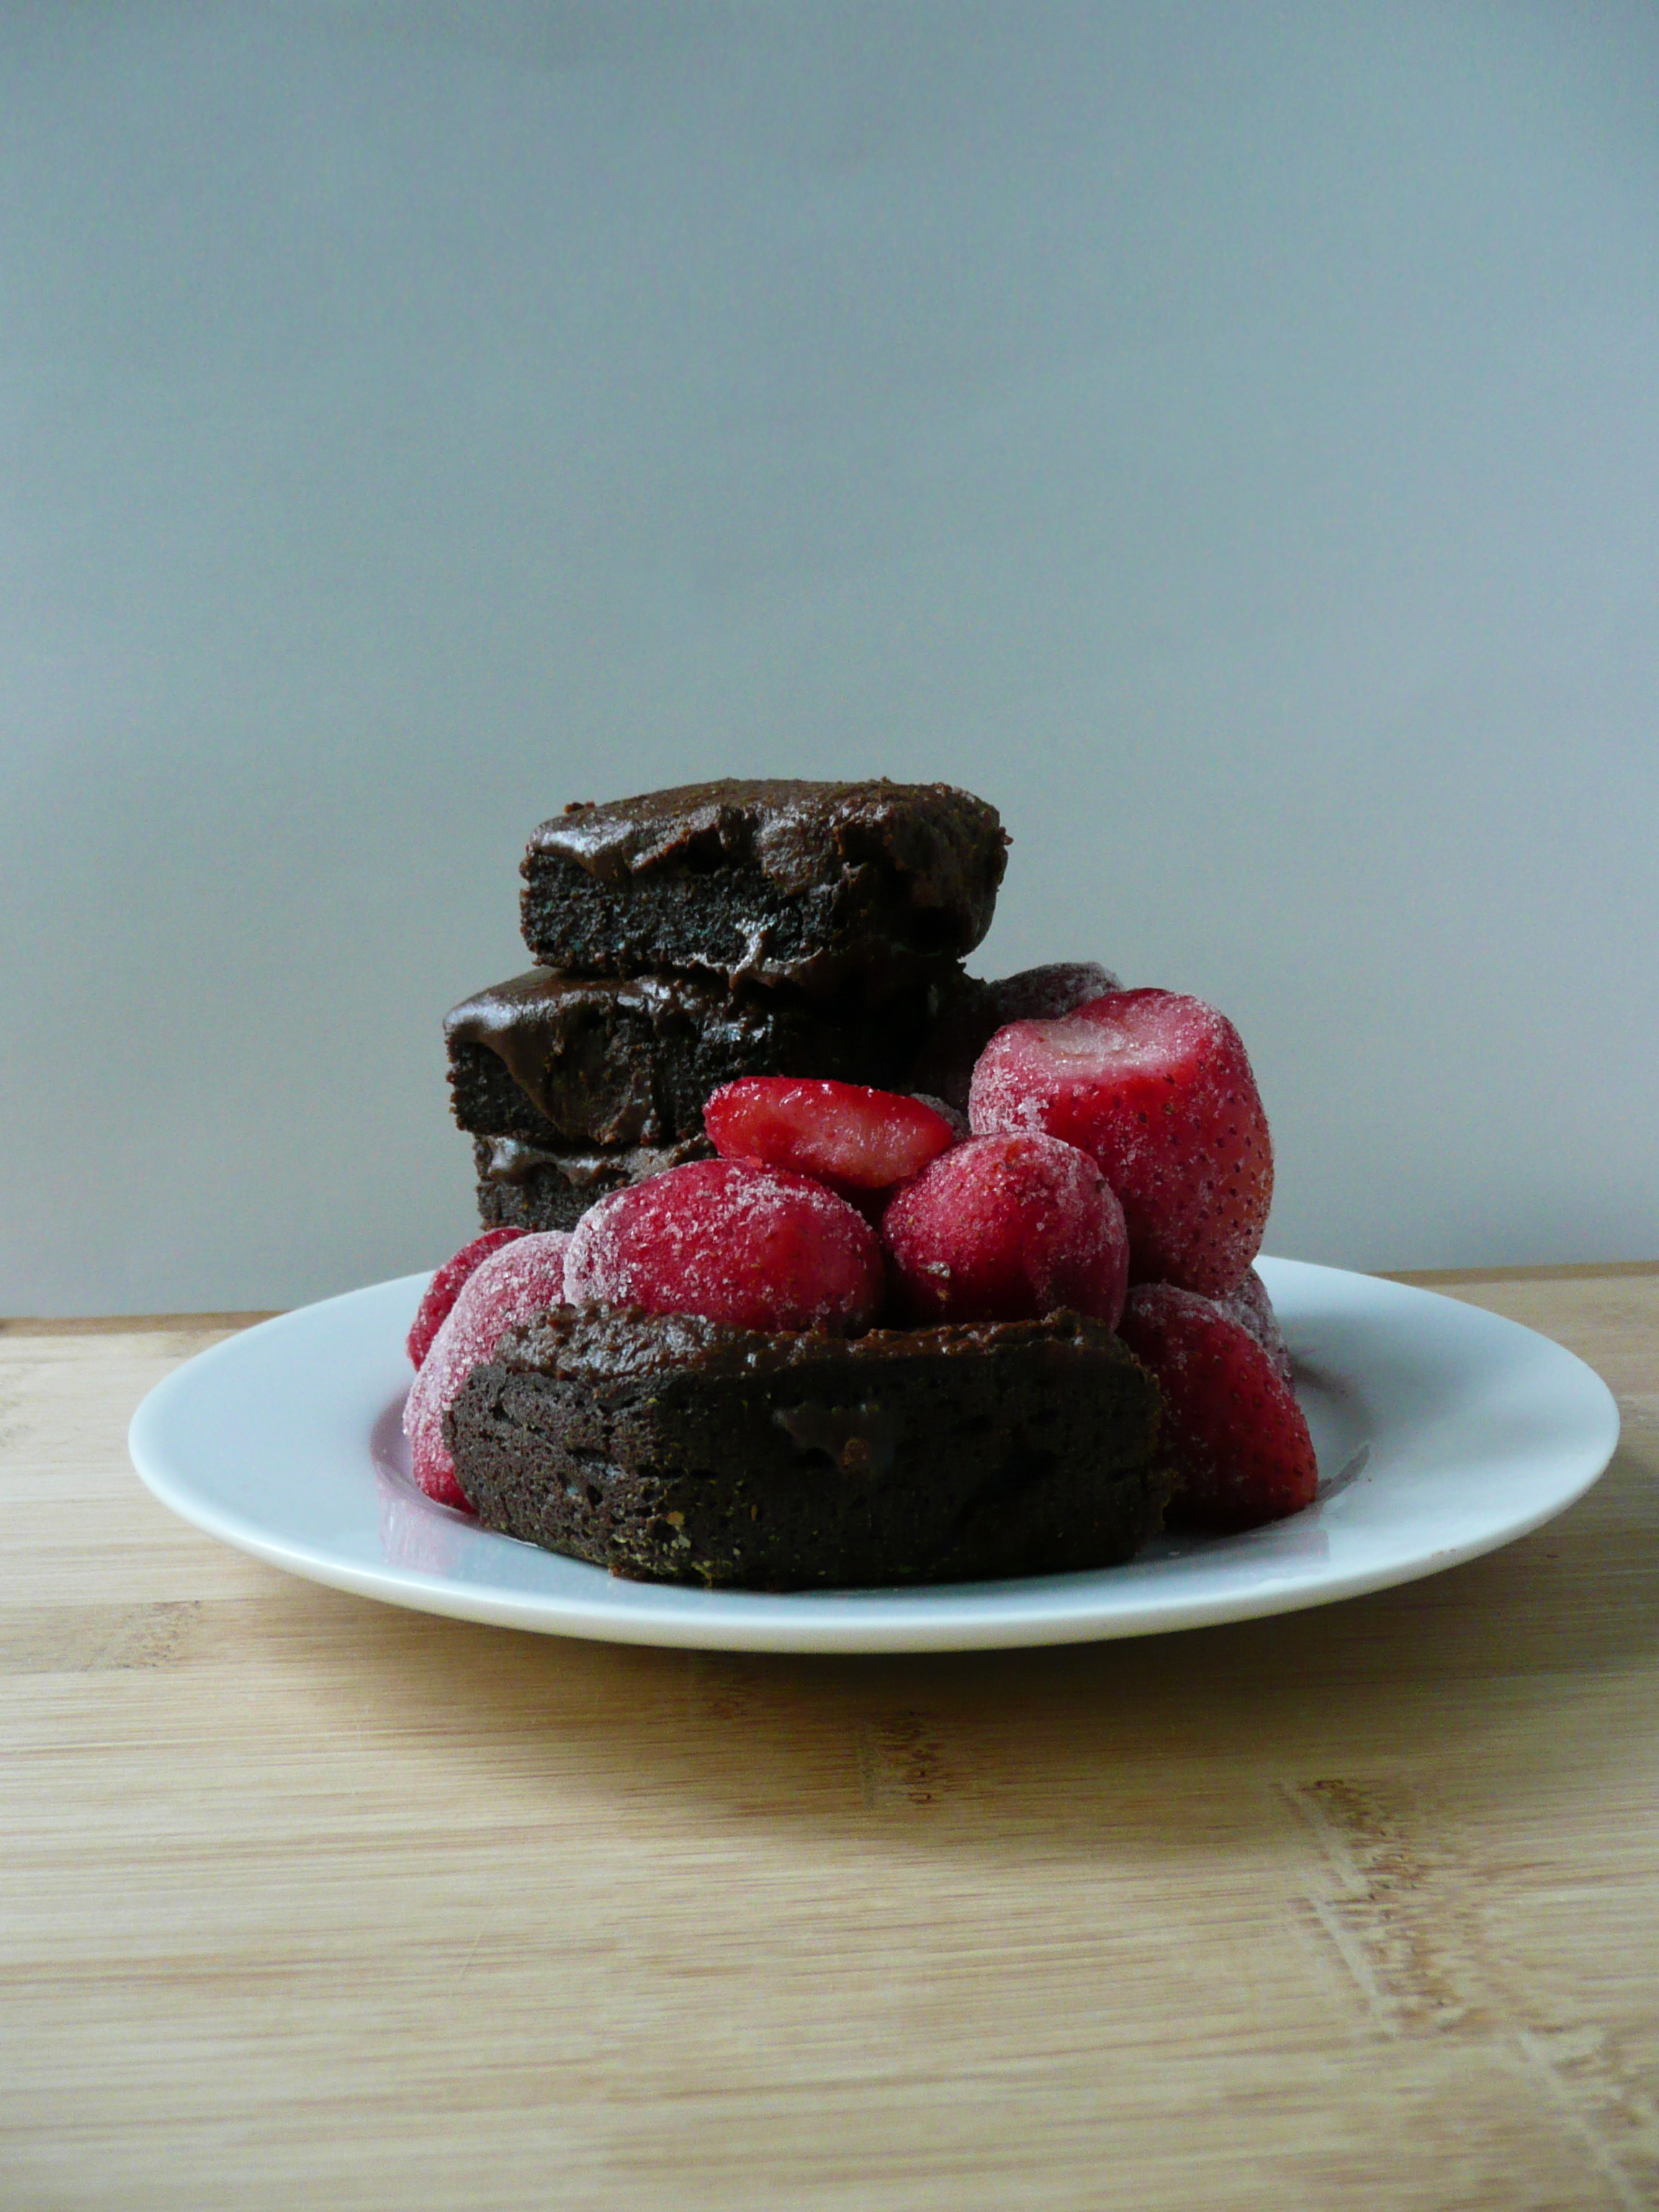
I like to freeze 1 cup portions of this and then let it thaw on the counter for about 30 minutes so the pudding sort of becomes this fudgesicle / chocolate ice cream-like frozen treat. In luscious pudding form or frozen, this treat is great when eaten with fresh strawberries.
You can also add about a 1/2 cup less milk and blend it in batches in a food processor for a more chocolate mousse-like texture.
Easy Chocolate Pudding
Makes 6-8 generous servings
Ingredients
28 oz cooked sweet potato – (3 medium sweet potatoes, or about 4 cups diced)
1.5 oz unsweetened baking chocolate
2/3 cup coconut oil
2 cups milk of choice
small pinch of salt
Instructions
1. Peel your sweet potatoes and cut them into 3/4 inch cubes. Steam them for about 30 minutes until they are soft and easily pierced with a fork. Allow to cool to room temp, measure out 4 cups of sweet potatoes and transfer to a blender.
2. Pour the milk into the blender and add the salt. Melt the coconut oil and chocolate over medium low heat stirring frequently (this took about 5 minutes for me). Pour the chocolate and coconut oil mixture into the blender and blend until smooth, stopping the blender occasionally to scrape down the sides and give it all a good mix with a spatula.
3. Pour the pudding mixture into a airtight container and refrigerate overnight until thickened.
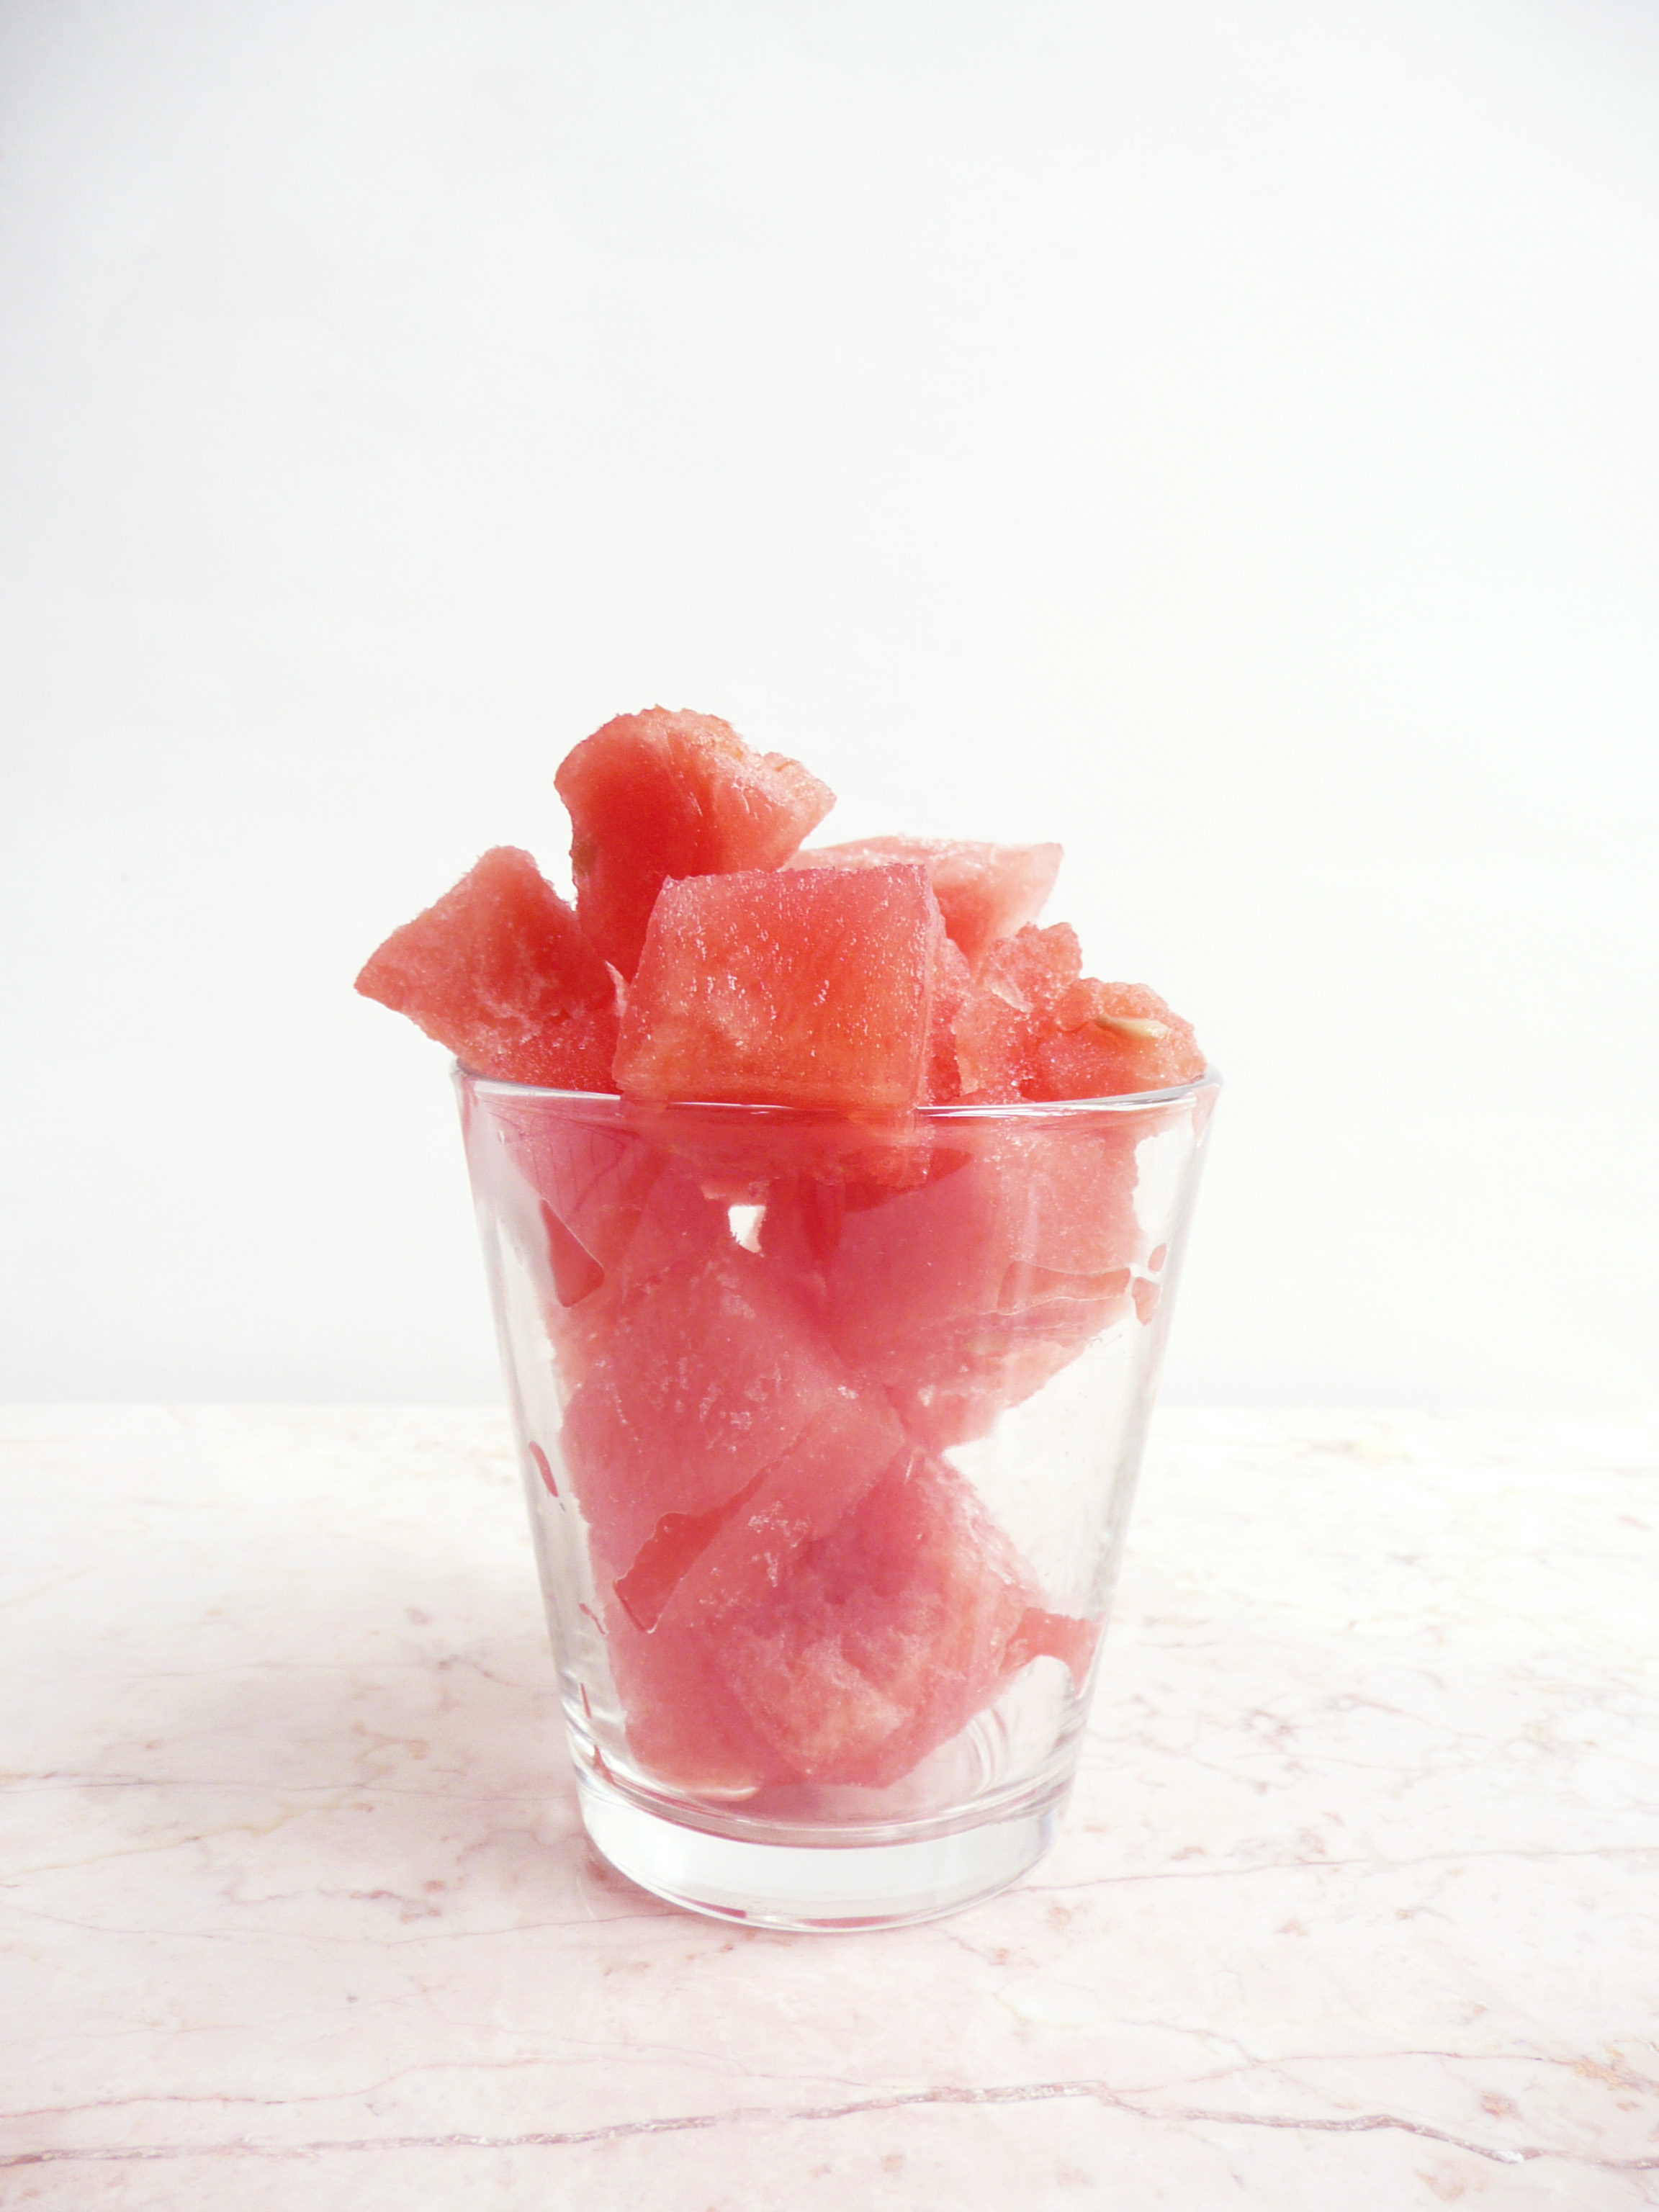
If you’re living through a heat wave at the moment what you probably want most in the world is something sweet, cold, and refreshing to eat.
Here is the simplest of desserts to keep on hand for a hot day. These little cubes of frozen watermelon are delicious and perfect for popping into your mouth (straight from the freezer) to cool you down.
Refined sugar free, dairy free, paleo, and all that jazz… but what’s really important is that they taste so good!
Iced Watermelon Cubes
Makes lots and lots of servings
Ingredients
1 sweet seedless watermelon (pick the sweetest one you can find)
That’s it! 😀
Instructions
1. Cut the watermelon into 3/4 inch cubes (this is a perfect size as they can be eaten straight from the freezer and they thaw quickly too).
2. Freeze the cubes flat in ziptop bags.
To serve, scoop about 1 – 1.5 cups (or however much you want) of the frozen watermelon cubes into a bowl and eat with a spoon.
Ta-Da! I hope that these little cubes of watermelon joy make your summer days a little more awesome. 🙂
Sometimes the best kinds of foods are the ones that remind you of what you ate when you were growing up.
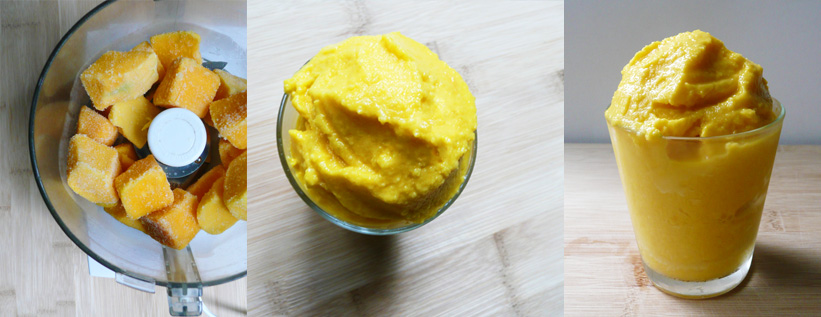
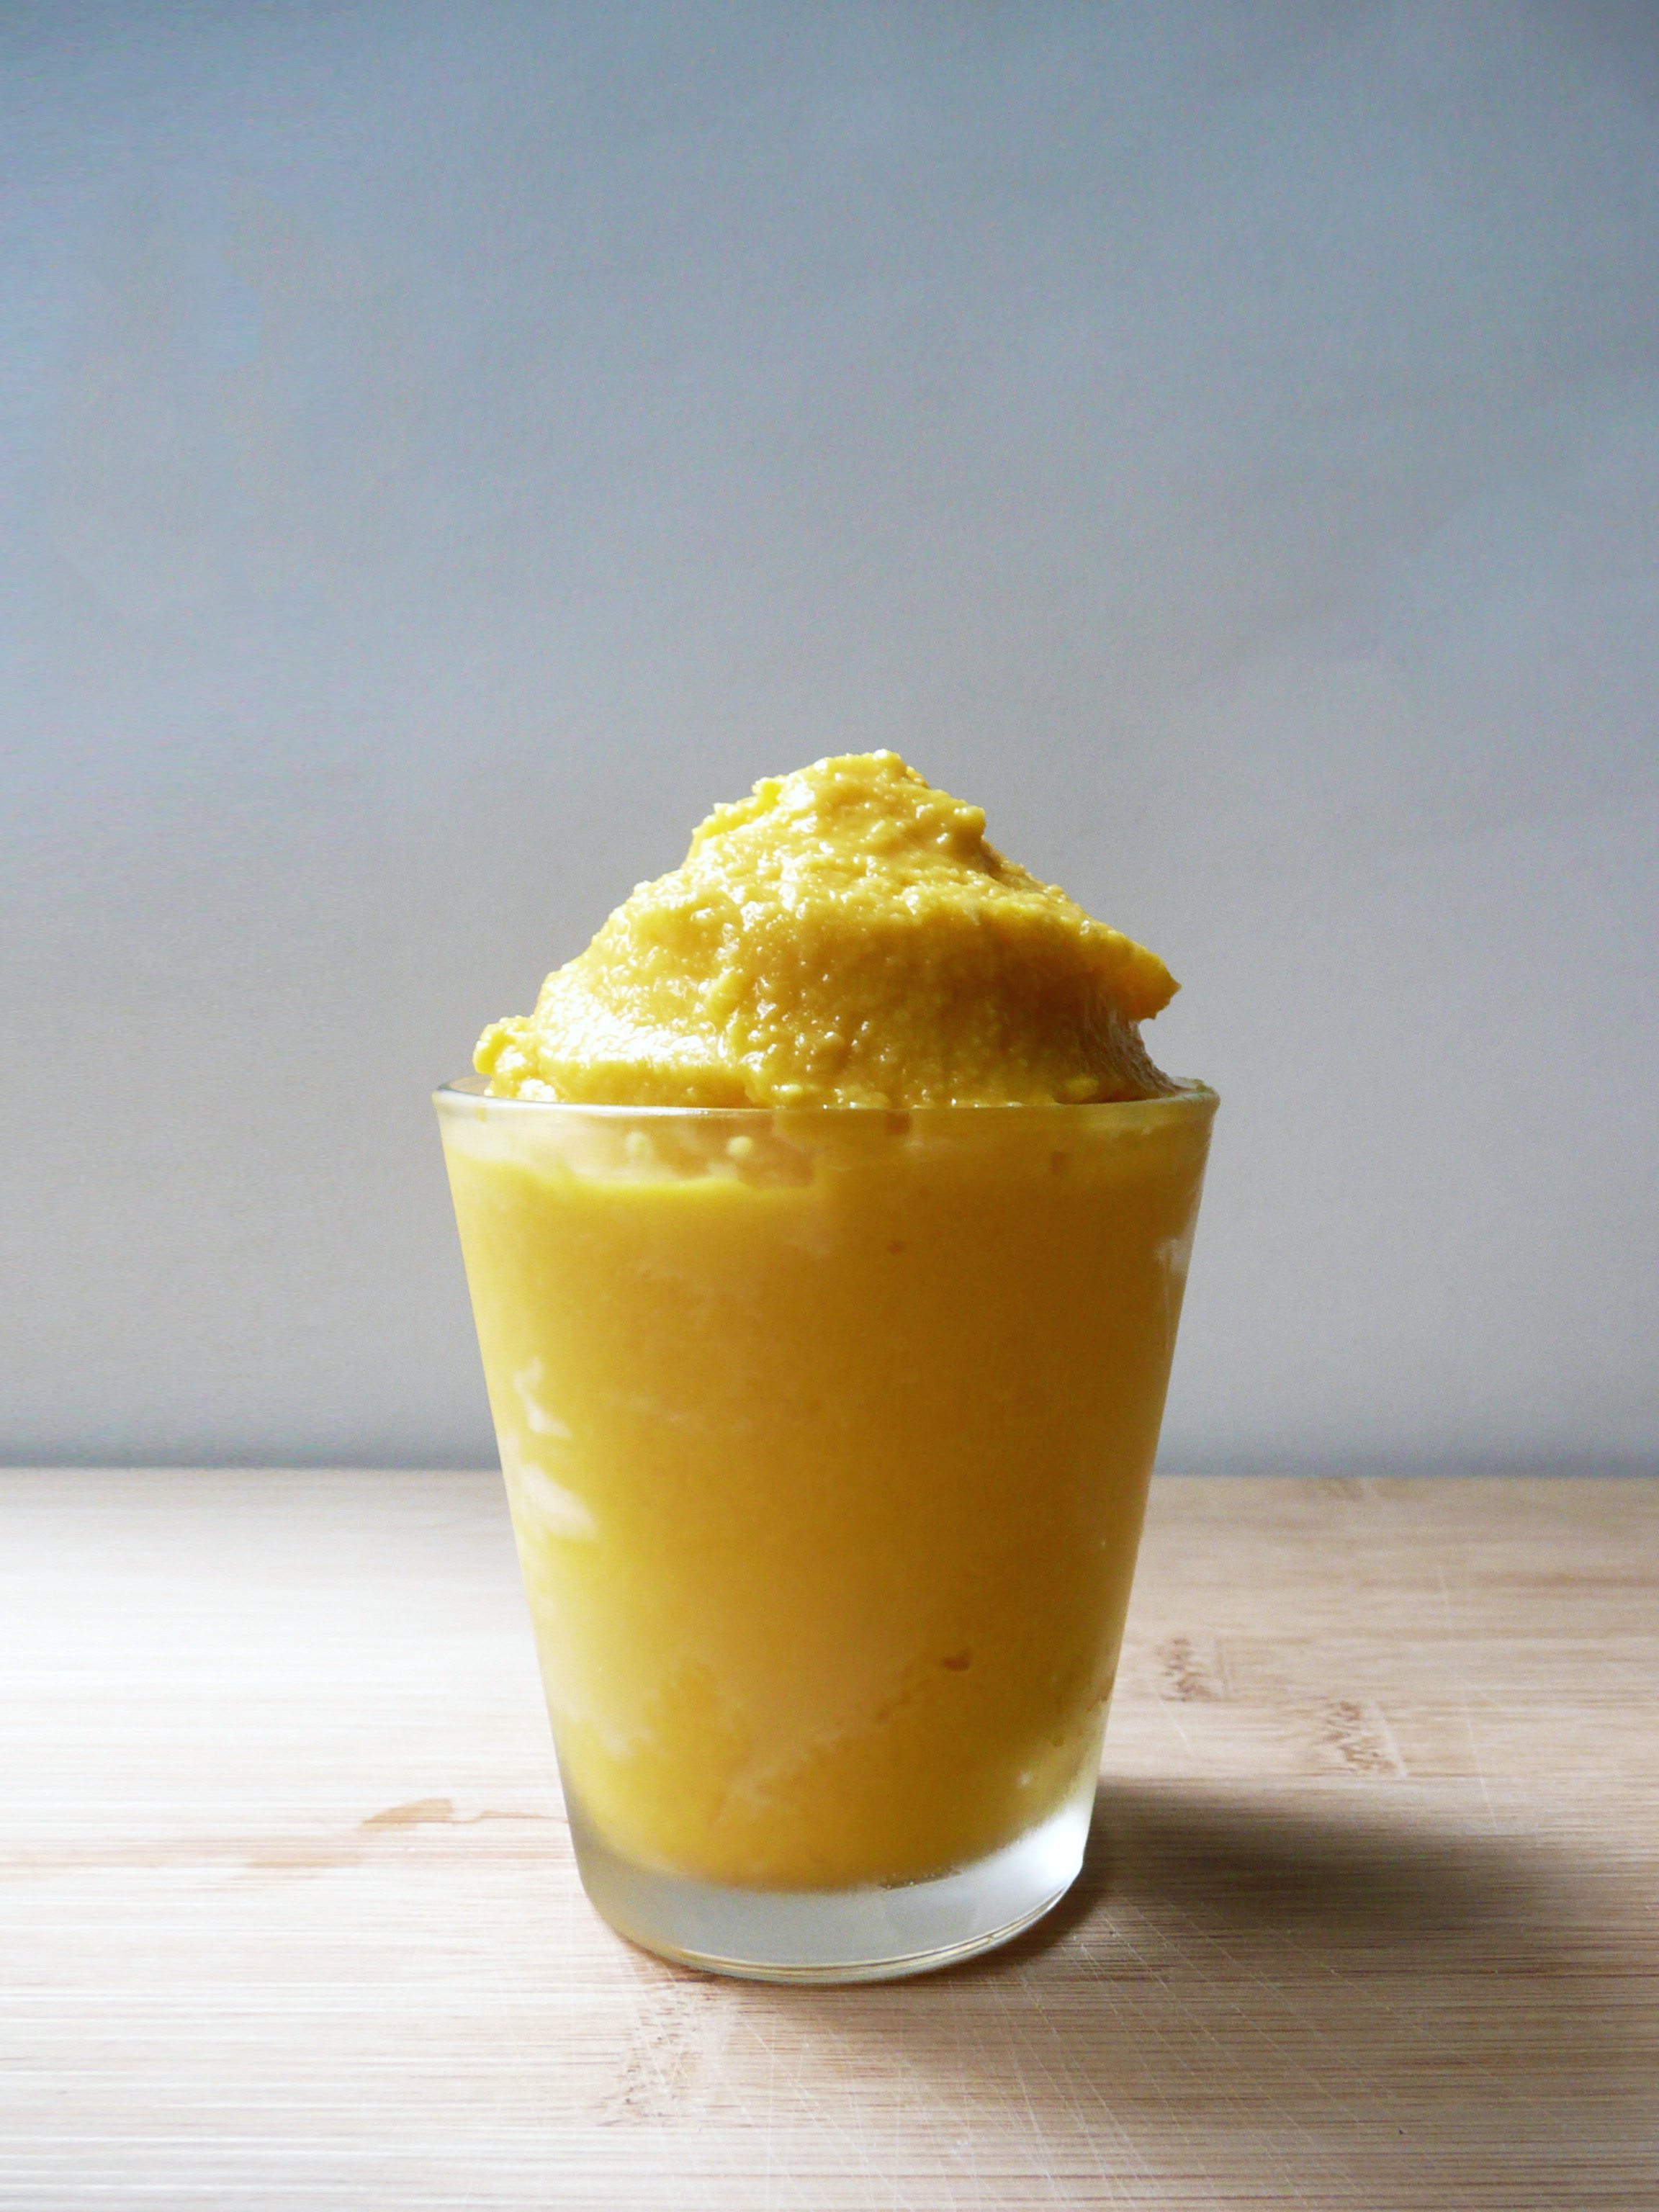
When I was a kid, we would often get takeout pasta and pizza from a local family owned Italian restaurant. The food was always good, but for me the highlight was getting to eat Italian ices anytime we ordered from that restaurant. This Mango Lemon Sorbet reminds me eating those Italian ices out of paper cups on hot summer days.
Mango Lemon Sorbet is incredibly simple to make, and you don’t even need an ice cream maker! The mango gives the sorbet a joyful tropical flavor, and the lemon zest gives it a brightness and zing. Each bite just tastes incredible.
This recipe would also work well if you have a number of ripe mangoes that you don’t quite know what to do with before they become overripe.
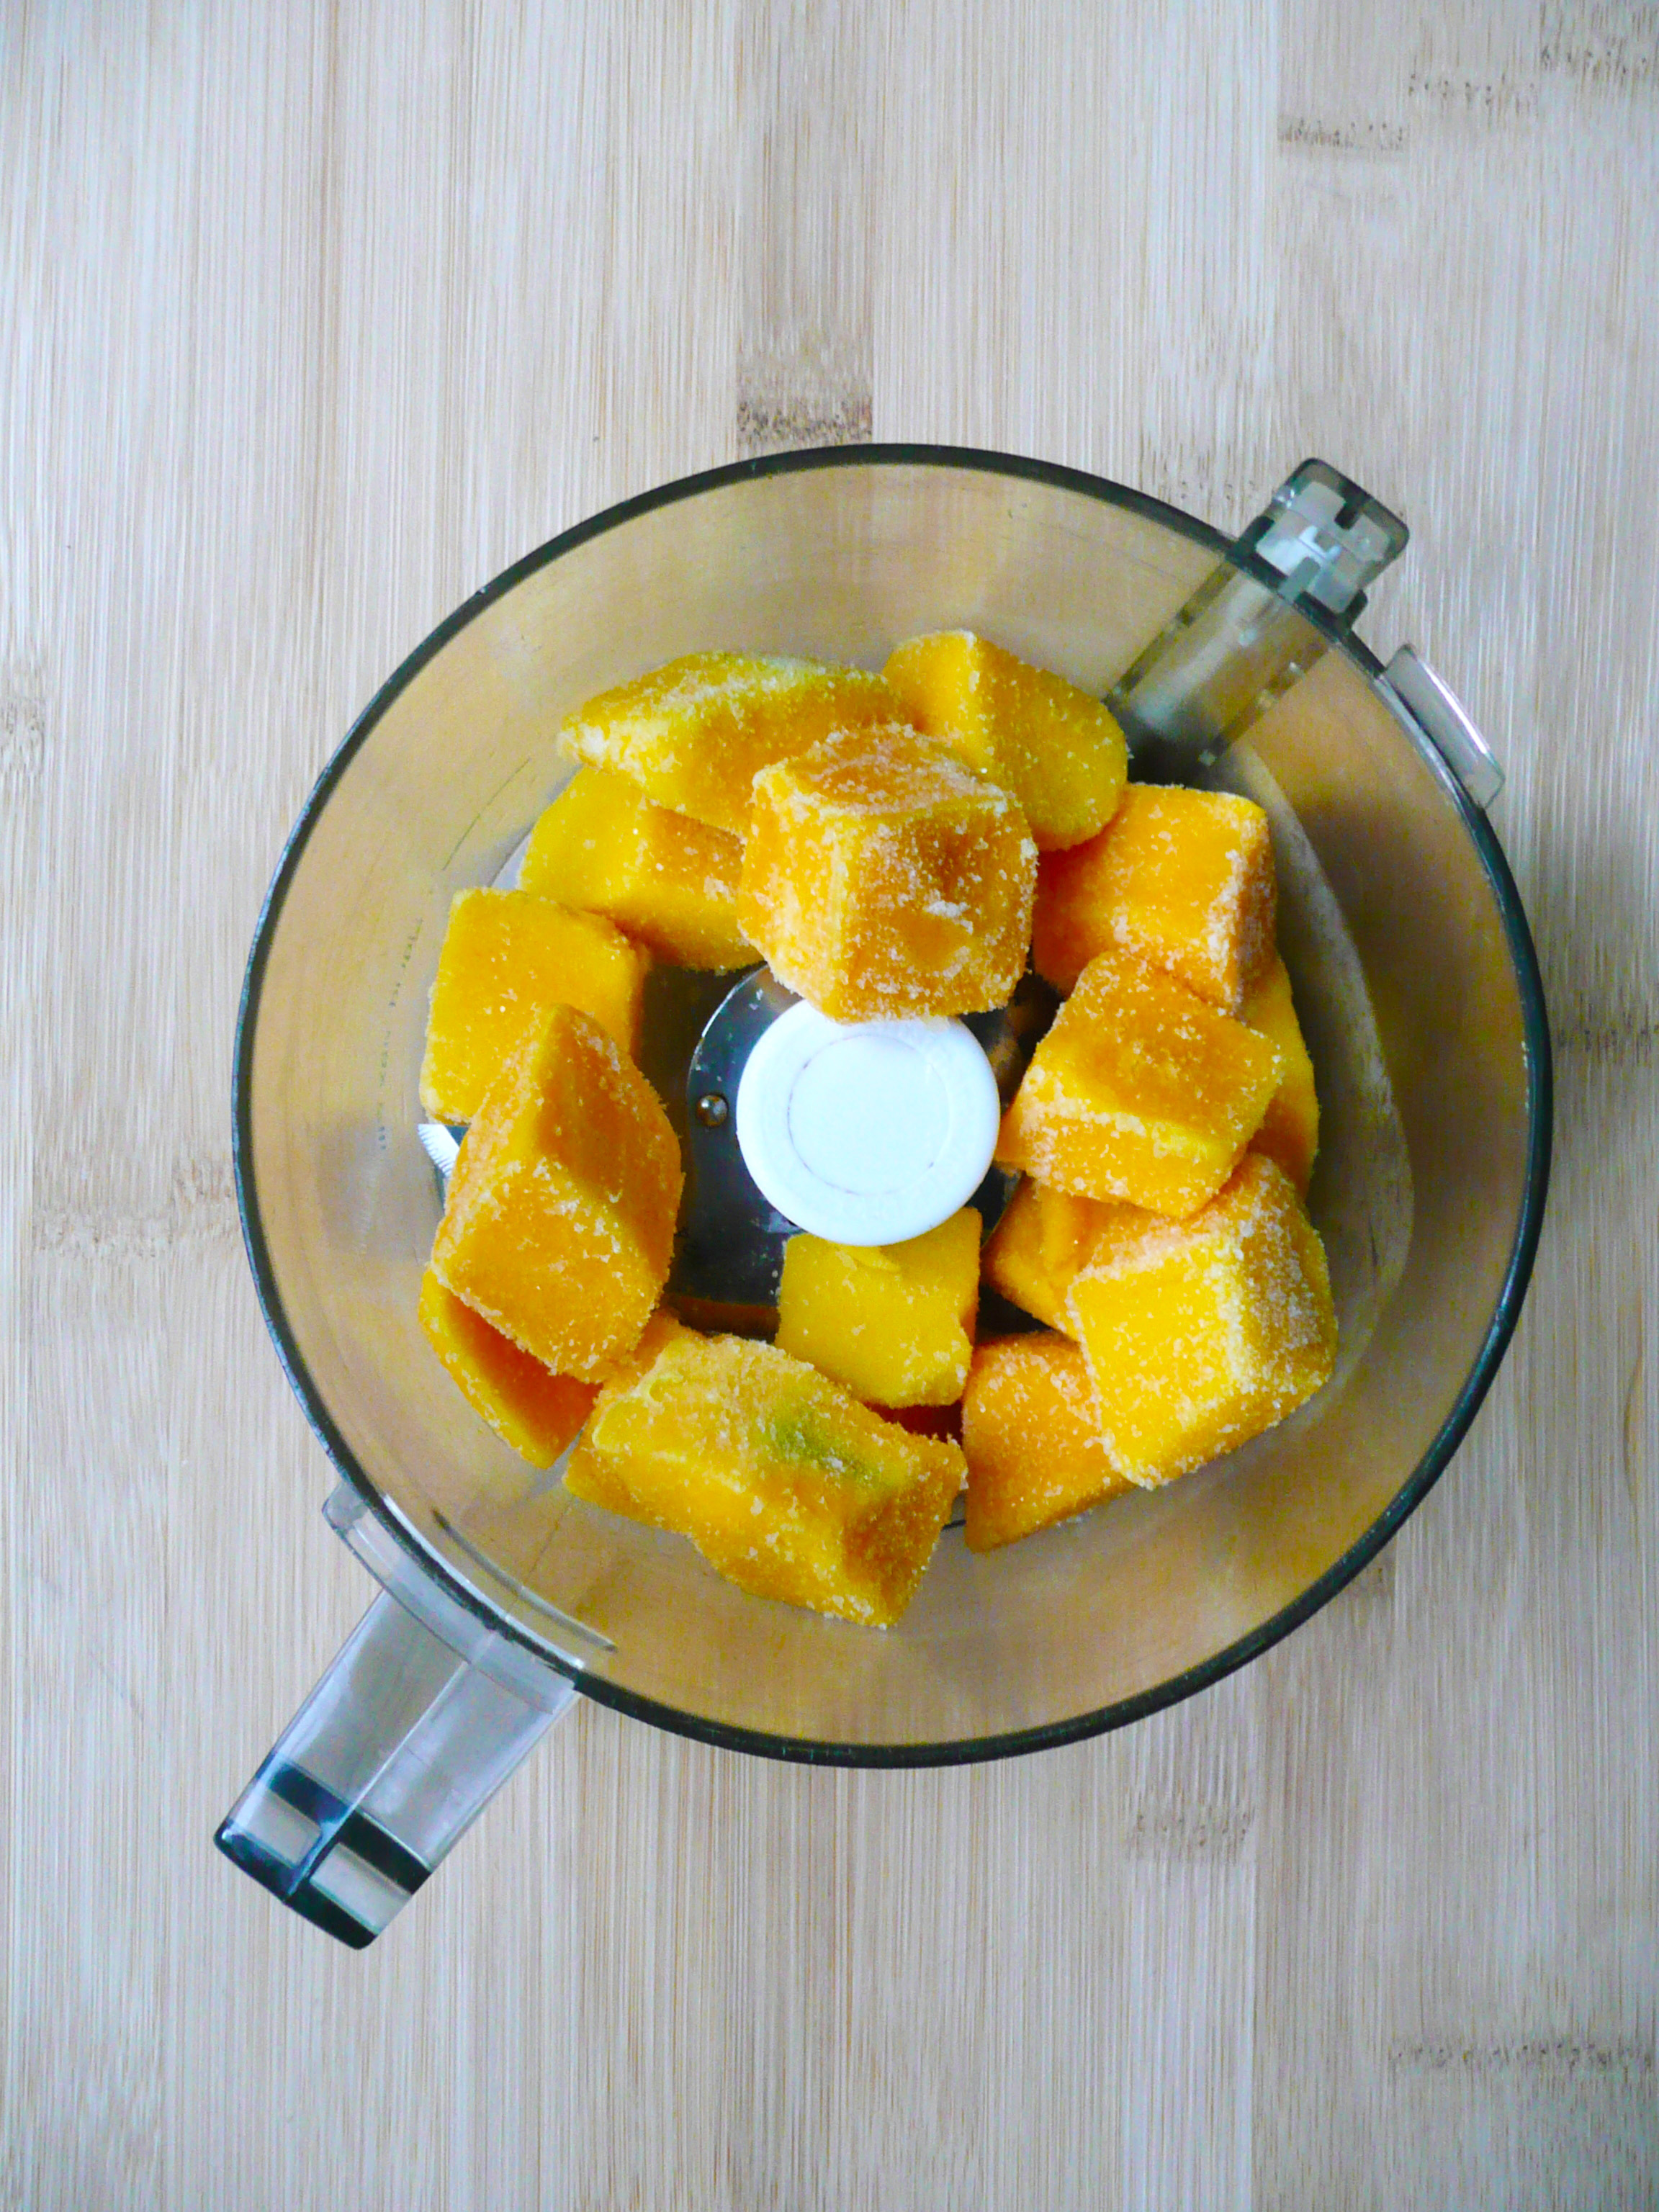
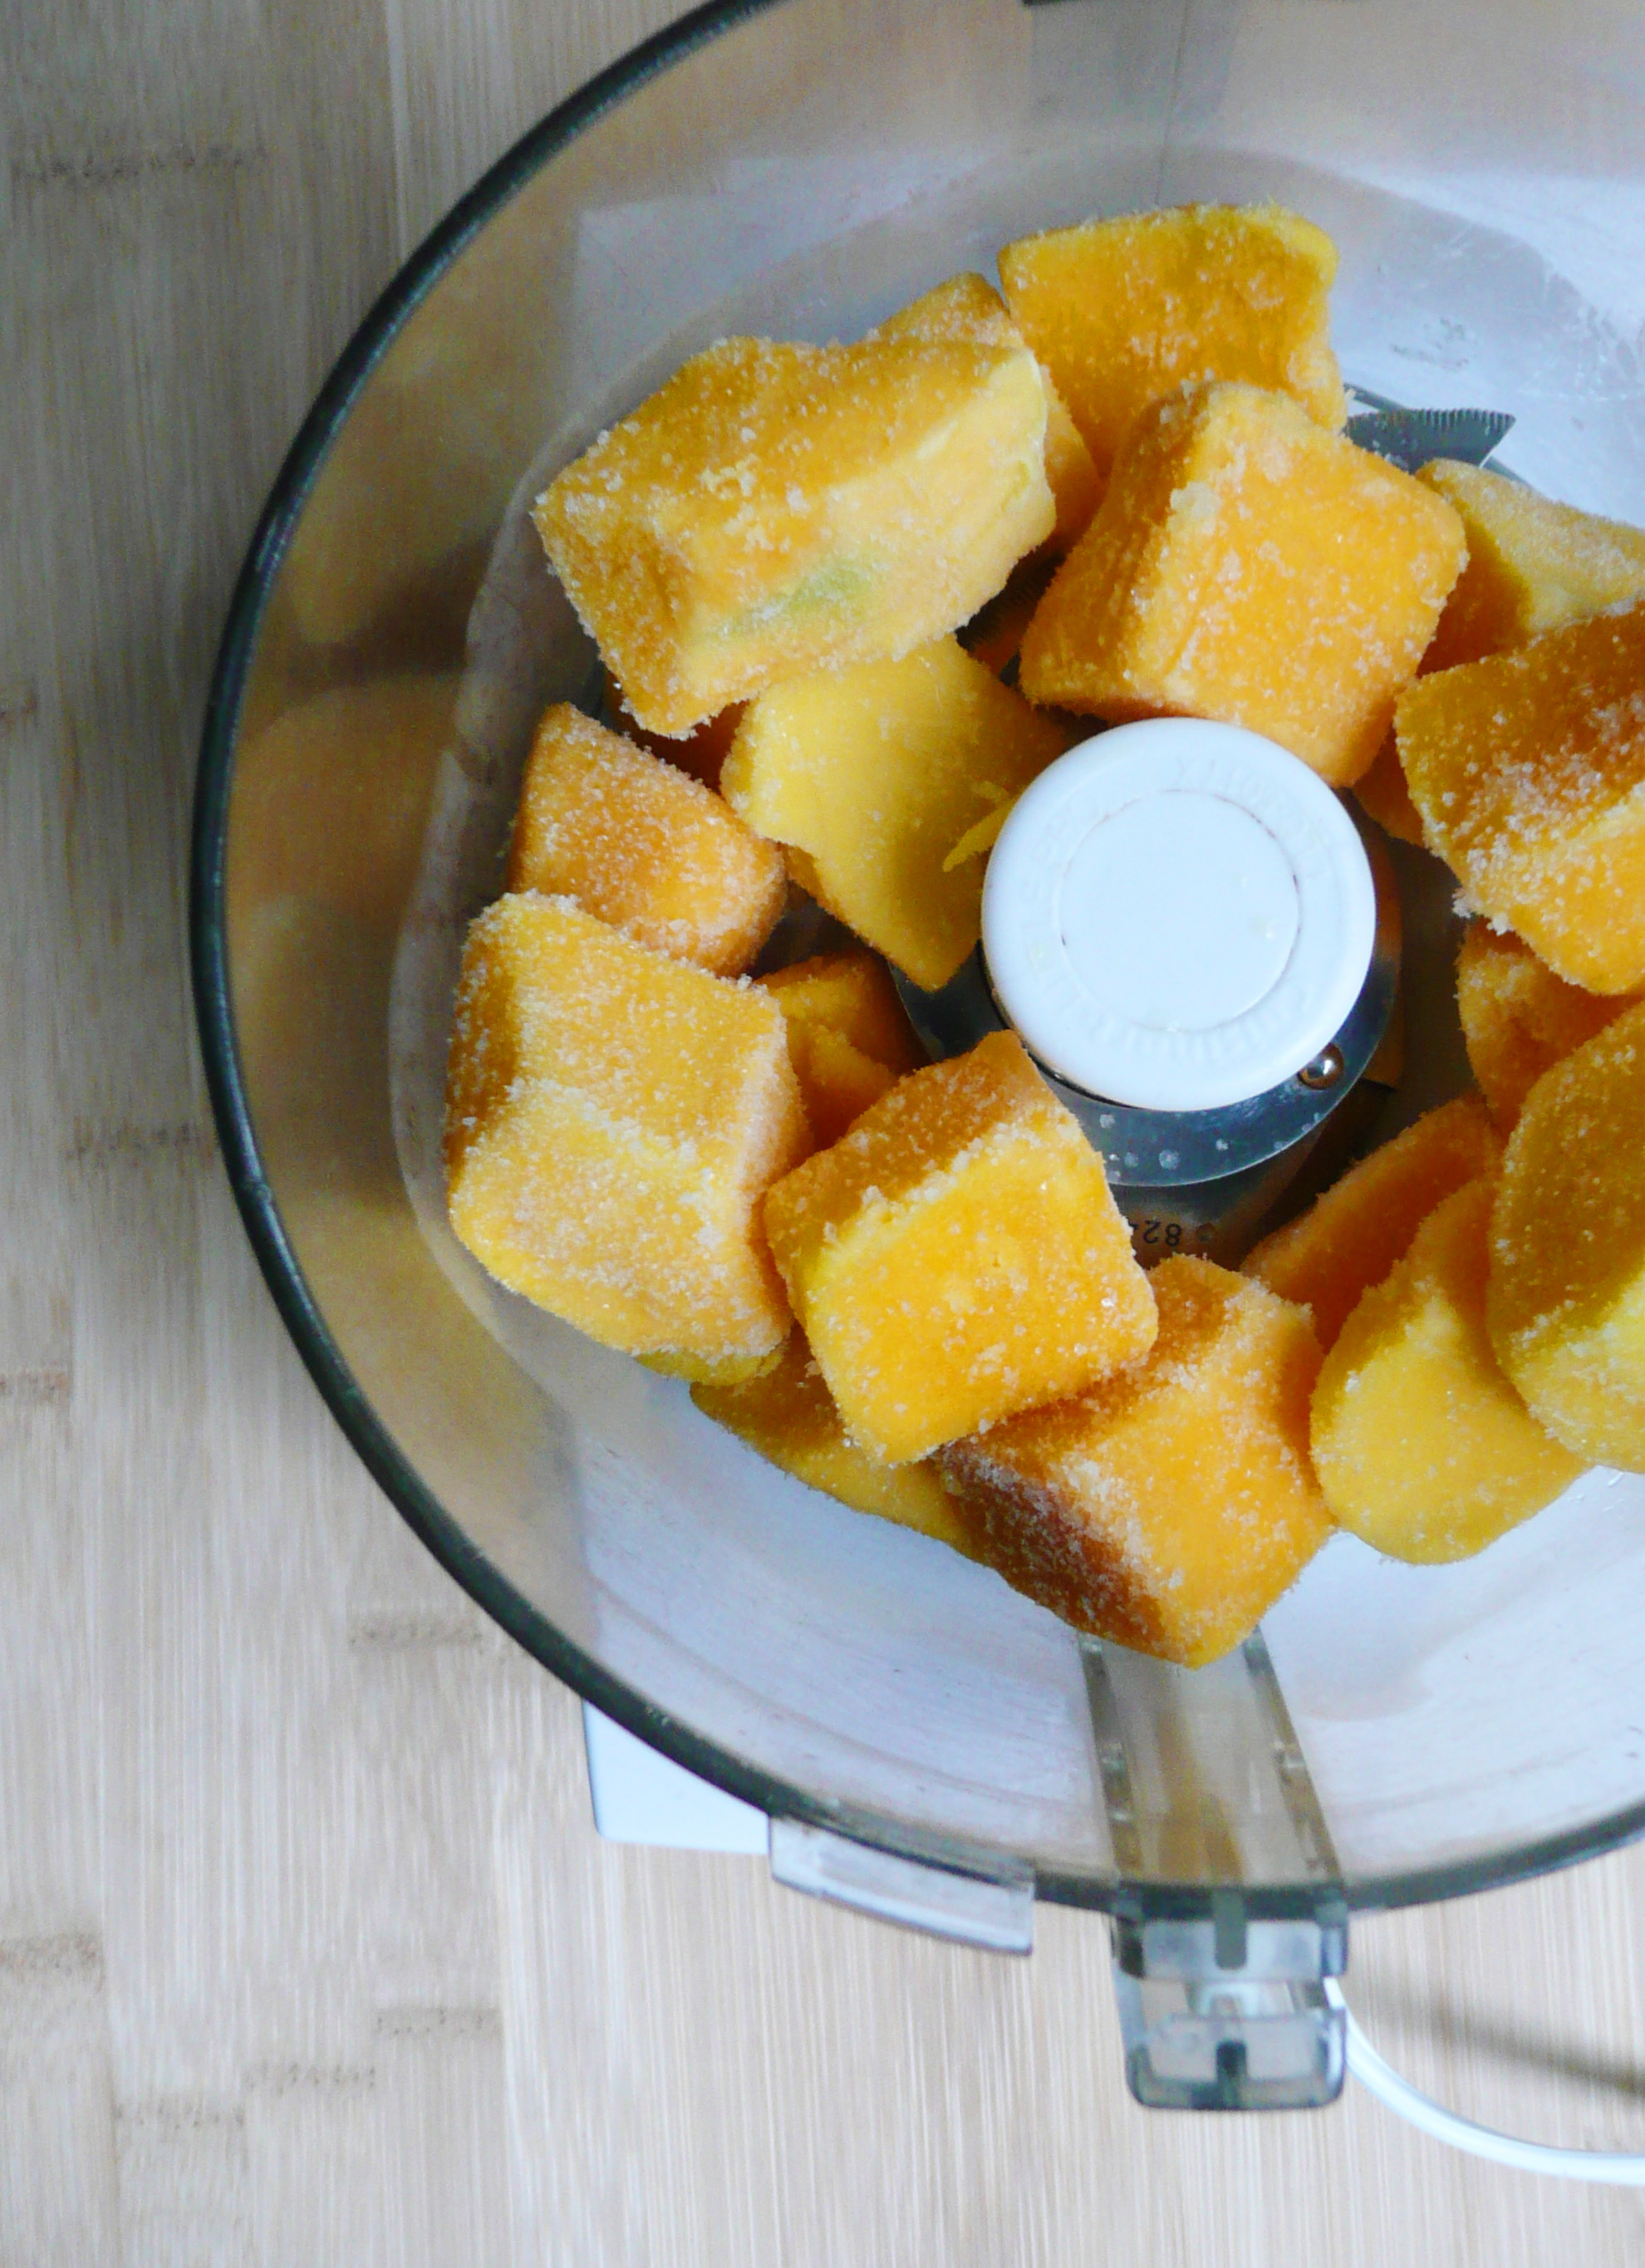
You can cut them into 1 inch chunks, freeze them, and make this mango sorbet anytime you like! It’s a delicious and satisfying way to cut down on food waste.
Mango Lemon Sorbet
Makes 1 generous serving (about 3 scoops)
Ingredients
2 cups frozen mango (1 inch chunks)
2 tbsp maple syrup*
1/2 tsp lemon zest (lime zest also works well)**
4 tbsp avocado oil (or any neutral flavored oil)***
1/4 cup water
Notes –
* The store bought frozen mango that I used wasn’t very sweet, so if your frozen mango is naturally very sweet, you can probably add less maple syrup. Just add a little at a time until you’re happy with the sweetness of the sorbet.
You can also omit the maple syrup entirely, and replace the water with 1/4 cup of apple juice instead if you’re trying avoid added sweeteners. The sorbet won’t be quite as sweet as it would be with the maple syrup, but will still taste really good.
**I actually used the frozen lemon rinds from this post for the lemon zest I used in this recipe.
** There is a part of the brain that lights up in the presence of a fat and sugar, so adding that little bit of fat makes the sorbet taste better, and helps to increase the absorption of the vitamin A from the frozen mango.
Instructions
1. Lay your mango pieces onto a plate in a single layer, giving a little space between each piece of frozen mango if possible. Allow the mango to defrost for 15-20 minutes until you can pierce the cubes of mango with a fork with little resistance.
2. Transfer the mango to a food processor and add in the water, avocado oil, lemon zest and maple syrup to taste.
Blend until smooth, stopping to occasionally scrape down the sides of the food processor with a spatula.
3. Serve immediately, or you can make a big batch of this and freeze it it for later in an airtight container. Allow to defrost for a bit before scooping and serving.
So good… and so simple to make! I’ll definitely be making this more often come summertime.
There’s a really funny writer/actor/comedienne extraordinaire named Tiffany Haddish who has a dish called “Joyful Greens.” She says that they are “Joyful Greens” because she smiles when she picks the collard greens from her garden, she smiles when she washes them, and she smiles when she cooks them. All that joy, love and care that she puts into growing and preparing the greens make them extra delicious.
Taylor Swift also loves Tiffany’s Joyful Greens. Tiffany brought them with her to one of Taylor’s dinner parties and where they also dined on homemade barbecue chicken, potato salad, and cornbread (don’t we all wish that we could have been at that dinner party? It’s sounds amazing.)
Here’s a video of Tiffany teaching Oprah and Ellen how to make them.
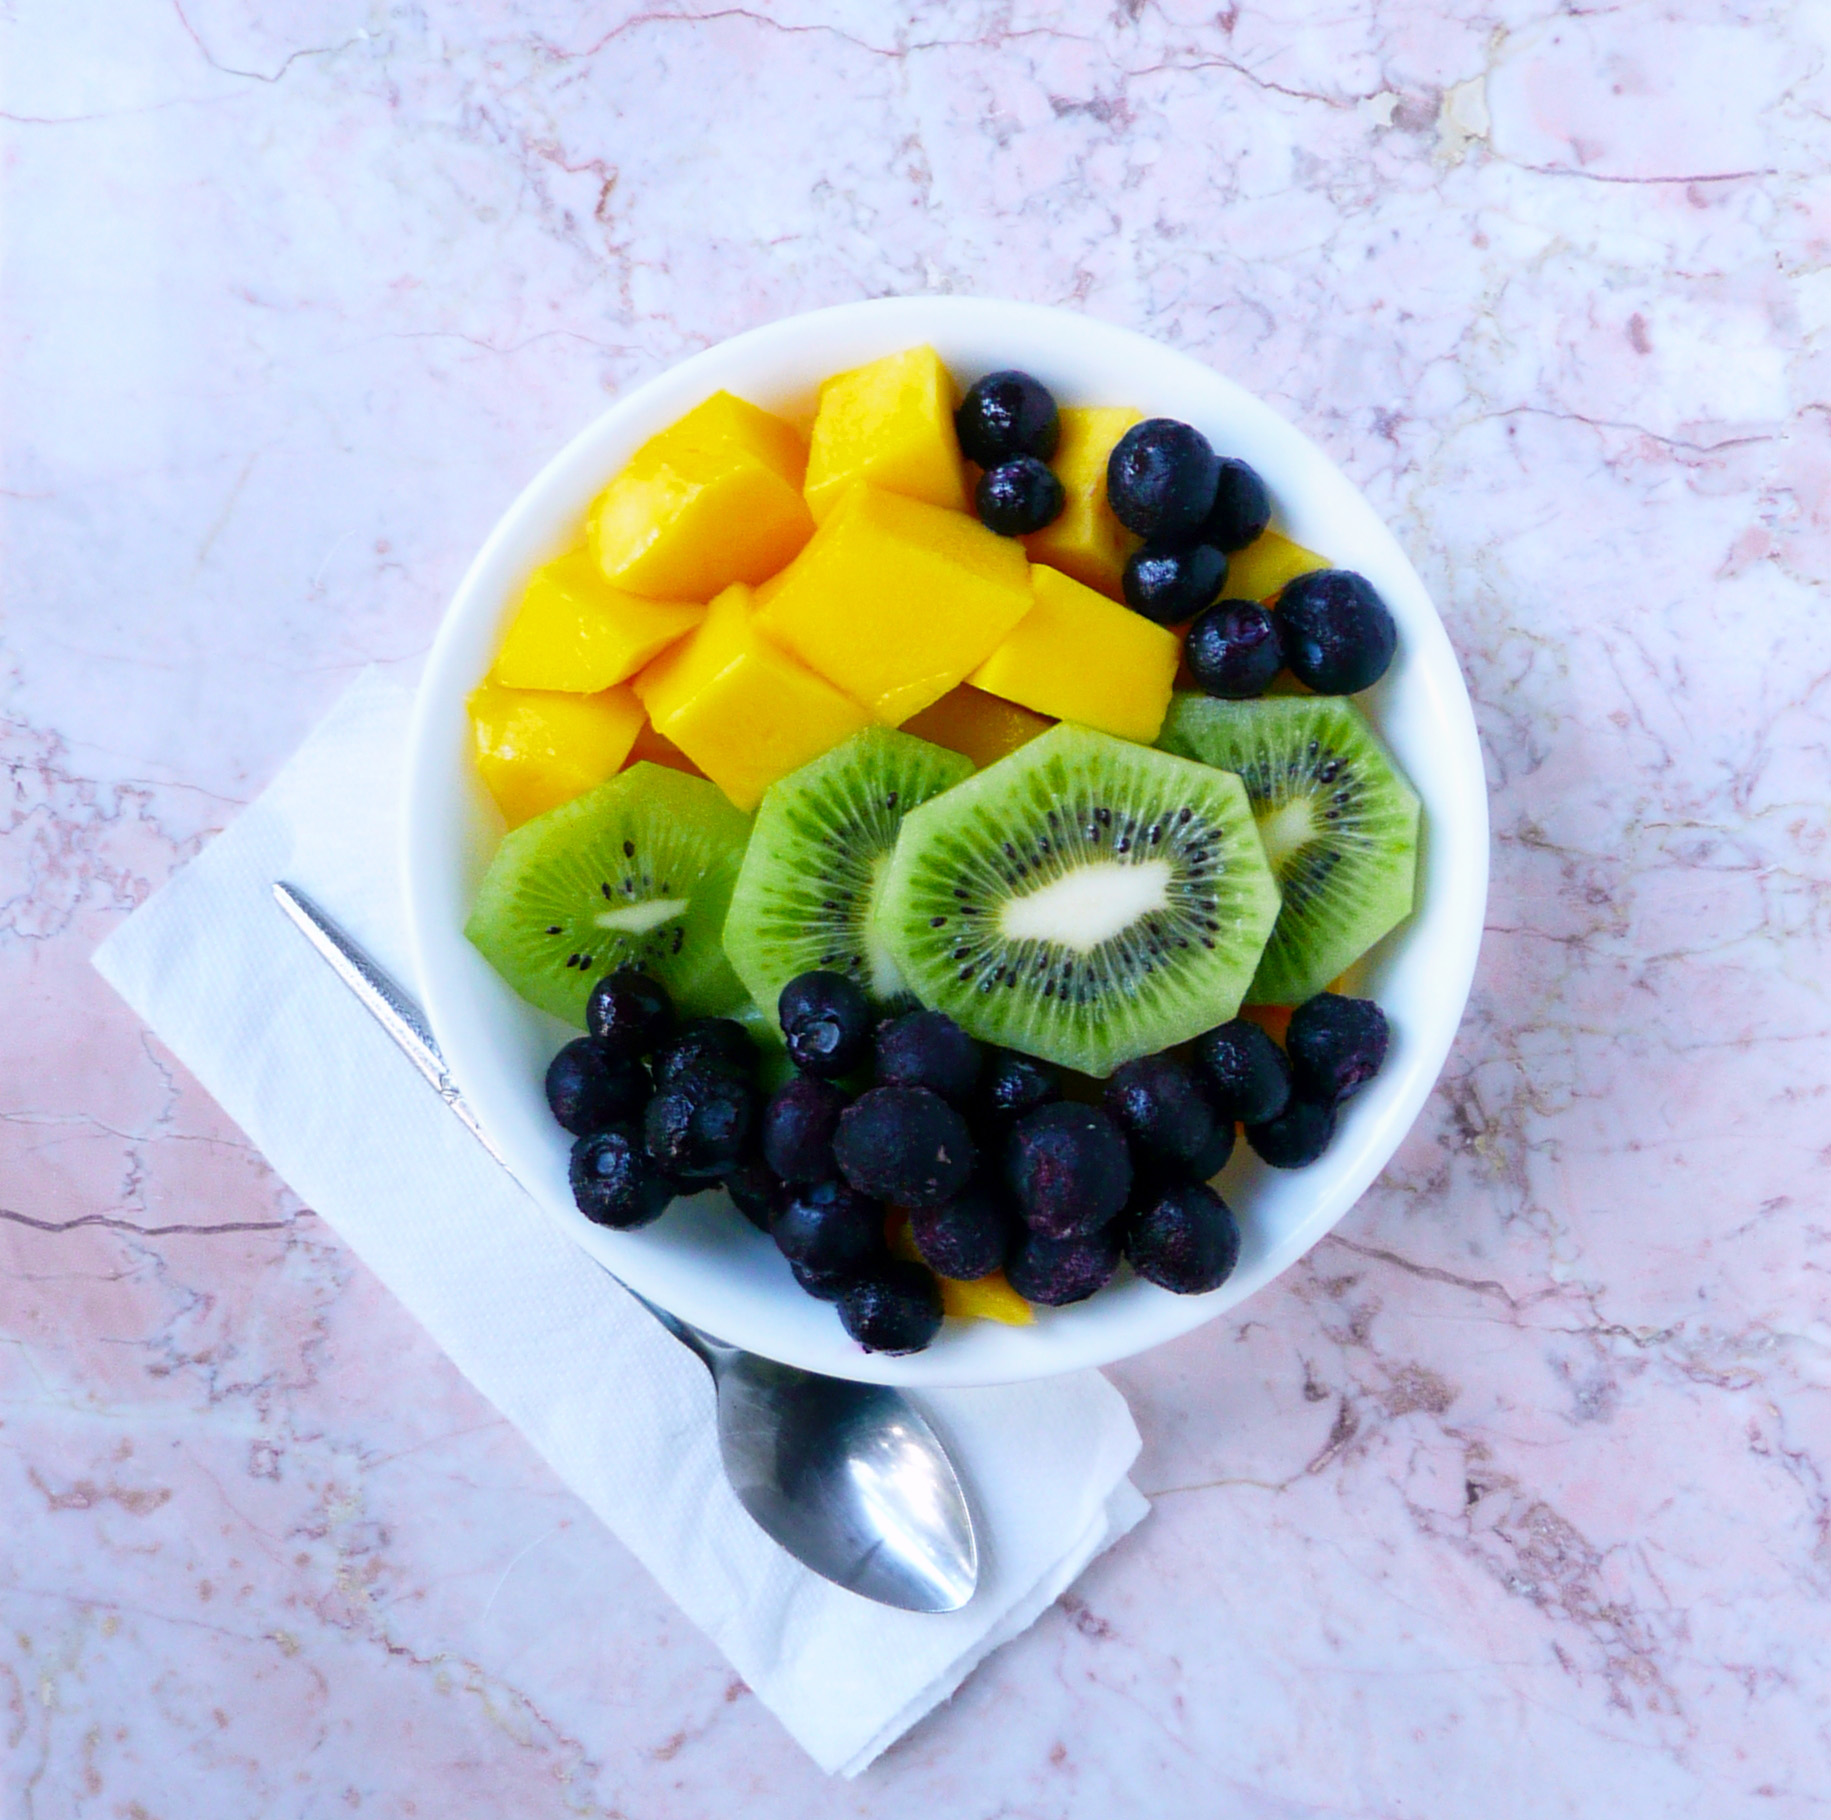
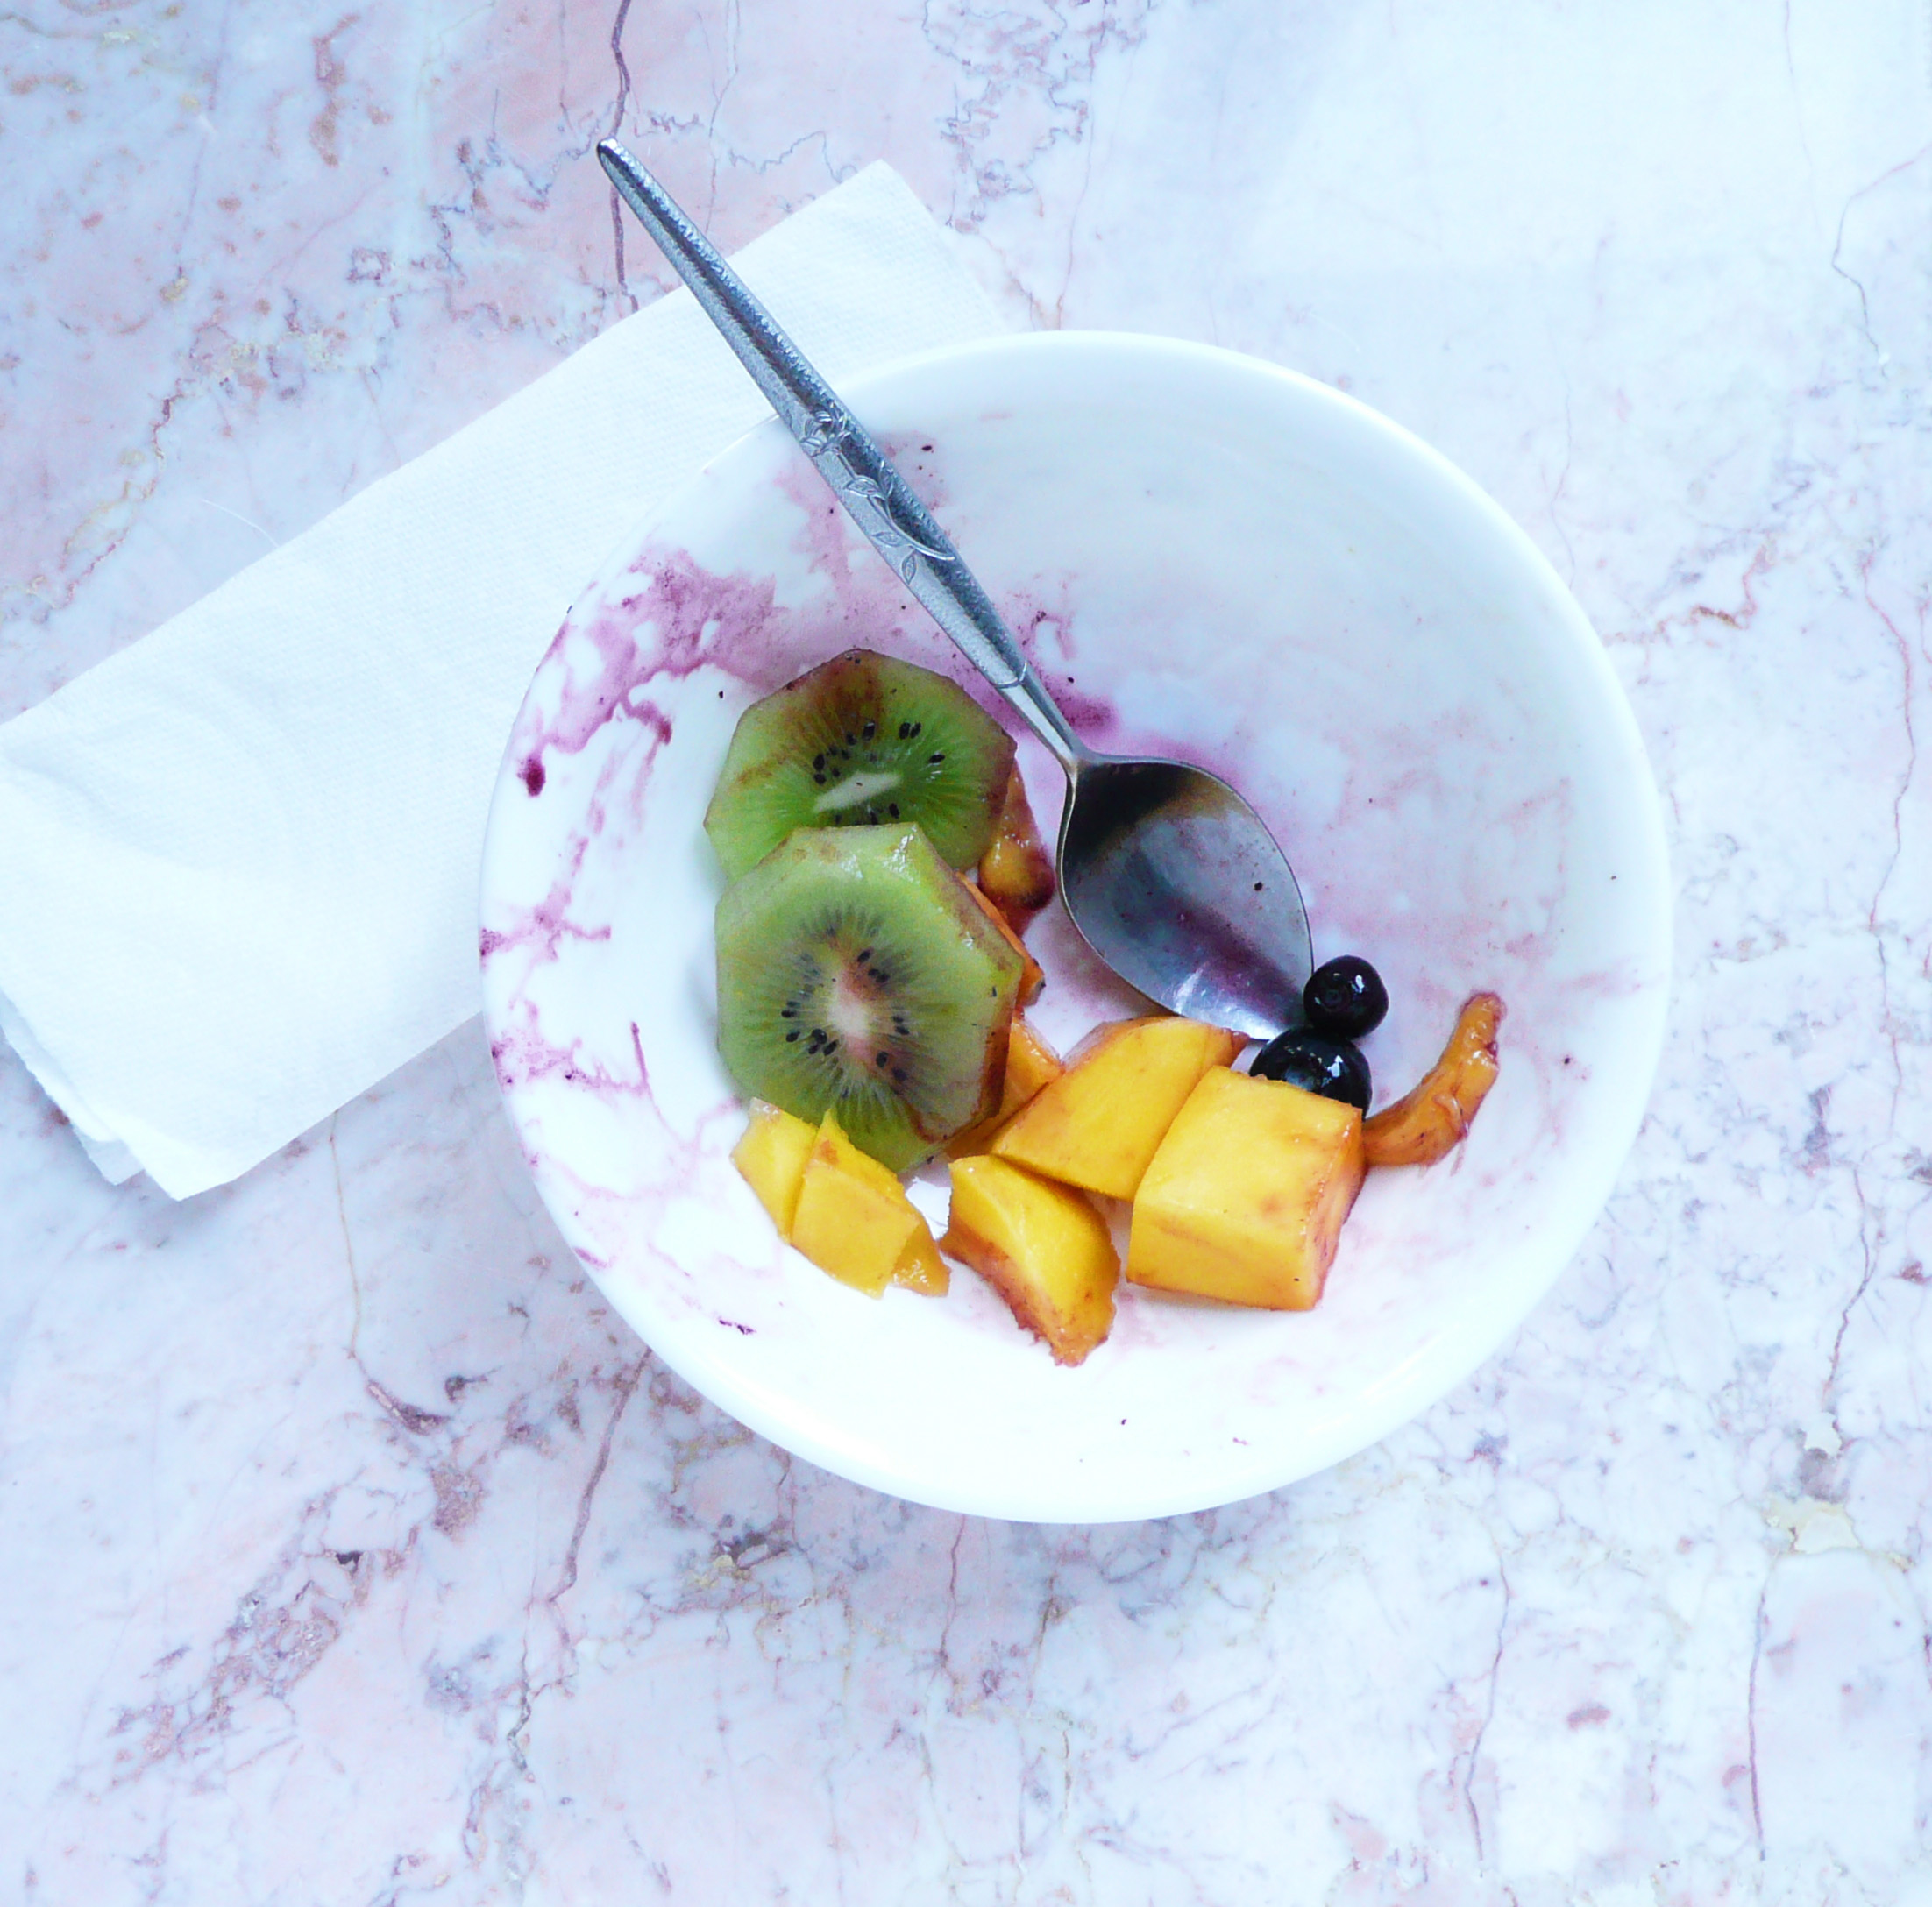
While I didn’t grow these fruits myself, this is my joyful fruit salad. It’s joyful because you smile while you’re picking out the fruit (you smile at how wonderful and sweet that ripe mango smells), you smile when you see how bright and happy the different colors of the fruits are together, and you smile when you eat it (because it tastes so good…)
It’s super quick to put together, and I like packing it in a lunch because the colors look so cheerful together that I always look forward to eating it. This combination of fruits taste lovely together, and eating it feels like a real treat.
Joyful Fruit Salad
Makes 1 generous serving
Ingredients
1 ripe mango*
1 ripe kiwi**
1/3 cup blueberries (fresh or frozen)
Notes – *Ripe mangoes smell very sweet and fragrant. Mangoes that aren’t ripe won’t smell much like anything.
** Ripe kiwis are soft, but not squishy. If you have one that’s really firm, go ahead and leave alone for a couple days and it will ripen up.
Instructions
1. Cut the mango into 3/4 inch cubes (or cut it up however you like, this is just how I do it).
There are many ways to cut up a mango. I slice the cheeks off either side of the seed, then try and carefully slice off any remaining mango flesh that I can off of the seed. Then I cut the mango cheeks into 3/4 inch strips and use a paring knife to carefully separate the peel from the mango flesh (kind of like how you would peel an apple with a paring knife). I then cut the peel away from the slices of mango that I cut away from the seed into rough chunks and add them to a bowl with the rest of the cubed mango.
I’ve also seen people use a potato peeler to peel the mango and then slice the mango cheeks off either side of the seed, but I don’t do it that way because I find that the mango gets really slippery to hold while you’re trying to make your initial cuts.
All this is to say, cut up your mango in a way that works for you. The fruit salad will still be awesome.
2. Peel your kiwi and slice it into 1/4 inch slices.
How I peel a kiwi – Cut 1/4 inch off the top and bottom of your kiwi. Sit it flat on your cutting board and make 1/2 inch slices down the sides of the kiwi, cutting as close to the peel as you can until you’ve cut off all the kiwi peel.
You can also cut 1/4 inch off the top and bottom of a kiwi and slide spoon between the kiwi peel and the green flesh. Rotate your spoon under the peel until the peel has completely separated from the fruit.
3. Add your kiwi to the bowl of cubed mango along with the blueberries.
Enjoy!
What the bowl looks like once I packed the rest of it into a mason jar for tomorrow’s lunch. This is what was leftover, which looks very pretty on it’s own.
No worries, this didn’t go to waste. I ate it right after I took the picture, and I felt very happy and grateful.
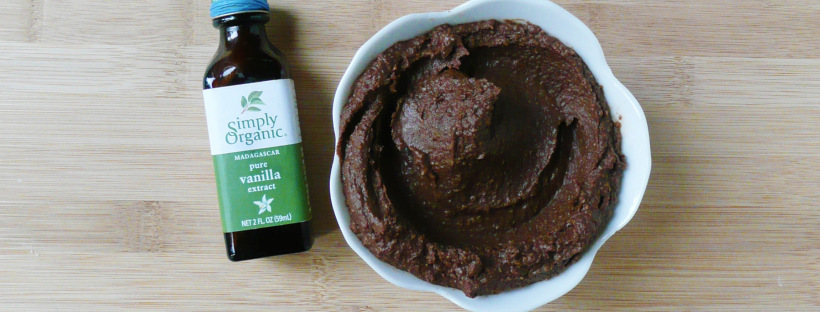
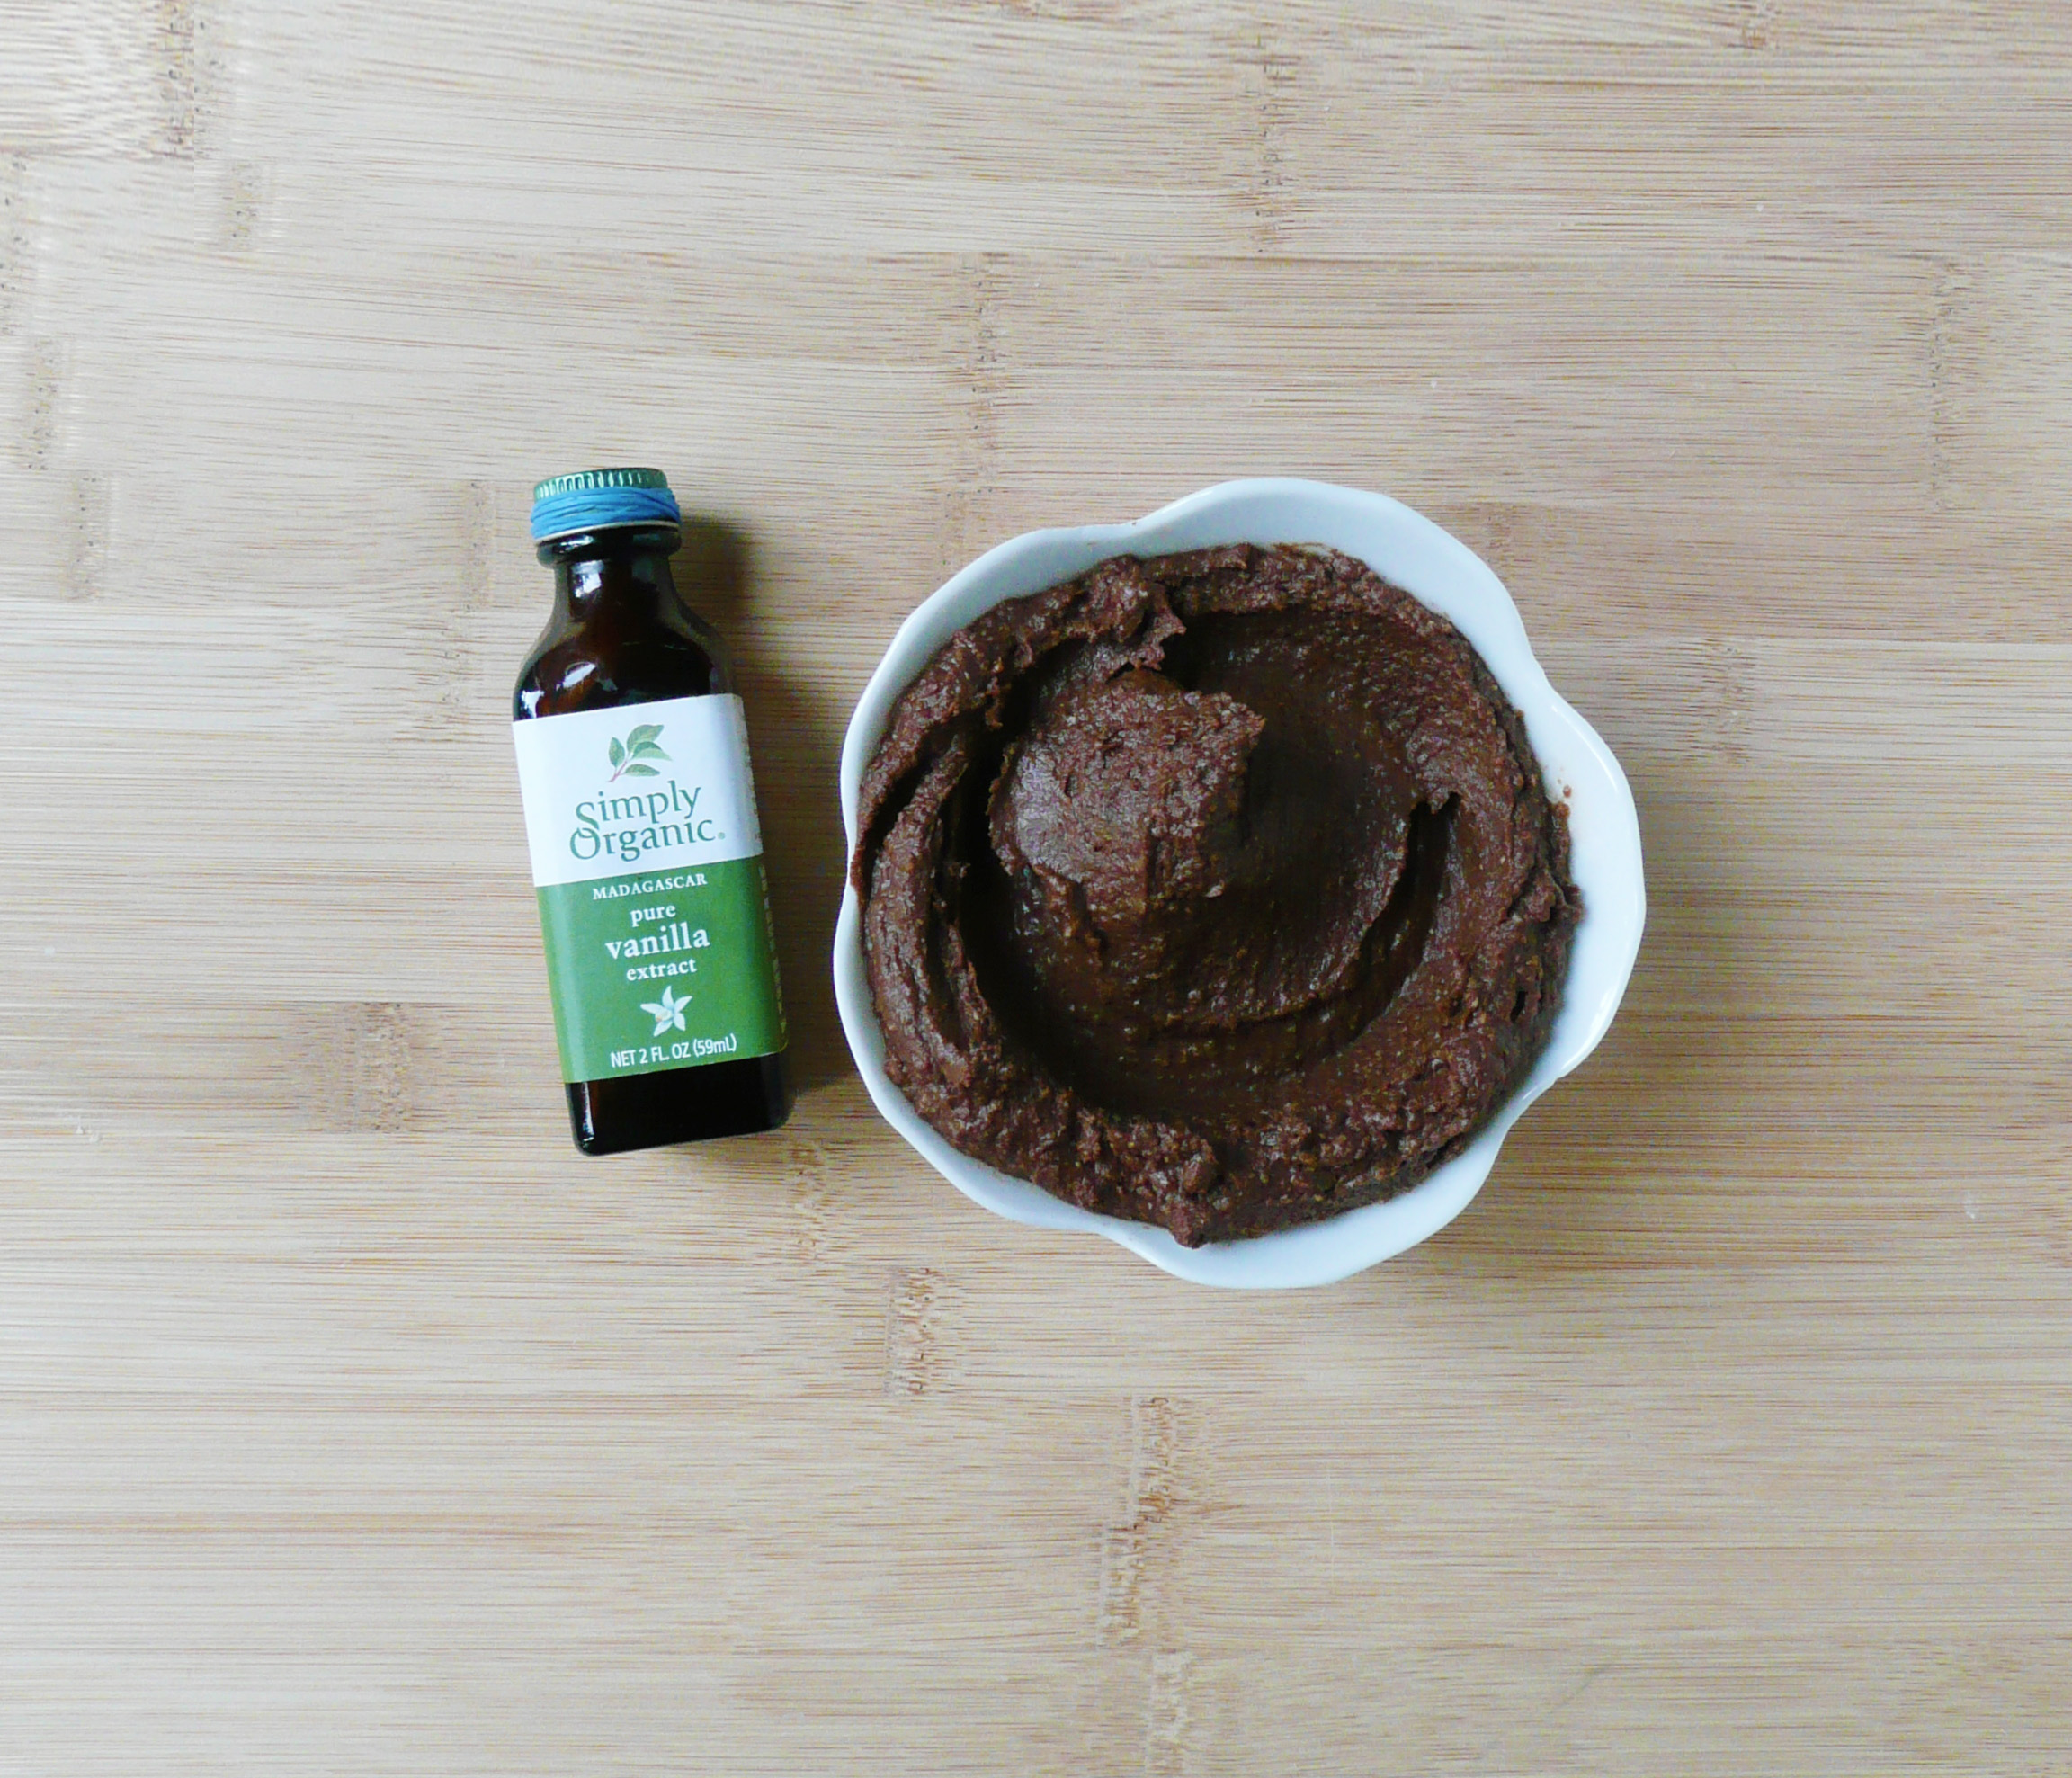
This fudgy chocolate frosting works great over my Chewy Sweet Potato or Adzuki Bean Brownies, and it’s delicious enough that you can eat it by itself with a spoon. It tastes better than any store brought chocolate frosting, and it’s refined sugar free and dairy free.
It’s stable enough of a frosting that you can pipe designs with it and give cupcakes or brownies a little extra joy and decoration if desired.
Notes – * I grind oats into oat flour using a blender. Don’t grind the oats in a food processor because the flour won’t be fine enough.
Any extra oat flour I don’t use in the recipe goes into an airtight container and I use it for another recipe.
If you’re making this recipe for someone who has celiac disease, use certified gluten free oats, as the oats from the bulk bins can sometimes be processed on the same equipment as wheat.
Instructions
1. Add all the ingredients to a food processor and blend until smooth. Transfer to a bowl and gently heat over a double boiler and stir until glossy.
If eating with brownies, spread the frosting onto the brownies while the frosting is still warm and glossy. If you frost the brownies while the frosting is still warm, then the frosting will stay glossy when it cools and sets.
If you want to use this frosting to pipe flowers or designs, then the frosting needs to cool to room temperature before you transfer it into a piping bag. You can make this frosting in advance if needed and keep it in the fridge, and either heat it very gently and quickly over a double boiler, or let it sit a room temperature until softened before piping.
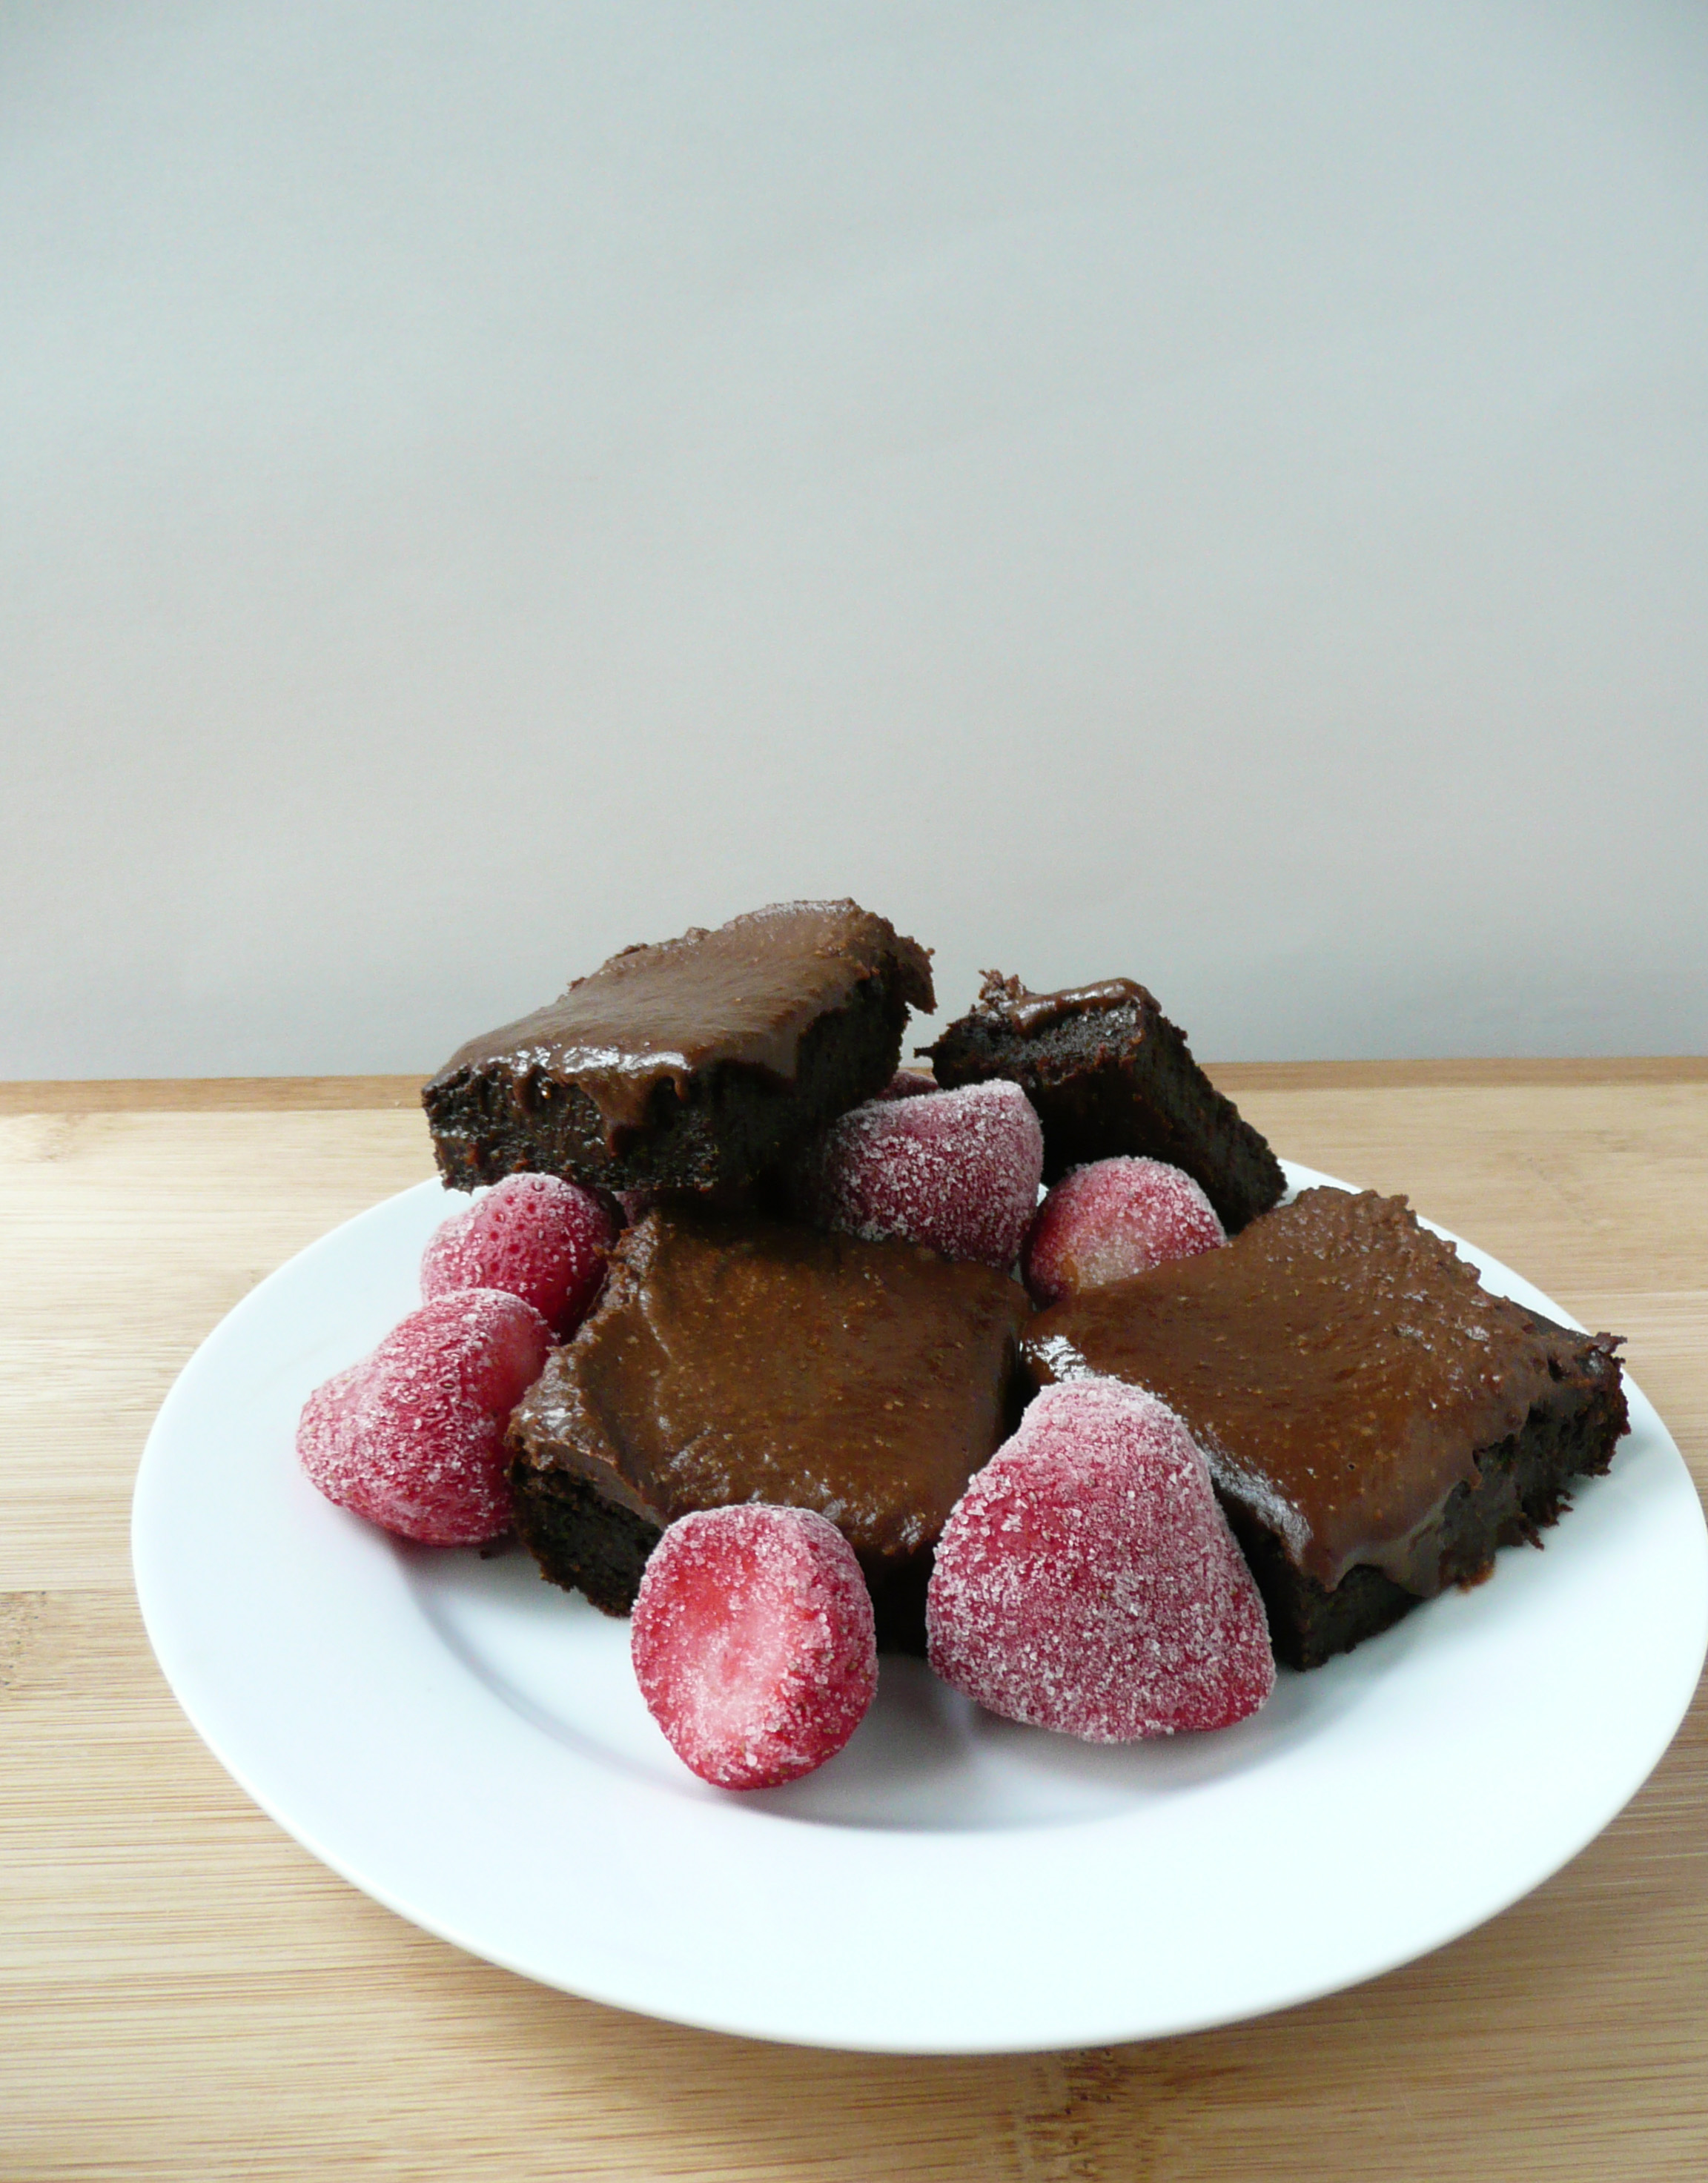
These brownies are the brownies of dreams. They have a rich, deep chocolate flavor, but are not too dark or too sweet, and they taste like the best brownie you’ve ever had.
I came up with this recipe one day when I needed to use up some extra sweet potatoes that I had in the fridge. Somehow this recipe came together so quickly (and I worked perfectly the first time!), and taking the first bite of these brownies made my heart sing. I couldn’t believe how good they were, and they were vegan! And made from leftovers!
The cool thing about this recipe is that you can also make them with adzuki beans (if you have any leftover red bean soup). They actually turn out slightly chewier when made with adzuki beans rather than sweet potatoes, but both kinds of brownies are fantastic.
With brownies, most people fall into two camps – chewy, or fudgy. These brownies are the perfect marriage between the two, because the actual brownies are wonderfully chewy, and the frosting is gloriously fudgy.
They don’t need the frosting, as they taste good enough without it, but a little frosting never hurt a good brownie.
The Best Chewy Sweet Potato (or Adzuki Bean) Brownies
Makes 9 brownies
Ingredients
1 tbsp ground chia seed (5g)
¼ cup + 1/8 cup hot water
1 cup of oat flour (90g)*
5 tbsp + 2 tsp cocoa powder (34g)
½ level tsp baking soda
½ level tsp + 1/8 tsp ground coffee (I used Starbucks Italian Roast Ground Coffee, which is also Fair Trade Certified, which makes it extra cool)
½ level tsp sea salt
2 tbsp apple cider vinegar
1 tsp of vanilla extract**
level ½ cup mashed roasted sweet potato (if using adzuki beans use ½ cup + 3 tbsp drained cooked beans instead of the sweet potato)
½ cup maple syrup
¼ cup + 1/8 cup melted coconut oil
Notes – for best results, please measure the dry ingredients by weight.
* I grind oats into oat flour using a blender. Don’t grind the oats in a food processor because the flour won’t be fine enough.
Any extra oat flour I don’t use in the recipe goes into an airtight container and I use it for another recipe.
If you’re making this recipe for someone who has celiac disease, use certified gluten free oats, as the oats from the bulk bins can sometimes be processed on the same equipment as wheat.
**If you run out of vanilla extract ( and it’s been the kind of day where you really need a brownie) have no fear, these brownies still taste amazing without it. So go forth, and bake with a light heart.
Instructions
1. Stir together the ground chia seed and hot water. Let sit for 10 minutes until thickened.
2. Add the cocoa, oat flour, salt, coffee and baking soda into the food processor and give it a quick blend so that everything is well combined.
3. Add the rest of the ingredients to the food processor and blend until smooth.
4. Turn the oven to 350F and let the mixture sit in the food processor for 15 minutes. Then give it one final blend for about 30 seconds and then spoon the mixture into a glass 8×8 inch baking dish that you’ve oiled and floured with coconut oil (or a neutral oil like avocado oil) and a bit of oat flour.
Take a spatula and smooth the brownie batter out so that it’s sitting evenly in the baking dish.
5. Bake the brownies at 350F for 70-75 minutes until the brownies pull ¼ inch away from the pan on all sides.
Allow to cool completely (at least an hour for the best texture), frost with fudgy sweet potato chocolate frosting if desired, and then cut into 9 square pieces. Serve and enjoy!
I hope that you love these brownies as much as I do, and if you’re having a tough day, I hope that these brownies make it just a little bit better and brighter. 🙂
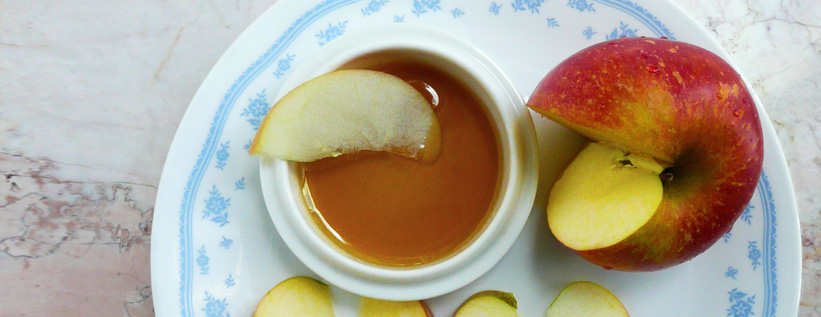
When I’m feeling like I want a sweet snack in a flash, I make myself a plate of apple slices and caramel dip.
This is the easiest no cook caramel dip ever. This caramel dip tastes incredibly indulgent and takes just seconds to make. Olive oil and maple syrup may sound like an unusual combination, but it tastes delicious, especially when combined with the sweet apple.
Apple Slices and Two Ingredient Caramel Dip
Makes 1 serving
Ingredients
1 fuji apple (or apple of choice, I like fuji apples because they are nice and sweet)
Caramel Dip
1 tbsp maple syrup
3/4 tsp – 1 tsp olive oil
Instructions
1. Wash and slice your apple, and place the apple slices on a plate. Spoon the maple syrup and olive oil onto the side of the plate, or into a small dish. Stir the maple syrup and olive oil together until well combined. Dip the apple slices into the caramel and enjoy!
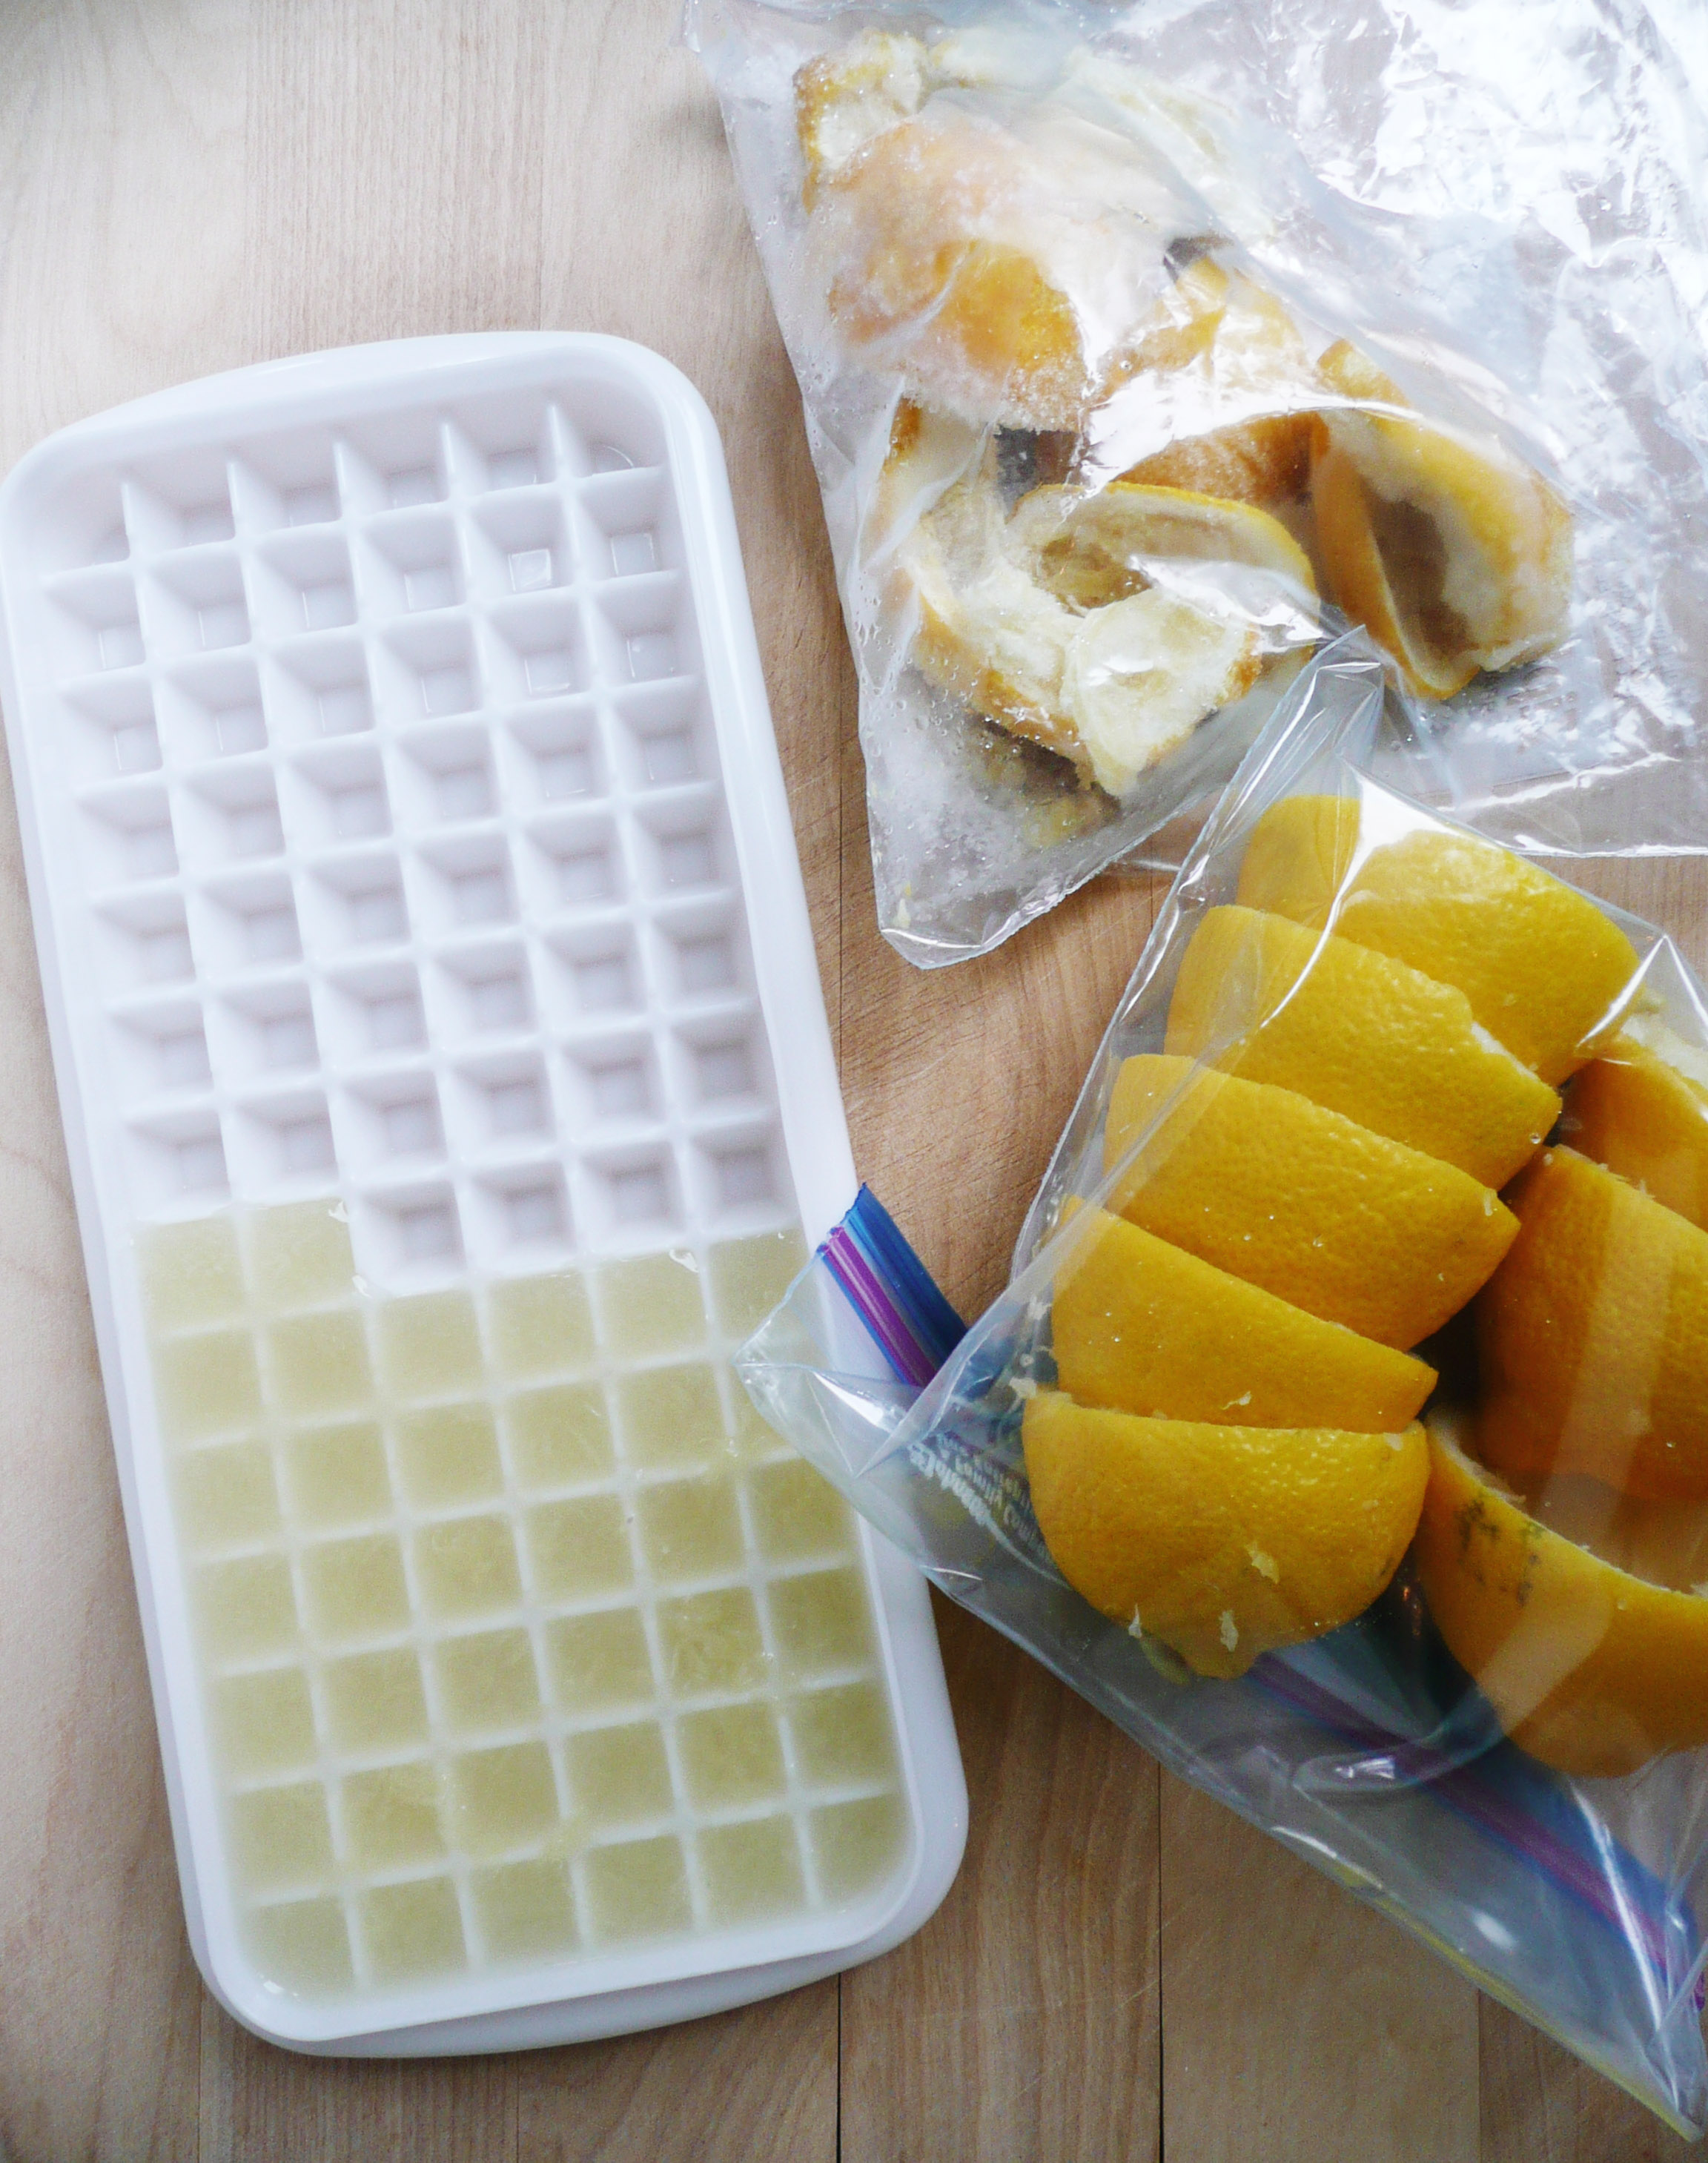
Lemons tend to be expensive. A single organic lemon can cost in the neighborhood of $1.30 – $1.70 depending on the store, so it’s usually a cheaper option to buy the 2 lb bag of organic lemons for about $5 instead.
This means that I usually end up with a bag of lemons when I only needed 1 or 2 of them.
If you’re ever in this pinch and trying to figure out what to do with the rest of your lemons before they go bad, then freezing them is a really good option.
I wash the lemons, then juice them and pour the lemon juice into an ice cube tray. Once frozen, pop the lemon juice cubes into a zip top bag and stash them in your freezer until you’re ready to use them. The lemon juice cubes melt quickly and are a great way to always have lemon juice always on hand. I used an ice cube tray from daiso, which just happens to make smaller ice cubes, but a normal ice cube tray will work just as well.
I add the lemon juice cubes to tea, or to chicken soup with brown rice and quinoa, or quinoa tabbouleh.
You can freeze the lemon rinds as well in a separate zip top bag, and grate them from frozen on a microplane to add lemon zest to your dishes.
When I have a cold, I’ll toss a few of the frozen lemon rinds into a pot and boil them with some water, ginger, turmeric, black pepper, a tablespoon of coconut oil, and honey for a soothing tea.
However you use your frozen lemons, I hope that this trick brings you many happy lemony dishes!
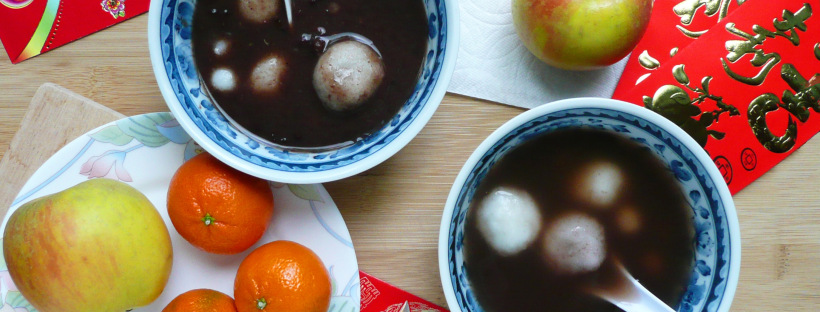
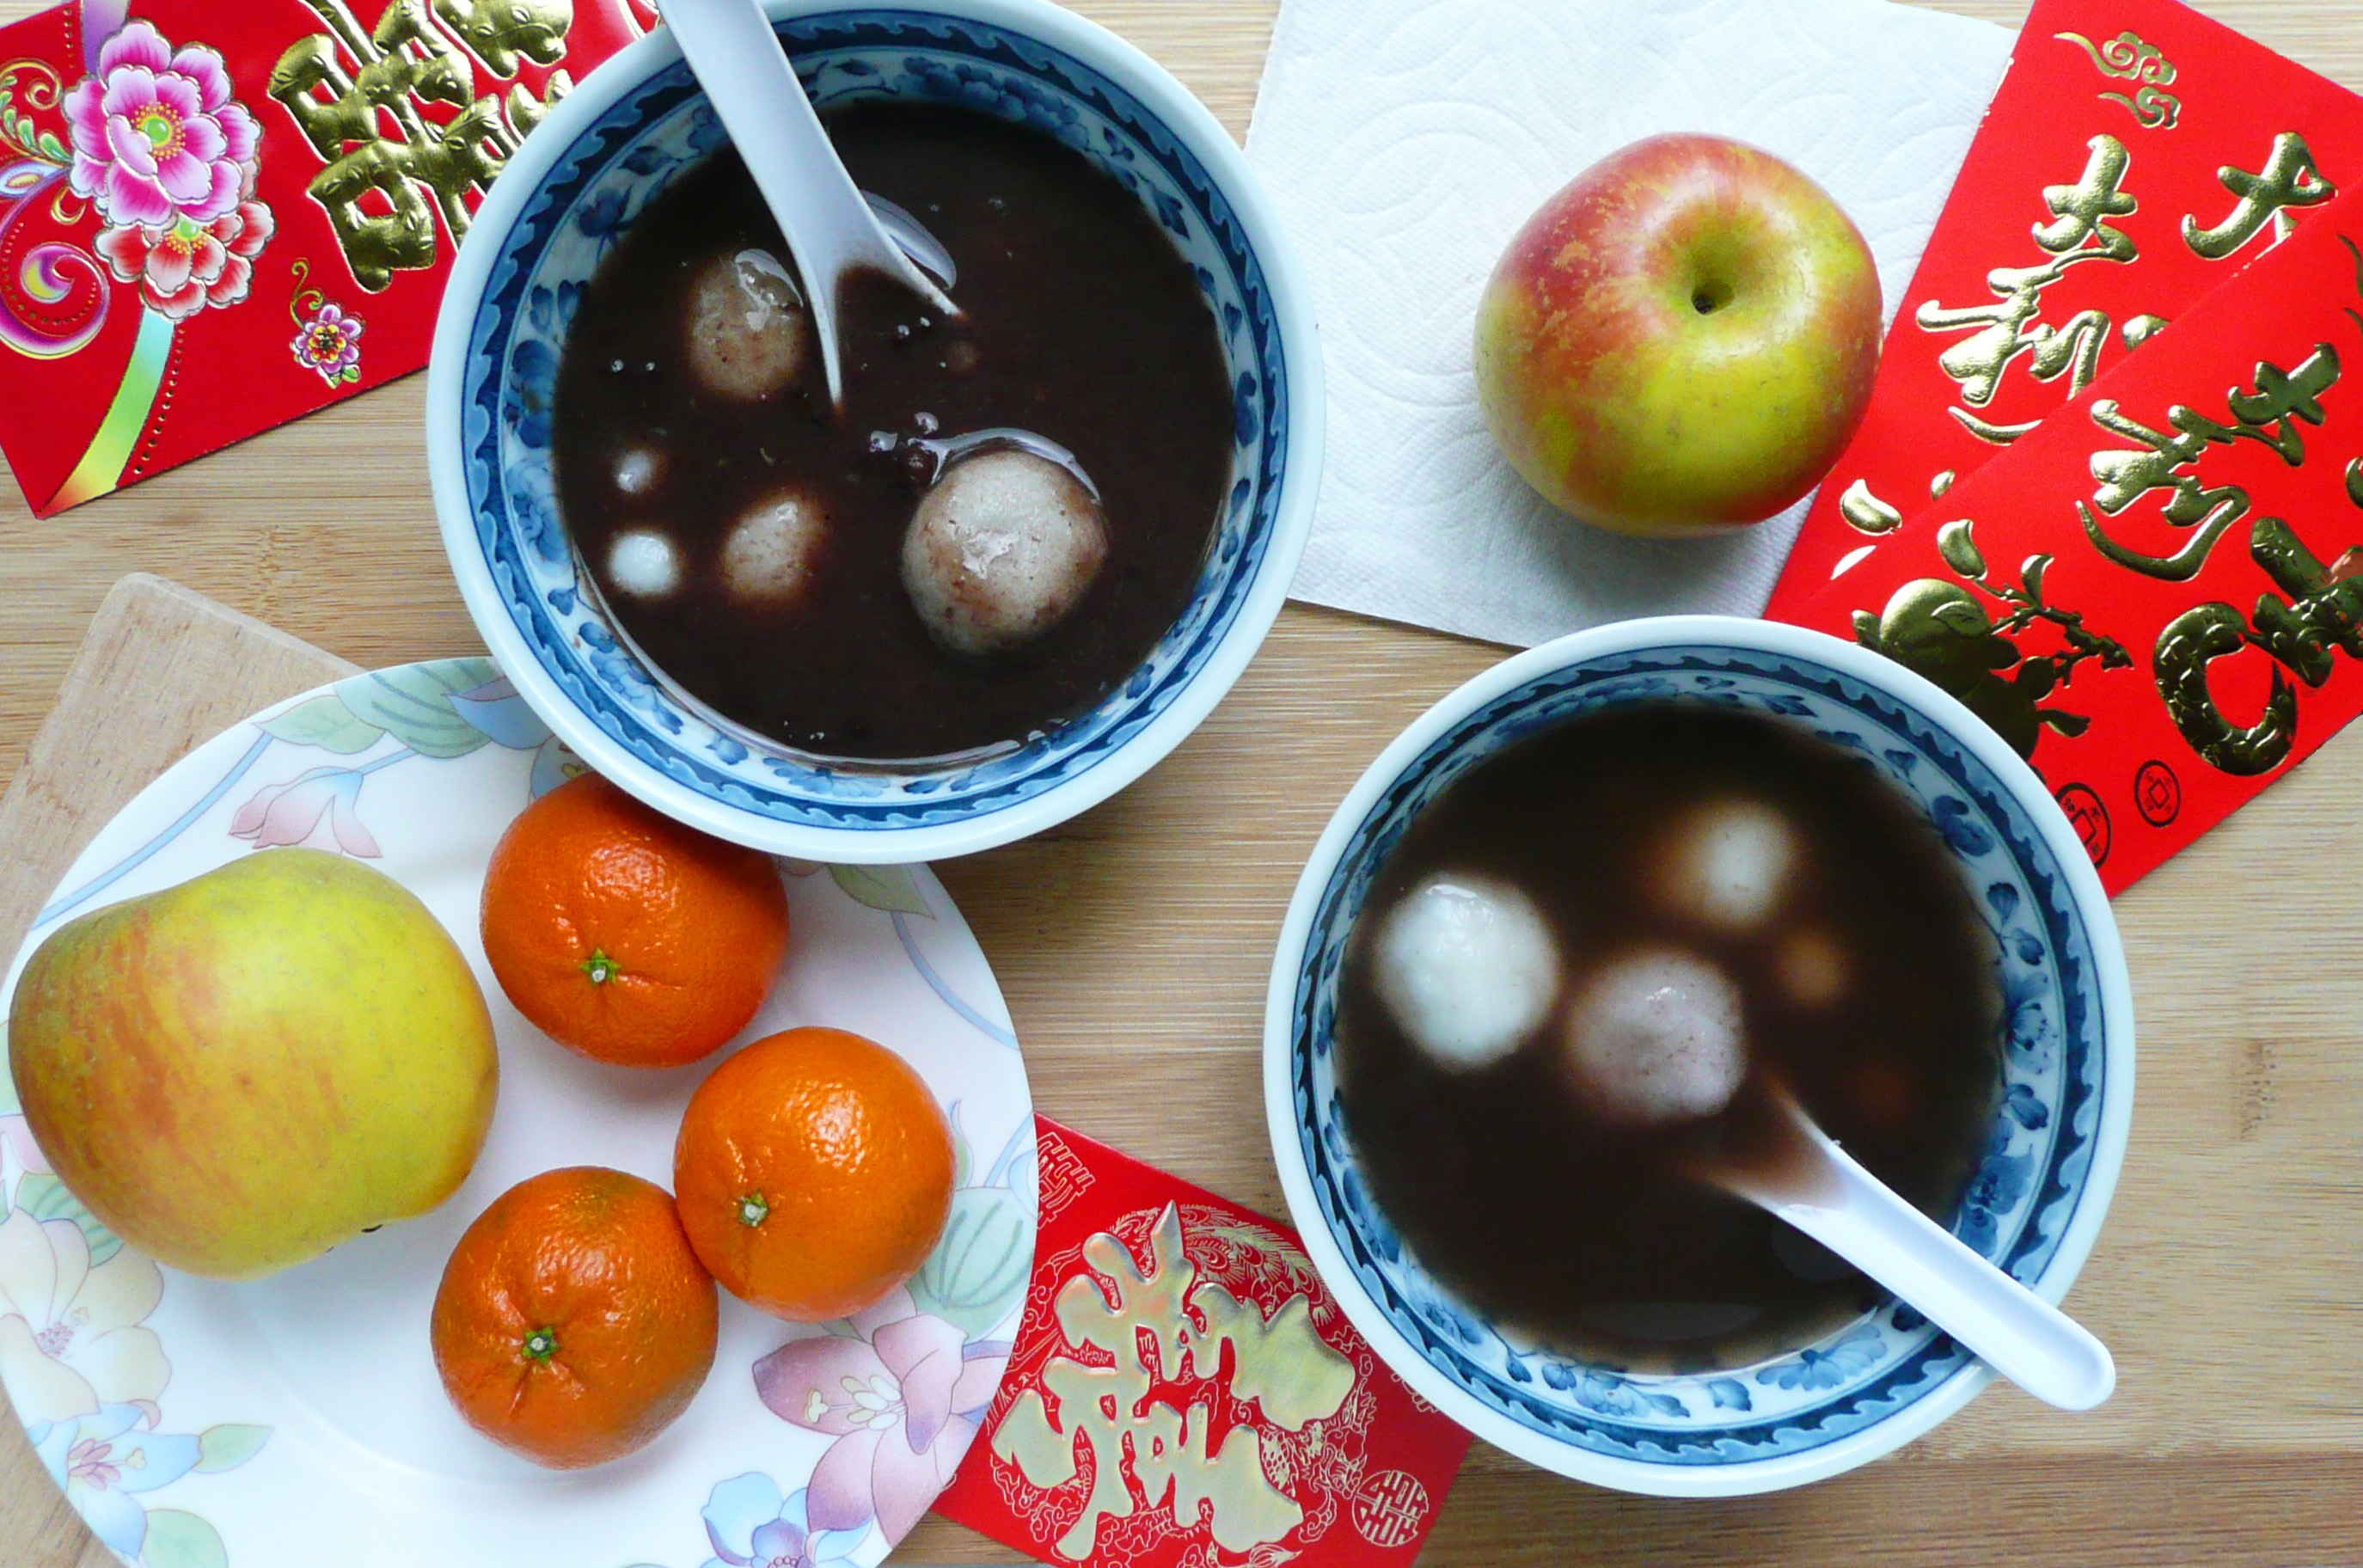
Lunar New Year is always an exciting time of year. It’s a time when we all get together and eat lots of amazing food.
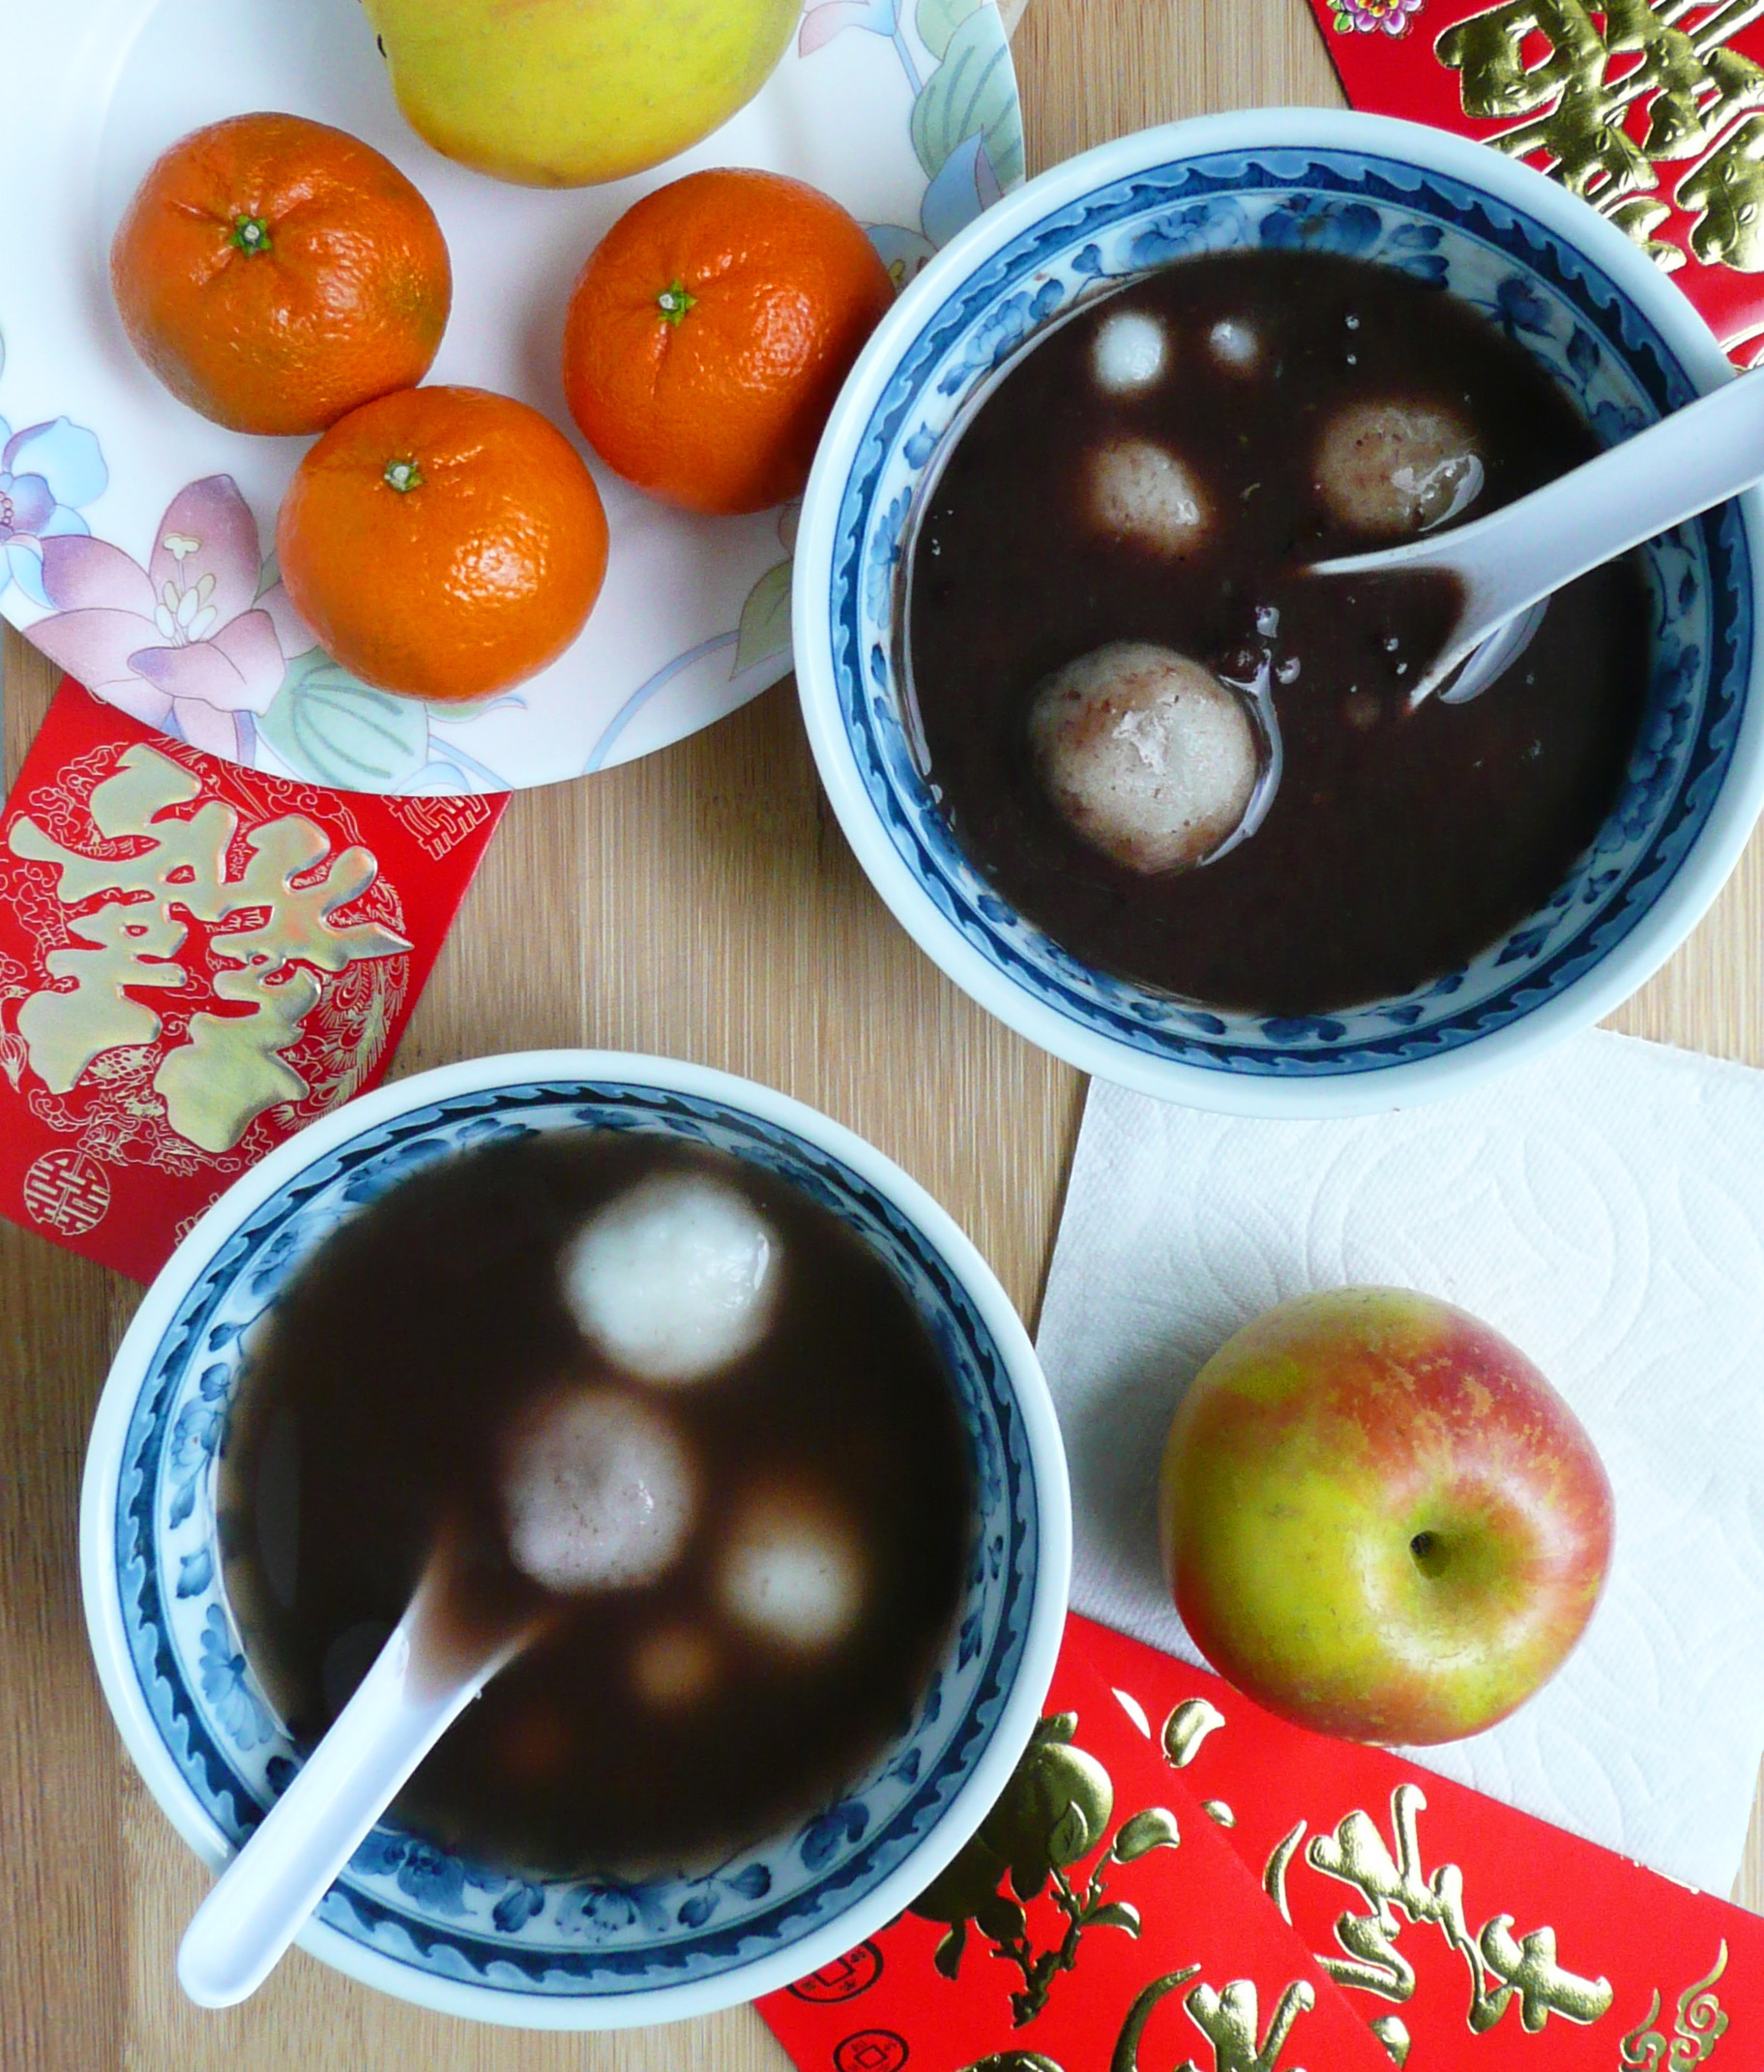
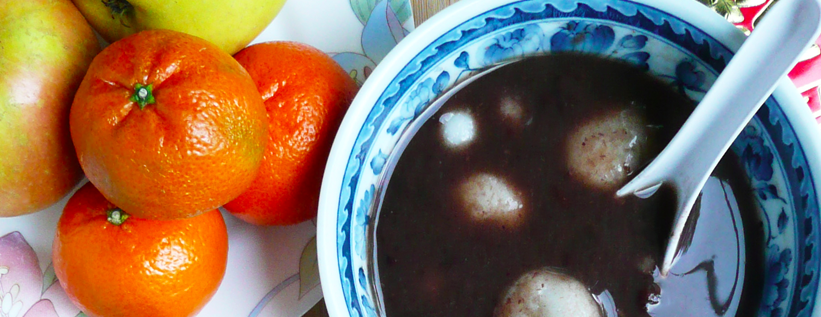
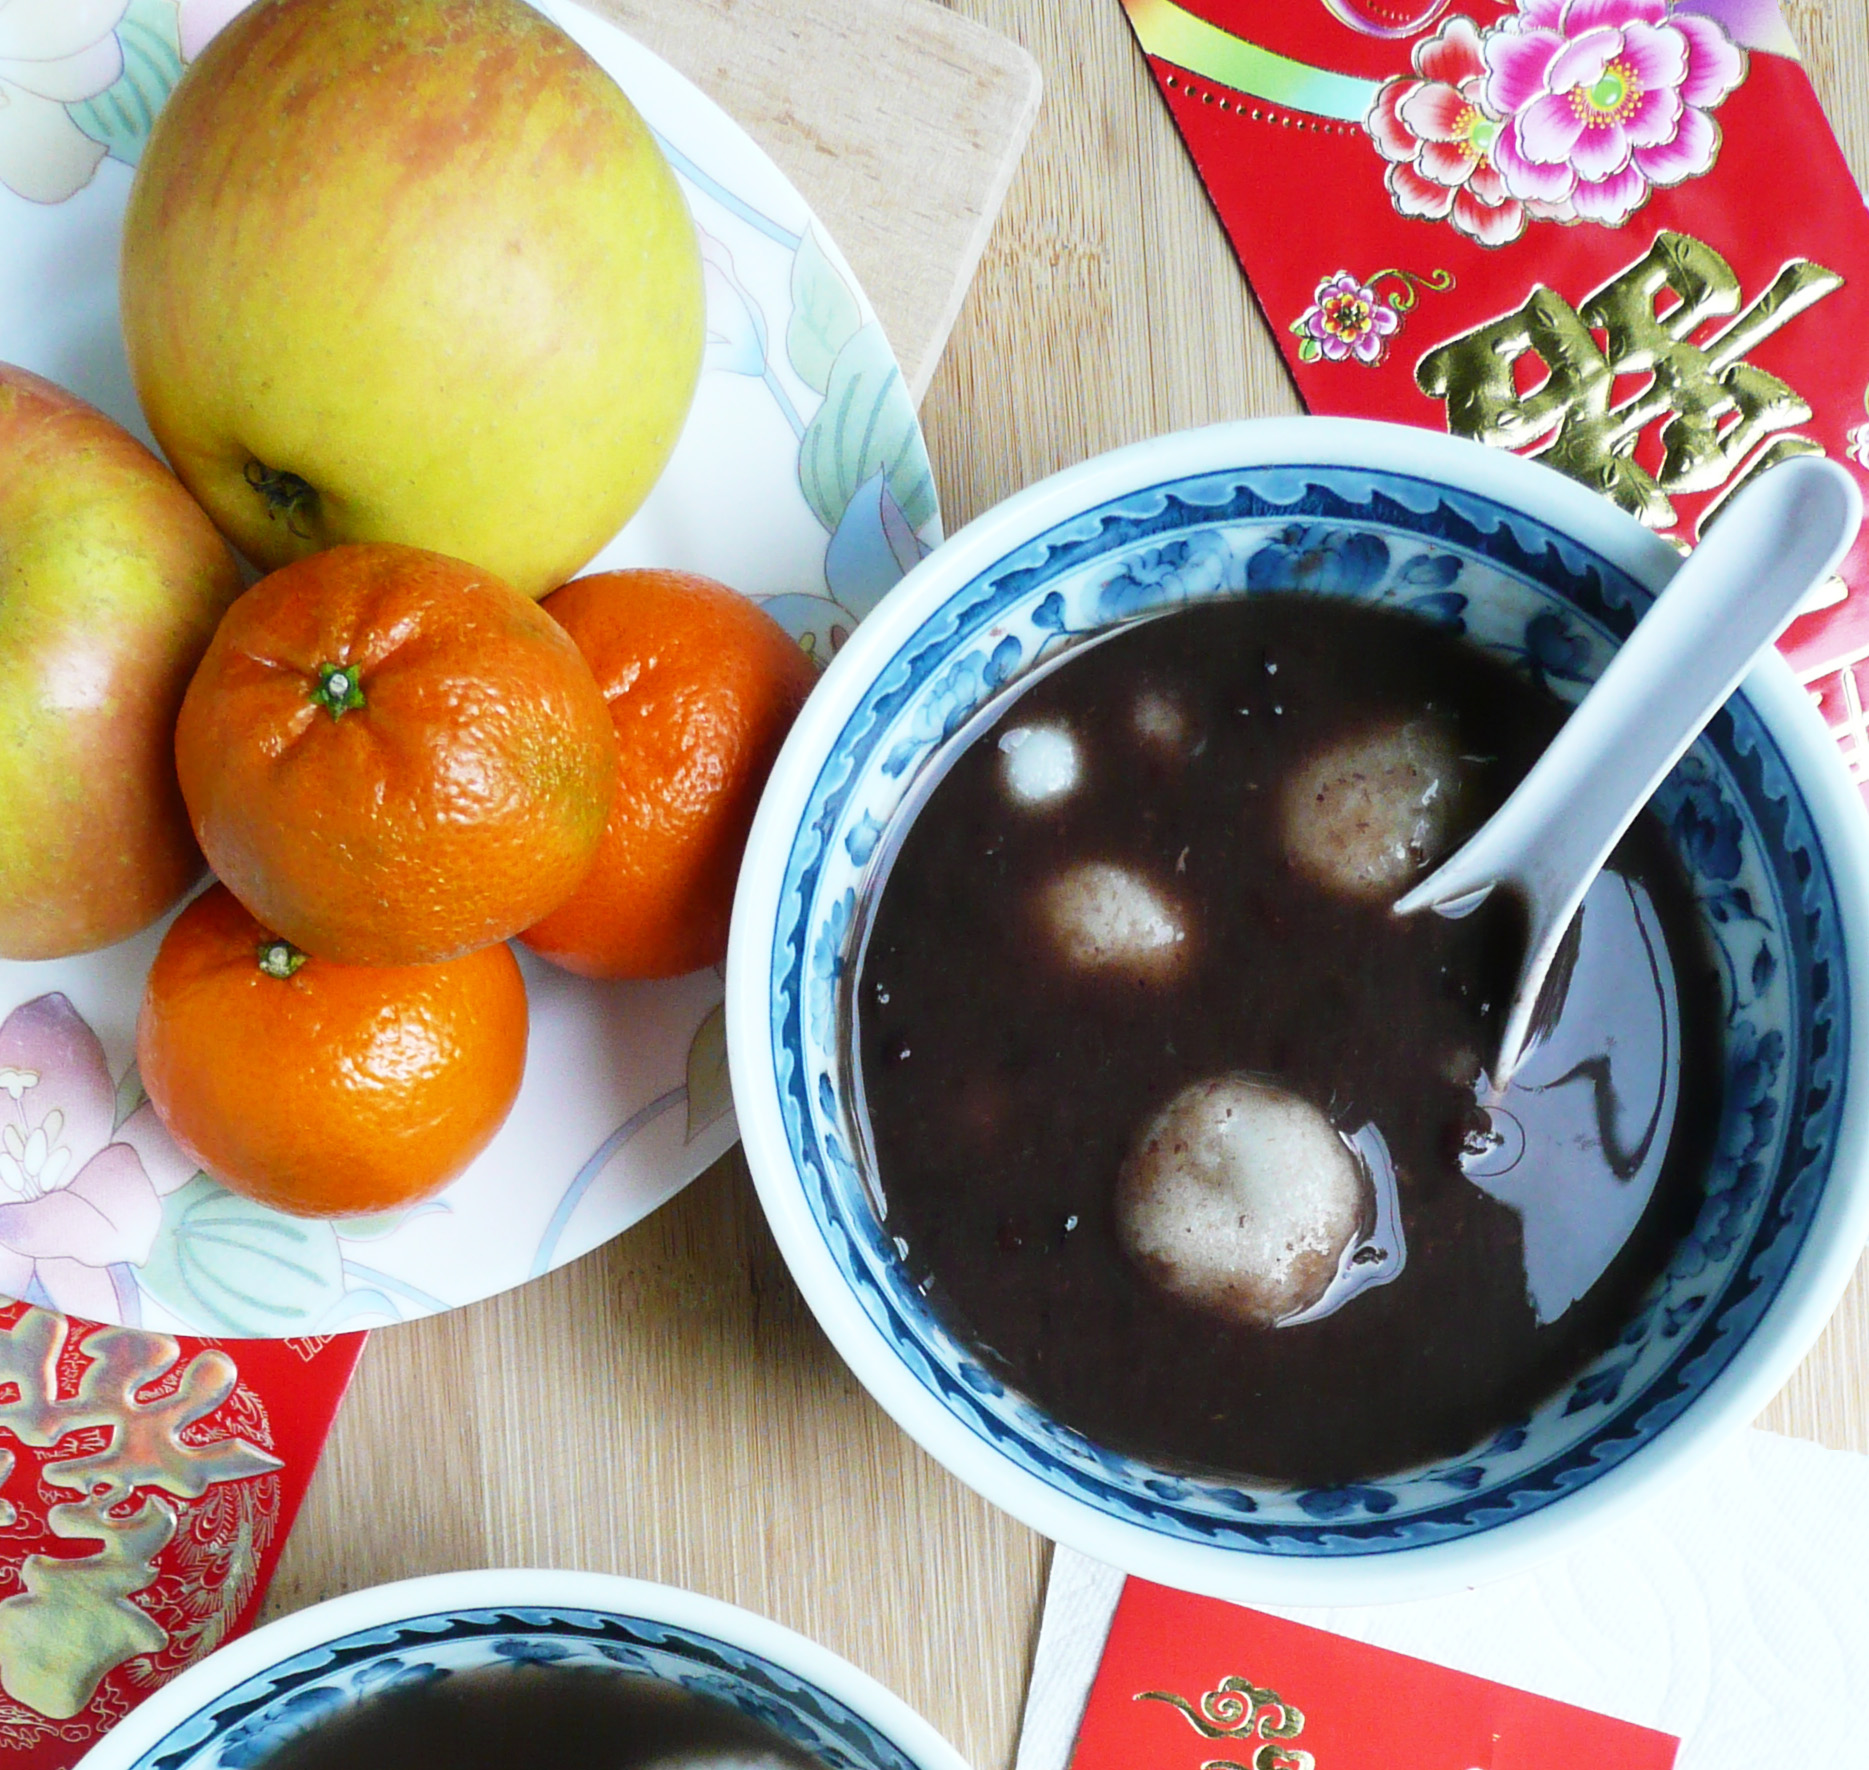
Every Asian culture celebrates Lunar New Year a little differently, but growing up Chinese American, we always made sure that we ate fish (for prosperity), noodles (for long life), oranges (for wealth), and tang yuan during the Lunar New Year feast.
“Tang” means soup, and “yuan” means round. “Yuan” also signifies a family gathering around a table, so this is why tang yuan are eaten at Lunar New Year.
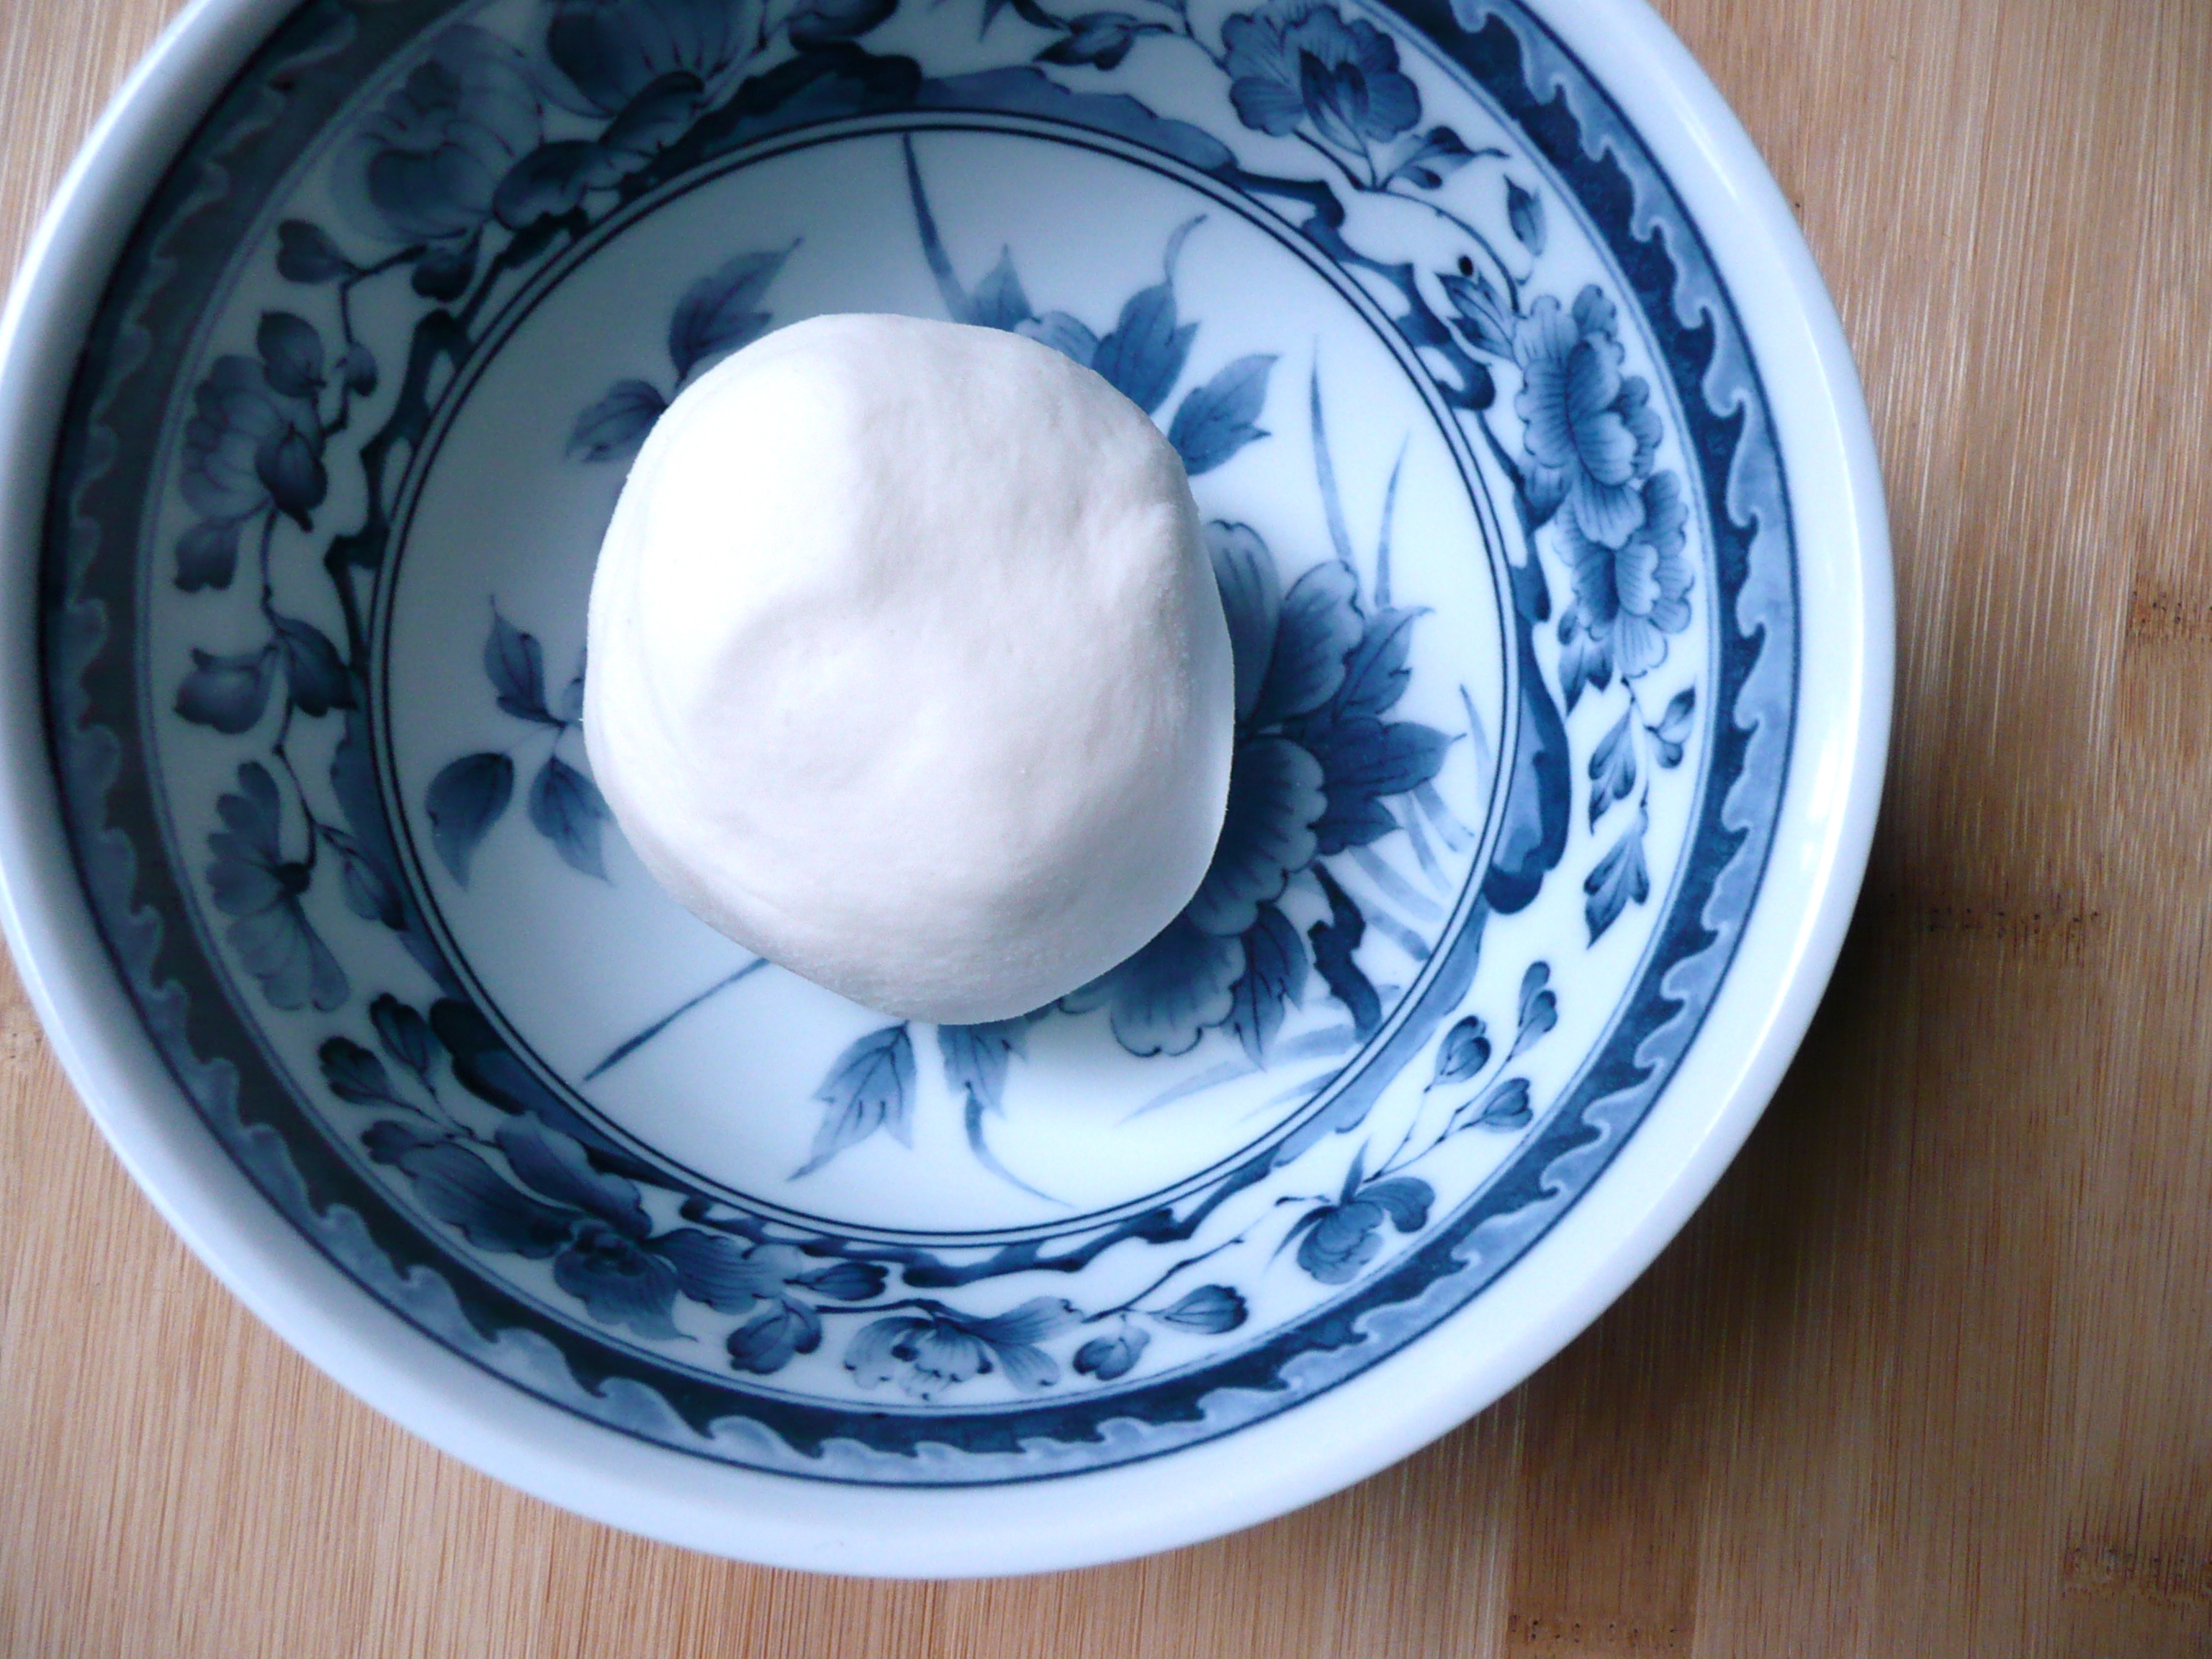
Tang yuan are chewy sweet rice balls. They can be filled with anything (there are peanut butter ones, taro ones, and black sesame ones too) but these are filled with sweet red bean paste, which is one of my favorite fillings.
These tang yuan are easy to make, and refined sugar free but still taste just like the ones I grew up eating.
My family eats them with red bean soup, and this is the perfect thing to warm you right up during cold weather that we’re having.
I hope that you eat these tang yuan surrounded by lots of loved ones this Lunar New Year.
Tang Yuan (Sweet Rice Balls with Red Bean Filling)
1/2 cup sweet rice flour – 90 g (I used the Koda Farms Mochiko Sweet Rice Flour)***
1/4 cup warm water – 60 g
* 3 – 4 Tang Yuan per person should be ok if you’re eating a big meal for Lunar New Year, but my family usually eat a lot of them. Some people want 8 tang yuan in their bowl, some want 5, so it’s a good idea to make some extra ones just in case. This recipe can easily be doubled or tripled if need be, and it’s nice to have some extra tang yuan on hand in the winter months when you want a sweet warm snack.
**Make the red bean soup first, then use those some of those red beans in this recipe. drain about 1 cup of beans and liquid before you measure the 1/2 cup. You want the 1/2 of beans to be almost all beans with very little liquid. Press the red beans lightly with the back of a spoon while the red beans are in a sieve so that you get as much excess liquid out of the beans as possible. You can save the liquid and add it back into the red bean soup, or keep it to the side to and eat it with a drizzle of maple syrup if you don’t want to make the red bean soup thinner.
*** I recommend weighing the sweet rice flour if possible for the best results.
Instructions
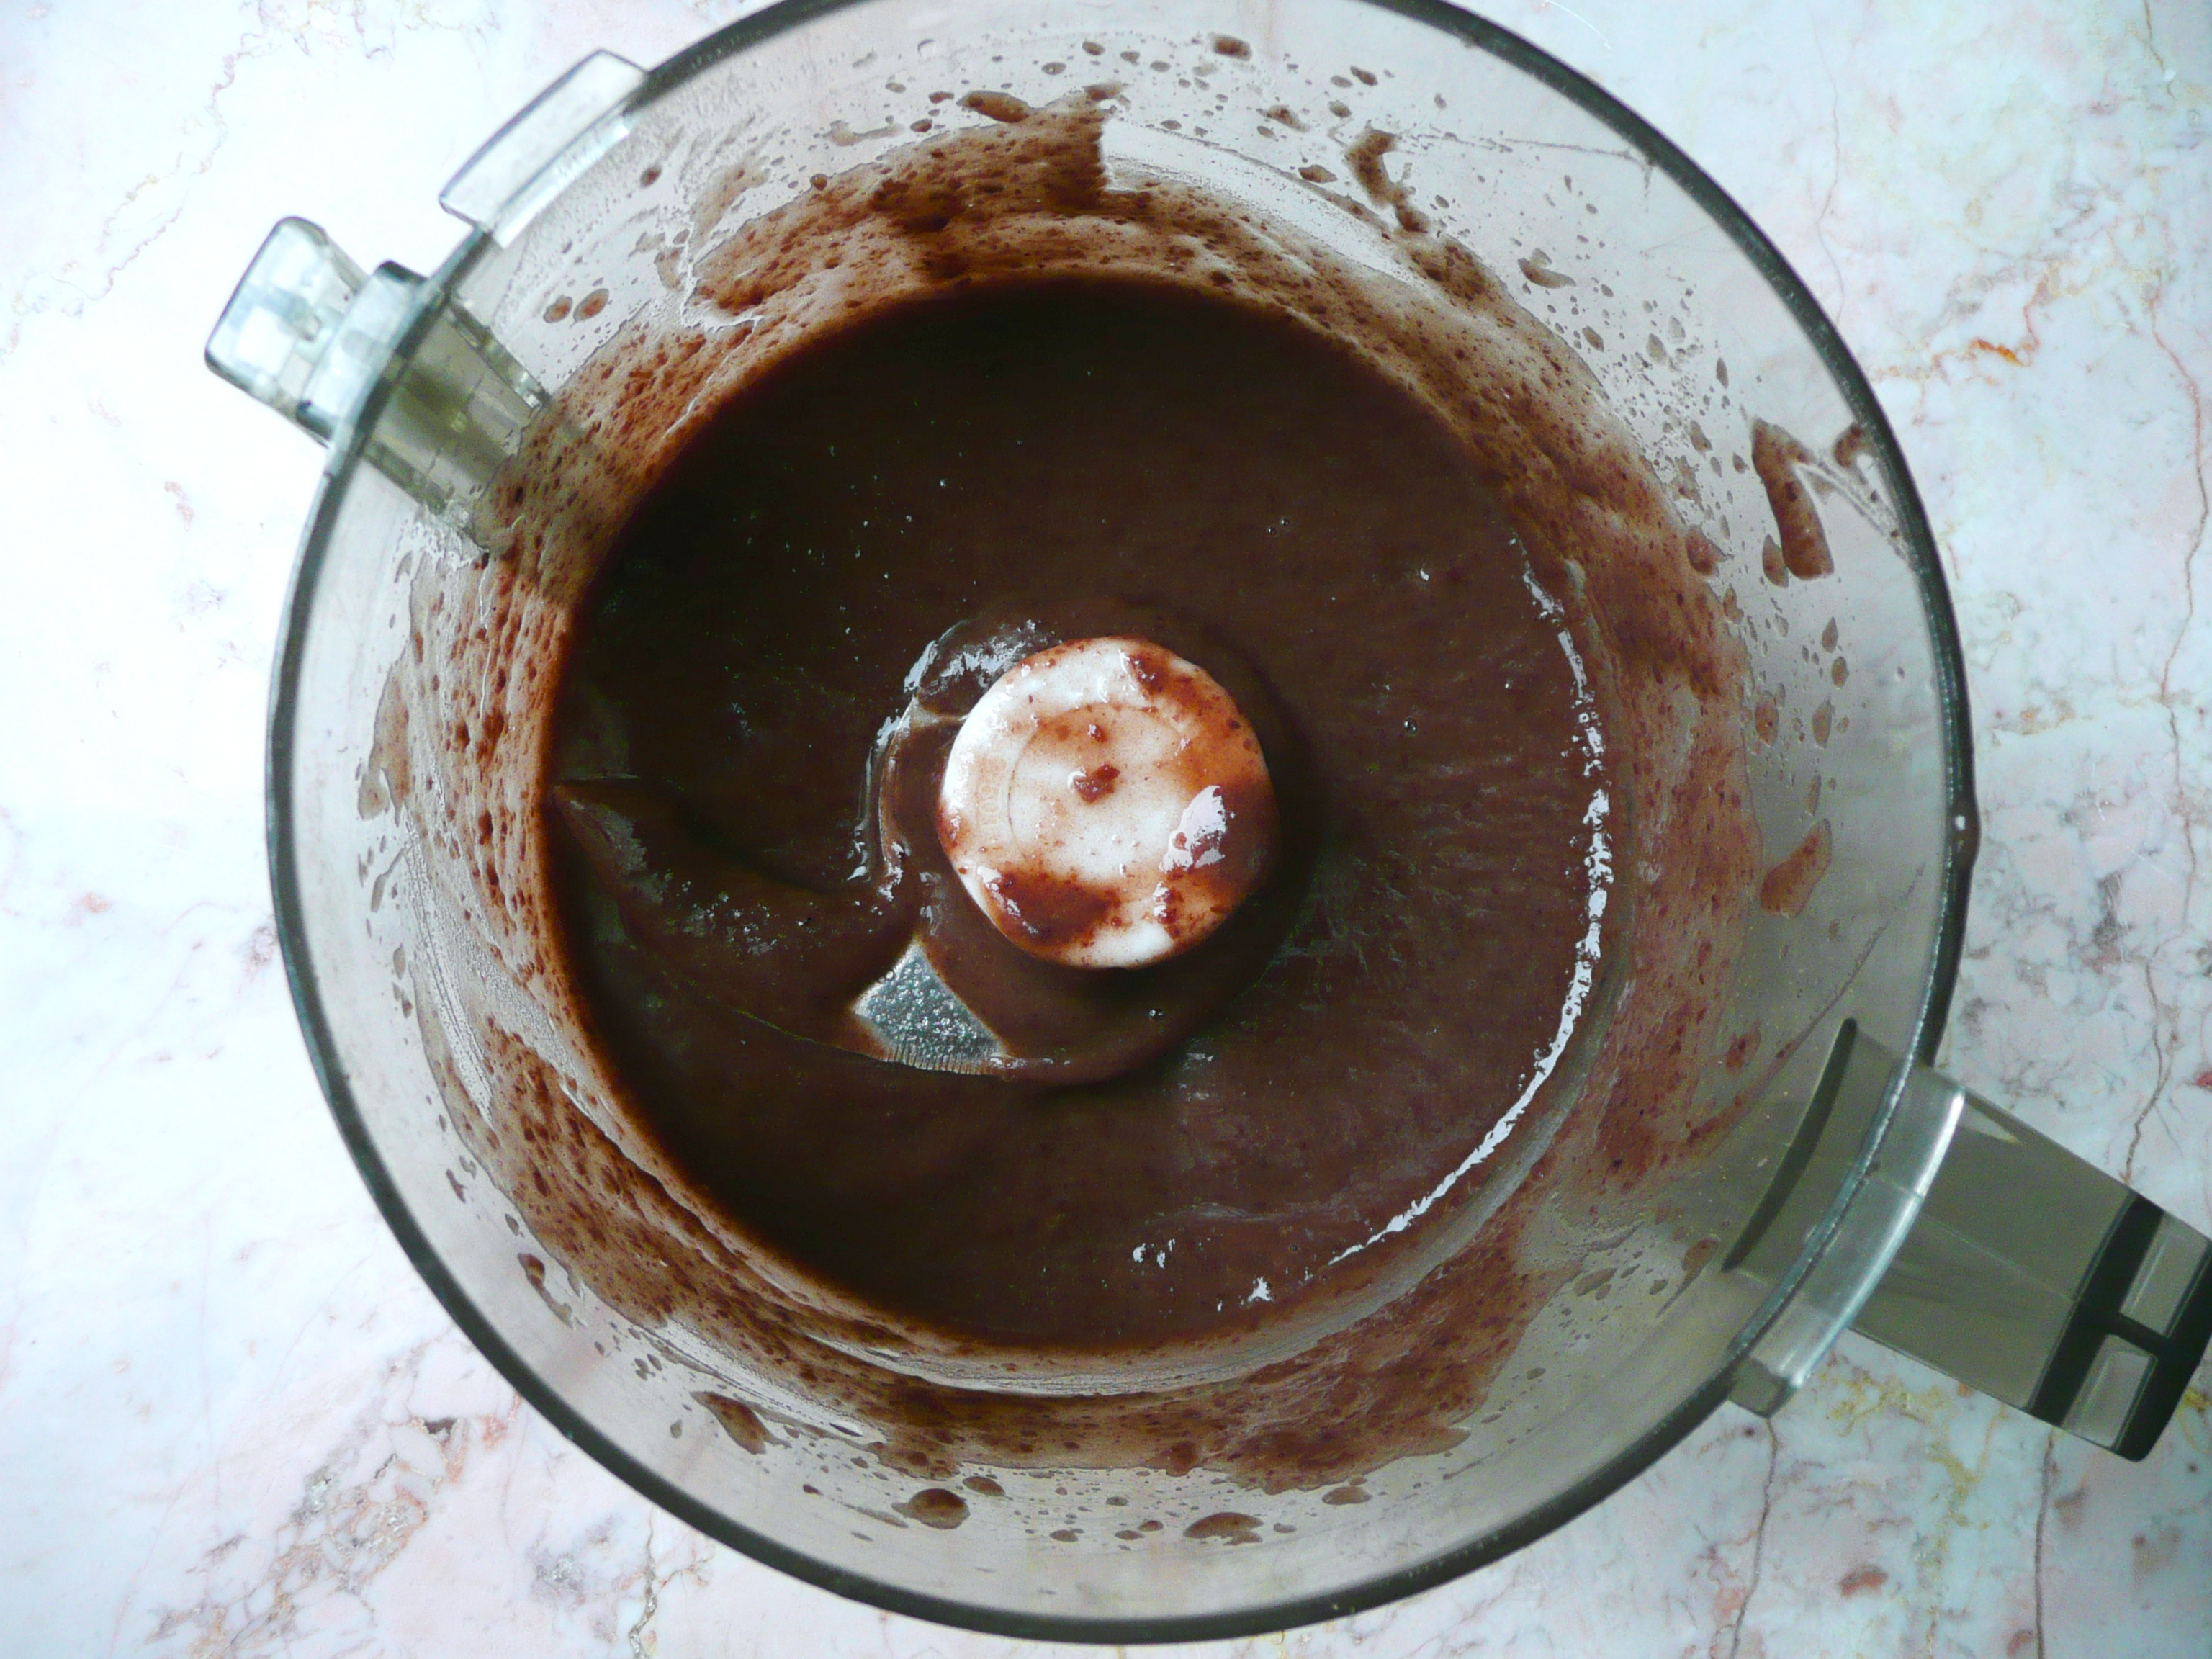
1. Add the drained red beans into a food processor with the 1/8 cup of maple syrup (I know that it doesn’t seem like much sweetener, but it gives just the right amount of sweetness to the tang yuan) and blend until smooth. It will look like this when it’s done.
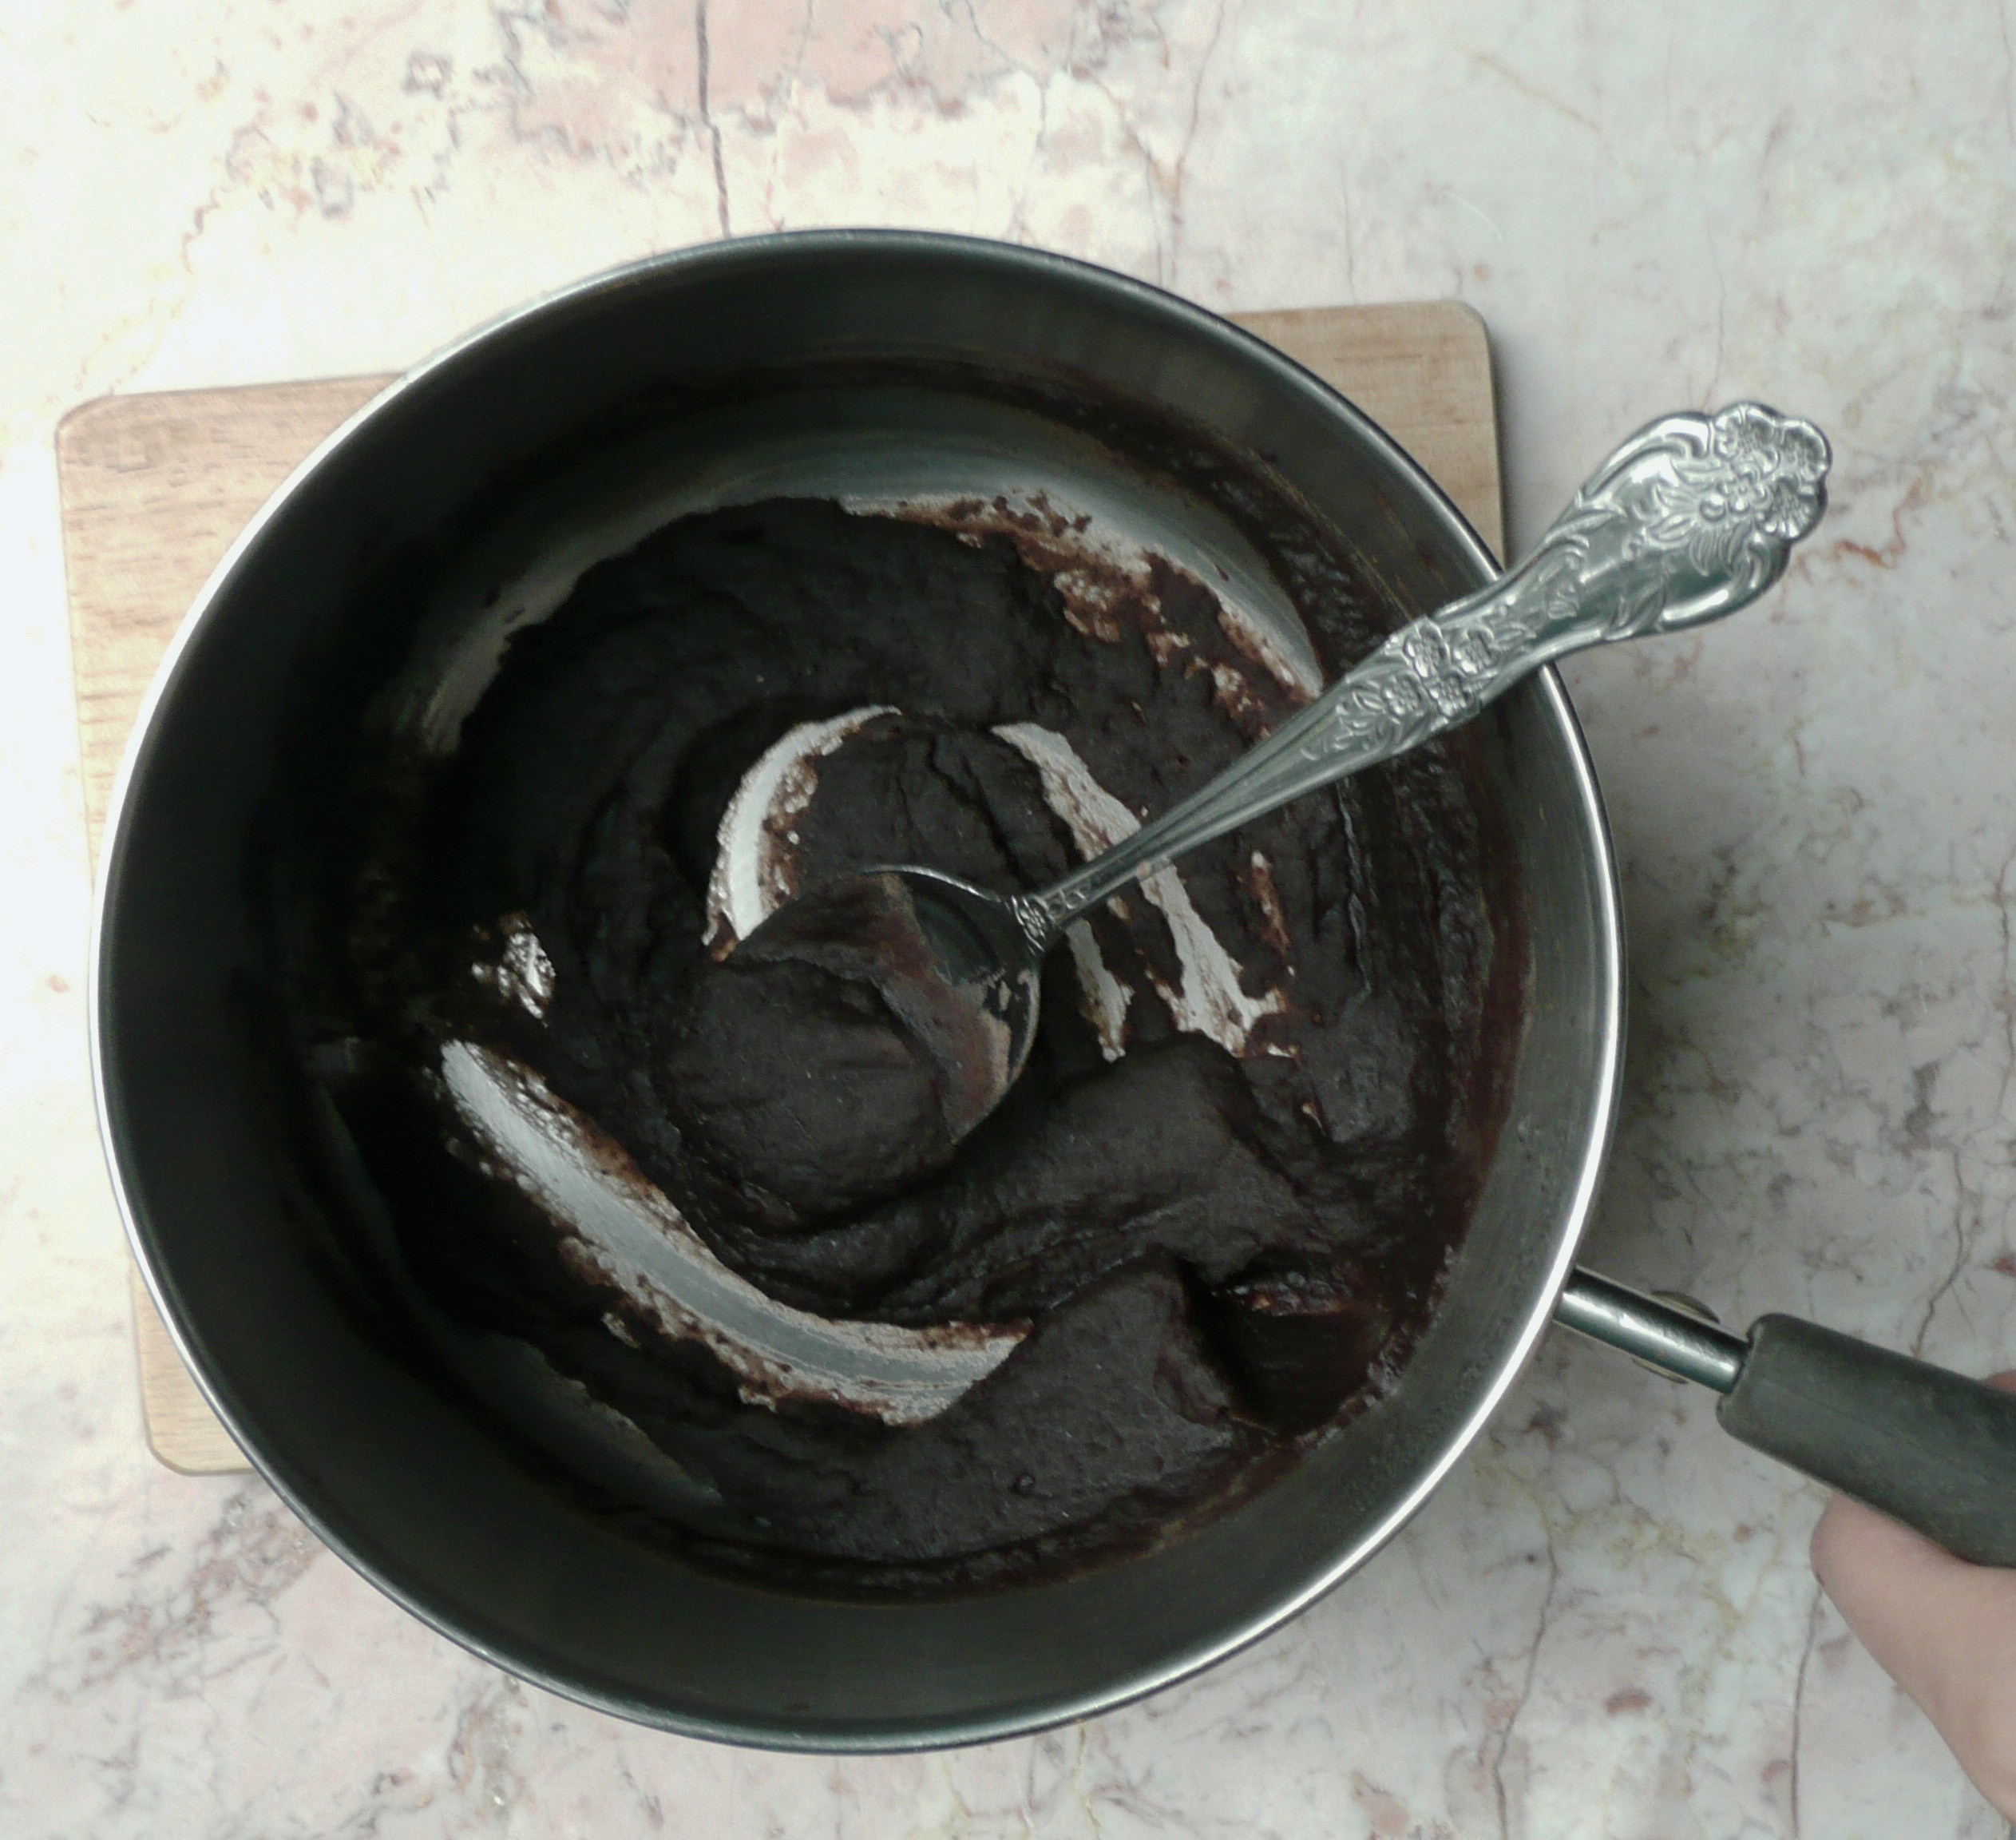
2. Cook the mixture in a small saucepan on medium high for 7-8 minutes, stirring constantly until thickened. It should be a similar texture to jam when you’re done.
3. Take the pan off the heat and allow to cool. The mixture should be reduced to just over 1/3 cup of red bean paste. Lay plastic wrap over a plate, and scoop a 1/2 tsp amount of the red bean paste into your hands and roll into a ball. Place the ball on the plate and repeat until you use up all the red bean paste. You should get about 12 little balls of paste in total. Cover lightly with plastic wrap and freeze for at least 1 hour until solid.
4. When the red bean balls are frozen solid, add the warm water to the sweet rice flour and stir with a fork until a shaggy dough is formed. Knead the dough together with your hands for 1-2 minutes until smooth.
5. Divide the dough into 12 pieces and keep the pieces of dough that you’re not working with covered with plastic wrap so that it doesn’t dry out.
Take the red bean paste balls out of the freezer. If you’re working with a double or triple batch, take about 12 red bean paste balls out of the freezer at a time, that way that don’t defrost before you cover them in the dough. It’s much easier to wrap the red bean paste in the dough if the red bean paste is frozen solid.
Wet your hands, and flatten each piece of dough into a small disk in your hand and pinch and fold the dough together to cover the red beans paste and roll until the ball is smooth.
If you’re a visual learner, this video shows how it’s done starting at the 2:30 min mark.
The first time I tried covering the balls in the dough, I did it with dry hands and it was much more difficult to work with than when my hands were wet. When I tried it again with wet hands, I made a double batch and only had trouble covering about 4 out of 24 of the tang yuan.
If the dough is too dry, it won’t stick to the red bean paste. You can peel off the dough and knead in a few drops of water before trying to cover the red bean paste again.
If the dough is too wet, it also won’t stick to the ball of red bean paste, but it will stick to just about everything else. In that case, just knead it with your hands for a little bit until it dries out a little and try again. Don’t worry if you can see little flecks of red bean paste on the outside of the tang yuan. No one will notice once they are in the soup.
If you get an air bubble around the red bean paste and the dough is not sticking to the ball, pull all the dough off of the ball, wet your hands, knead it the dough a little and try covering the ball again. This technique works better than trying to squeeze the air out which tends to make the rest of the dough pull away from the ball as well.
Once you’re done rolling the tang yuan, put them onto a plate lined in plastic wrap and cover lightly with another layer of plastic wrap and freeze until solid. Once frozen, transfer the tang yuan into an air-tight container and stash in your freezer until you are ready to cook them.
When you want to cook them, warm up some red bean soup (or you can also eat the tang yuan in the water that you cook them in with a little maple syrup drizzled over for sweetness).
Then bring a pot of water to the boil. Add the tang yuan (cook a few extra in case a few break open while cooking), cover with the lid and turn the heat down to medium low. Let the tang yuan cook until they float (about 6-8 minutes) lifting the lid to check on them occasionally. Once they are floating, put the lid back on and then set a timer 3 minutes let them continue cooking over medium low until the timer goes off.
If some of the tang yuan break open, don’t worry about. Just ladle those ones into your bowl (cook’s treat, you can also ask if anyone else wants the extras) and they will taste just as good as the whole ones.
For the Miniature Tang Yuan – You can also make little (non-filled tang yuan) as well, and those are even easier to make.
Stir together 1/4 cup (45g) sweet rice flour with 1/8 cup warm water (30 g) and knead until smooth. Roll the dough into a long snake and keep cutting the dough in half until you have 32 little pieces of dough about the size of a centimeter. Roll each little piece of dough into a ball and place them on a plate lined in plastic wrap. Over lightly with another piece of plastic wrap and freeze until solid.
The cooking instructions for the little tang yuan (no matter if they are freshly made or frozen) is to bring a pot of water to the boil. Add in the little tang yuan, cover, and set a time for 3 minutes.
When the timer is up, scoop out the little tang yuan with a slotted spoon and add them to the red bean soup. Ta-da! Extra adorableness for Lunar New Year!
To Serve – Ladle the red bean soup into bowls, top with your tang yuan and drizzle over some maple syrup.
What I do when I eat this soup is I’ll drizzle over about 1 tbsp of maple per bowl and don’t stir it in. That way, each time you take a bite you get a little hint of sweetness and you use less sweetener overall in the soup.
I hope that you and your family have a lucky, wonderful, safe and prosperous Lunar New Year!
Red bean soup is a recipe that my family makes often. Red bean is a very popular flavor in Asian desserts (there’s red bean ice cream, red bean filling in mochi, and even red bean popsicles), and I’ve grown up eating this soup all my life.
This soup is a sweet soup that warms you up in the winter, and it goes great with tang yuan, which are a traditional chewy sweet rice balls that signify family togetherness and are eaten at celebrations like weddings, and especially at Lunar New Year.
This soup is normally made with a lot of cane sugar, but I make the soup with maple syrup instead. My trick for using less sweetener when eating this soup is to drizzle about 1 tbsp of maple syrup on top of each bowl, and to not stir it in.
That way each time you take a bite, you get that little hint of sweetness and you end up using less maple syrup overall.
Another good way to cut down the sweetener in red bean soup is to cook the soup in a slow cooker. The beans taste sweeter when cooked this way, and with a few tang yuan and a drizzle of maple syrup, I promise you that you won’t miss the cane sugar version because this one is amazing.
If you need to cook red bean soup in a hurry, you can do this on the stove top in about 1 – 1 1/2 hours. The texture of the beans won’t be quite as soft and tender as the slow cooker red bean soup, but the stove top version will still be very good.
If you’re expecting to serve this to more than 6 people for Lunar New Year, I recommend making two batches of this soup. If you have extra, you can send it home with people and everyone will be extra happy for Lunar New Year.
Sweet Red Bean Soup Recipe
Makes 4 – 6 servings (if you use some of the red beans to make tang yuan, 6-8 servings if you don’t).
Ingredients
1 lb Adzuki Beans (aka Red Beans, preferably organic)
10.5 cups of filtered water
– maple syrup for serving
Instructions
Slow Cooker Directions
1. Give the beans a good rinse. Add them to a large pot and cover them with 1.5 inches of cool filtered water. Bring the beans to a boil, then set a time for 2 minutes and let the beans boil until the timer goes off.
2. Drain the beans and add them to a slow cooker along with 10.5 cups of filtered water. Cover, and let the beans cook on high for 9-10 hours until the beans are very soft and tender.
Stove Top Directions –
1. Give the beans a good rinse. Add them to a large pot and cover them with 1.5 inches of cool filtered water. Bring the beans to a boil, then set a time for 2 minutes and let the beans boil until the timer goes off.
2. Drain the beans and add them back into the pot along with 10.5 cups of filtered water. Cover, bring the beans to a boil again, then turn the heat down to medium low and let the beans cook covered for 1 – 1 1/2 hours until the beans are soft. Give the beans a stir every now and then, and if the water looks a little low, add a little more water. The soup is done when you can easy smush a bean between your thumb and forefinger.
If after an hour and a half of cooking the beans are still firm (older beans sometimes take longer to cook) turn the heat up to medium and cook for another 30-45 minutes and the beans should be soft by then.