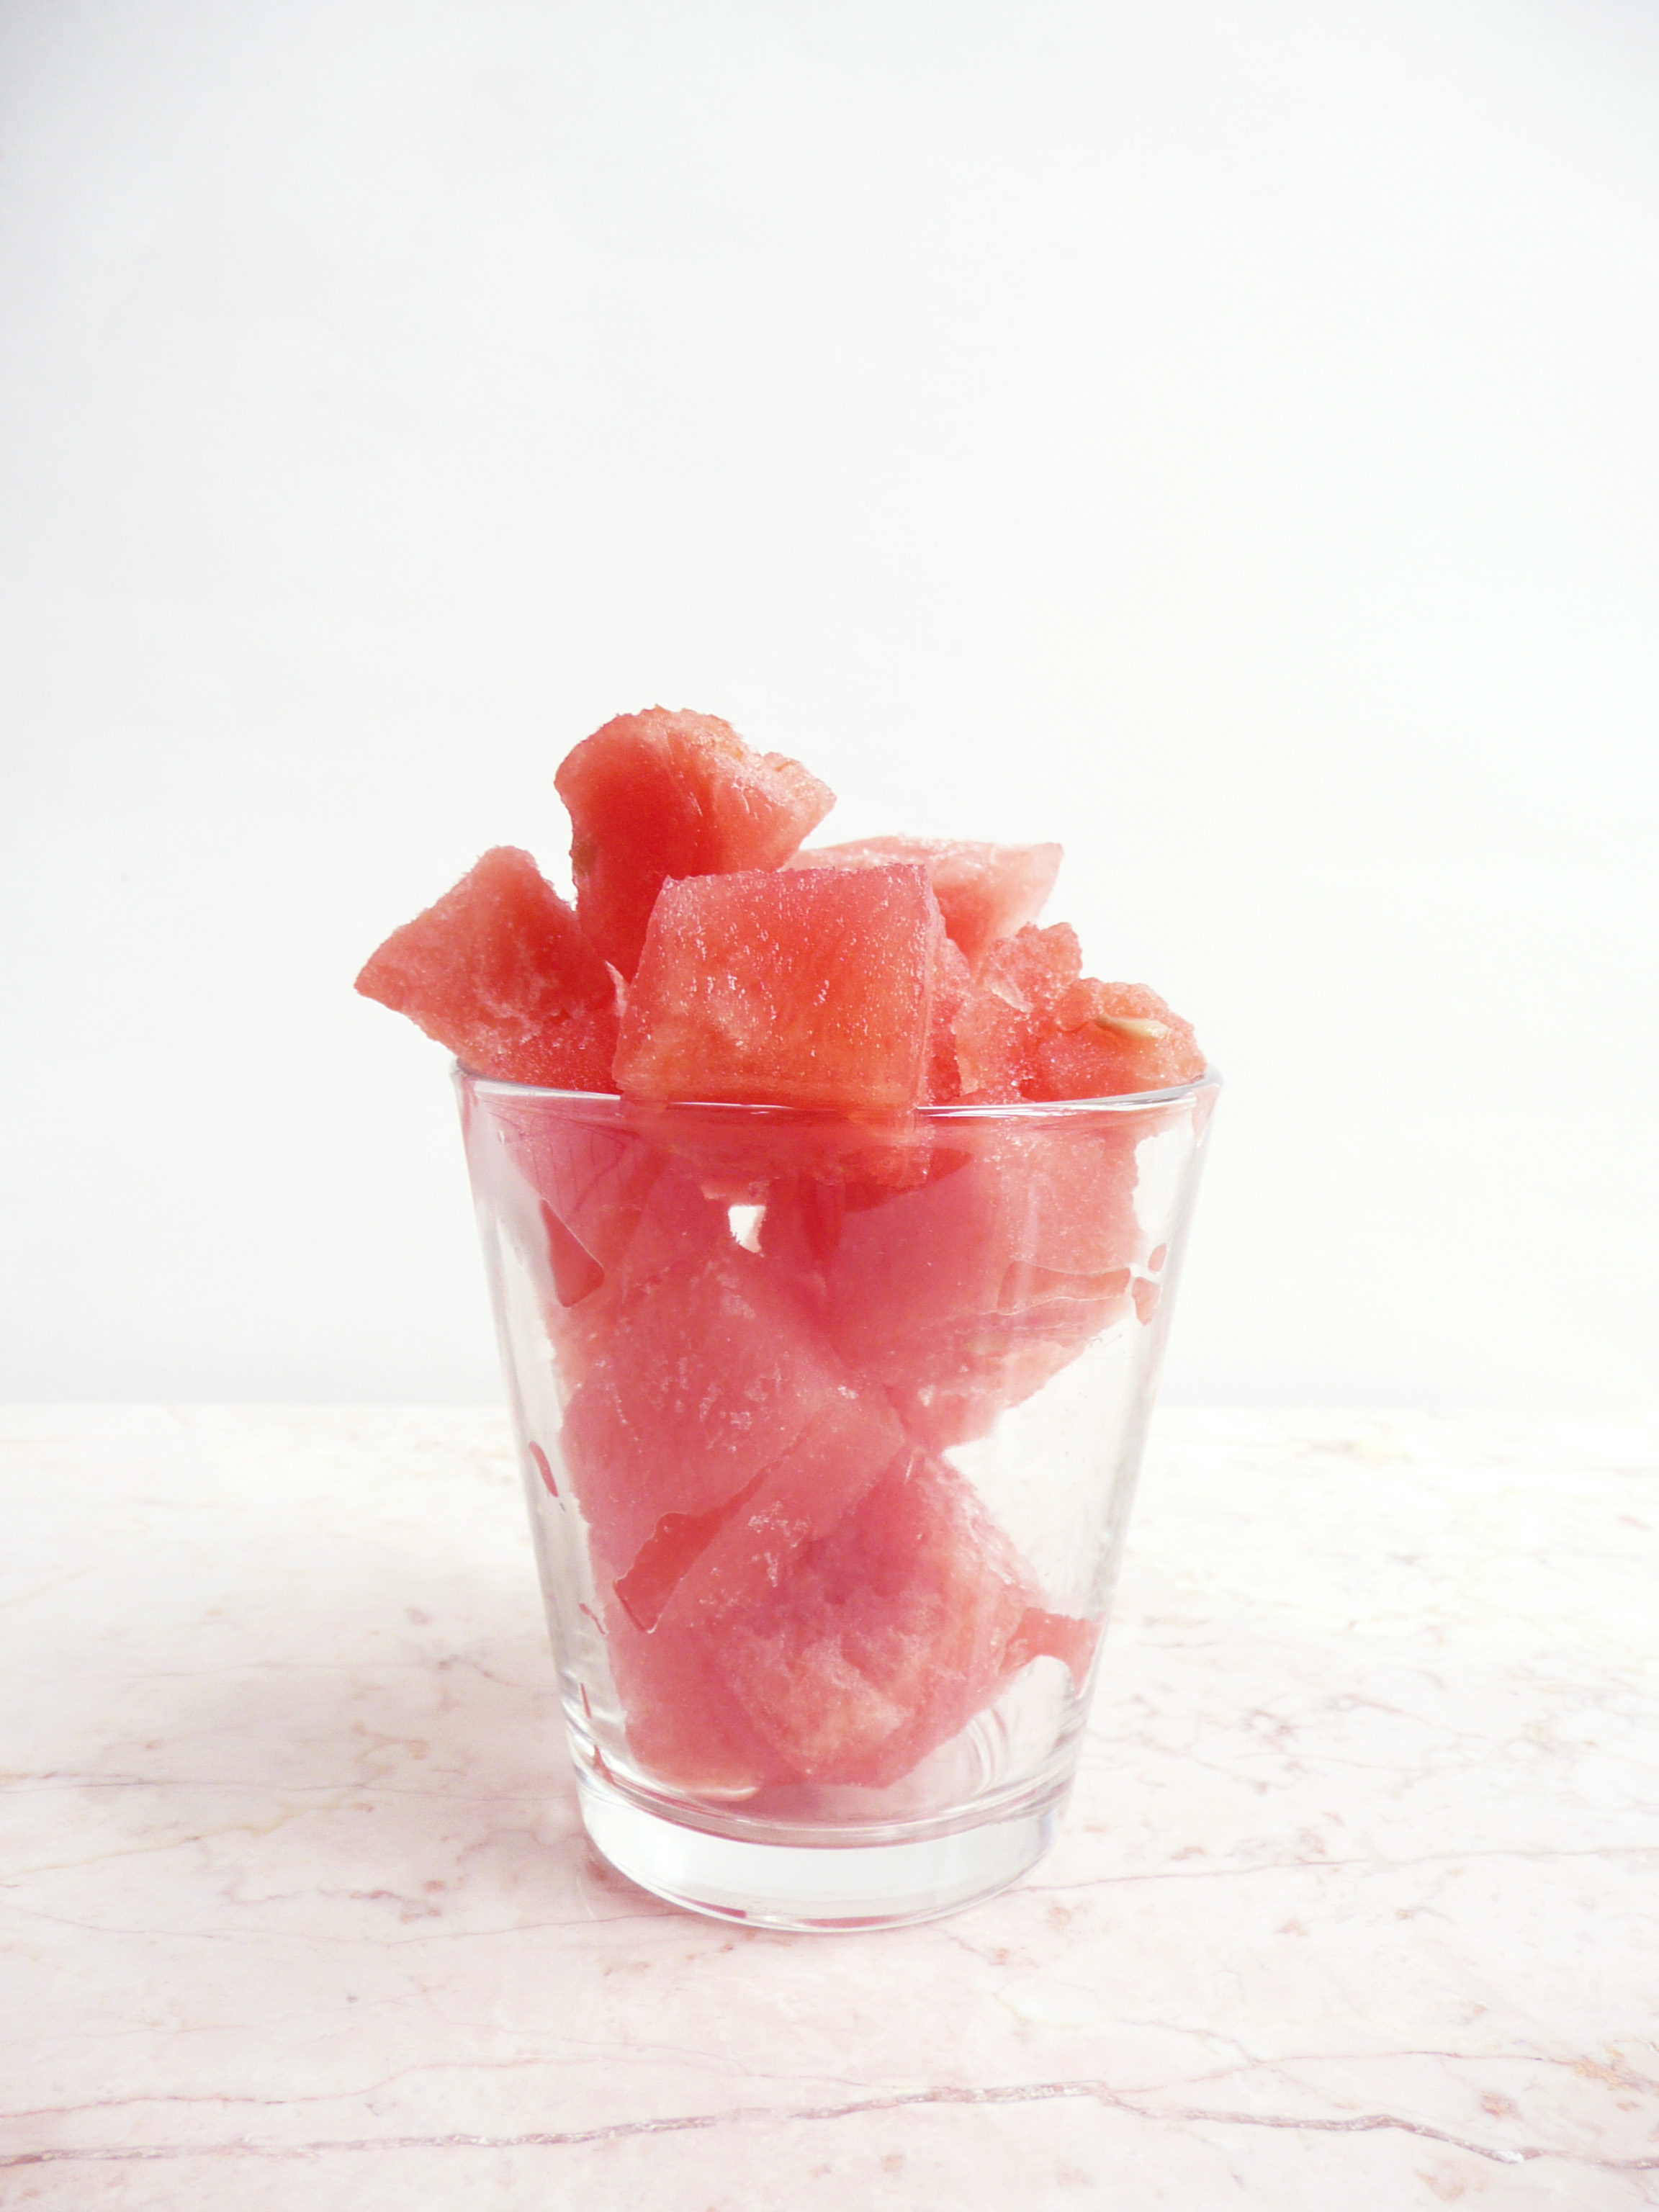
If you’re living through a heat wave at the moment what you probably want most in the world is something sweet, cold, and refreshing to eat.
Here is the simplest of desserts to keep on hand for a hot day. These little cubes of frozen watermelon are delicious and perfect for popping into your mouth (straight from the freezer) to cool you down.
Refined sugar free, dairy free, paleo, and all that jazz… but what’s really important is that they taste so good!
Iced Watermelon Cubes
Makes lots and lots of servings
Ingredients
1 sweet seedless watermelon (pick the sweetest one you can find)
That’s it! 😀
Instructions
1. Cut the watermelon into 3/4 inch cubes (this is a perfect size as they can be eaten straight from the freezer and they thaw quickly too).
2. Freeze the cubes flat in ziptop bags.
To serve, scoop about 1 – 1.5 cups (or however much you want) of the frozen watermelon cubes into a bowl and eat with a spoon.
Ta-Da! I hope that these little cubes of watermelon joy make your summer days a little more awesome. 🙂
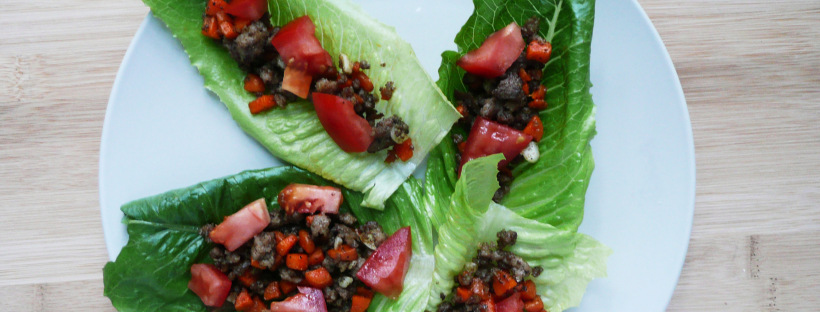
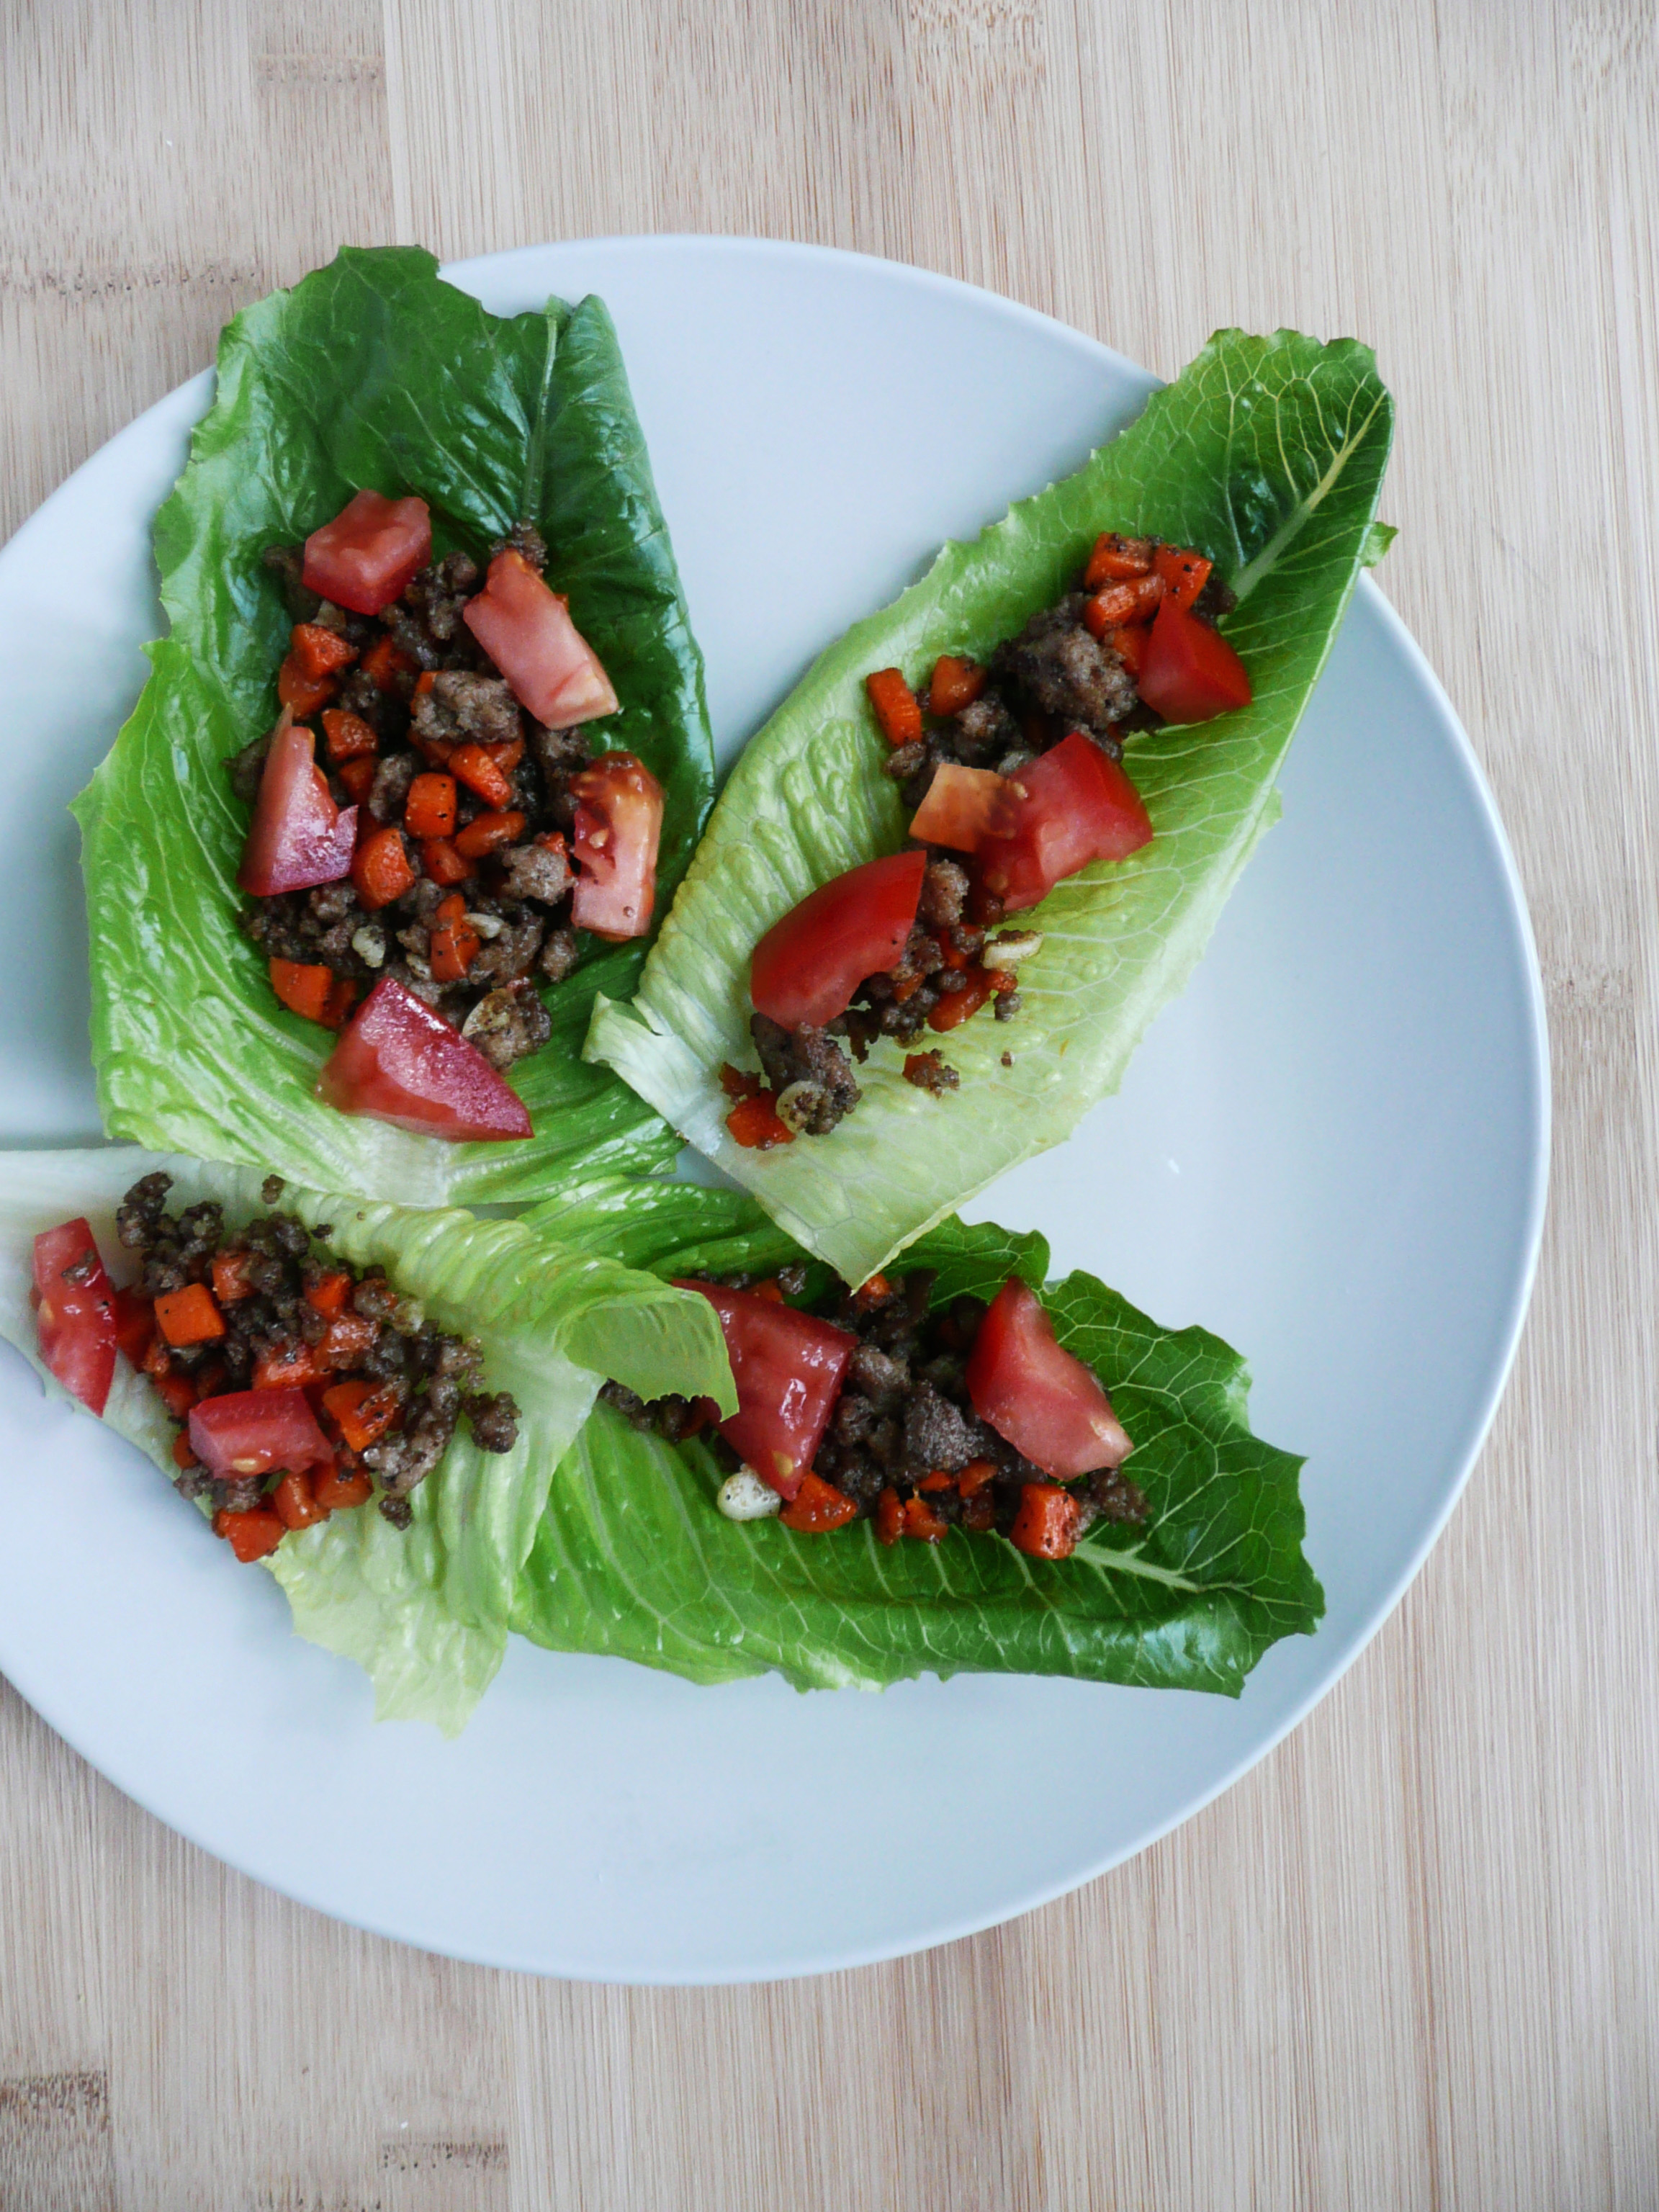
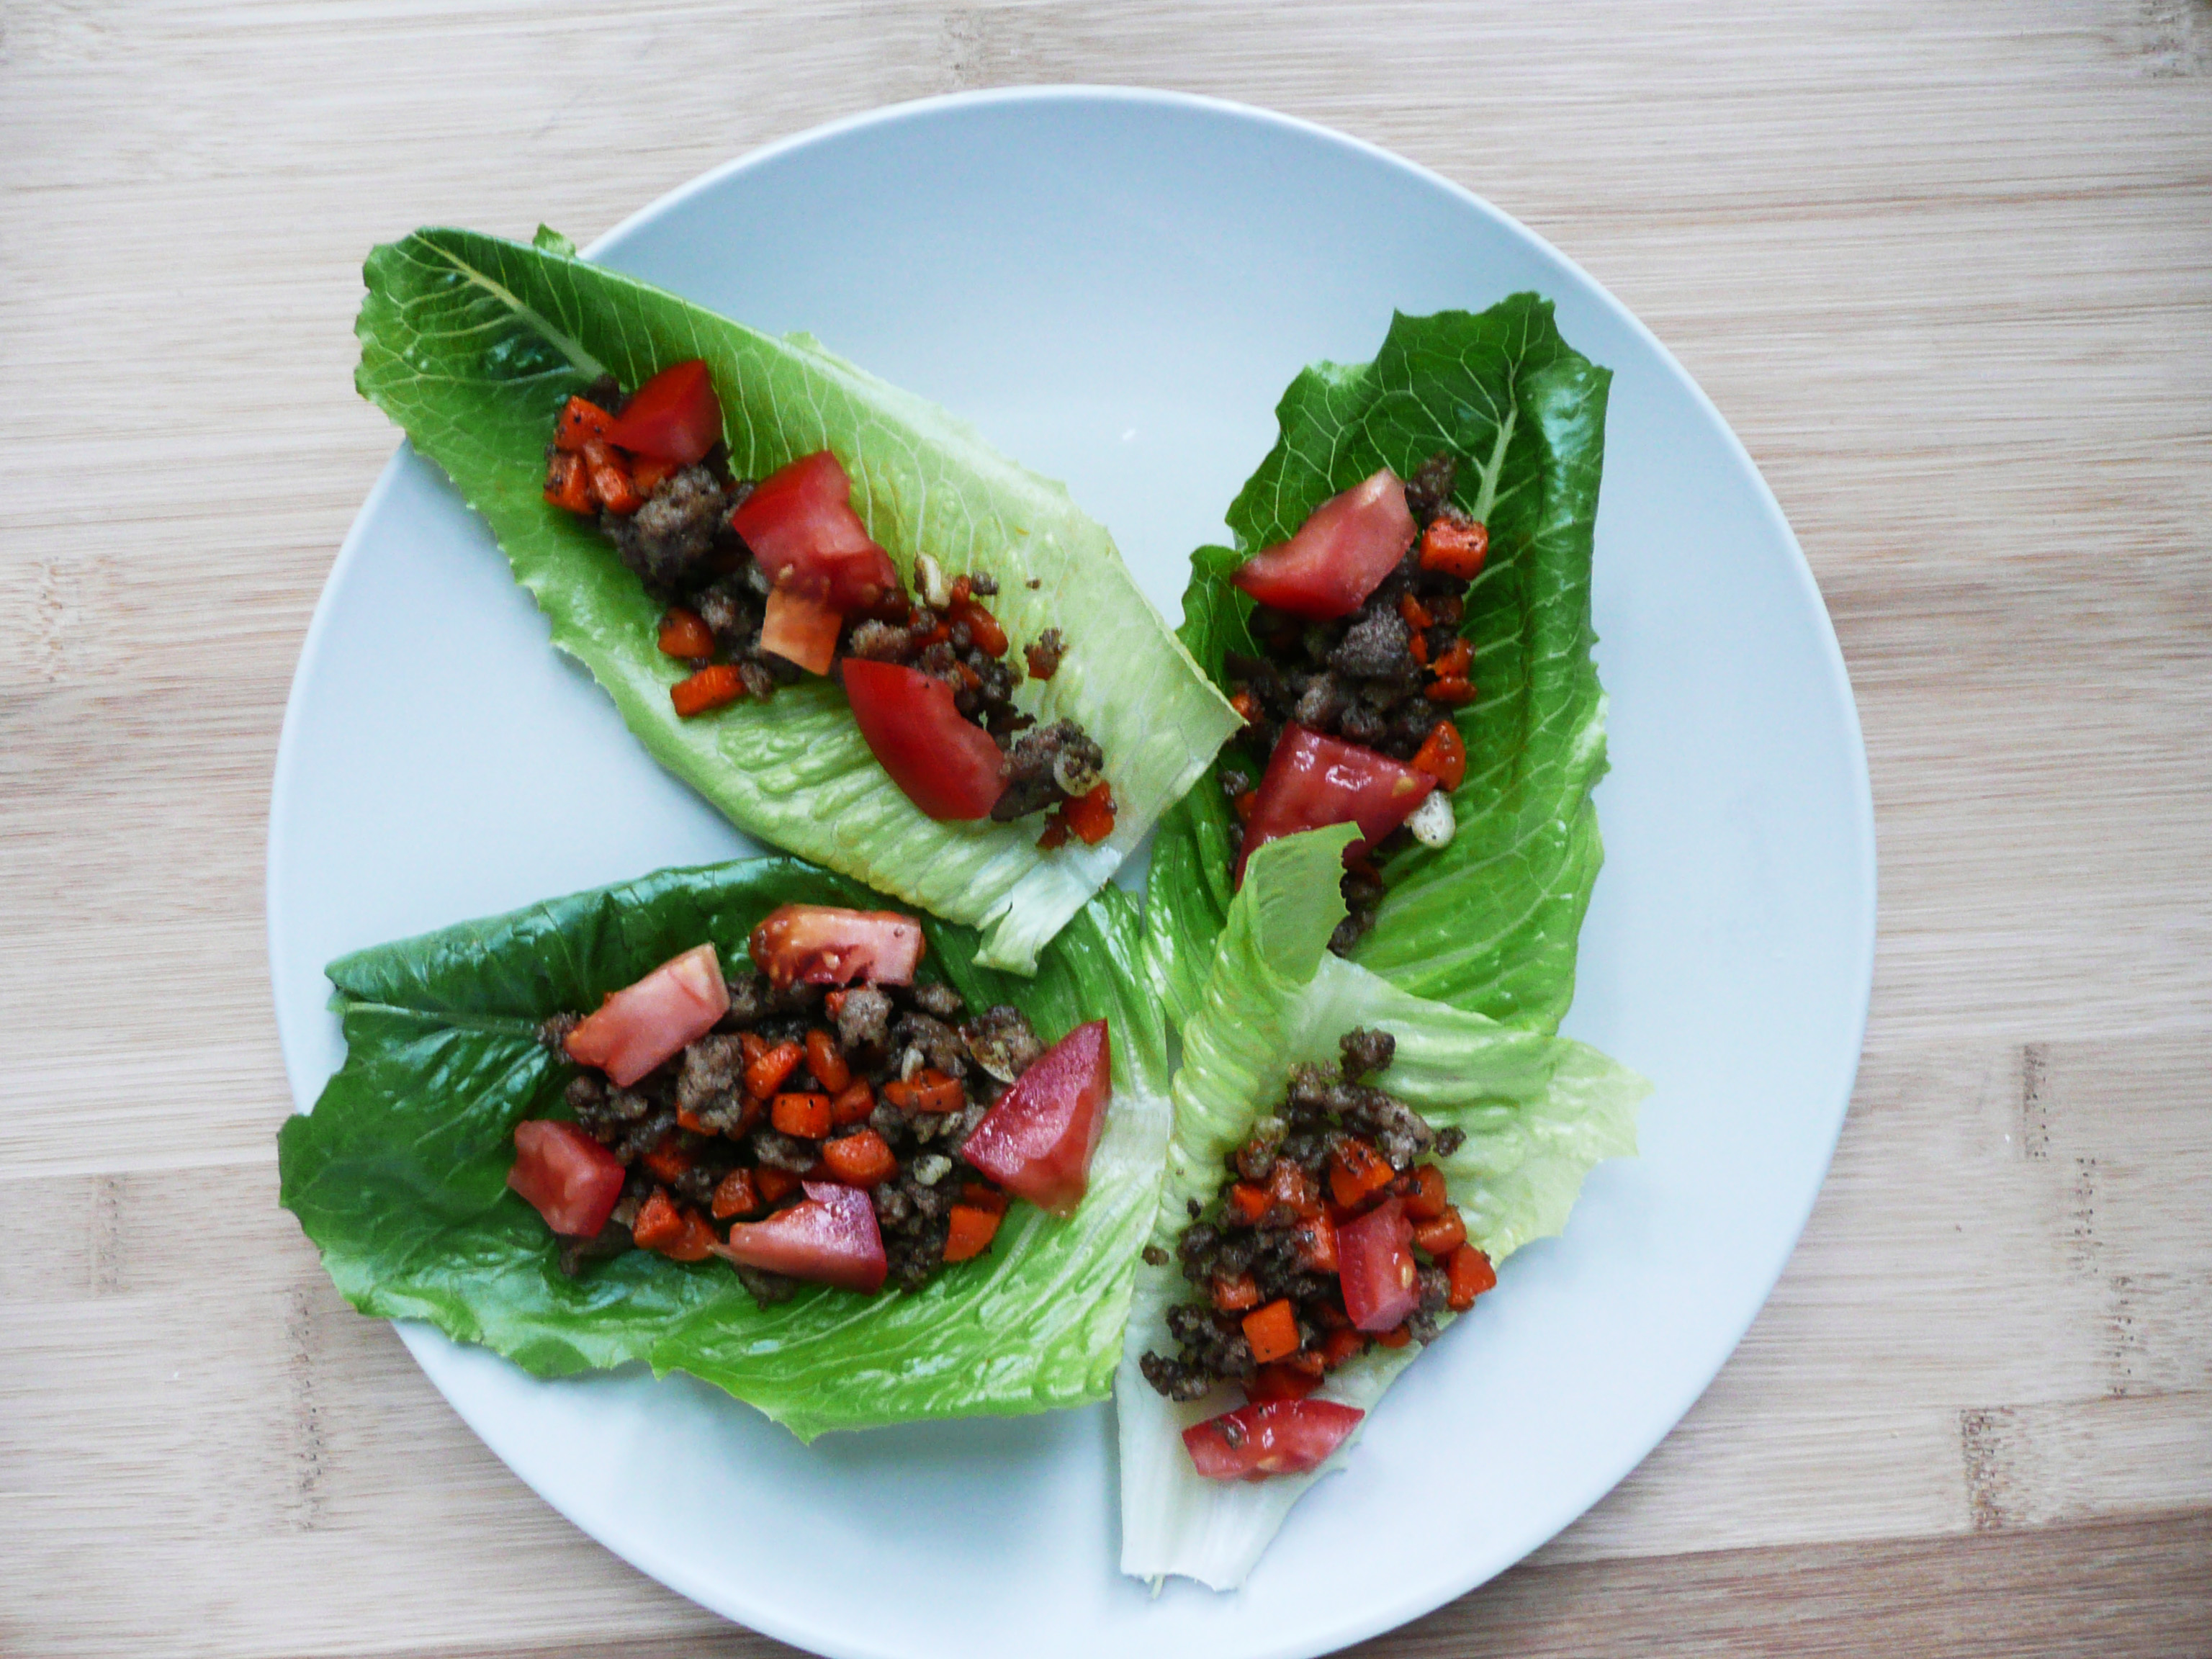
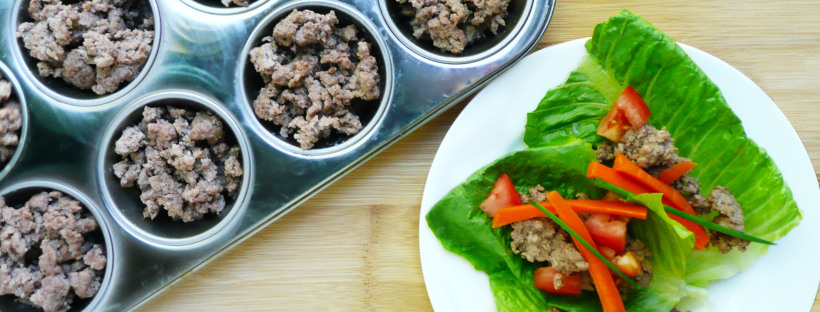
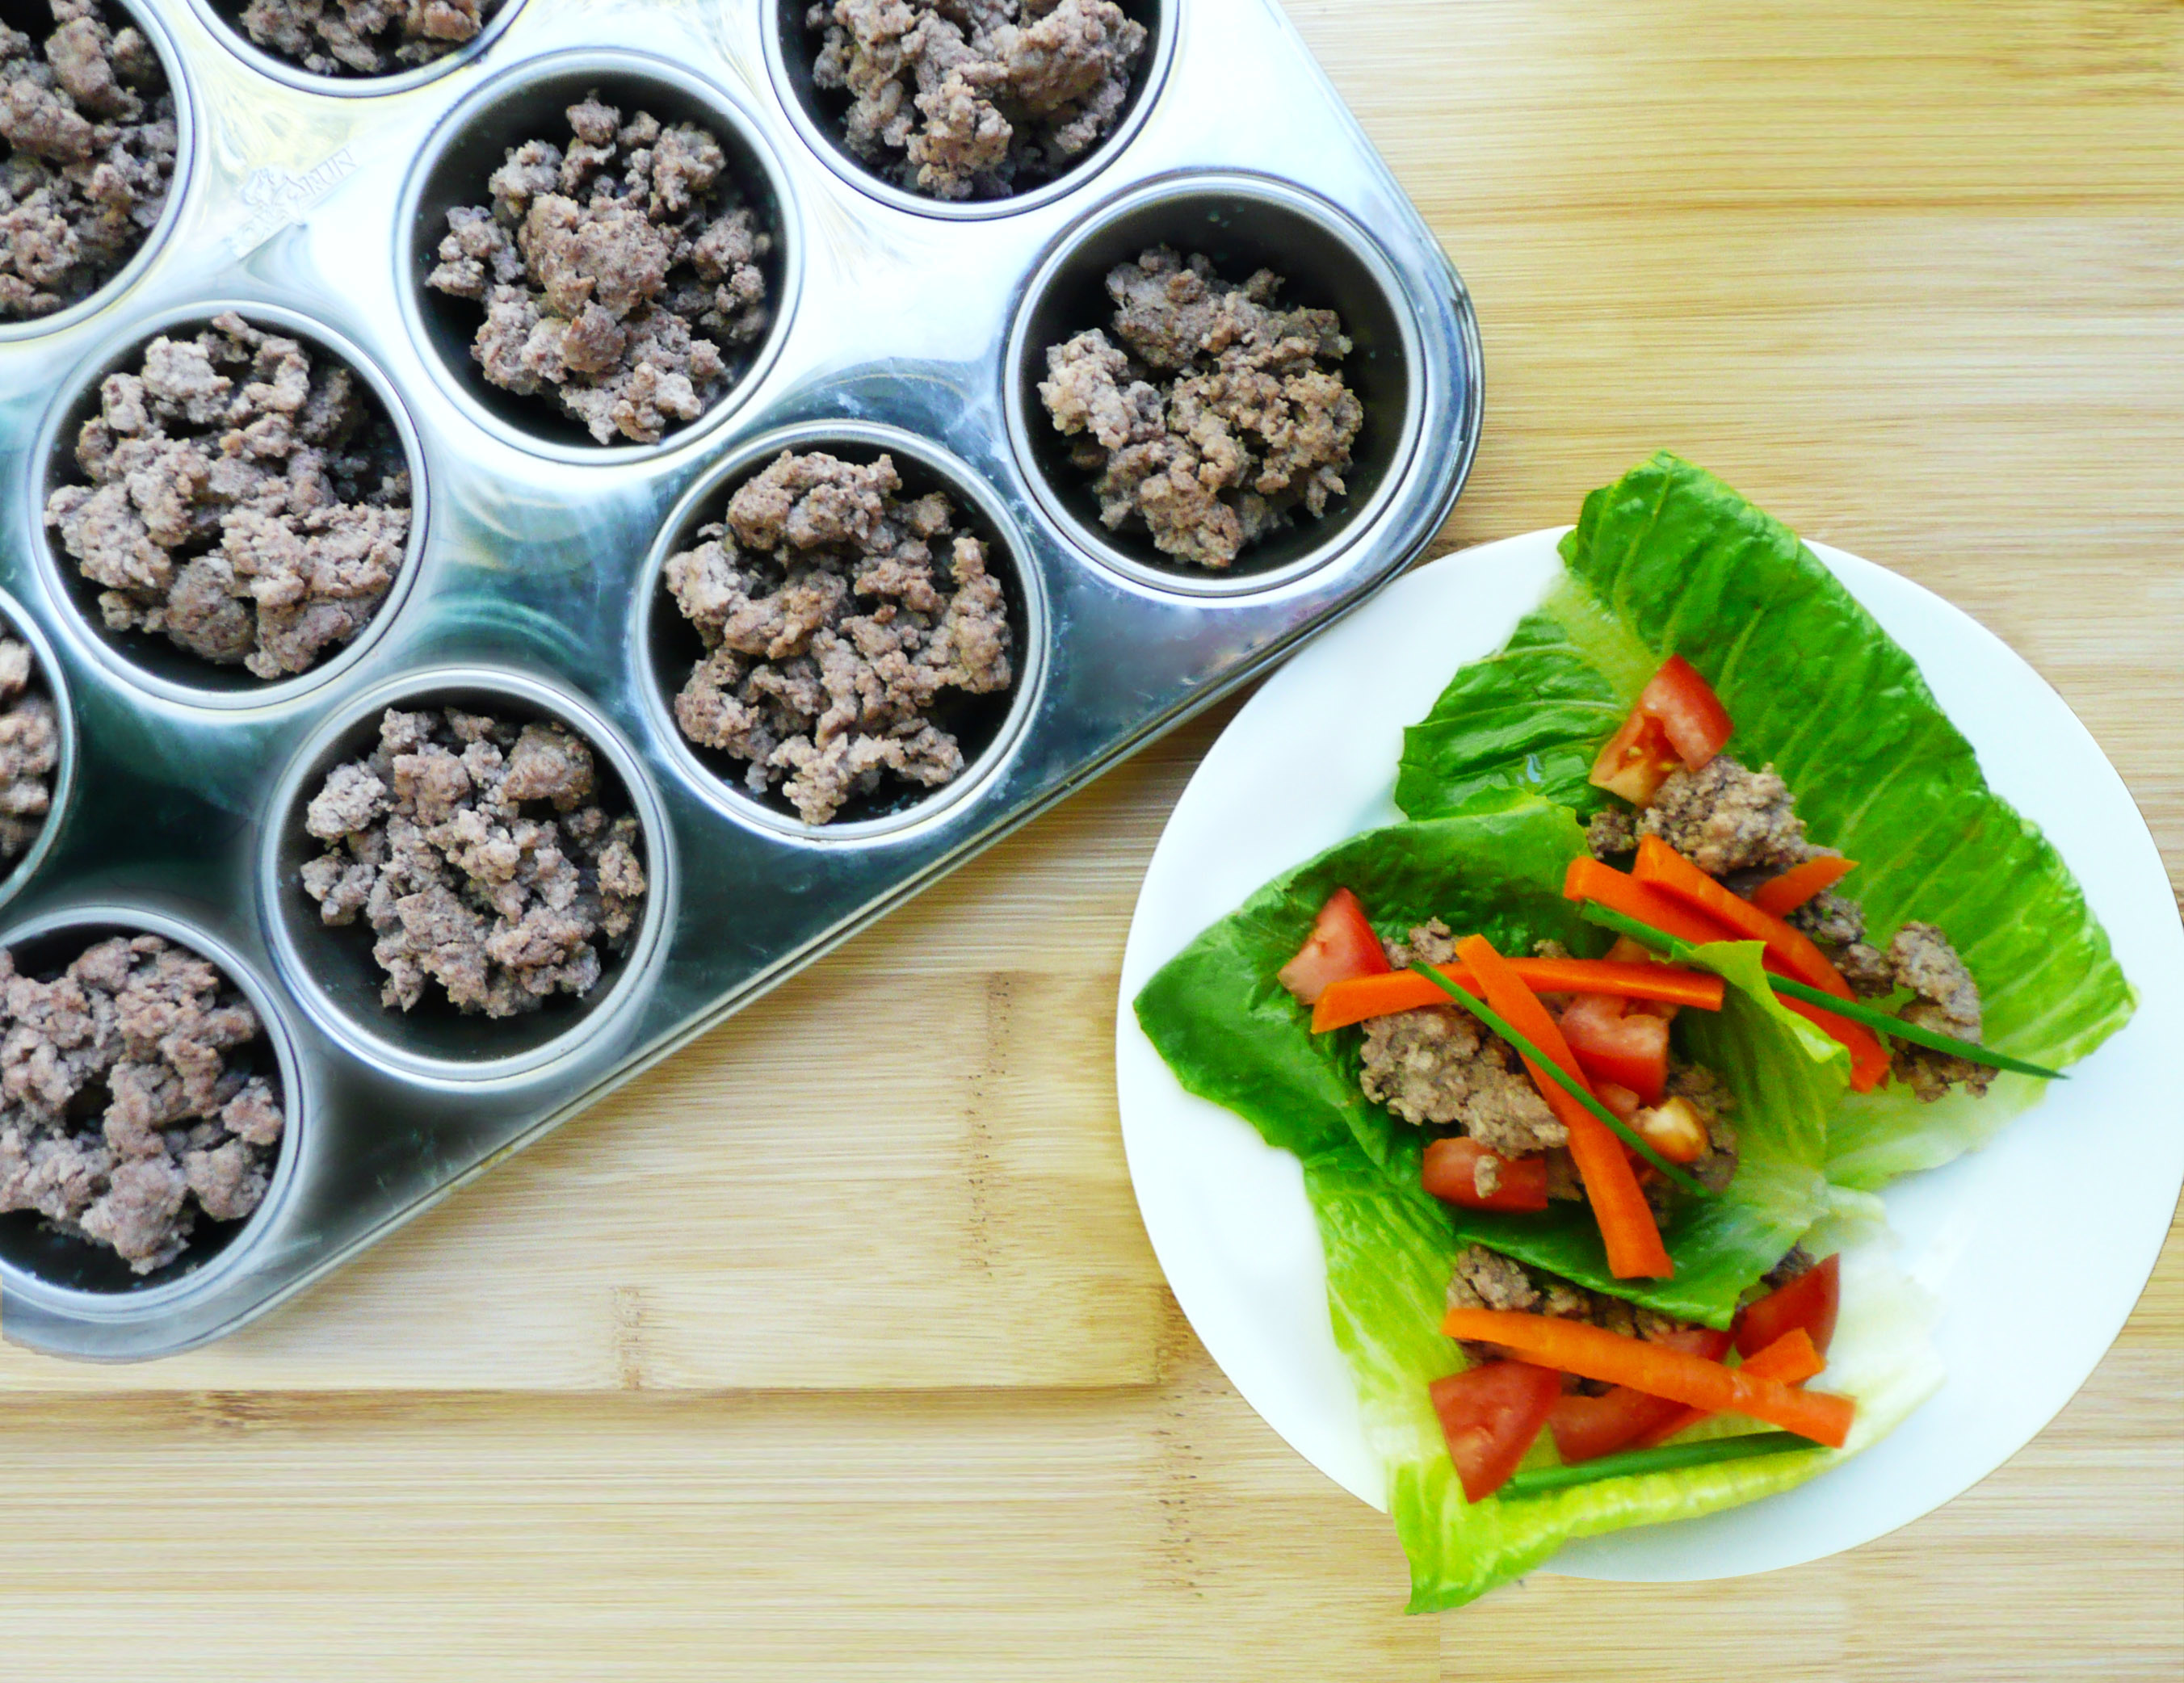
These easy cumin lettuce cups are super delicious and budget friendly.
I used lamb and garlic that I had frozen previously. Adding those ingredients to a few spices, a carrot, along with some diced tomato and romaine leaves makes for a quick and healthy meal, perfect for a busy weeknight dinner.
Easy Weeknight Cumin Lettuce Cups
Makes 1 serving
Ingredients
1 tbsp olive oil
3-4 cloves of garlic, finely chopped (I used frozen garlic that I had, but fresh works great too)
1/3 cup finely diced carrot (about 1 small carrot)
4 tbsp water
1/2 tsp granulated onion
1/4 tsp ground cumin
pinch of salt and pepper (add more to taste)
romaine lettuce leaves and diced tomato (for serving)
Notes – * The lamb that I used was frozen solid in a 1/2 cup portion. I added that to the pan without defrosting it (it defrosted in the pan while the other ingredients were cooking).
If you use cooked lamb that is defrosted, you may have to adjust your cooking time slightly (and probably add a little more water so that the carrots have a little more time to cook through).
Instructions
1. Add the lamb, spices, olive oil, garlic, carrots and water to a medium sauce pan and cook the mixture over medium heat for about 7 minutes until the water has cooked off.
2. Turn the heat to medium high and sauté the mixture for another 3 minutes or so until the meat has browned and the carrots can be pierced with a fork without resistance.
3. Allow the mixture to cool for a few minutes, add more salt and pepper to taste and serve on romaine lettuce leaves and top with diced tomato.
I stumbled upon this money saving tip this past Father’s Day.
I was at my local grocery store early in the morning and on a whim decided to check out the meat section. It was a nice surprise to see that they had started carrying grass fed lamb (it used to be that in my area only Whole Foods carried grass fed lamb).
The grass fed lamb ribs were pretty expensive though, about $15 / lb and I wasn’t quite in the mood to spend that much. So I kept browsing and saw that they also had grass fed ground lamb.
Then I looked at the price – $6.99 / lb. Eh, not cheap but not too terrible either.
Then I saw the 50% off stickers.
Huh?
Grass fed lamb for $3.50 / lb? That is a great deal!
As it turns out, the sell by date was June 17th (which was the same day as Father’s Day this year) and that’s why the ground lamb was 50% off. That was the last day that they could sell the lamb before they took it off the shelves.
One of my family members told me later that grocery stores also do the same thing with dairy products (they discount them on the sell by date).
The sell by date is not the same as the expiration date. There’s more info on this here.
Obviously, if you’re going to buy meat on the sell by date, you do that at your own risk (’cause no one can completely guarantee the safety of raw meat).
Personally though, I looked for packages where the plastic wrap wasn’t puffy and the meat still smelled ok.
I wouldn’t use this meat for anything like a rare burger, and I would make sure to cook it thoroughly.
I ended up buying 4 lbs of grass fed meat for about $14. The ground lamb was packaged in those vacuum packed blocks and looked just as good as the ground beef that was packaged the same way (but was a week or two away from the sell by date).
So I took it all home, cooked it off in a big pot, drained off the excess fat and spooned the cooked lamb into muffin pans and froze it. I then transferred the blocks of ground lamb into ziptop bags.
The little individual portions of frozen lamb are really convenient and make life a lot easier as they defrost quickly and you can add them to anything for a quick dinner.
So far, I’ve tossed these little blocks of ground lamb into pasta sauce and paleo chili, used them to make Cumin Lamb Lettuce Cups, and made them into a soup with leftover greens and vegetables that I had in my fridge.
Altogether I got 24 half cup servings of ground lamb for $14, which works out to $0.58 per serving. This amount of meat will last me about 2 months (I tend not to eat meat every day).
If I were to do this again – (which I definitely will – saving money is pretty awesome!)
– I would go to my local grocery store and make a note of the sell by dates of the meat was I interested in buying. (This is pretty easy to do during my weekly shopping trip.)
– I would either go to the grocery store the night before the sell by date (sometimes grocery stores will put the discount stickers on the meat the night before) or early in the morning the day of (like before 8:30 am).
– I would cook the meat off that day and freeze it.
I hope that this tip helps to save you some money too!
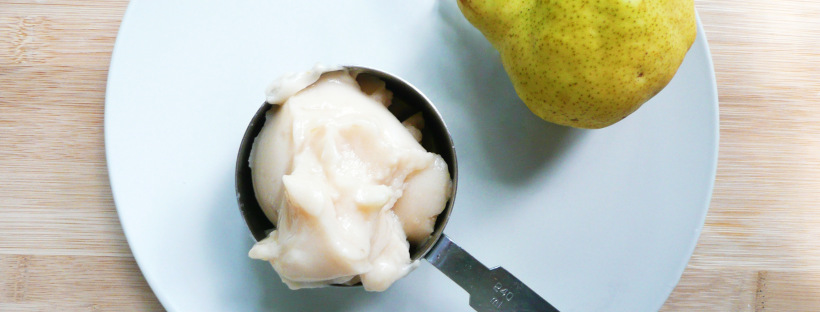
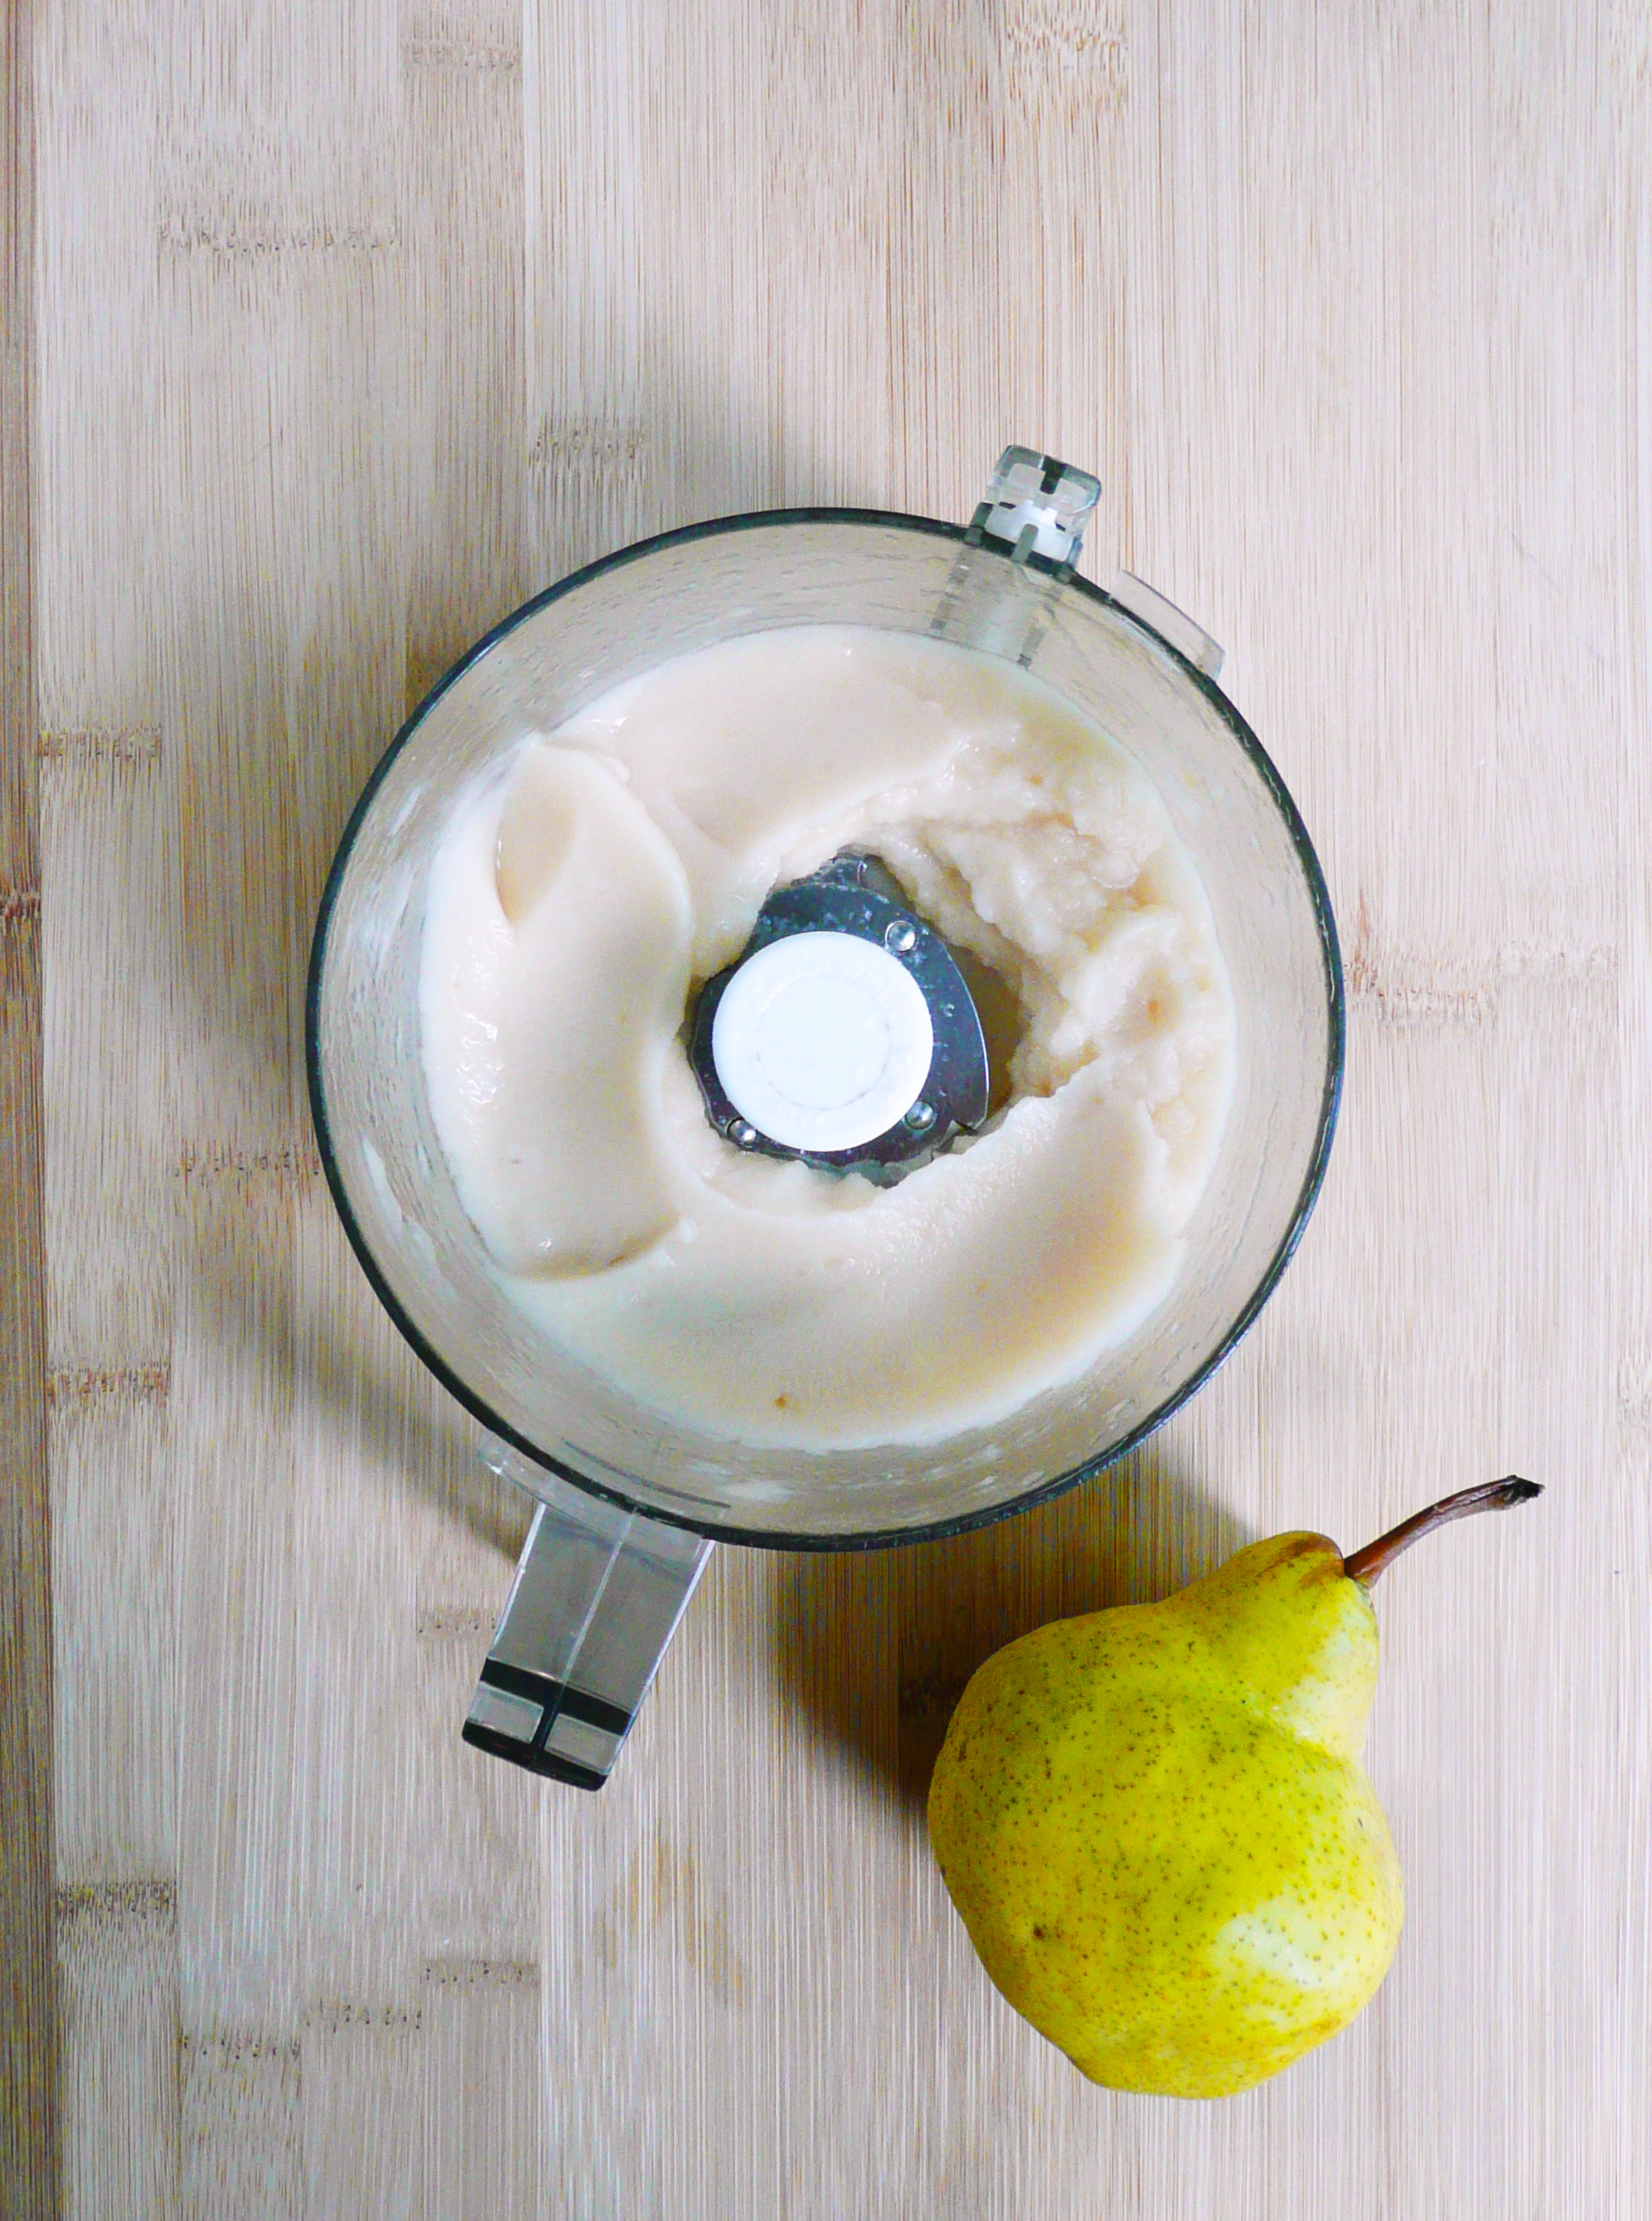
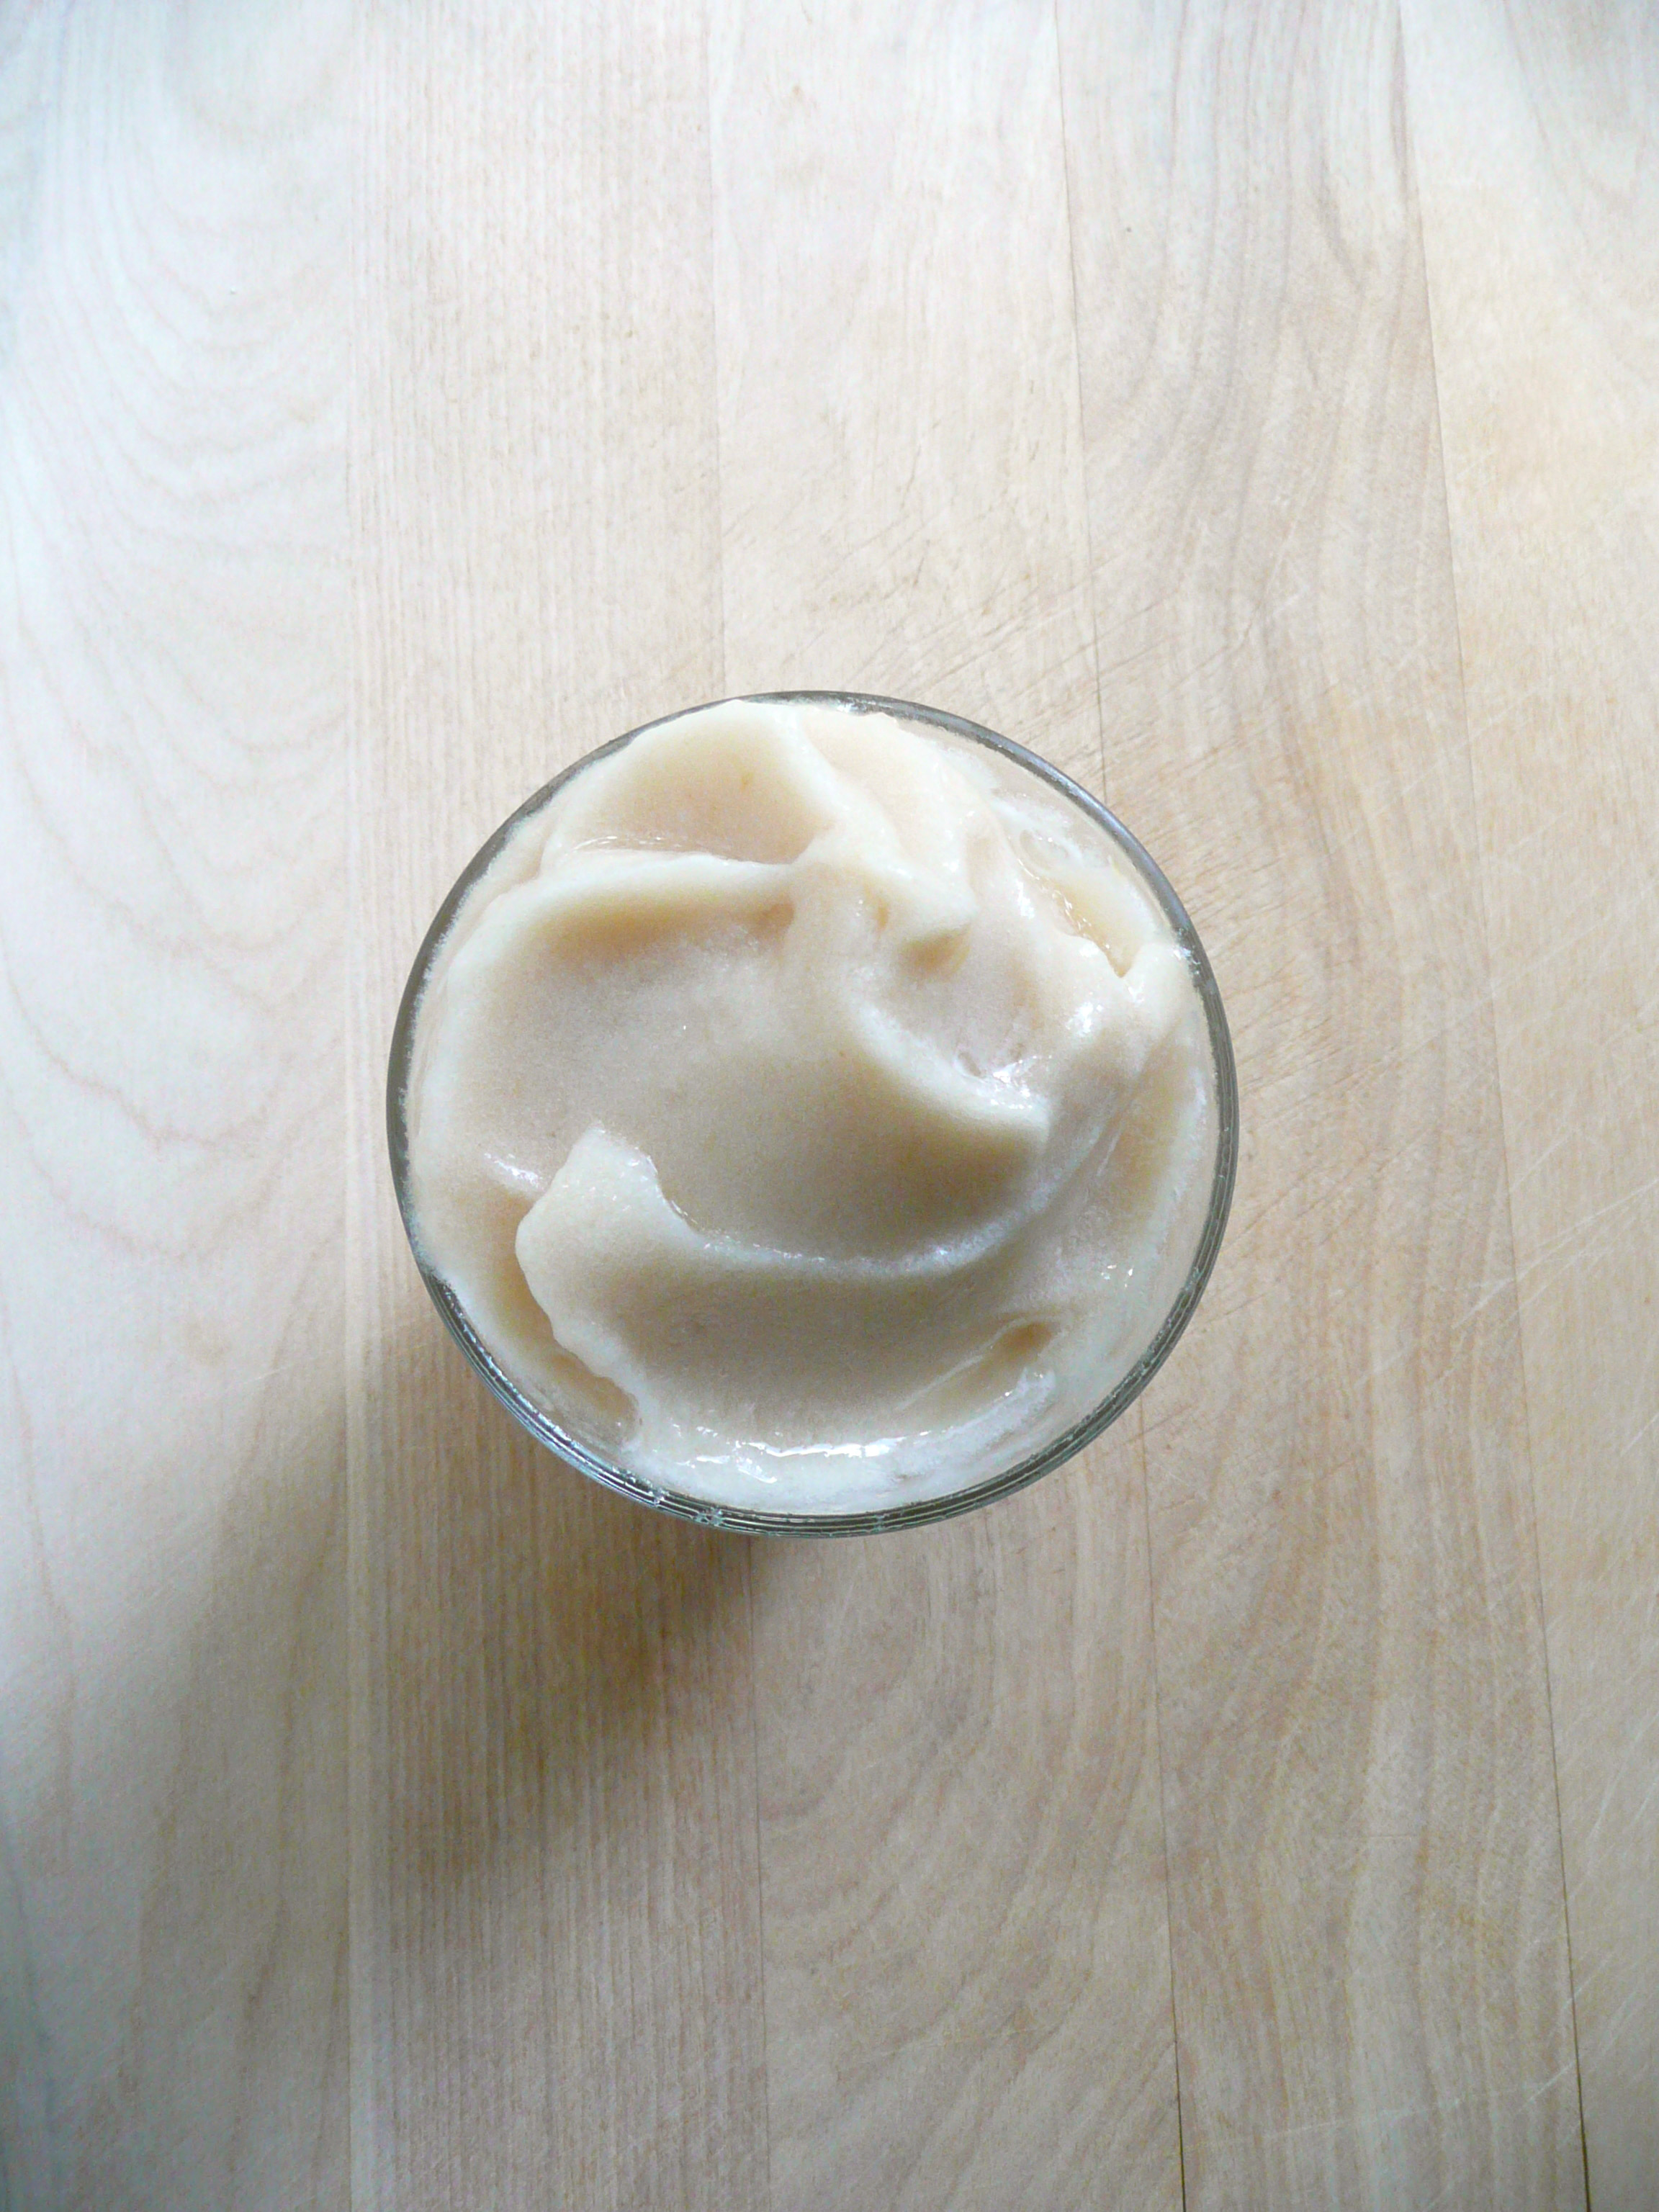
This pear sorbet is so simple to make and it tastes amazing! It’s flavor is light and sweet and makes the humble pear really shine.
When I first tasted it I couldn’t believe how good it was, and it was only 2 ingredients!
It’s smooth and creamy, and the perfect thing to make when you have ripe pears that you’re not quite sure what to do with. Even if they are a little bruised, that’s ok! They will still work great in this recipe.
2 Ingredient Pear Sorbet
Makes 2 servings (2 scoops each, or a generous serving for one)
Ingredients
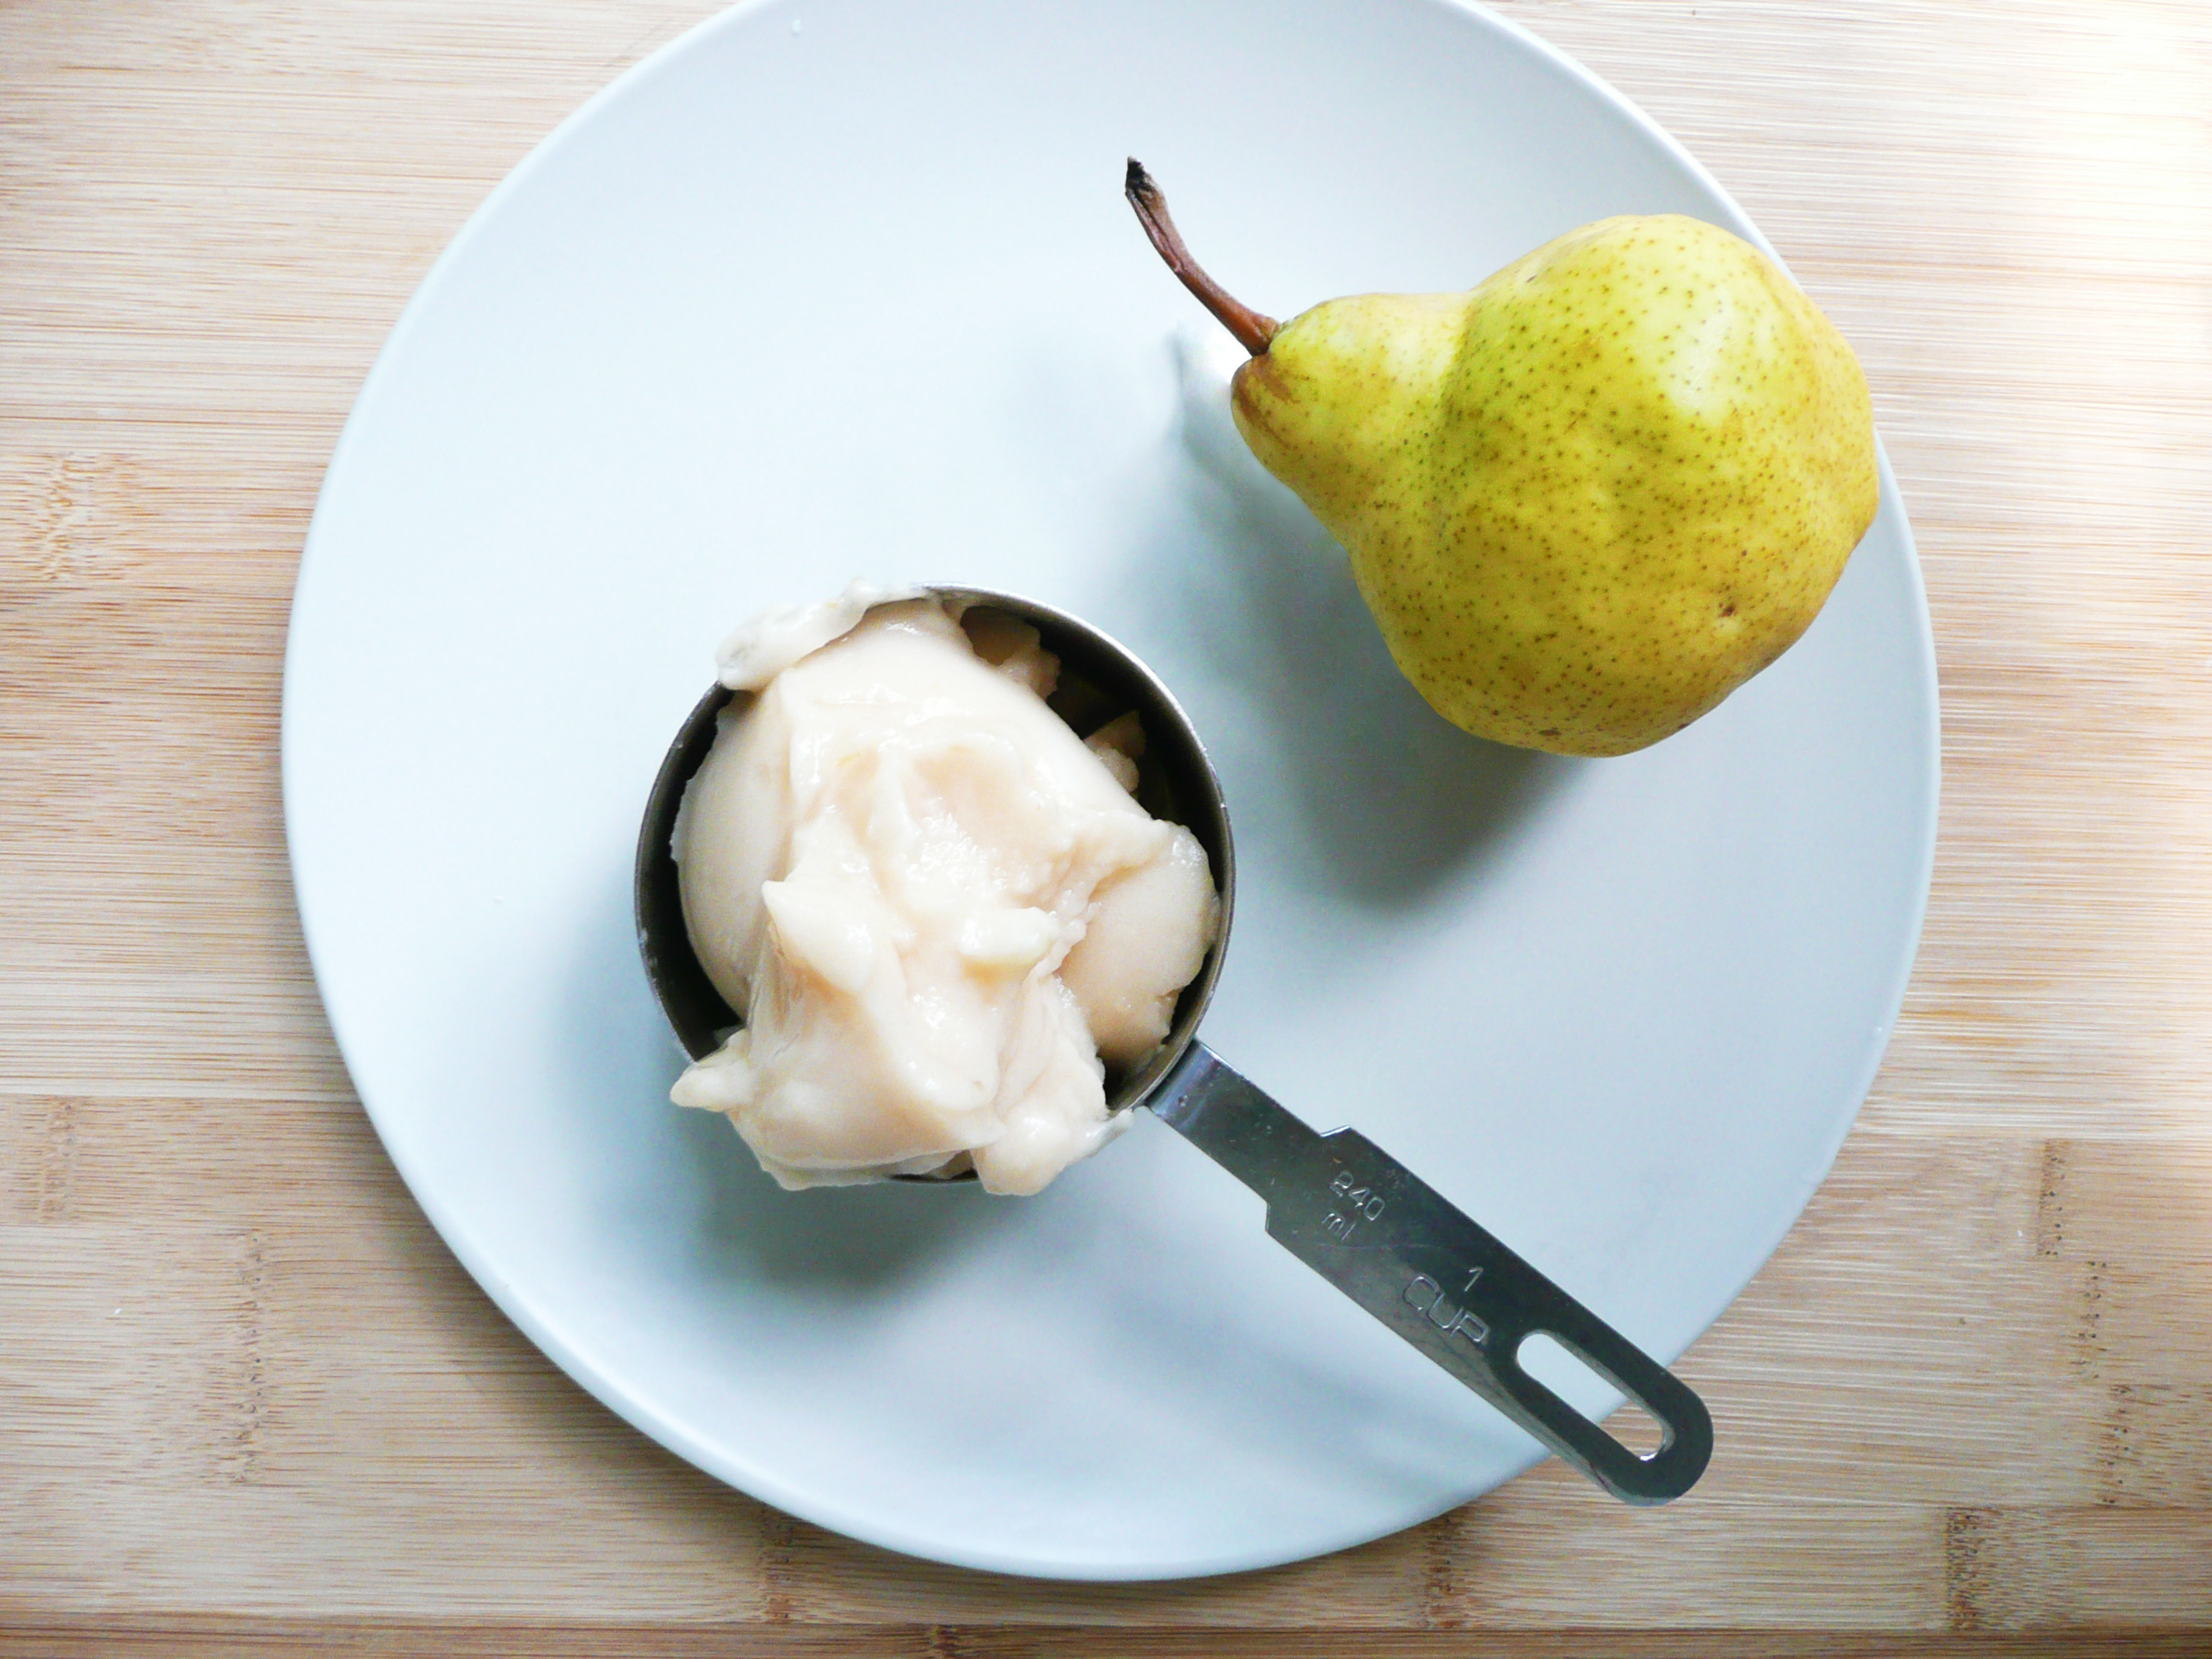
2 ripe Bartlett pears (also known as William’s pears)
1/4 cup apple juice (I used the Martinelli’s brand apple juice as it’s naturally very sweet)
Instructions
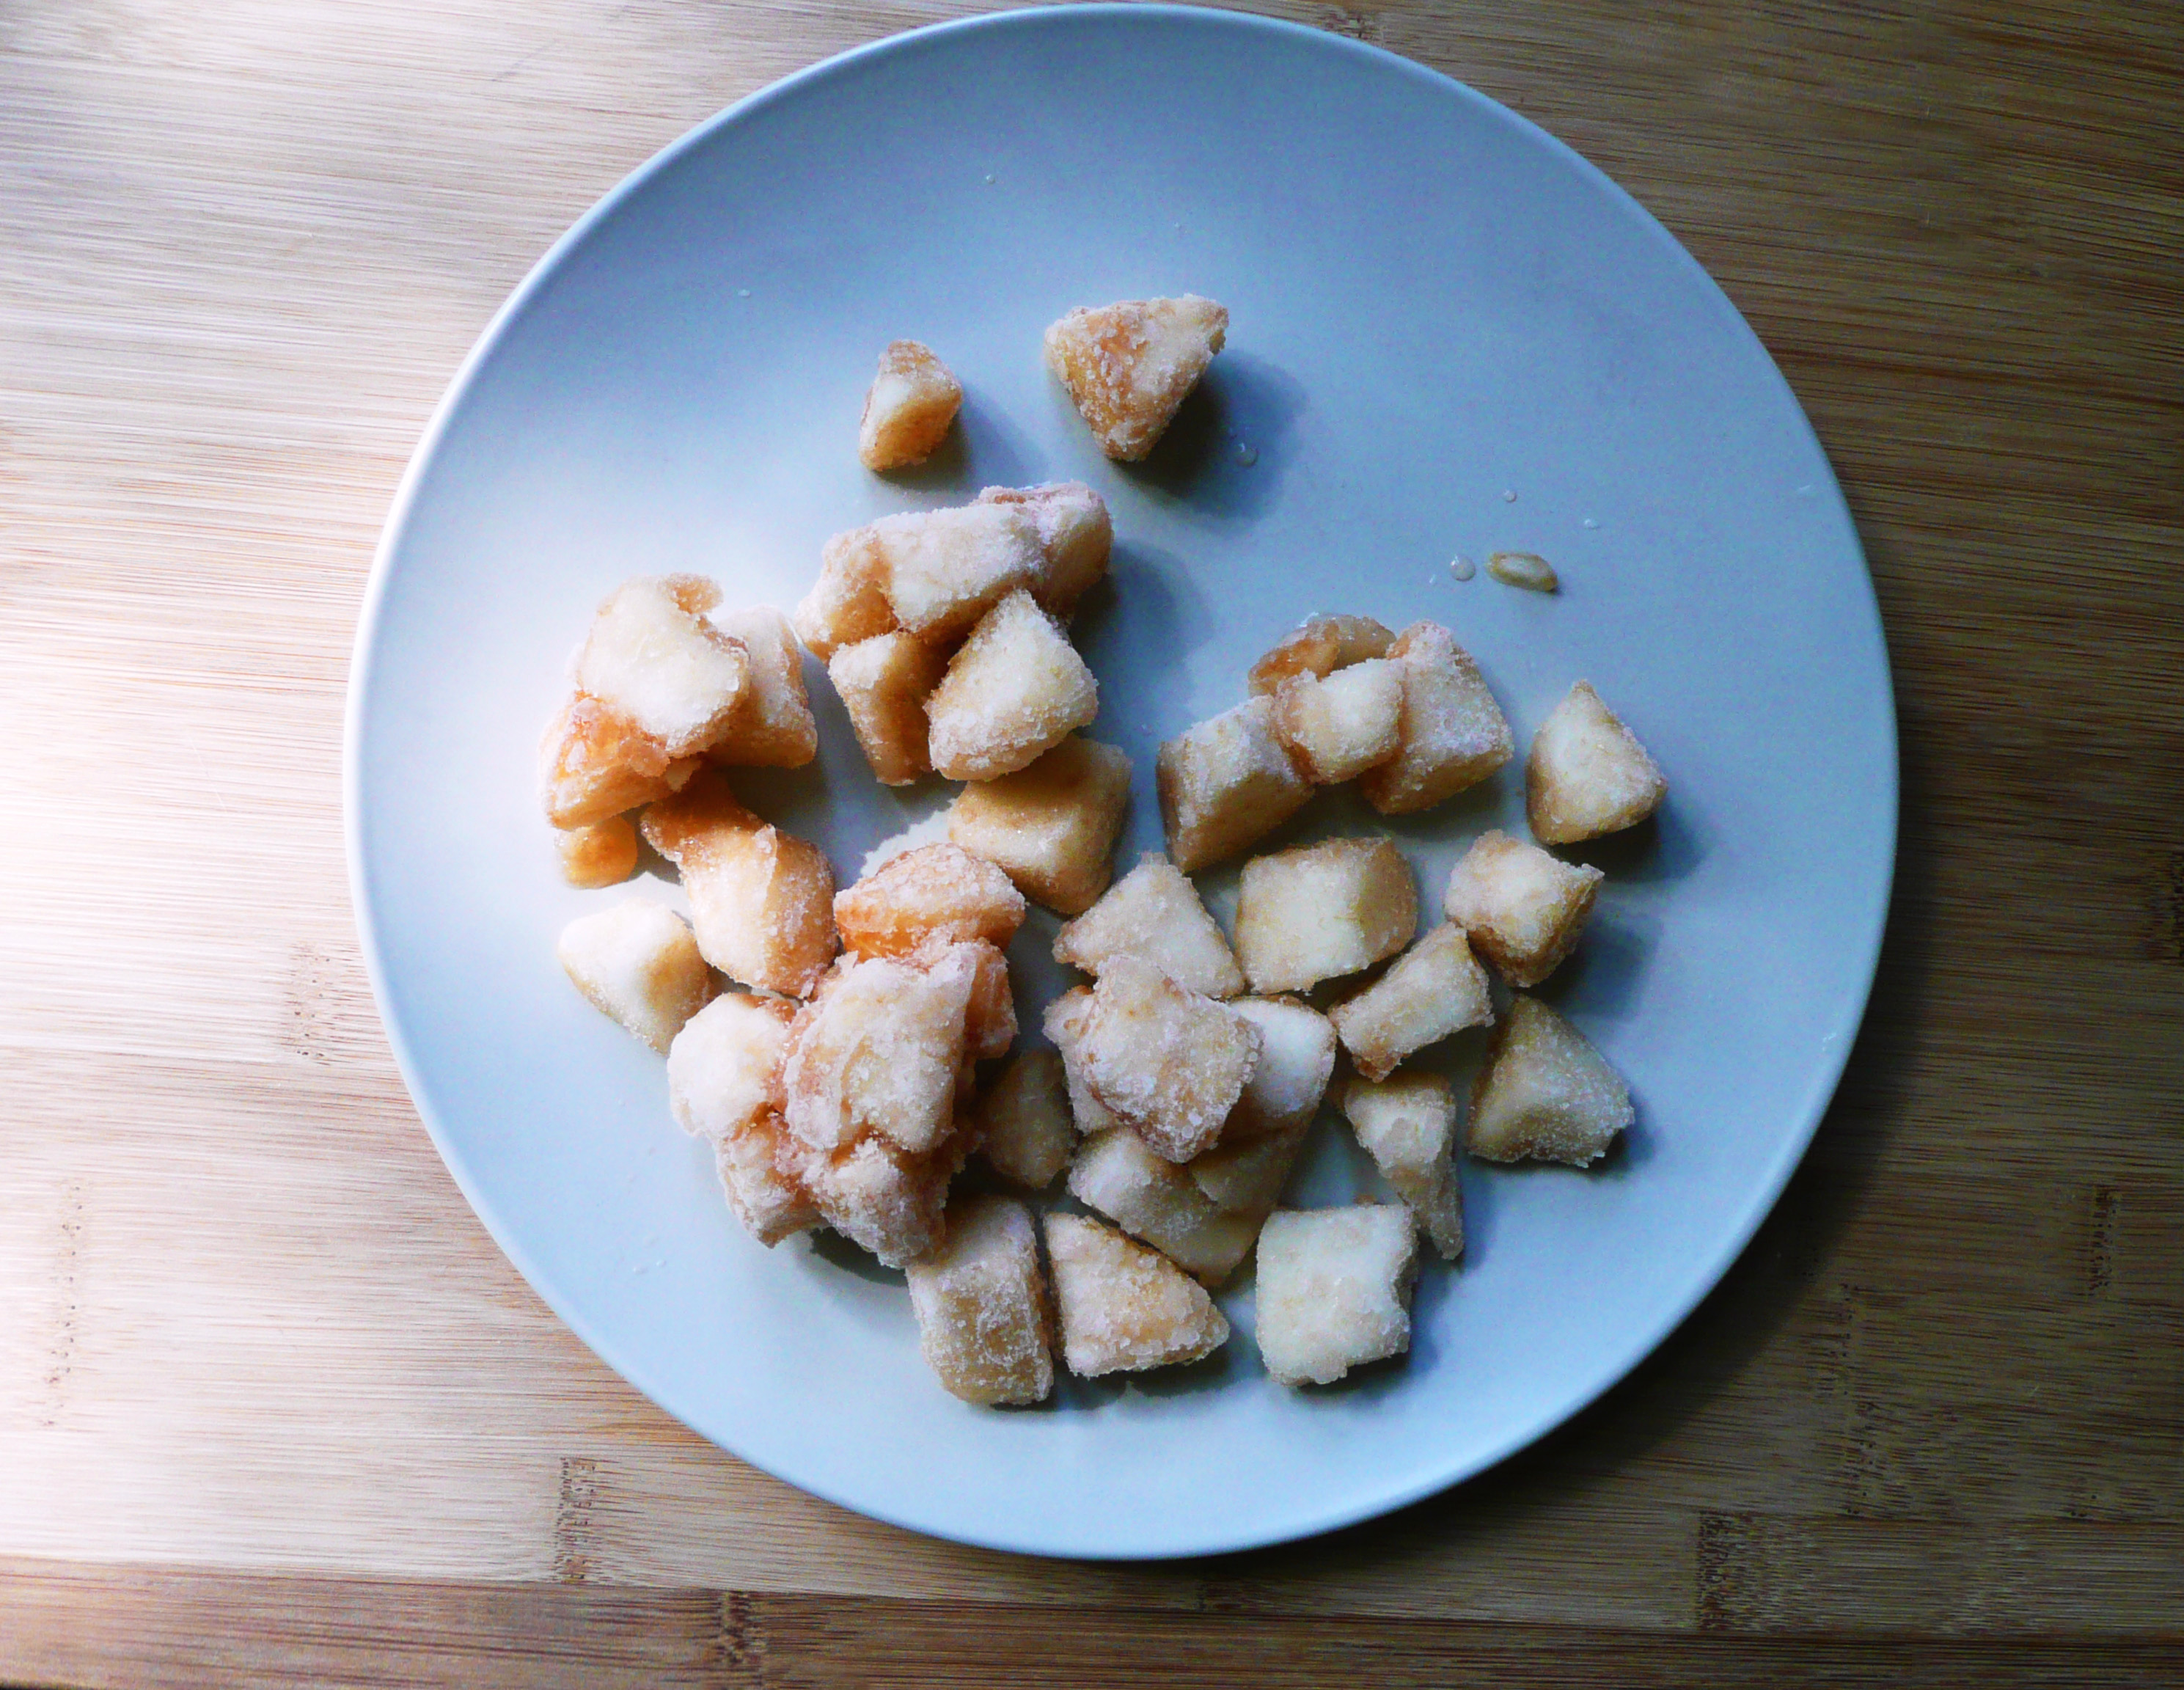
1. Peel and core the pears. Cut them into 3/4 inch cubes (if they vary in size a little that’s ok) and freeze them in a single layer in a ziploc bag or an airtight container.
My two pears (after being peeled, cubed, and frozen) measured 2 2/3 cups.
2. When you’re ready to make your sorbet, take the frozen pears out of the fridge and let them thaw for 10-15 minutes.
Break up any big clumps of pear cubes up with your hands and add the pears to a food processor along with the apple juice and process until smooth, stopping occasionally to scrape down the sides.
If you’re having a hard time getting the sorbet completely smooth, you may have to process half the mixture at a time. I have a smaller food processor and had to process the sorbet in two batches, but it came together beautifully.
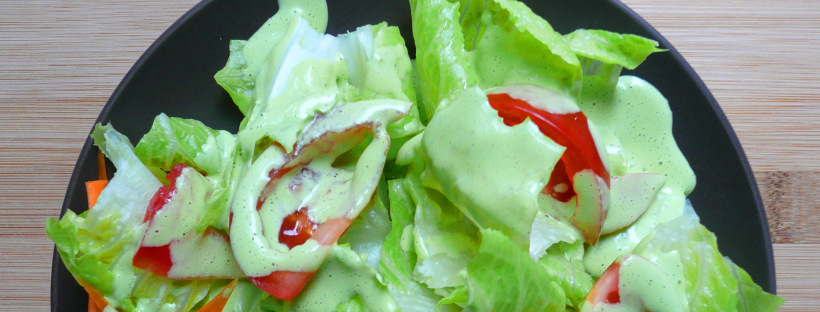
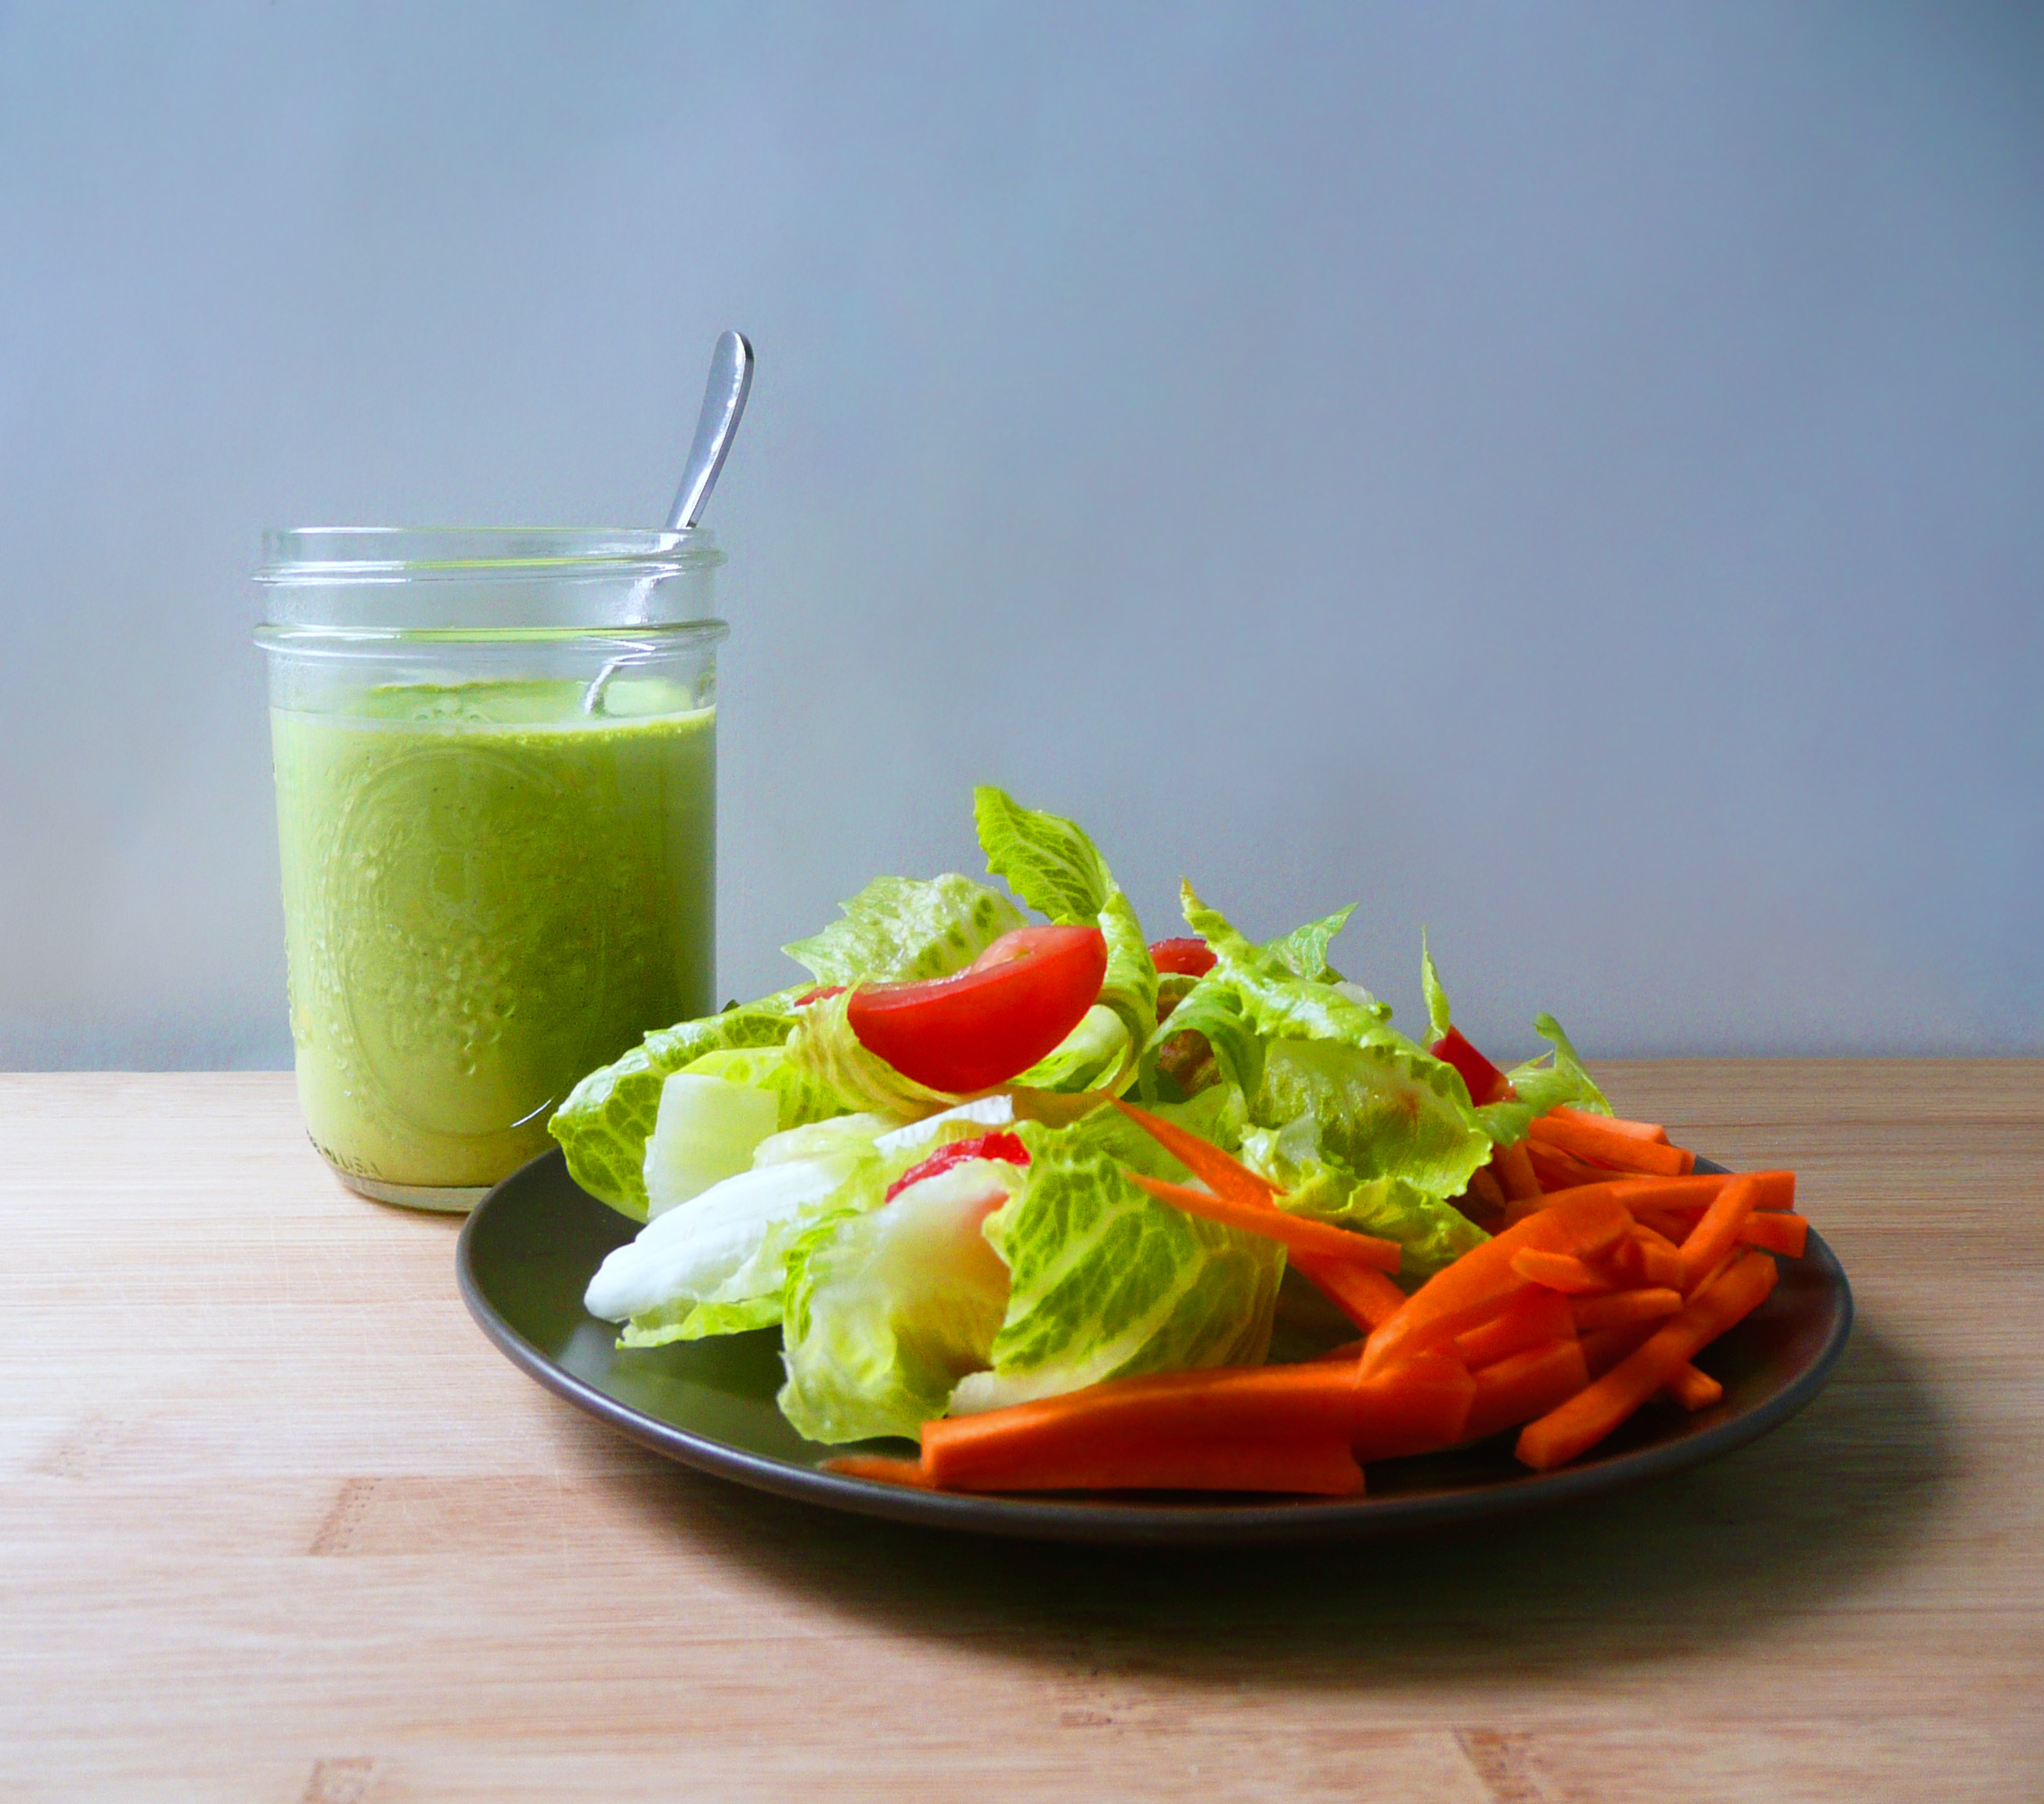
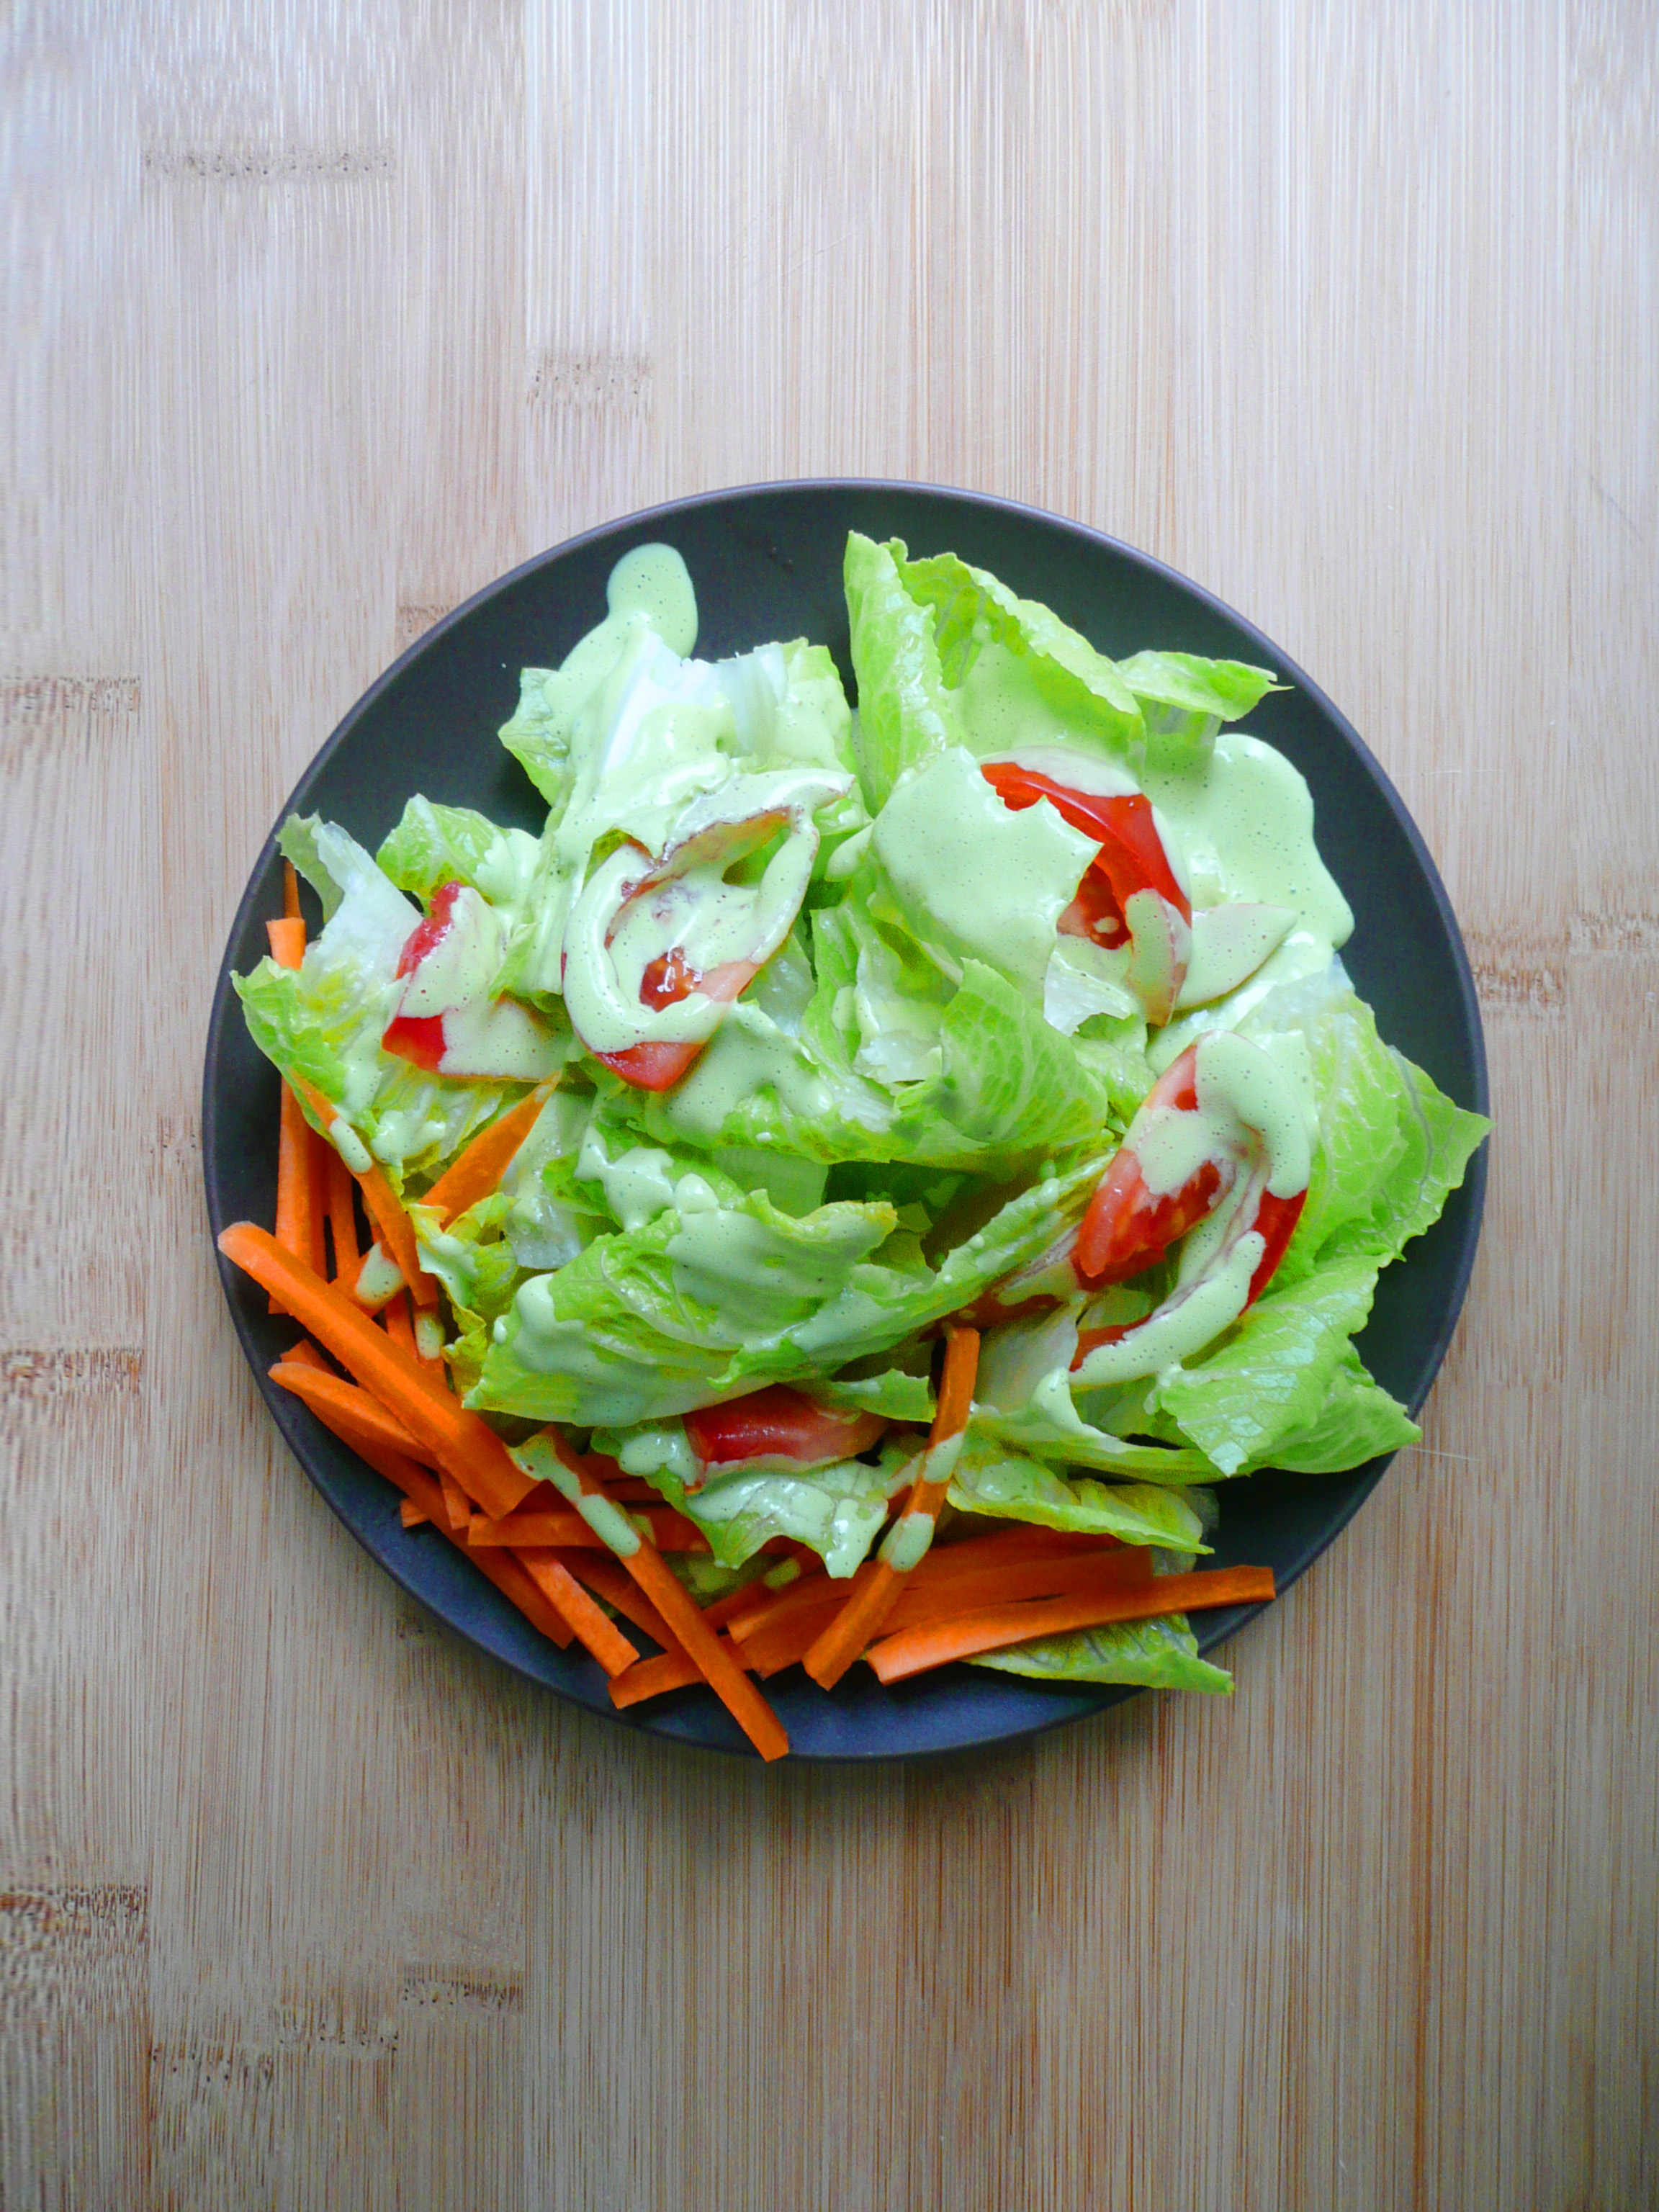
I like to think of Green Goddess dressing as Caesar dressing’s sort of hippier, more free spirited cousin.
Caesar is the dressing that you want for a beautiful dinner party, while Green Goddess is for summer picnics and dancing through a garden in a sundress while wearing a daisy crown.
My Parsley Green Goddess dressing has all the things that you love about Caesar dressing (the rich savoriness and creaminess, with a bit a bit of garlic thrown it to punch up the flavor) and is full of anti-inflammatory herbs like parsley, rosemary, and basil.
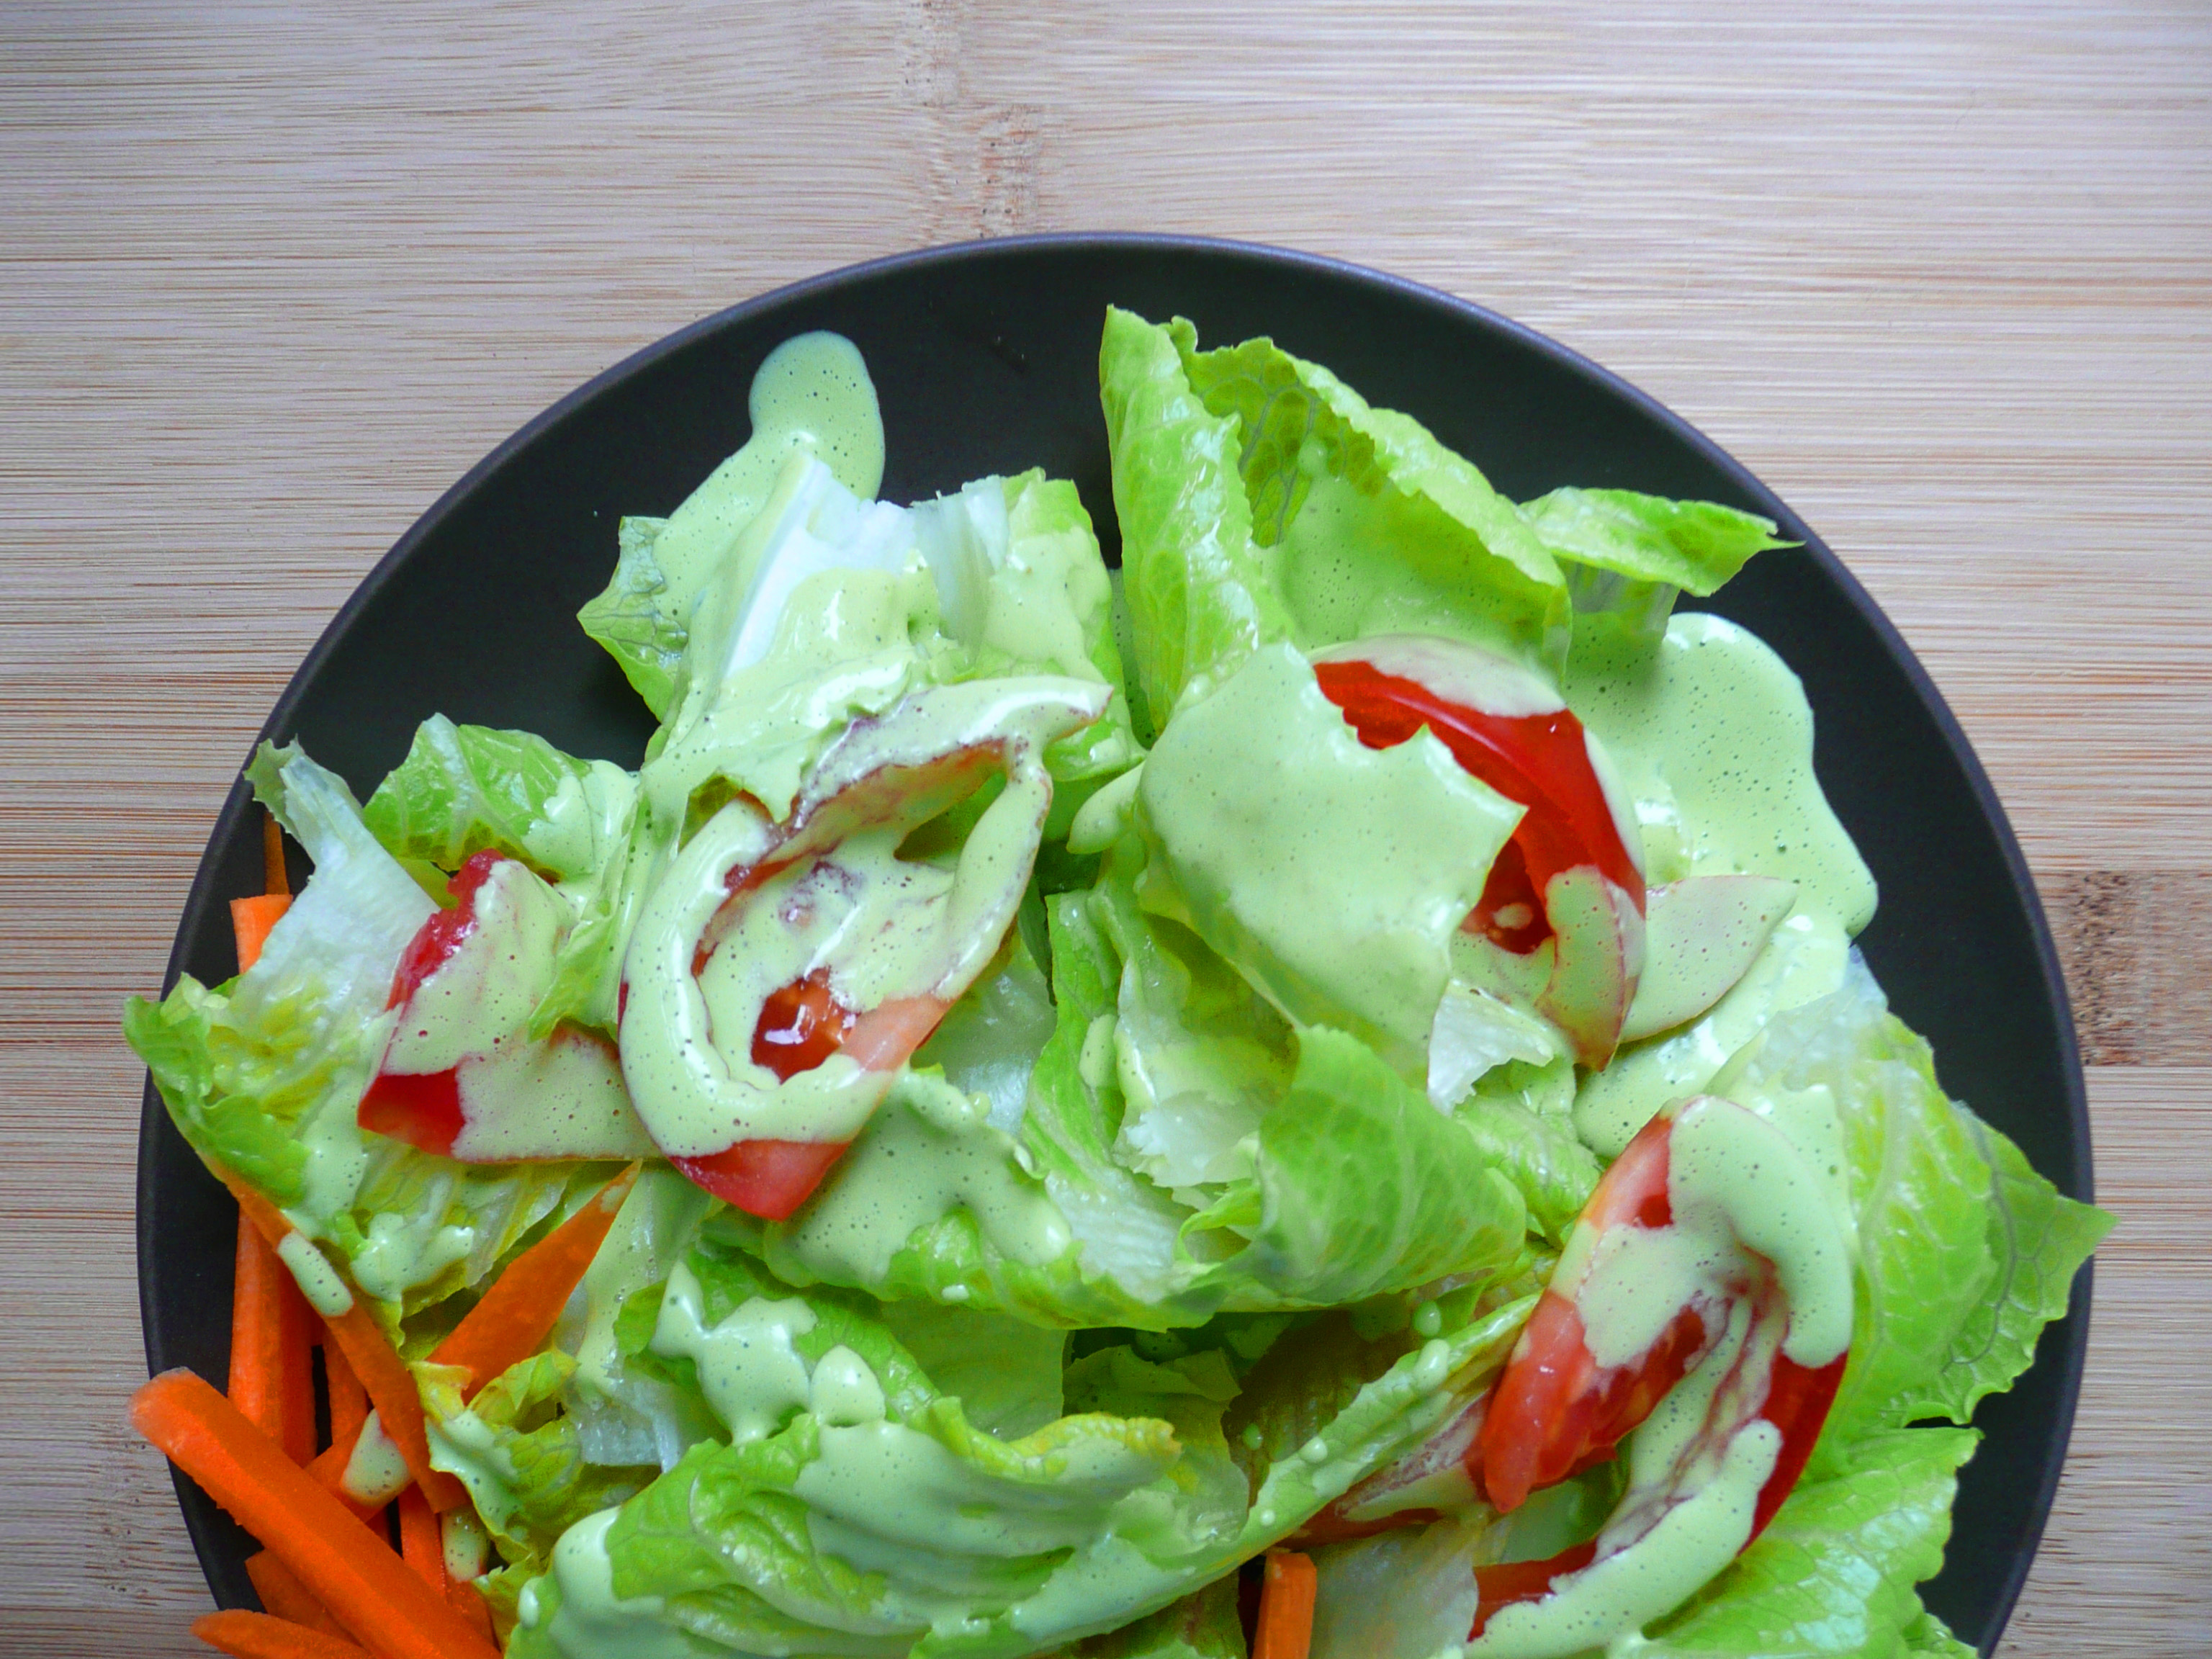
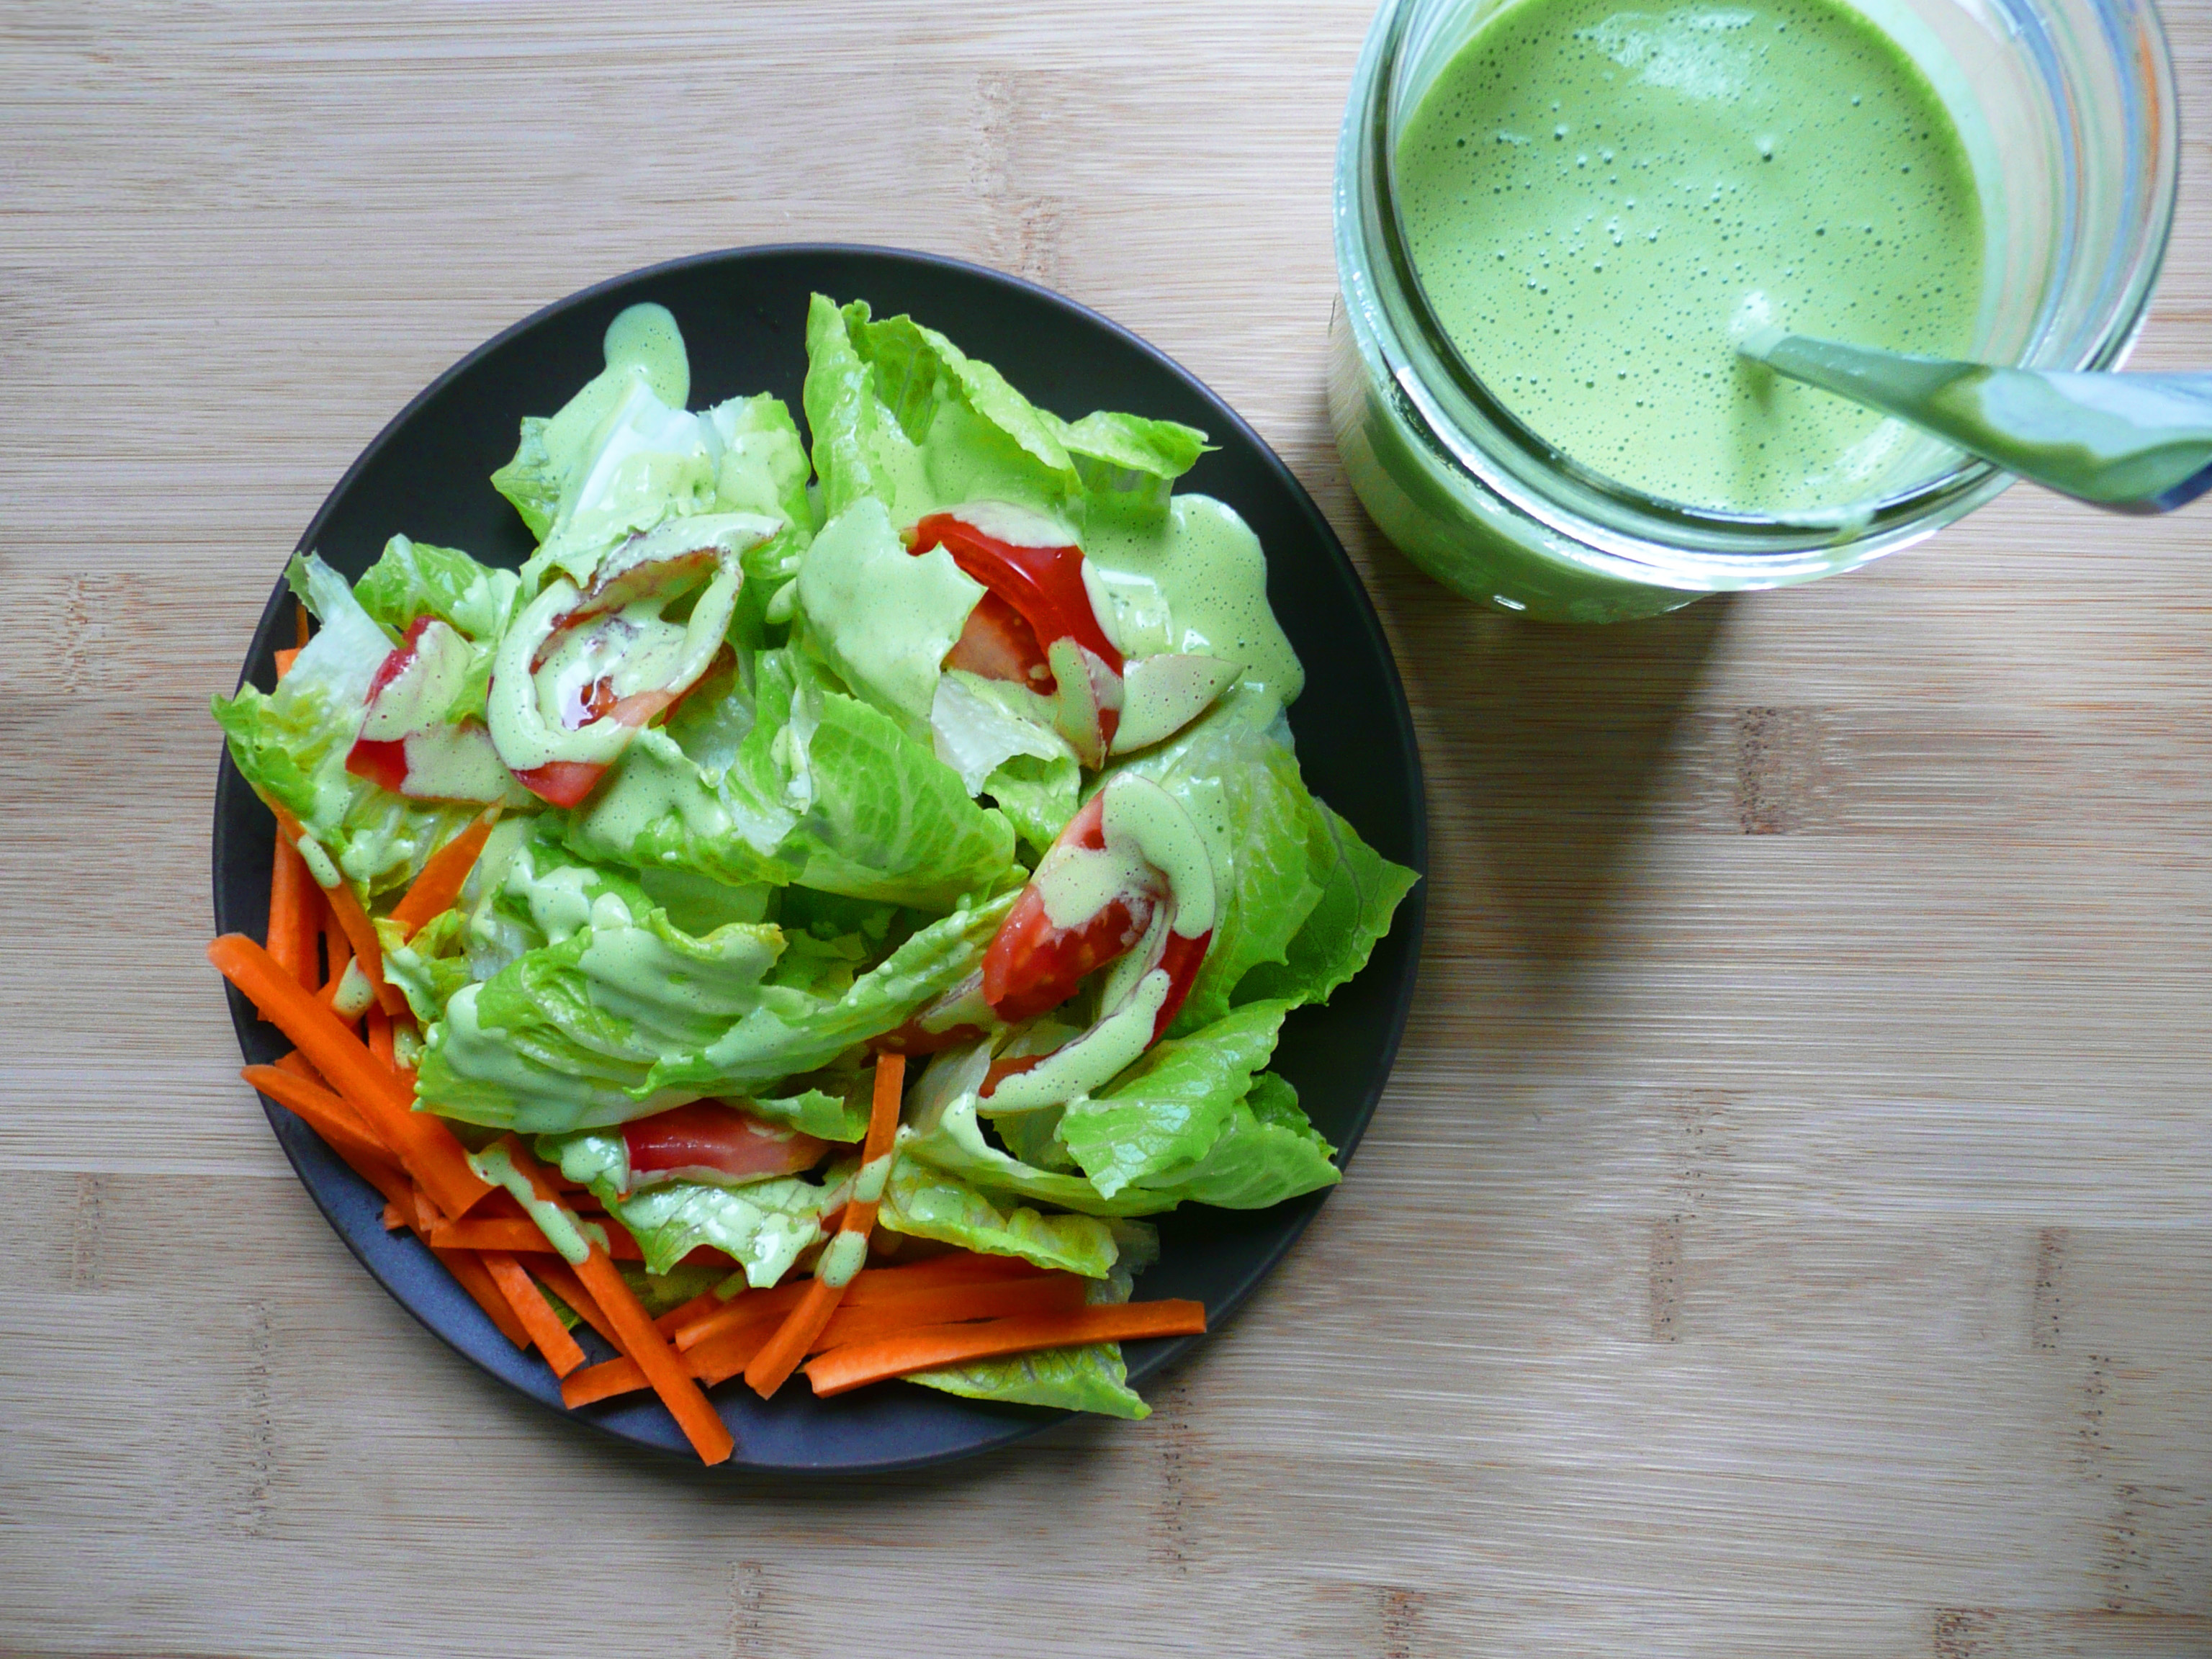
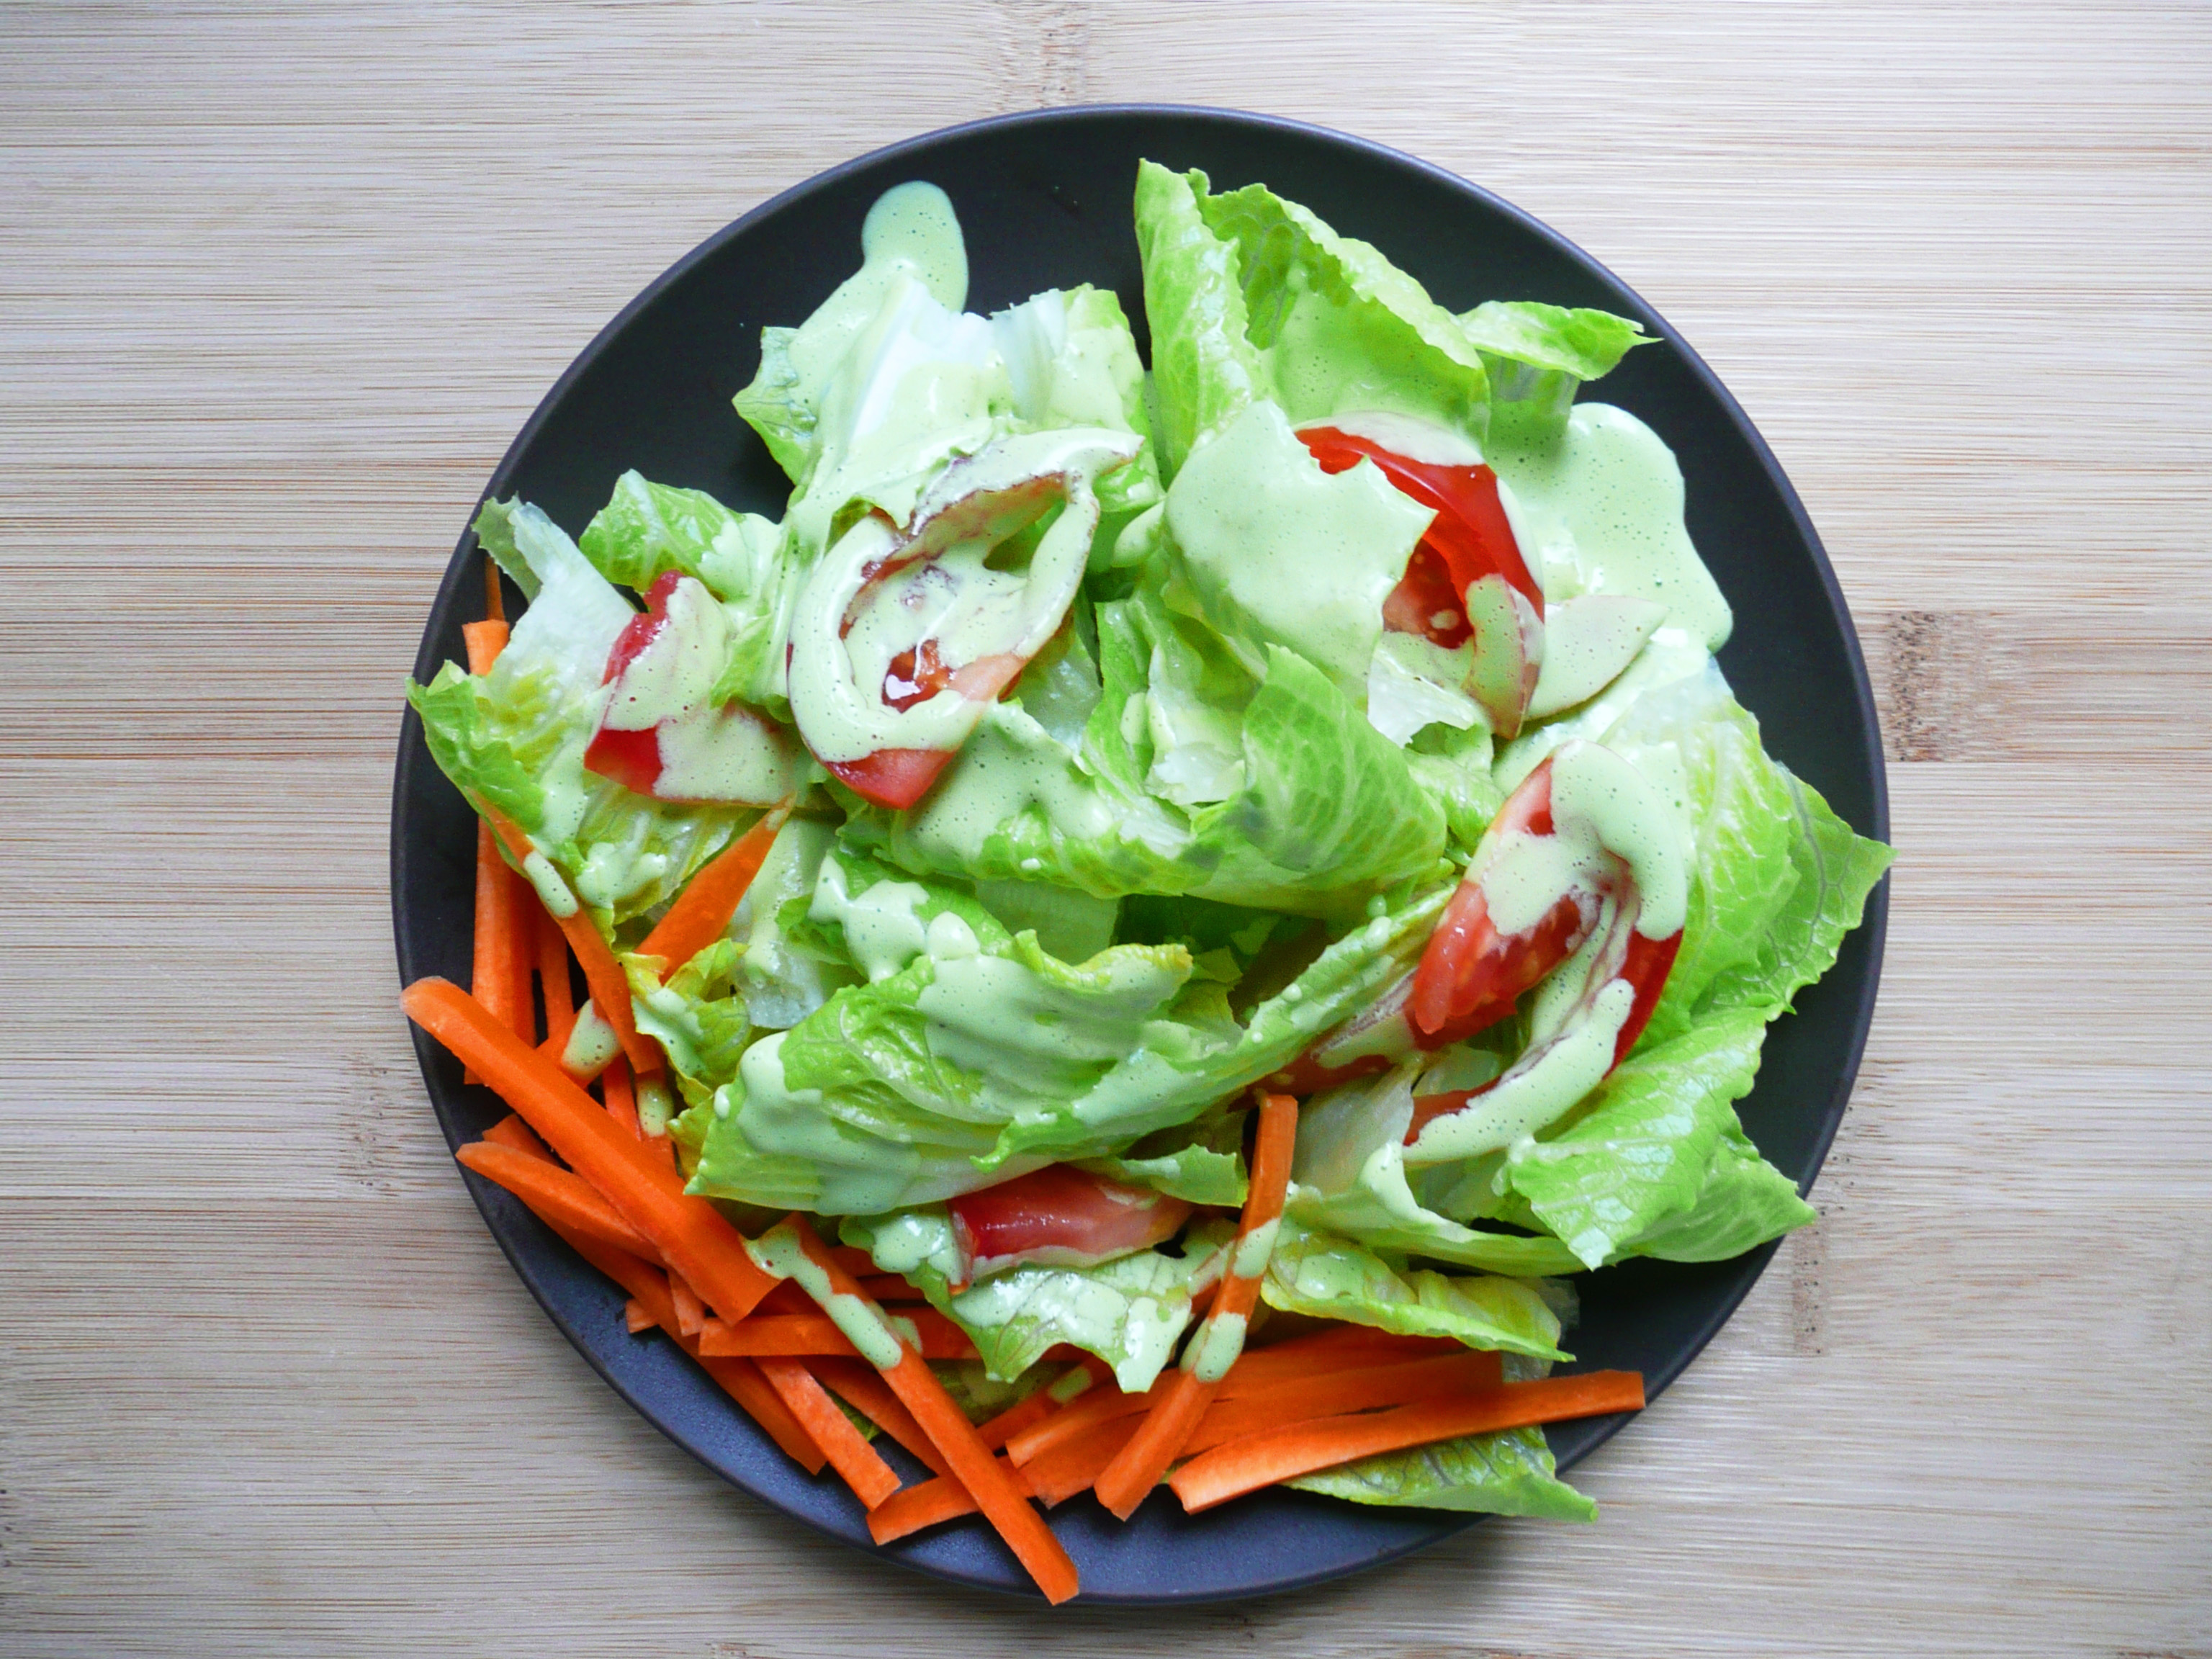
It’s light and creamy, a little thinner than most green goddess dressings (which makes it better for drizzling over a salad), and is packed with heart healthy olive and avocado oils.
This is also the perfect recipe for when you’re looking to use up a bunch of fresh parsley in a hurry. You can blend it all into this beautiful dressing.
Parsley Green Goddess Dressing
Makes 1 1/4 cups
Ingredients
3/4 cup packed parsley (stems and leaves)
1/2 cup water
2 cloves garlic
1 egg (lightly scrambled over a double boiler, and cooled to room temp)
2 tbsp + 2 tsp apple cider vinegar
3/4 tsp fish sauce (I used the Red Boat brand)
1/8 level tsp dried rosemary
1/4 level tsp dried basil
1/8 level tsp granulated onion
1/4 level tsp granulated garlic
1/4 level tsp black pepper
1/2 level tsp sea salt
1/4 cup avocado oil + 1 tbsp (or any neutral oil)
1/4 cup olive oil
Instructions
1. Add all the ingredients except the oils to the blender and blend until smooth, stopping to scrape down the sides of the blender occasionally.
2. Take the top cap off of the blender, and with the motor running, slowly drizzle in the olive and avocado oil into the dressing (you’re basically making a cooked mayonnaise).
If there is some separation in the dressing at this point, that’s ok. Put the top cap back onto the blender and blend on high until well combined.
3. Pour the dressing into a jar and keep in the fridge until ready to use. The dressing should keep at least 3-4 days.
This dressing would also be delicious over chopped roasted potatoes for a quick potato salad, but honestly it’s good on just about anything.
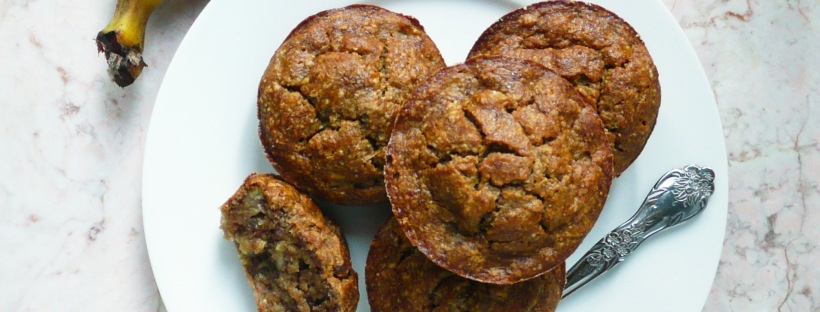
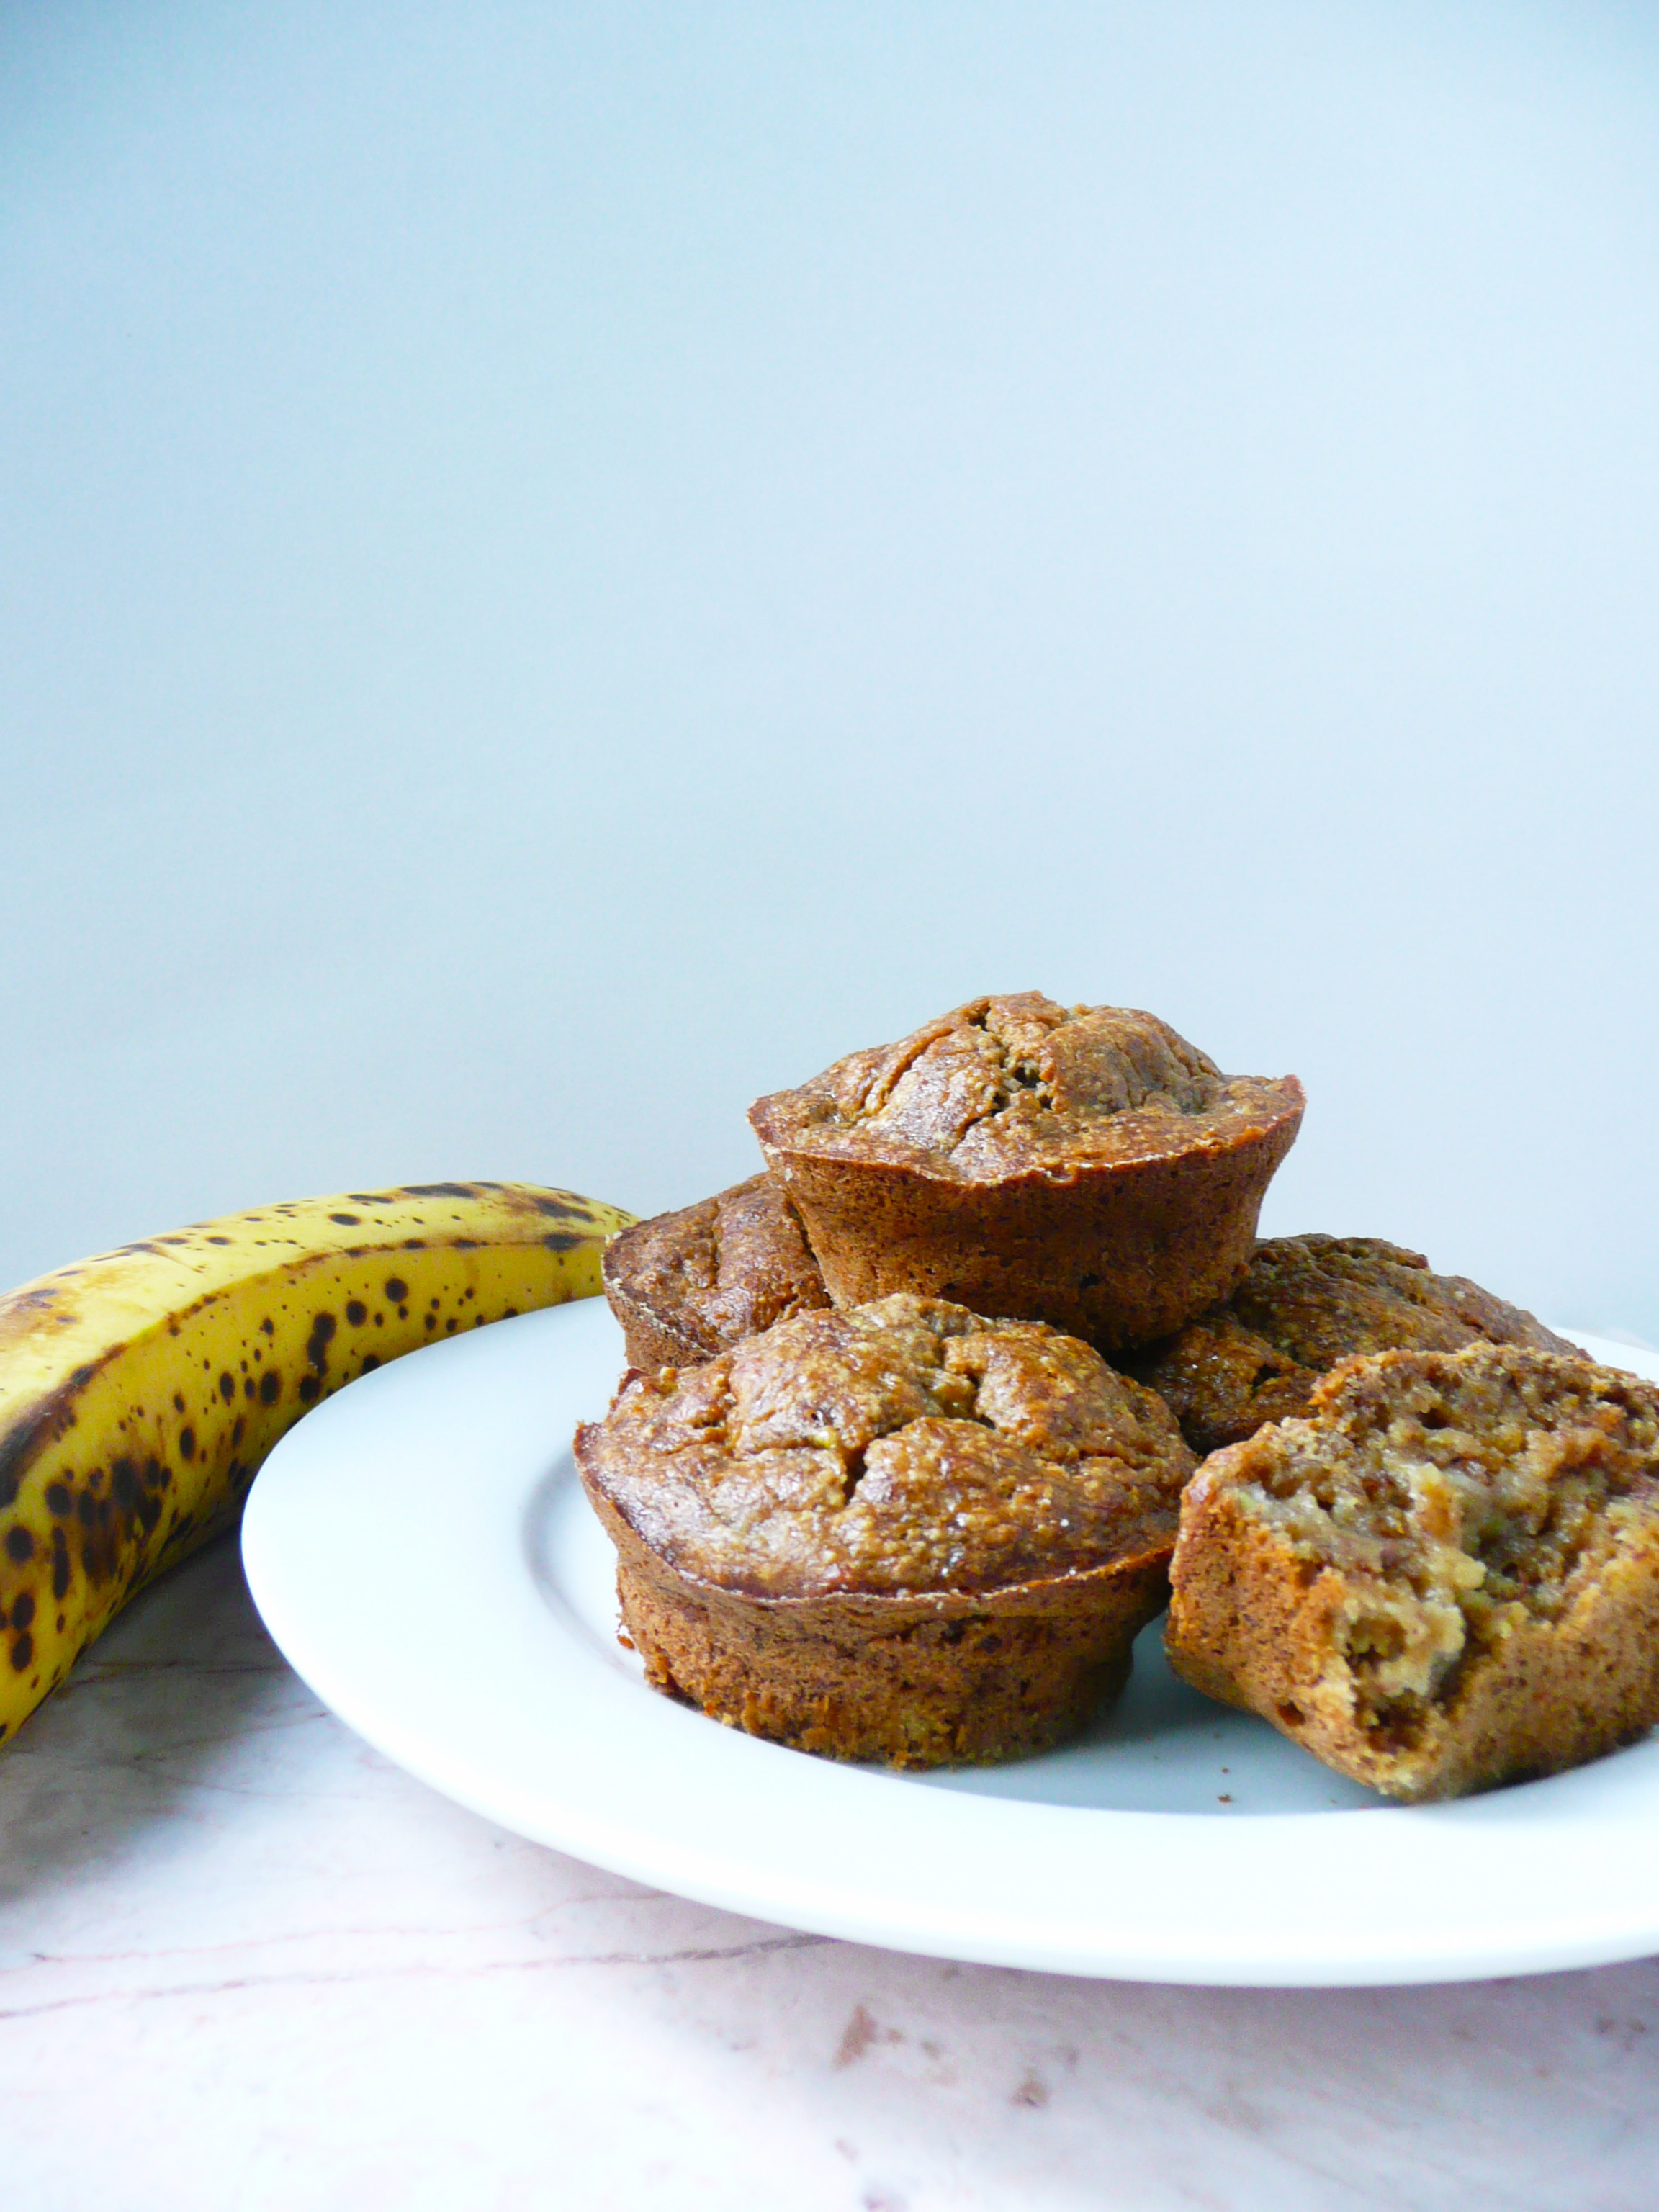
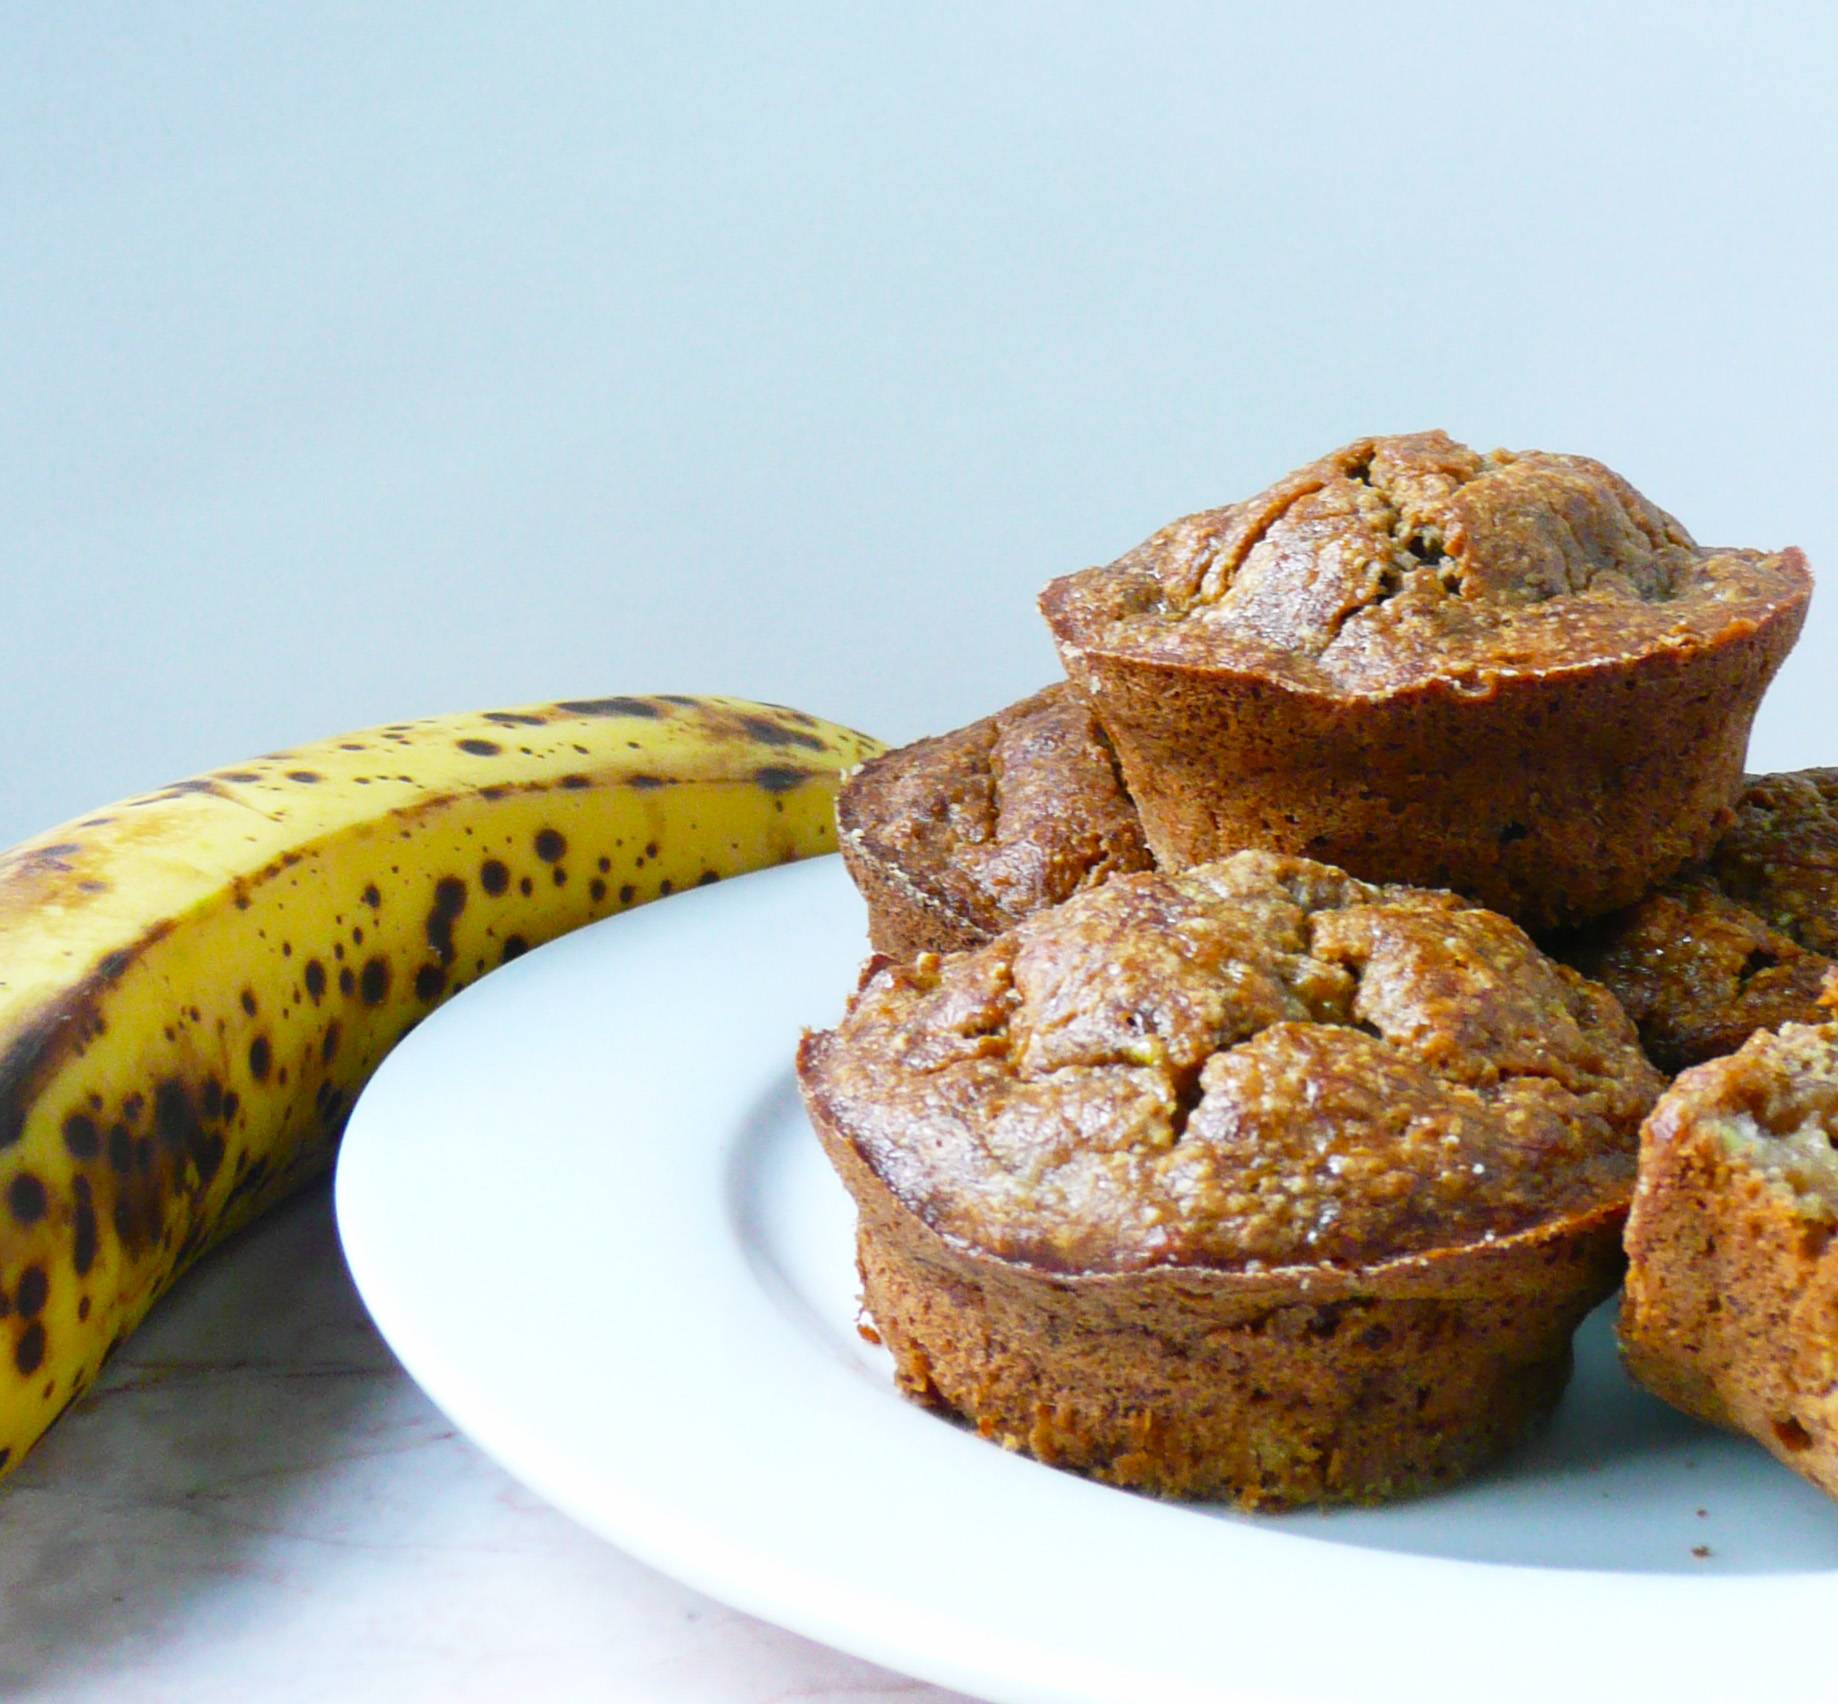
There is something magical about making muffins. You sift together a few ingredients, stir in a few more, and a little while later 12 mini cakes emerge from the oven ready to fill your heart with joy and comfort.
If there is a practice more conducive to self care than baking, I have yet to discover it.
If I’m ever having a bad day, I bake. It takes focus and when you’re measuring and stirring everything together, the things that troubled you before seem far away.
The scent of delicious muffins wafts through the air and makes any house and home seem more warm and friendly. It’s a scent that makes the world a little softer and everything feel a little more possible.
And once you bite into a freshly baked muffin the spell is complete, and life feels ok again.
I love blueberry muffins, but there’s something about banana bread muffins that seem extra nourishing to your soul.
When I first cut gluten out of my diet, I really missed banana bread. I missed it’s buttery sweetness, and cozy banana richness.
It took me a couple of tries to get this recipe right, but these muffins taste just like the banana bread that I used to love eating. They also have a touch of cinnamon and vanilla to give them an extra bit of warmth to their flavor.
I like to use the ripest bananas that I can find (overripe bananas work the best as they are sweeter) and baking these muffins is a great way to cut down on food waste and have breakfast ready to go for the next few days (even if you eat 3 – 4 muffins still warm from the oven like I normally do).
I like to make these muffins a day ahead and leave them out on a plate on the counter covered by a paper towel. They dry out a little overnight, and the texture gets even better the next day.
* I grind oats into oat flour using a blender. Don’t grind the oats in a food processor because the flour won’t be fine enough.
Any extra oat flour I don’t use in the recipe goes into an airtight container and I use it for another recipe.
If you’re making this recipe for someone who has celiac disease, please use certified gluten free oats, as the oats from the bulk bins can sometimes be processed on the same equipment as wheat.
2. In a large bowl, sift together the oat flour, baking soda, and ground cinnamon and set aside.
3. In a separate bowl stir together the mashed bananas, apple cider vinegar, melted coconut oil, eggs, maple syrup, and vanilla extract until well combined.
Pour the wet mixture into the dry and stir until well combined. Divide the batter evenly between the 12 muffin cups and bake at 350 F for 33 minutes (until golden). Turn the oven down to 300 F and bake for another 10 minutes until the cake tester comes out clean.
Let the muffins cool in the pan. To pop them out of the muffin tin, run a small knife around the edge of each muffin (a small butter knife works great for this) and they should come right out.
I wish you many happy breakfasts (and memories) with these wonderful muffins.
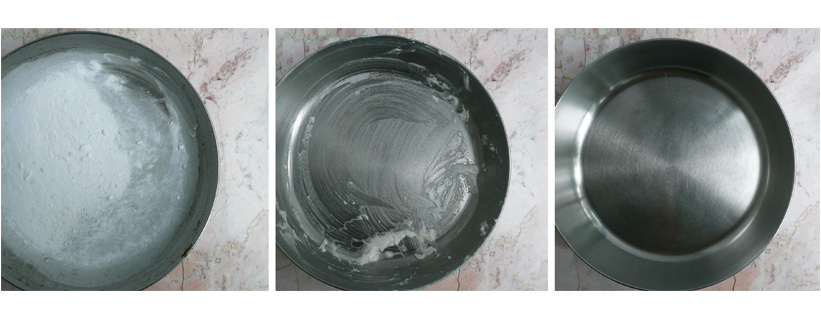
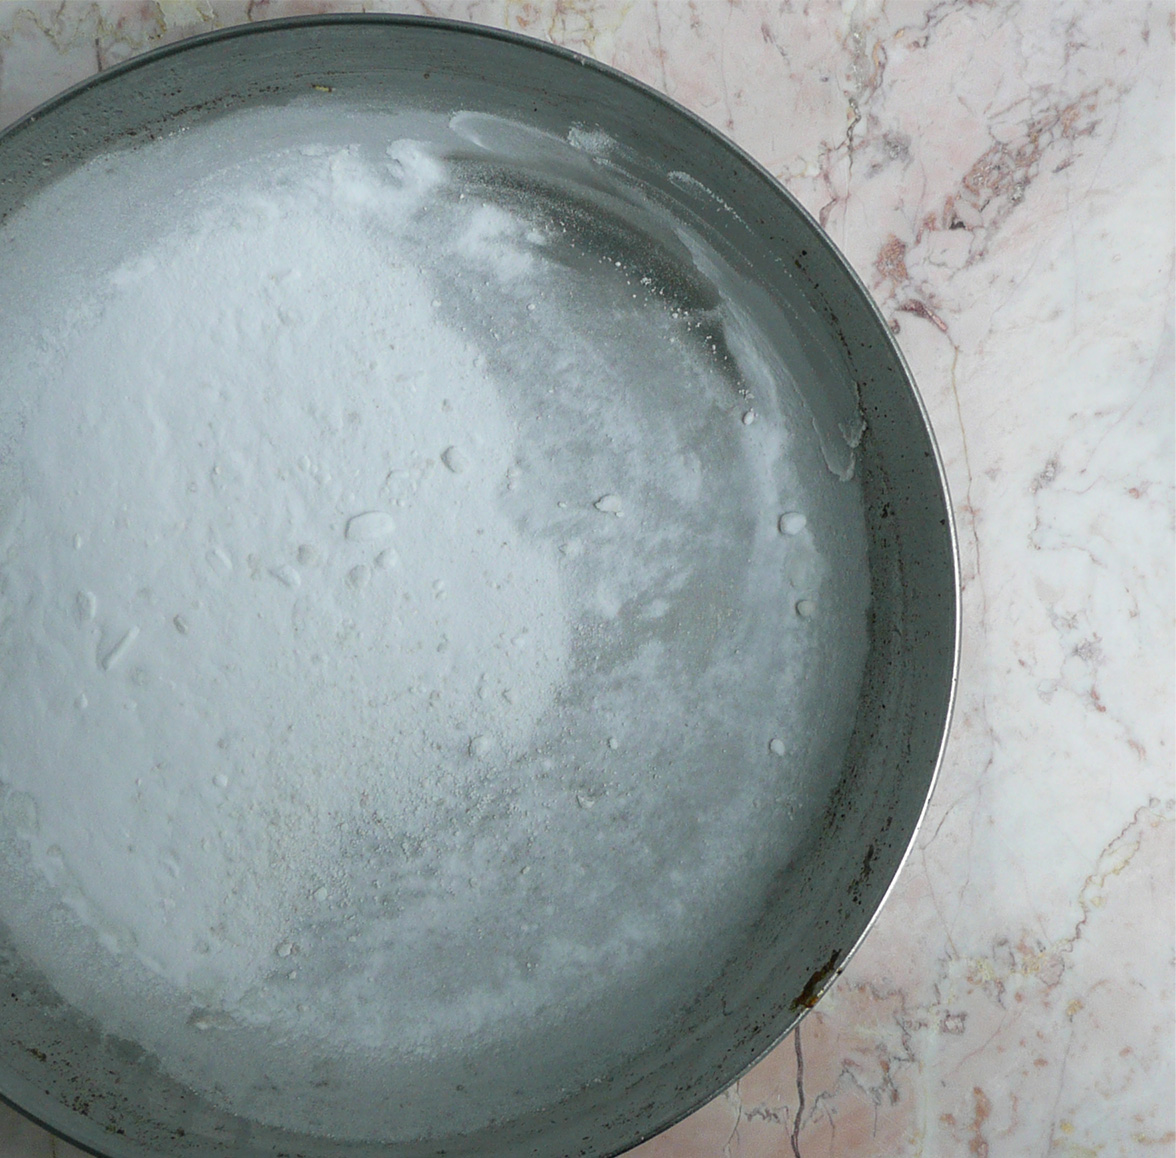
Baking soda and vinegar can be your best friends in the kitchen. They help muffins to rise, can make a sink squeaky clean, or help you scrub out a pan without damaging the finish.
Here’s how I like to clean my pots and pans (if they need a little more help to get clean than the dishwasher can handle by itself).
(This is a pan that I used to sauté some baby spinach with garlic and olive oil.)
Start by sprinkling a generous amount of baking soda into your pan to absorb any leftover oil.
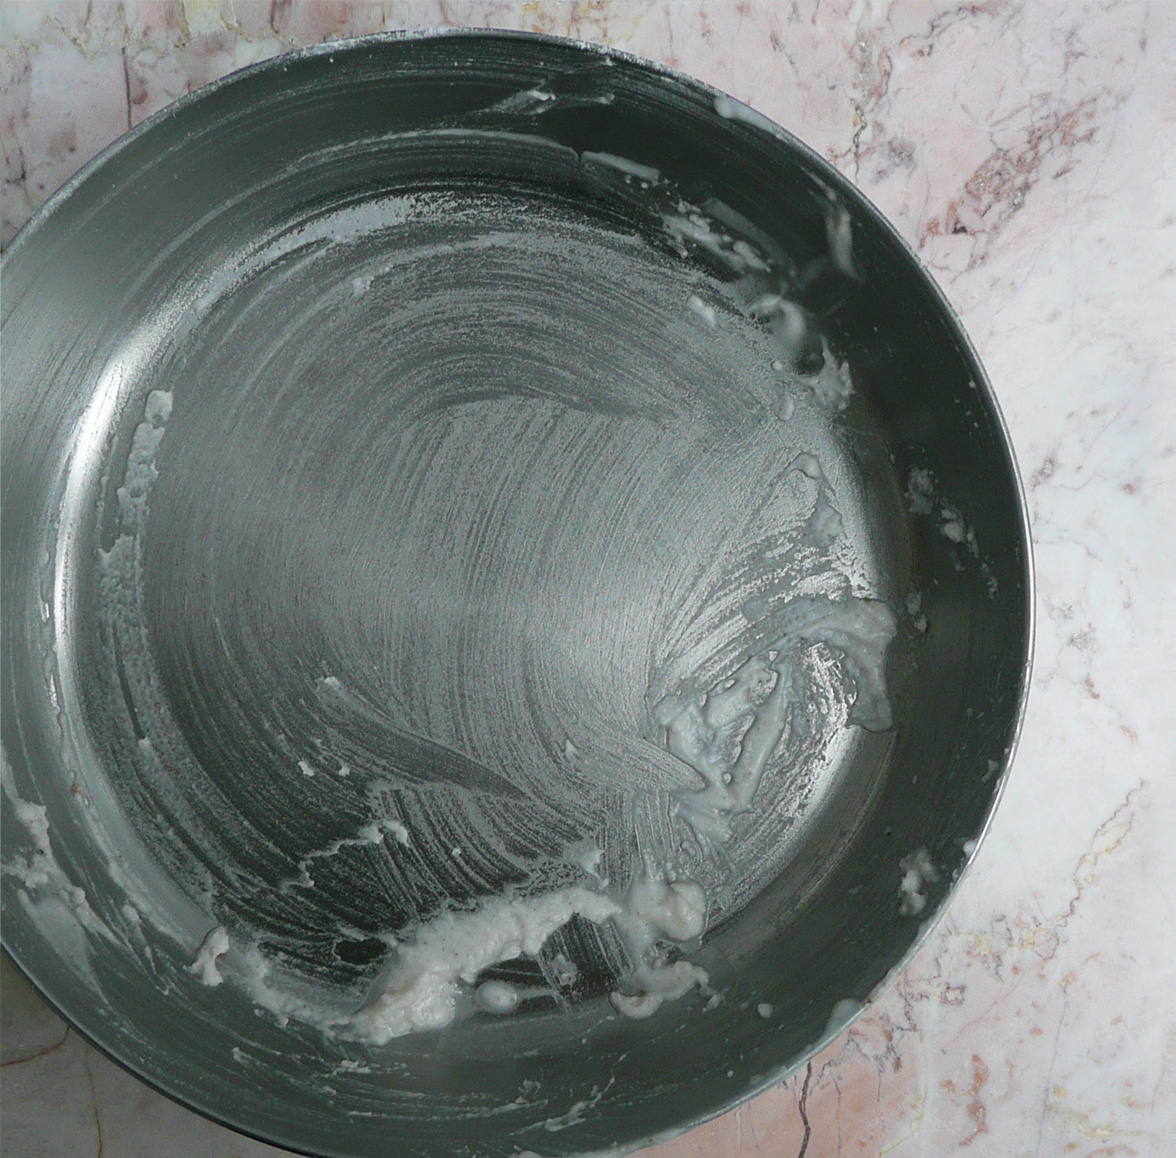
Add a splash of plain white vinegar, and use a sponge to give the pan a good scrub.
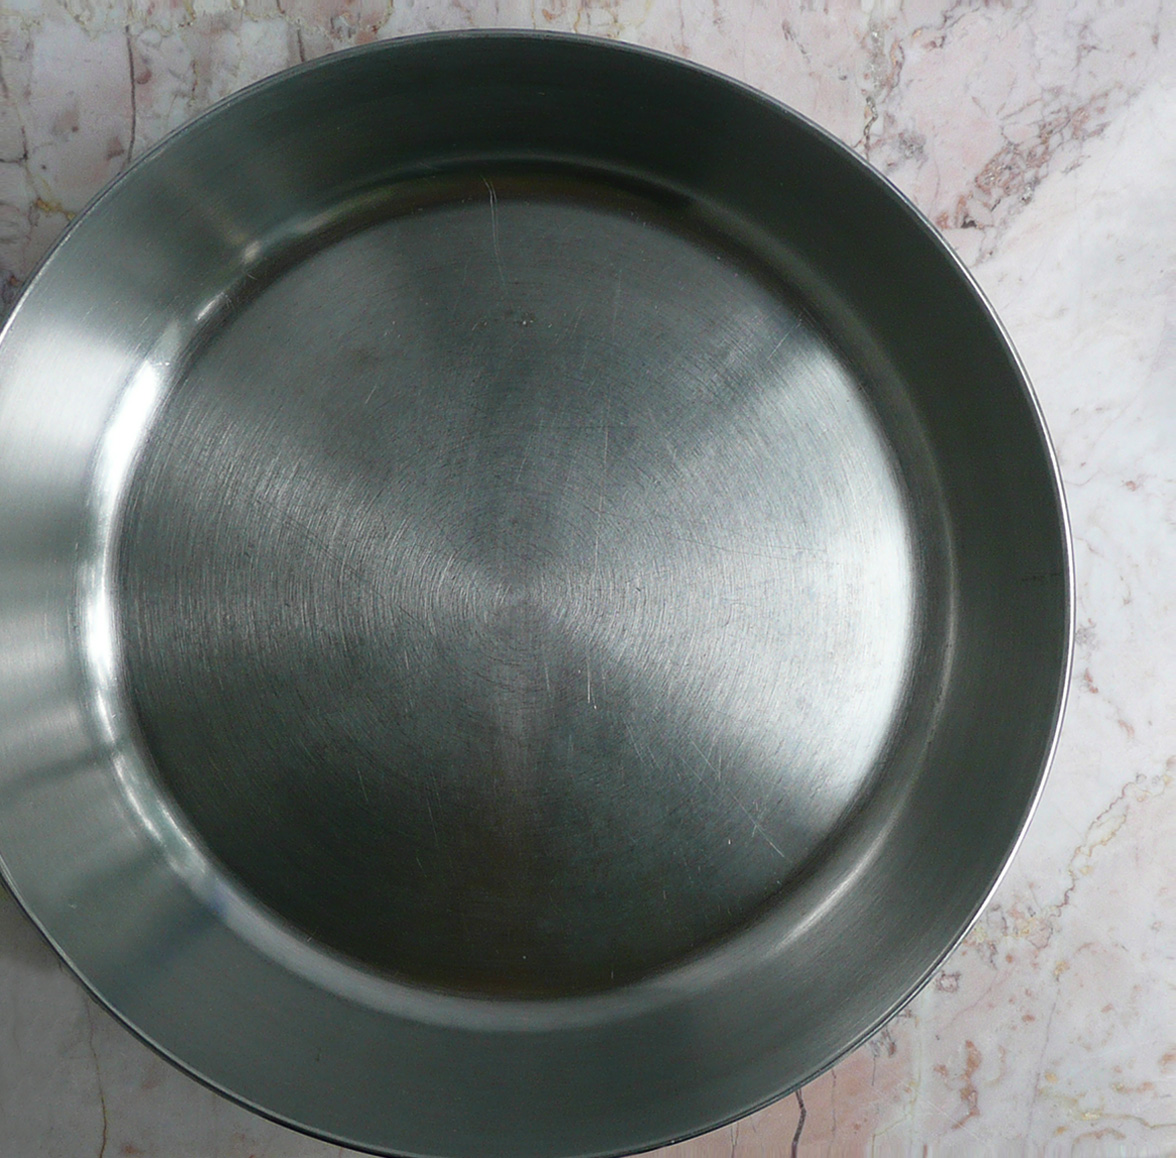
Rinse the pan out, then wash with soap and water as usual.
Ta da! A super clean pan, ready to make your next delicious dish.
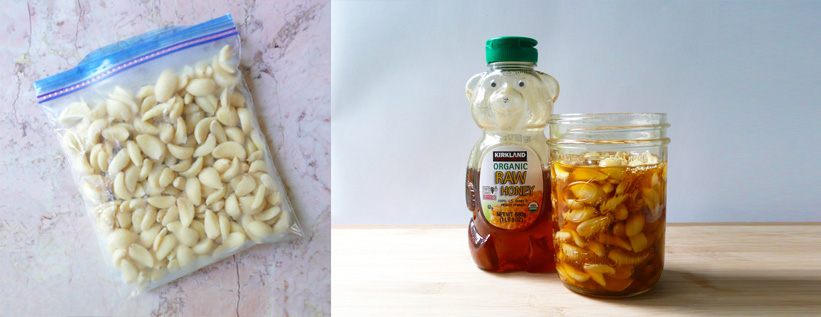
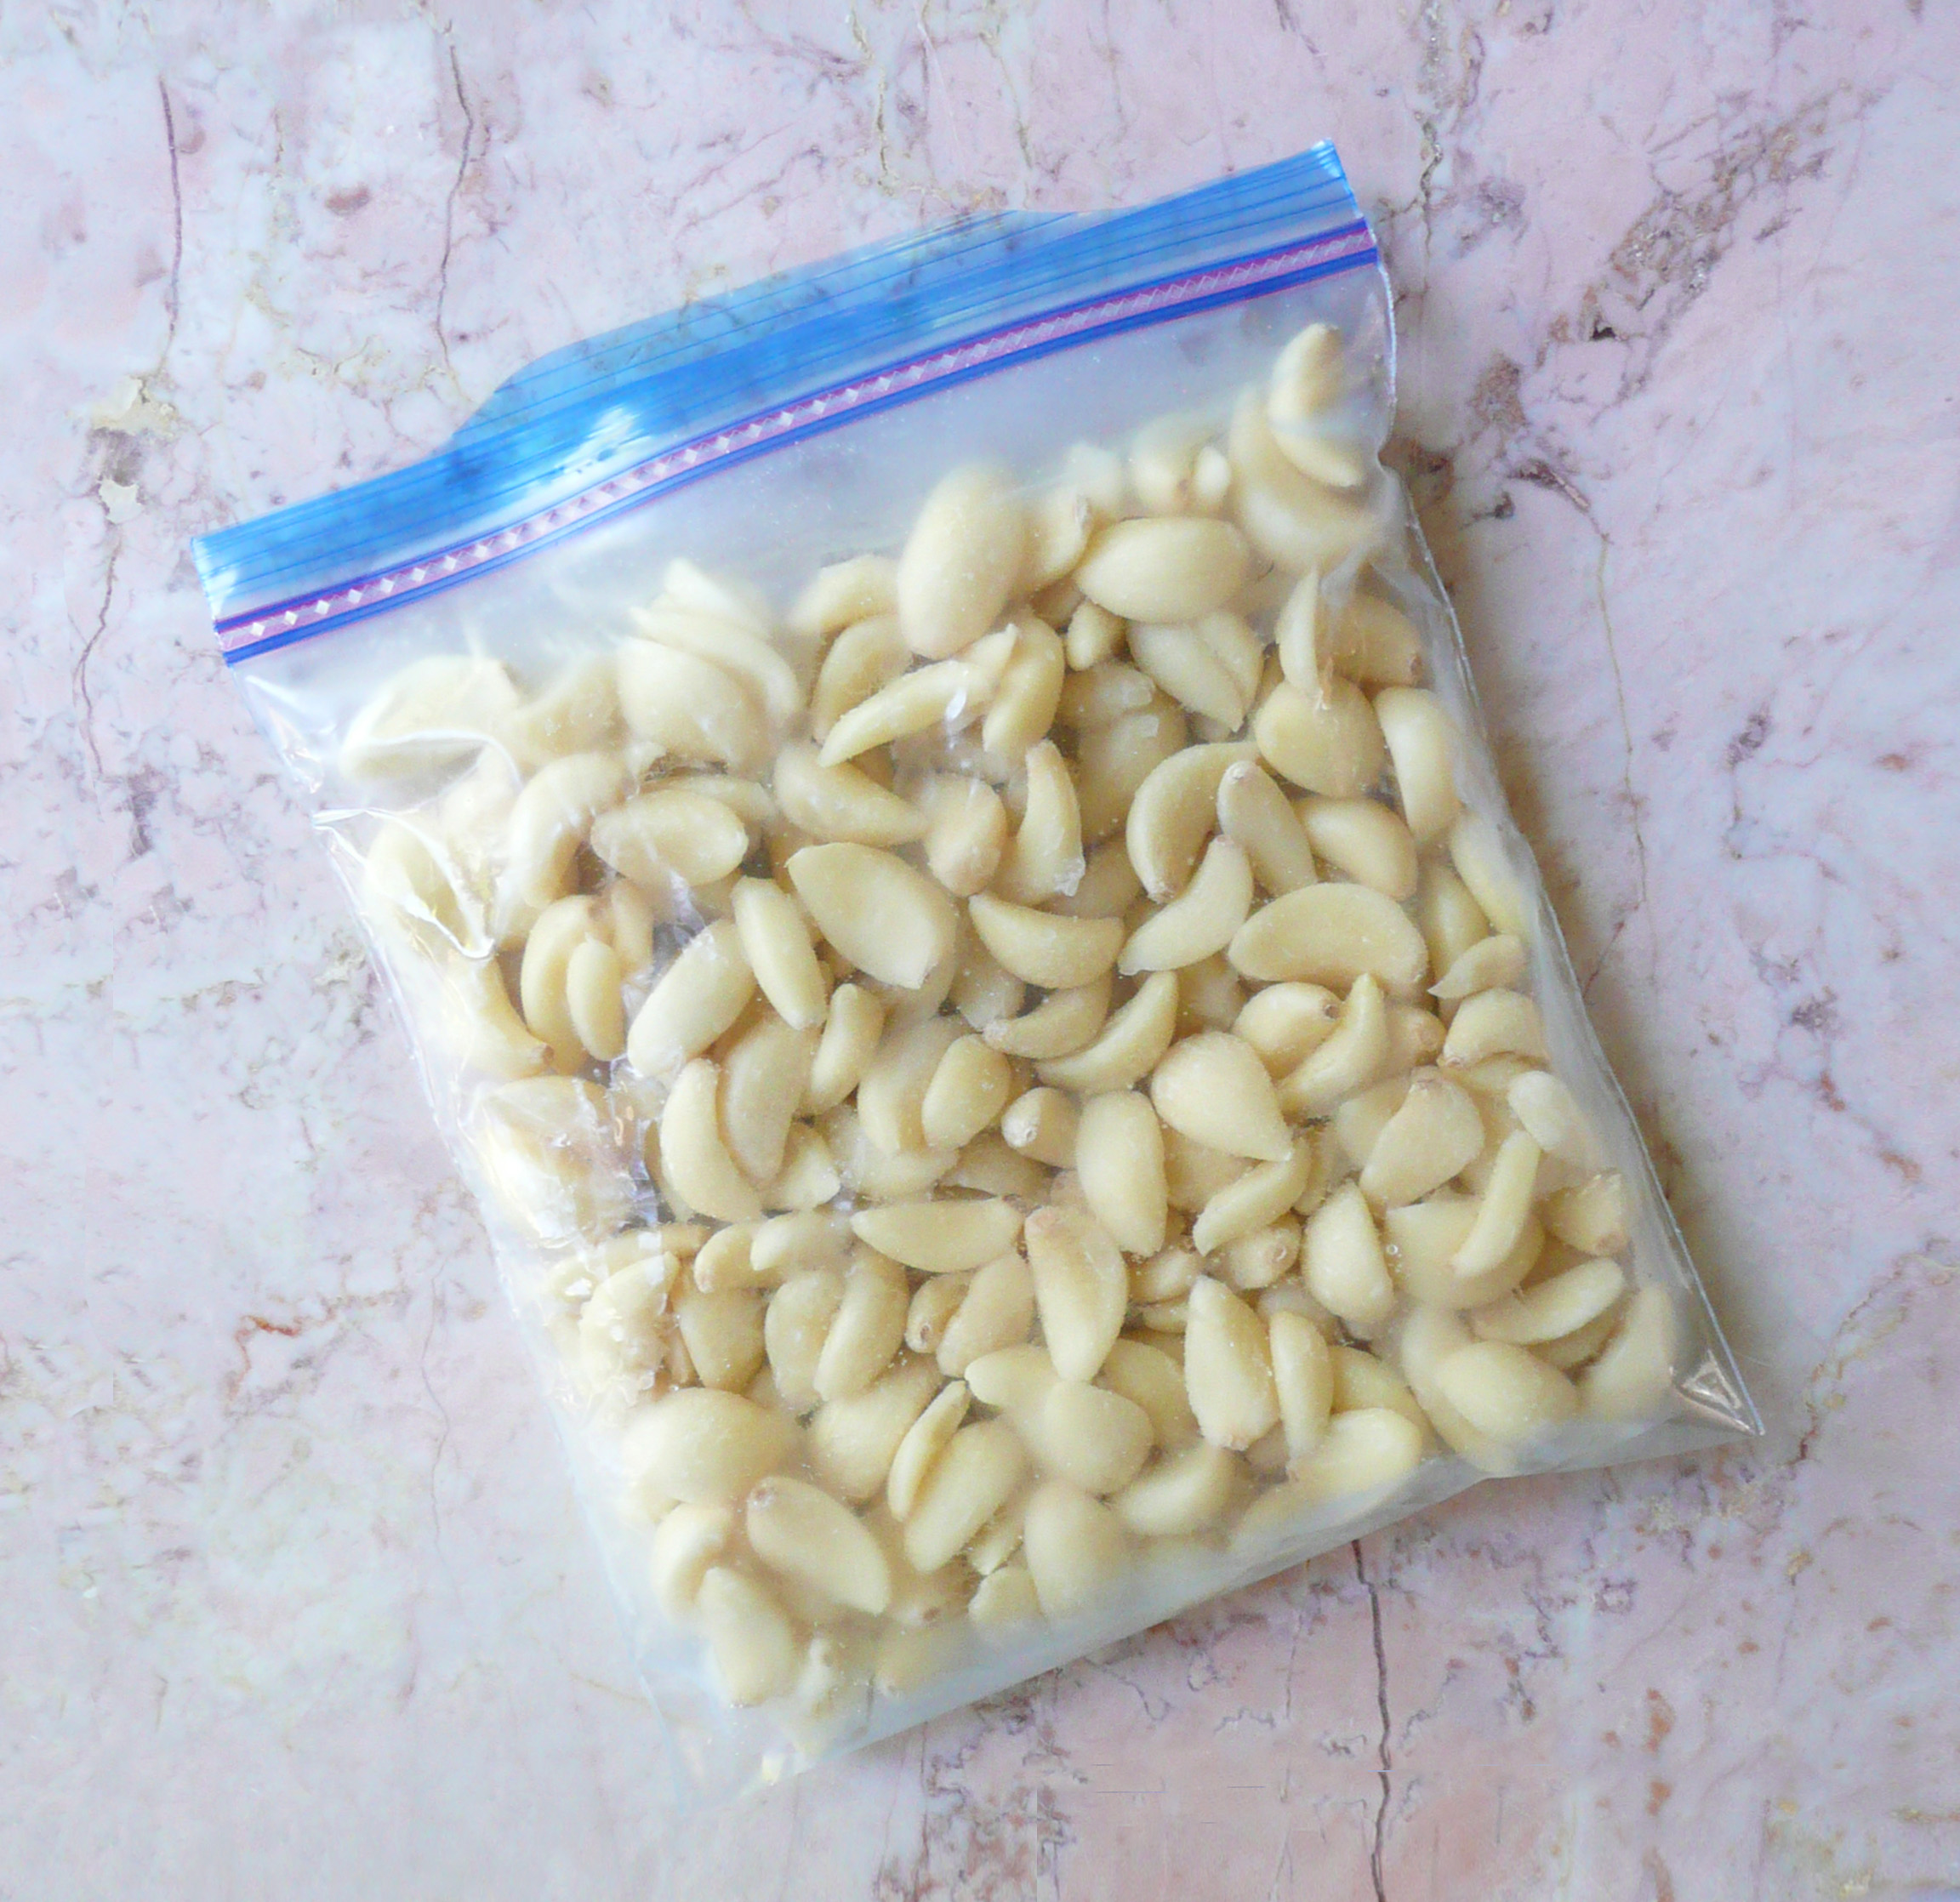
Finding giant bags of organic peeled garlic at the grocery store (or at Costco) usually seems like a huge win. It’s not very expensive (yay!) and will save you tons of time peeling garlic when you’re cooking.
Cut to a week later and you realize that even though you’ve been eating more garlic than normal (because you don’t have to peel it, throwing extra garlic into dishes is super easy) you’ve barely made a dent in your giant bag of garlic.
Peeled garlic also doesn’t have as long of a shelf life as unpeeled garlic either, so now you’re thinking that it’s unlikely that you’ll be able to eat all of it before it goes bad.
But don’t worry! Here are two ways of storing extra garlic cloves so that you can use them up when you’re ready to.
1. Freeze The Extra Garlic Gloves
This is super simple to do and you can use up all your garlic cloves in your own time.
Instructions
1. Pour the extra garlic cloves that you want to freeze into a bowl and set aside. Add a folded paper towel or two to the garlic cloves in the original package that they came in that you want to keep fresh in your fridge (the paper towel will absorb any excess moisture and the garlic will keep fresher for longer). Replace the paper towel every couple of days.
2. Give the excess garlic cloves a good rinse. Transfer them into ziploc freezer bags and squeeze out as much air as possible, and freeze them flat.
3. When you’re ready to use them, take out as many cloves as you need and run them under warm water for a few seconds to defrost. Chop and use as usual.
They will have a softer texture than fresh garlic cloves, and the flavor might be slightly milder, but you can always add another clove or two to your dish to balance that out.
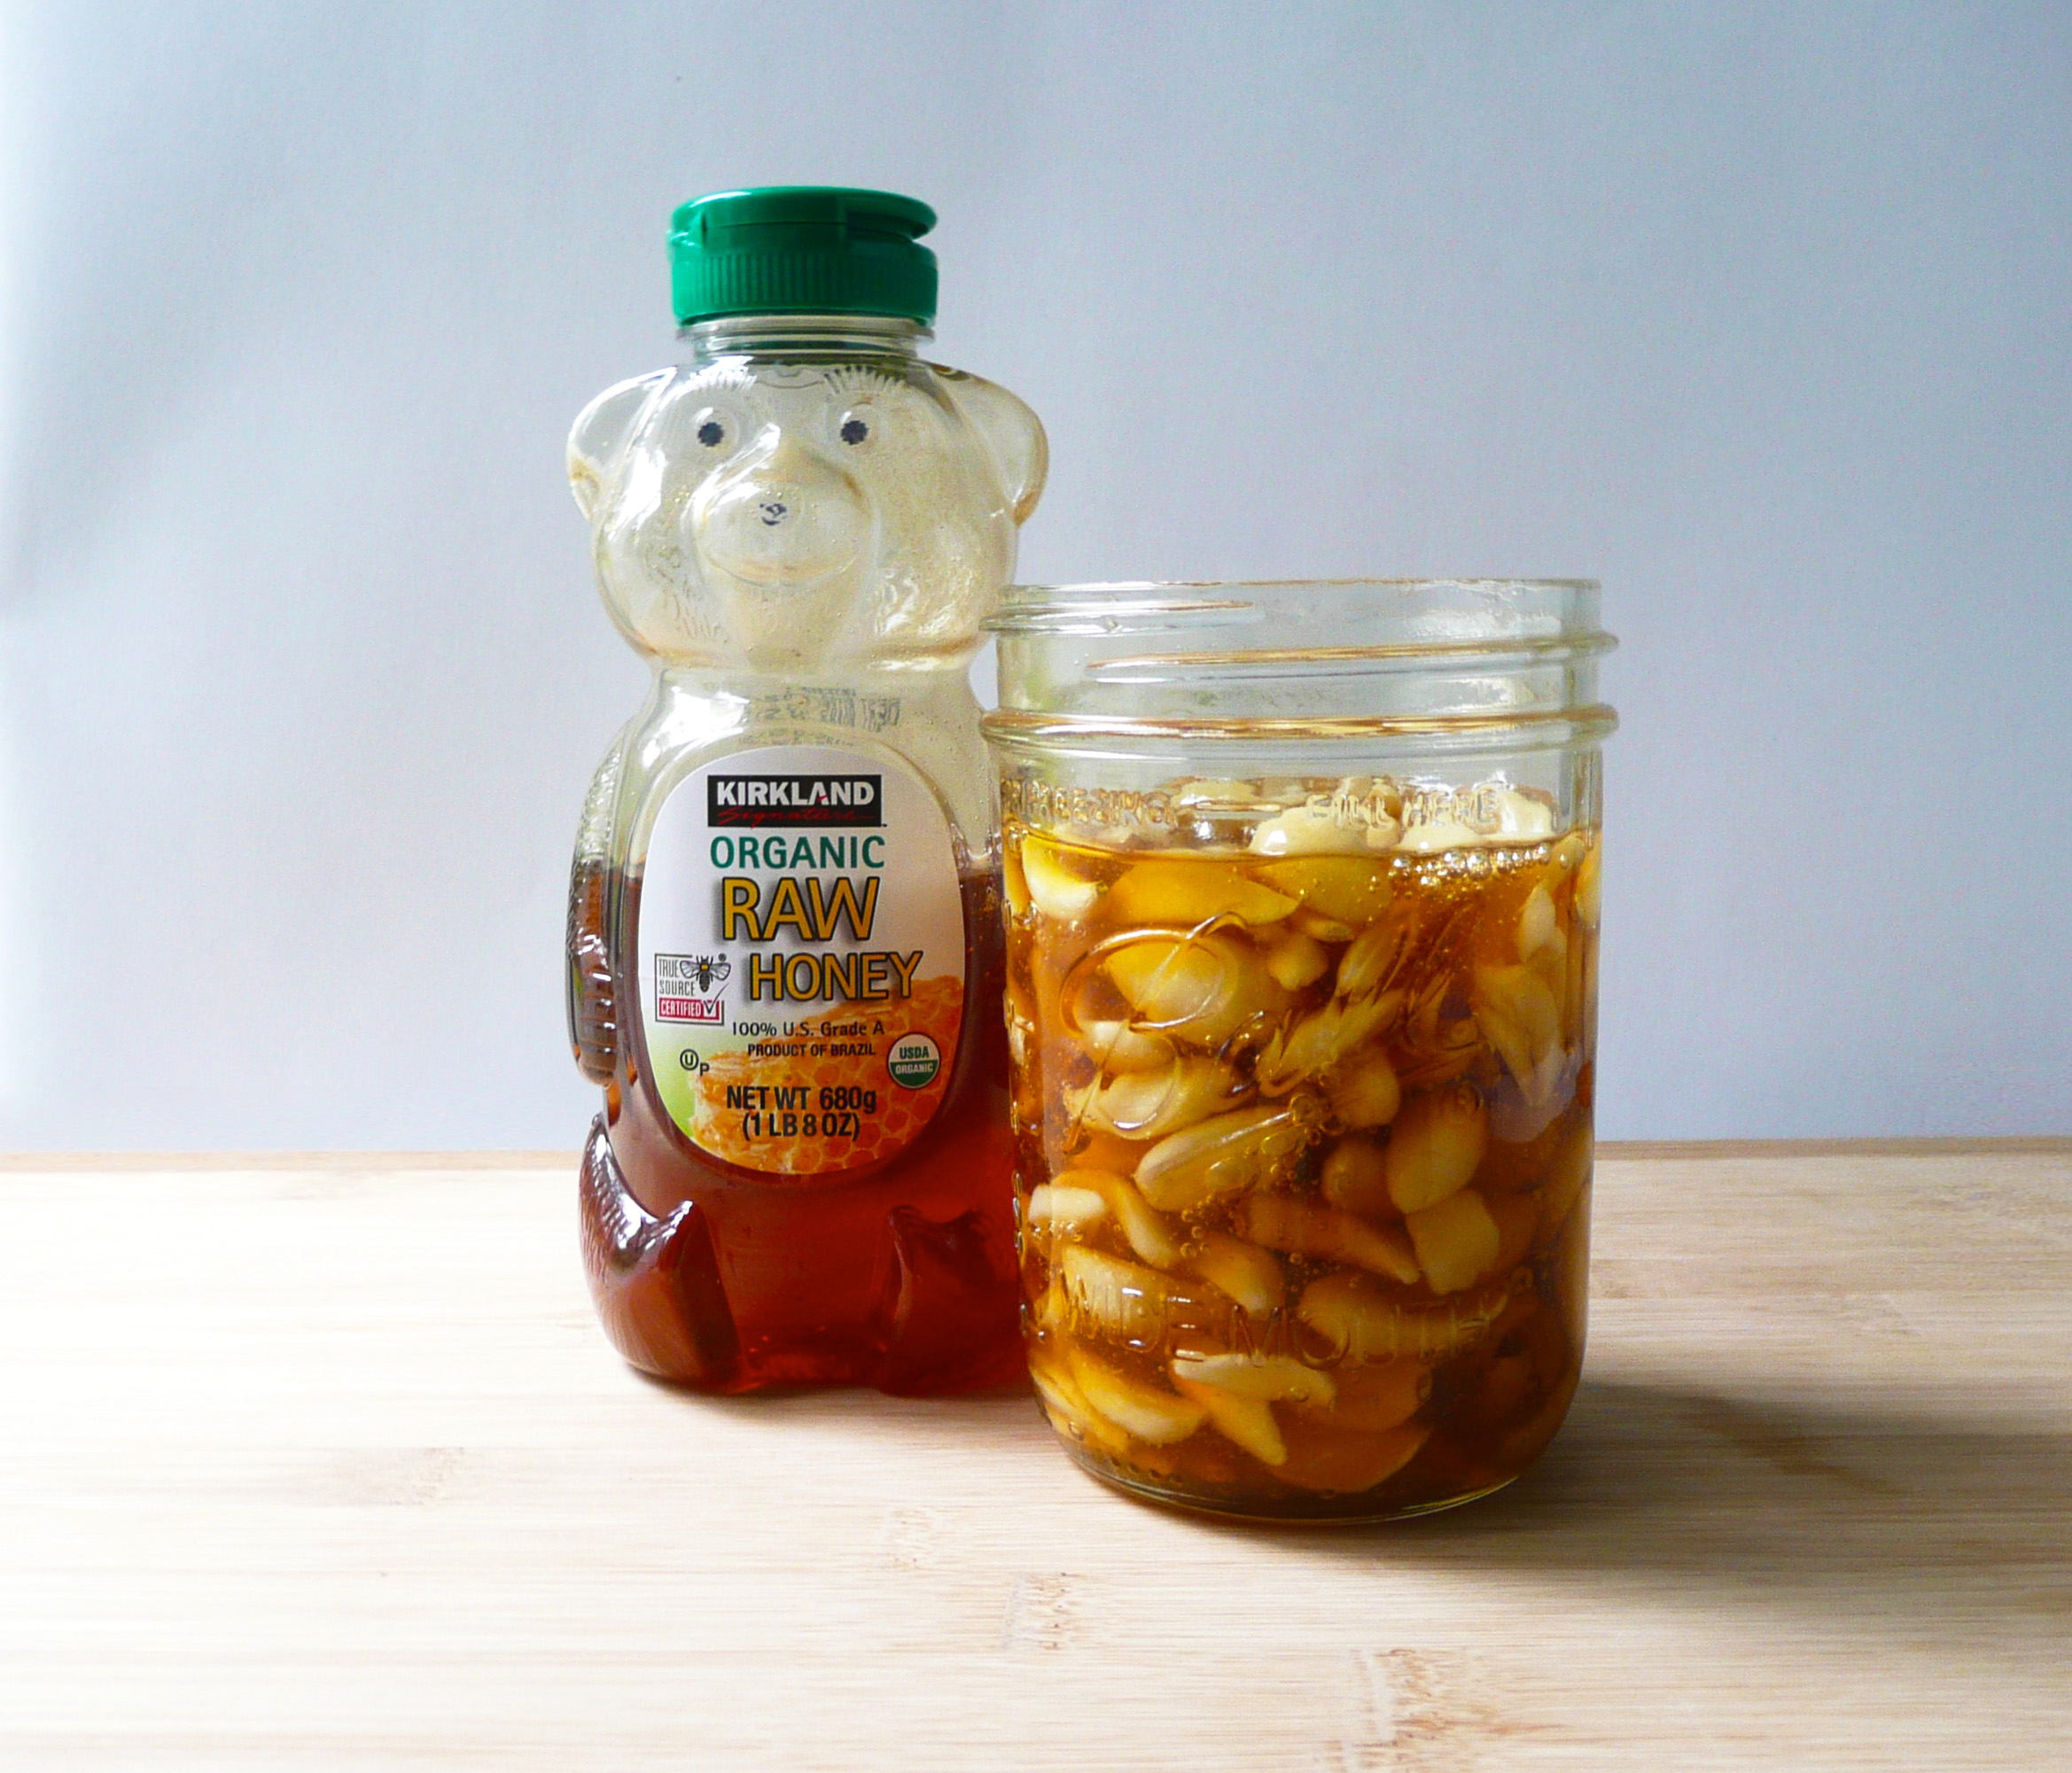
2. Make Fermented Garlic Honey
I love watching the It’s Alive series on the Bon Appétit YouTube channel. It is hilarious. The editing and the host are fun and you learn a lot about fermentation. Here’s the episode about fermenting garlic in honey.
I’ve made garlic honey a few times now. I’ve made a few other fermented things before (red cabbage kimchi kraut and lacto-fermented garlic cloves) but the fermented garlic honey is by far the easiest thing to make if you’re looking to start preserving food using fermentation.
Garlic honey is delicious drizzled onto gluten-free bread, or homemade tortilla chips. I like to eat a few cloves of this when I have a cold. I’m not sure if it does anything to fight off a cold, but it’s a nice treat to have nonetheless.
I’m not a expert in this, so please watch the video above for more info, especially about adding the splash of apple cider and keeping the pH below 4.6 to be on the safe side.
Instructions
1. Rinse off your garlic cloves with filtered water (chlorine can prevent or slow fermentation). If you use straight tap water, that’s ok too. Just rinse them off with filtered water. Drain off as much water as possible and place them onto plates lined with paper towels to dry.
The next day replace the paper towels with dry ones, and leave the garlic cloves to dry another day until they are completely dry to the touch.
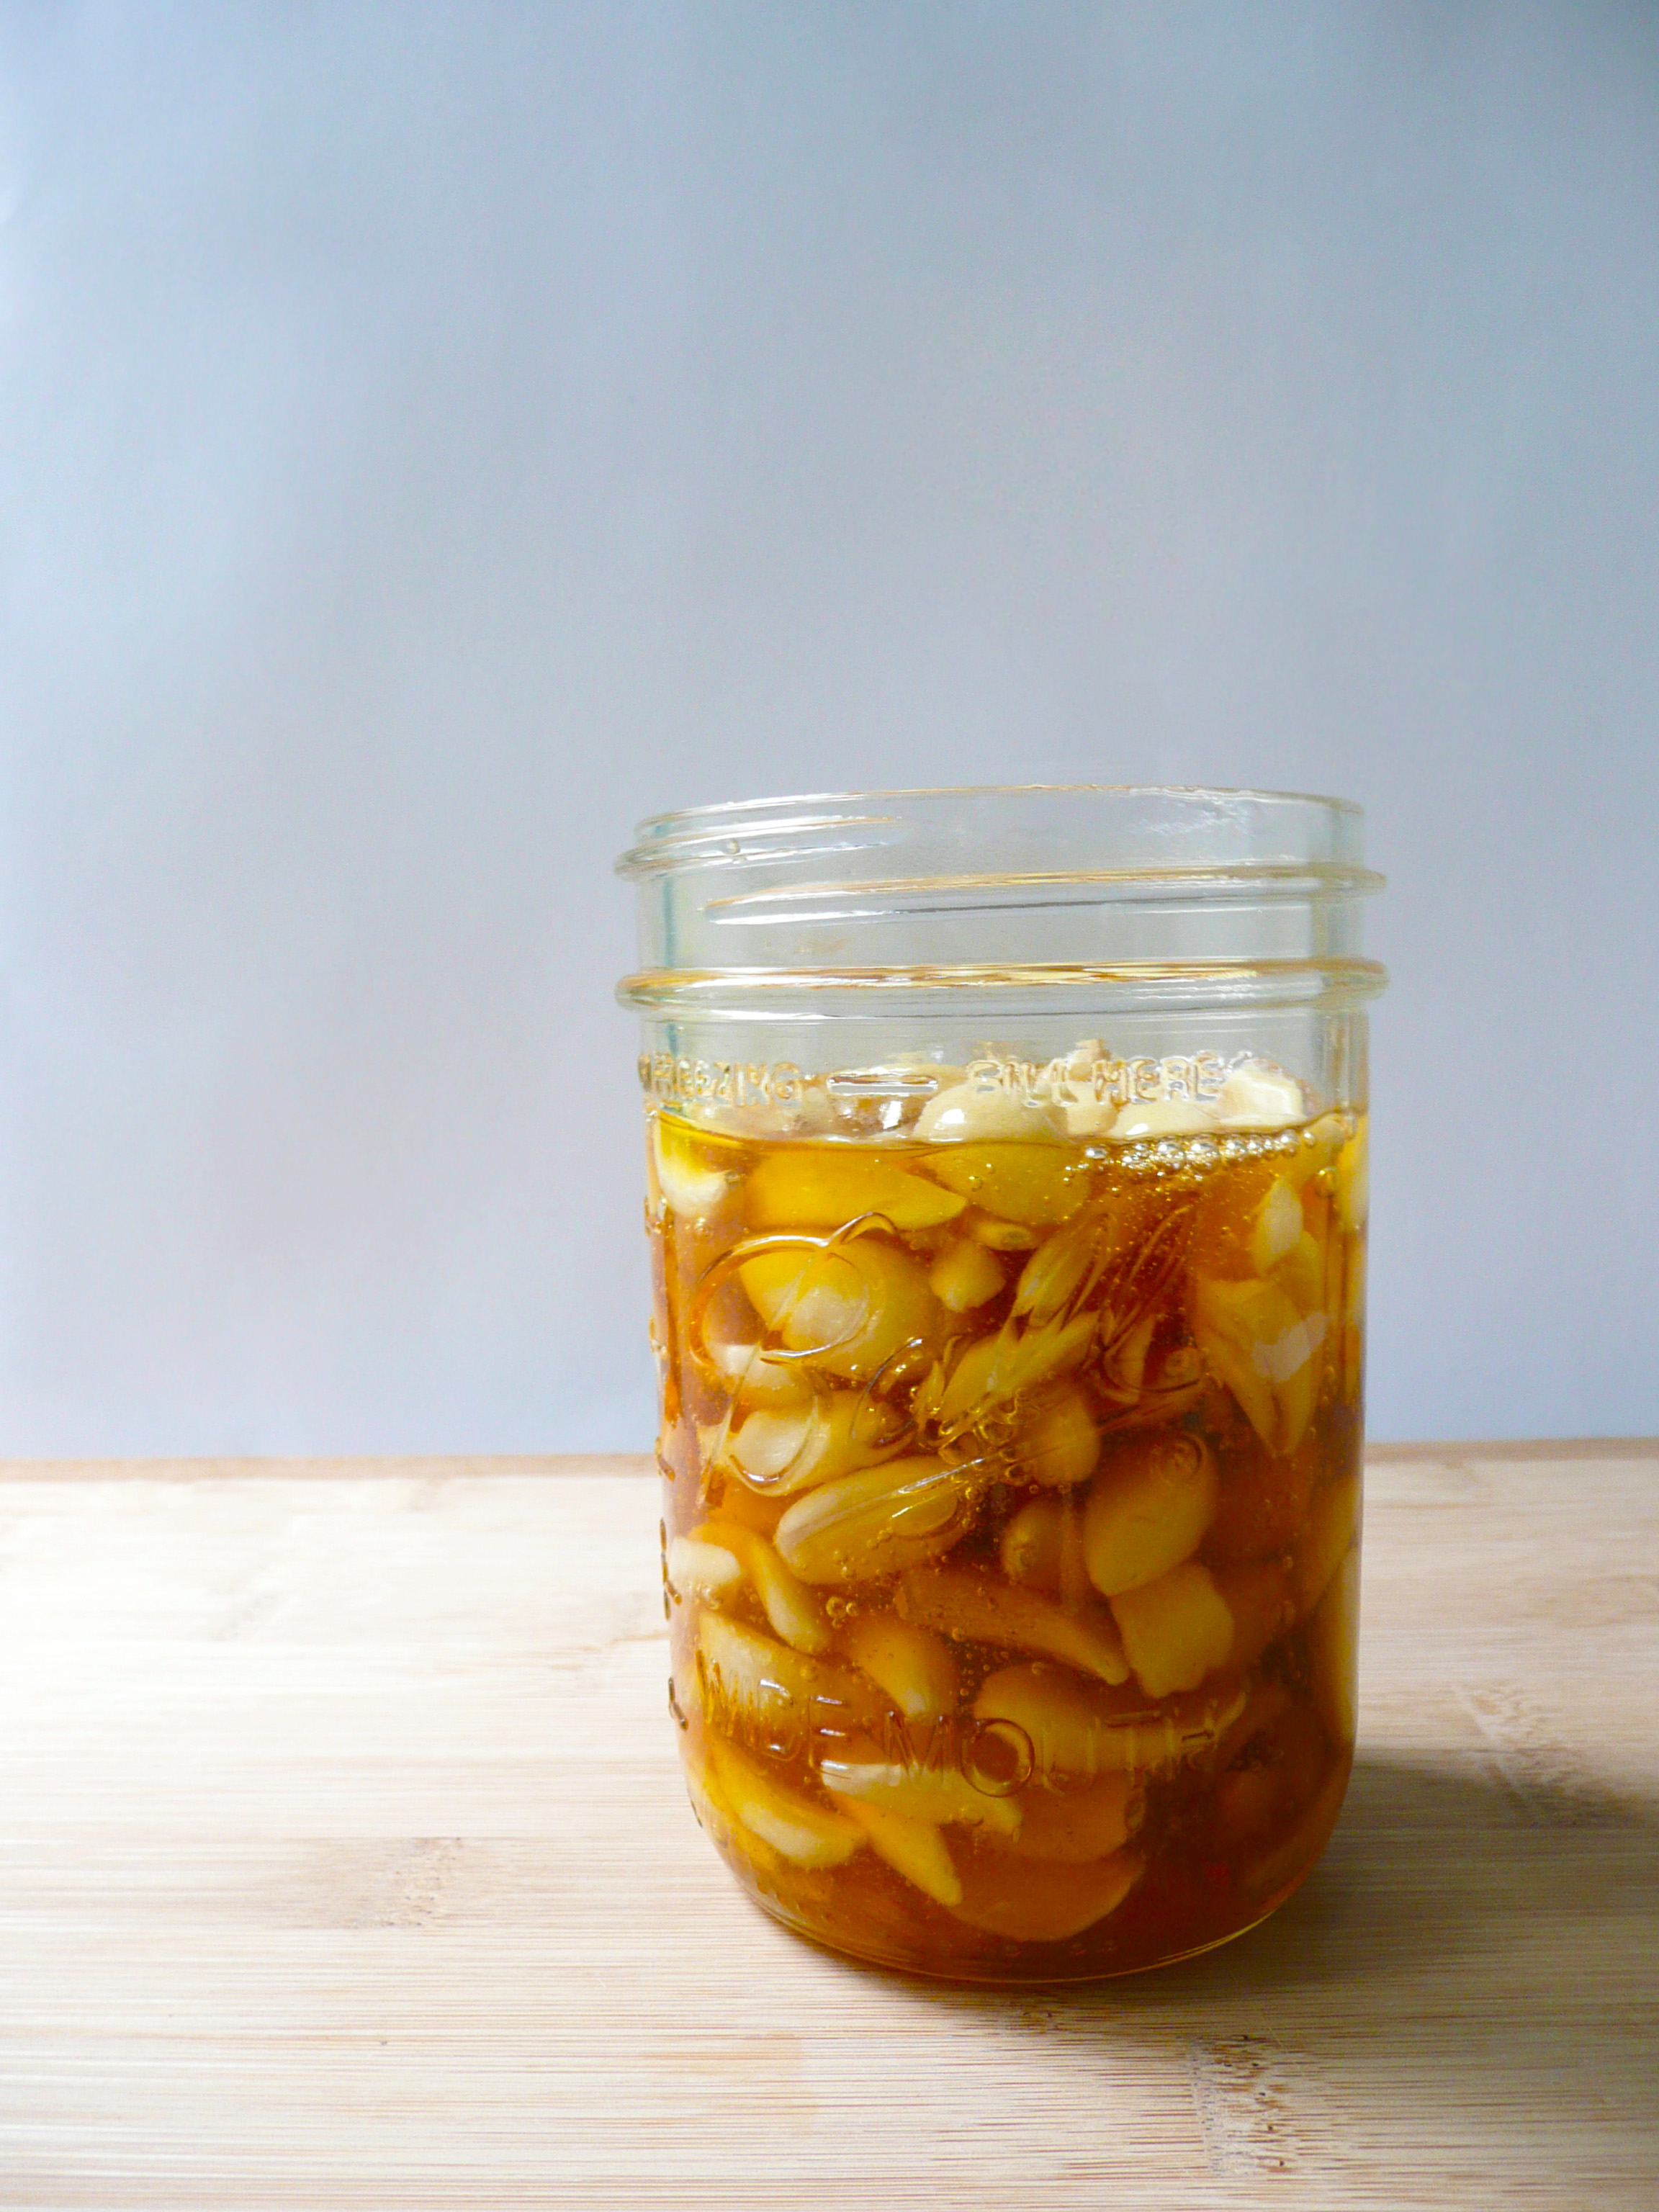
2. Pick out the cloves the look a little rough and trim off any blemishes or dark spots on the cloves. Put the cloves onto a cutting board and bash them with a knife or cut them in half. Add all the garlic into a clean dry wide mouth mason jar and cover them in raw honey (leaving about 2-3 inches of headroom in the jar).
I didn’t leave enough headroom in my jar, and the honey has leaked a little out of the top of the jar while it’s been fermenting (not a big deal, you can just wash it off). Give everything a good stir so that the garlic and honey are well combined.
3. Put the lid on the mason jar and don’t screw the jar completely tight, leave it a little loose so that any gases produced during the fermentation can escape. Set the jar aside in an area without any direct sunlight where it wont be disturbed. I set my jar on a small plate so that it will catch any honey that might leak out from the top of the jar during fermentation, which makes it easy to rinse the honey off of the plate and the outside of the jar every few days.
Every day for the first few days, screw the lid on tightly and turn the jar upside down so that the honey can cover all the garlic cloves. Turn the jar right side up, loosen the lid, and place it back in it’s spot again.
After the first week, you can just do this every few days or so. After a month, you can just leave it alone with the lid a little loose and it should look after itself. Check the pH periodically to make sure that it stays below 4.6.
I’ve never had a jar of garlic honey go bad on me yet, but if you have any mold growing in the jar or if anything looks funny, when in doubt, throw it out.
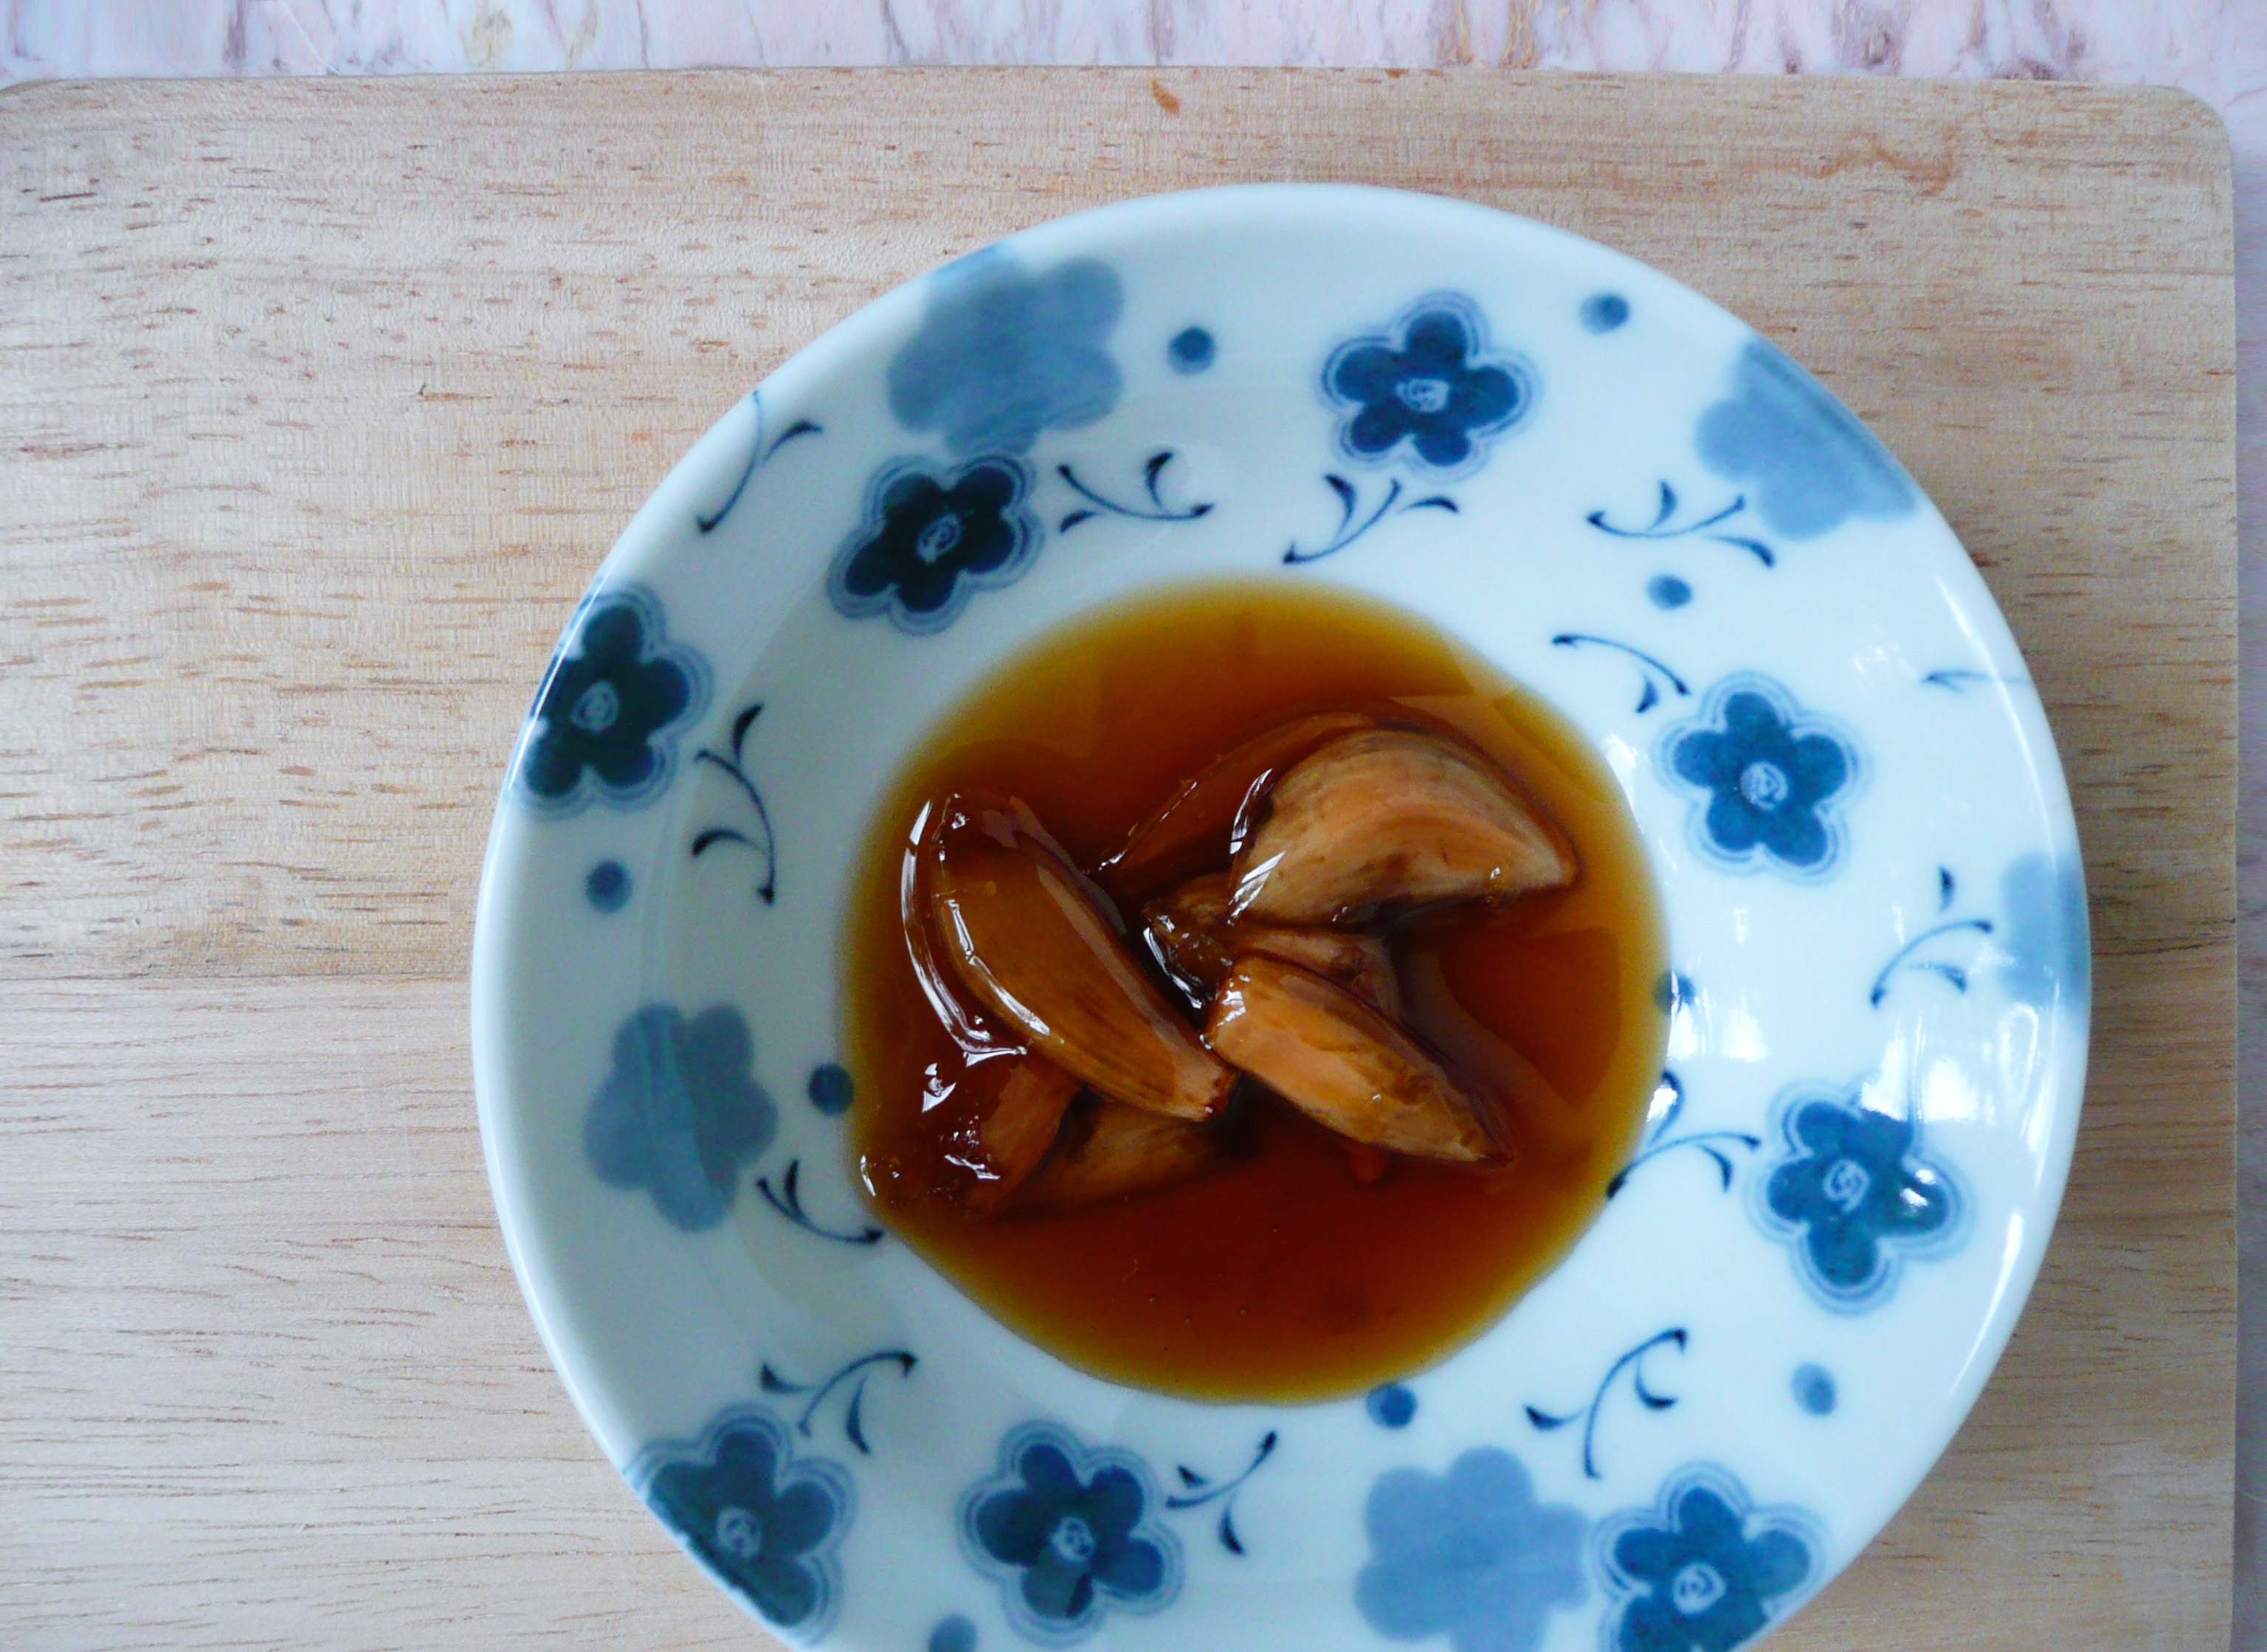
This is what the garlic will look like after 6 months. The flavor of the garlic mellows out over time, and the cloves become sweet and chewy. The longer the garlic sits in the honey, the mellower the garlic flavor and the chewier they get. If you have a friend who loves garlic, a jar of this garlic honey makes a great gift.
Limes are a great way to add zip and flavor to all kinds dishes from tacos, to pho, or sorbets, or pad thai. The the little burst of bright sourness that they give can instantly make a dish go from “good” to “Wow! This tastes AMAZING!”
Organic limes can be a little hard to find at my local grocery store. They also tend to be expensive if I don’t buy them in bulk. The cheapest place that I’ve seen them is at Trader Joe’s for about $2 for a bag for 4 -5 organic limes, so that’s where I tend to buy them from.
Limes are also not an ingredient that I tend to use very often, so before I figured out that there was a way to freeze them, I tended to buy a bag of limes when I really only needed one or two, and then forget that I had them at the back of the fridge until eventually I had to throw them out.
But no more! If you ever find yourself with leftover limes, here’s how to freeze them so that you have them on hand whenever you need them.
Instructions
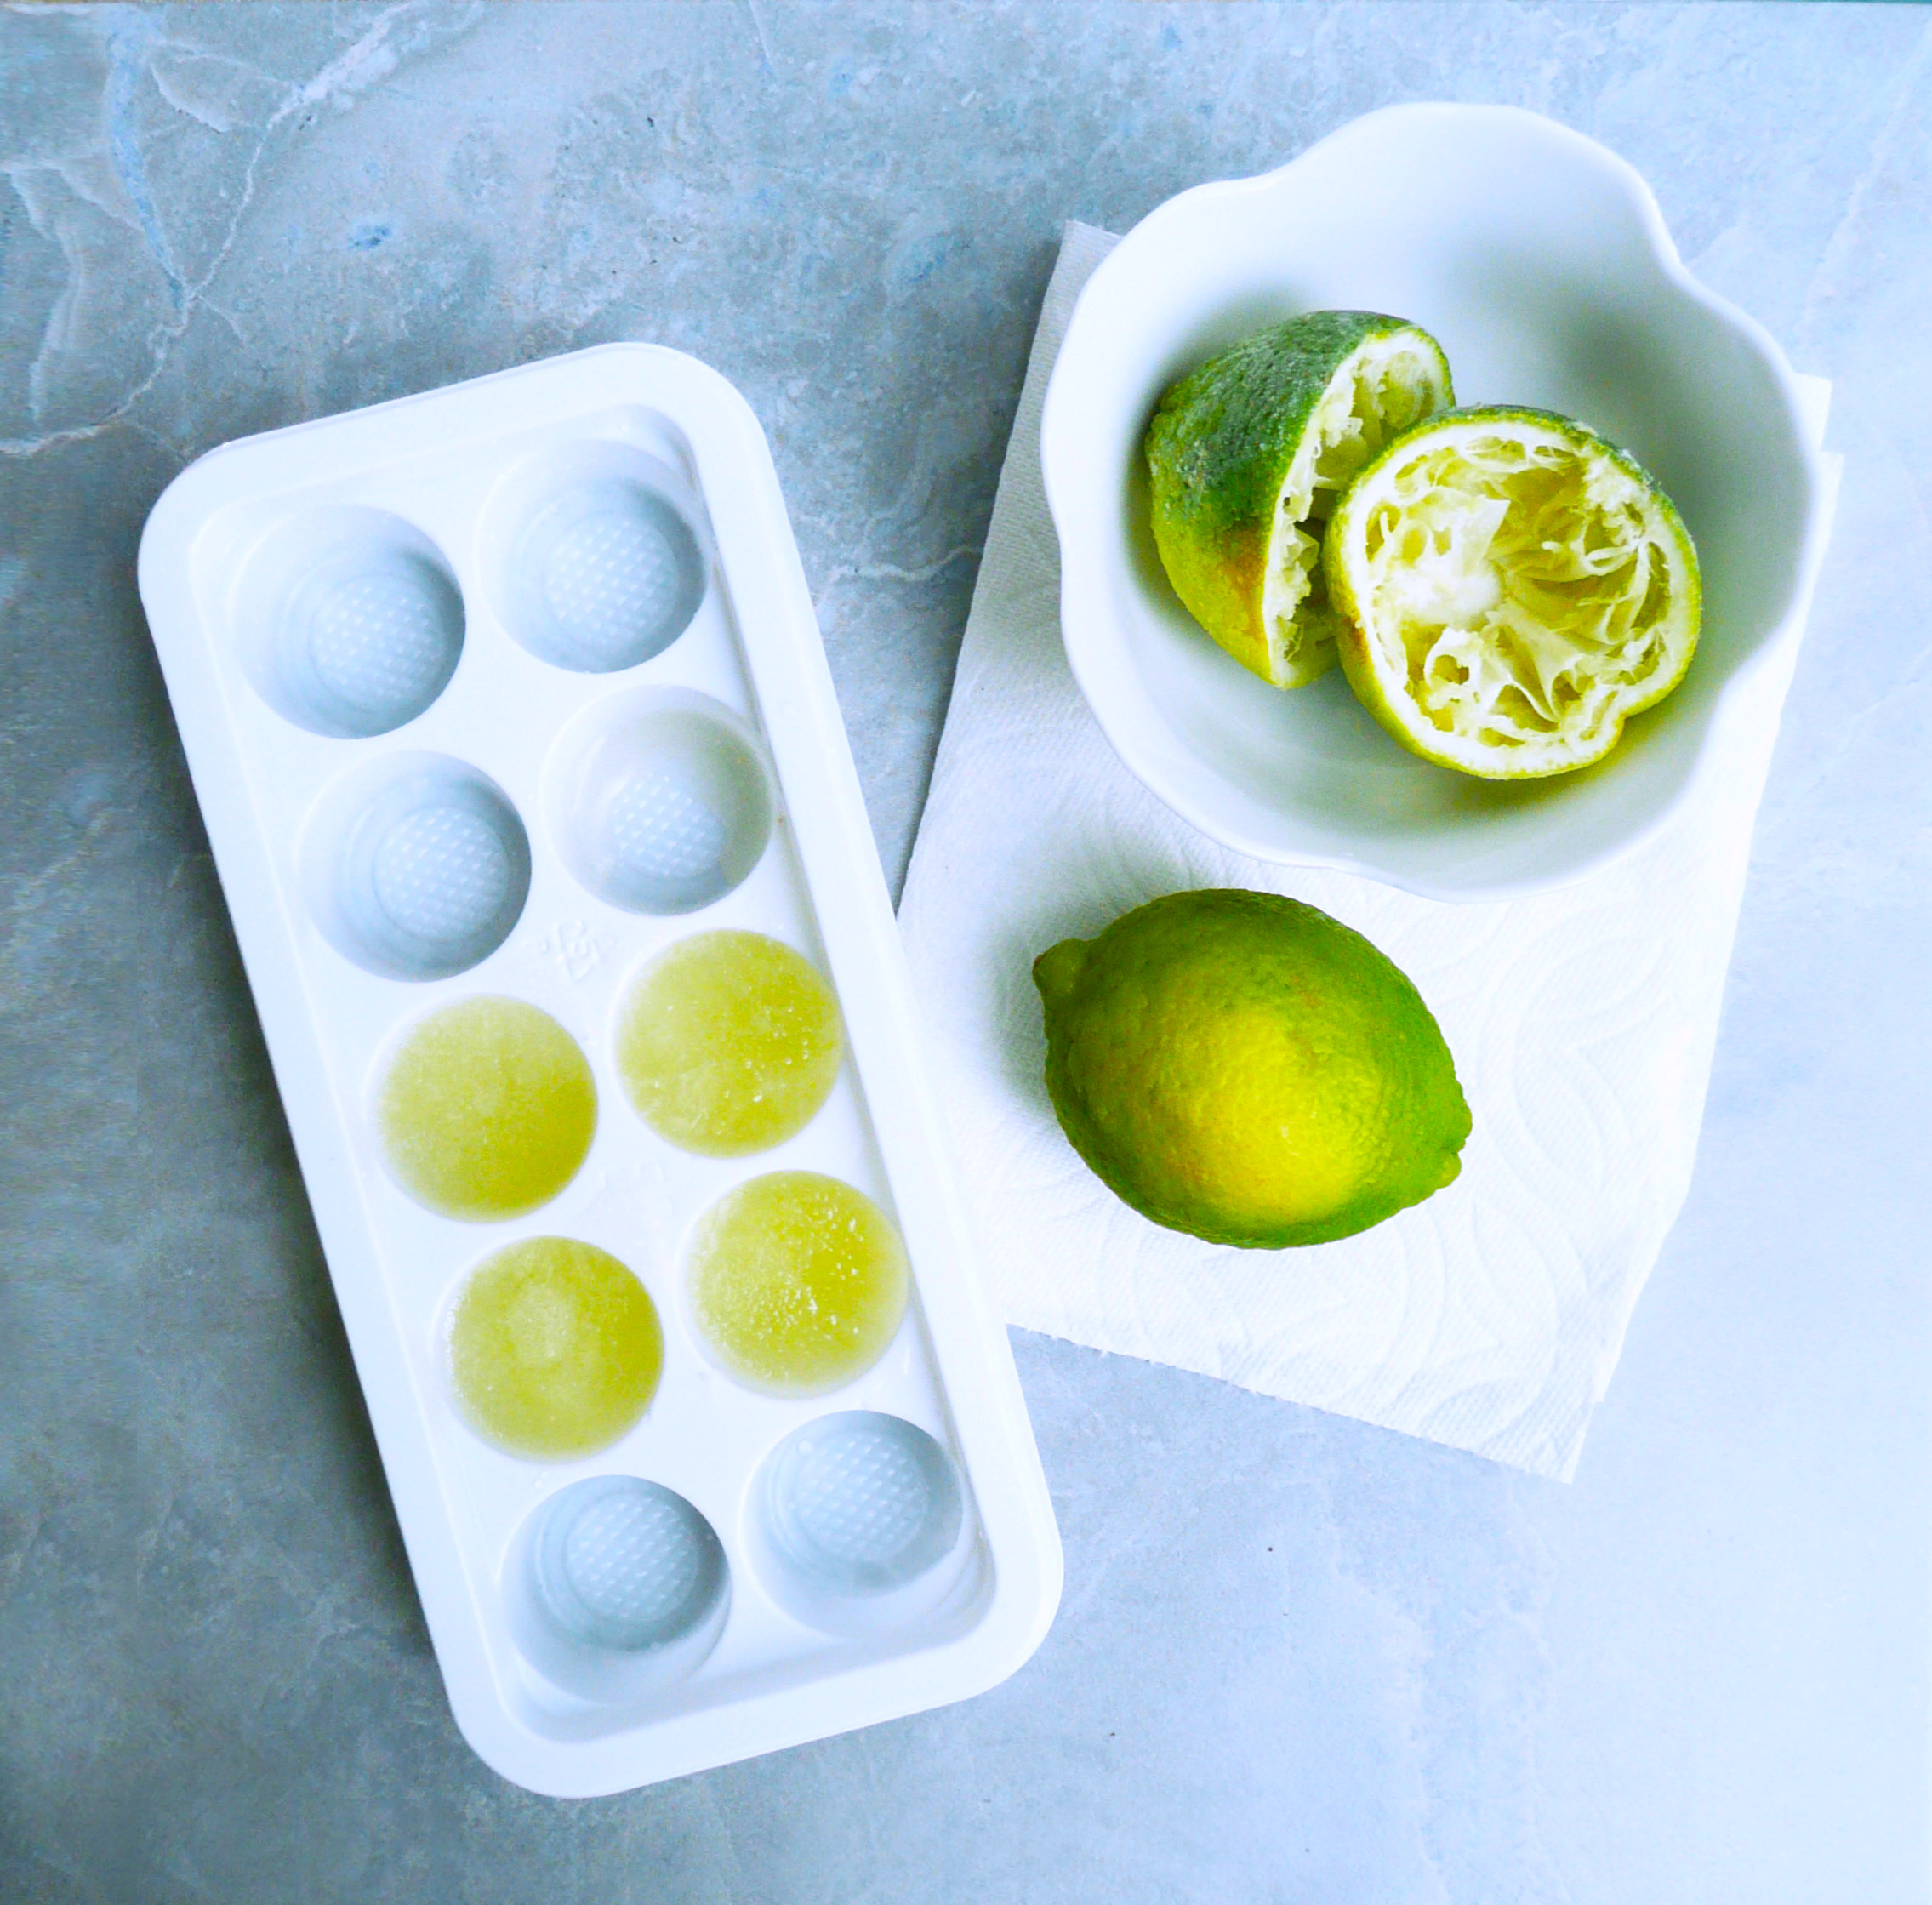
1. Give your limes a good scrub with a vegetable brush. Juice them, and pour the juice into ice cube trays (any ice cube tray will do, this is just a circular one). Once the juice is frozen, transfer the lime juice cubes into a ziploc bag and keep in the freezer until ready to use.
You can set a few of the lime juice cubes in a little bowl on the counter to defrost, and then use the juice as needed.
2. Take the lime rinds and freeze them in a separate ziploc bag. You can zest the lime rinds from frozen when you need lime zest. The zest will defrost almost instantly once grated, and you can use it the same way that you would fresh lime zest.
If you find that the lime juice is a little bitter (some limes are bitter and some aren’t, I’m not entirely sure why) you can add a little maple syrup (if you’re vegan) or honey to your dish and it should balance out the bitterness.
I did this recently when I was making pico di gallo for a family get together and found the the limes that I had were a little bitter. So I added a little honey to the pico, and that smoothed out the bitterness and the bright flavor of the lime still came through. The pico came out great, and everyone happy ate their tacos and even went for seconds.
I hope that this helps you make the most of the times when you have fresh limes! If you use this tip, let me know what dishes you used your frozen limes for. It would be great to see all the different dishes that everyone was able to make with limes that they saved.
Sometimes the best kinds of foods are the ones that remind you of what you ate when you were growing up.
When I was a kid, we would often get takeout pasta and pizza from a local family owned Italian restaurant. The food was always good, but for me the highlight was getting to eat Italian ices anytime we ordered from that restaurant. This Mango Lemon Sorbet reminds me eating those Italian ices out of paper cups on hot summer days.
Mango Lemon Sorbet is incredibly simple to make, and you don’t even need an ice cream maker! The mango gives the sorbet a joyful tropical flavor, and the lemon zest gives it a brightness and zing. Each bite just tastes incredible.
This recipe would also work well if you have a number of ripe mangoes that you don’t quite know what to do with before they become overripe.
You can cut them into 1 inch chunks, freeze them, and make this mango sorbet anytime you like! It’s a delicious and satisfying way to cut down on food waste.
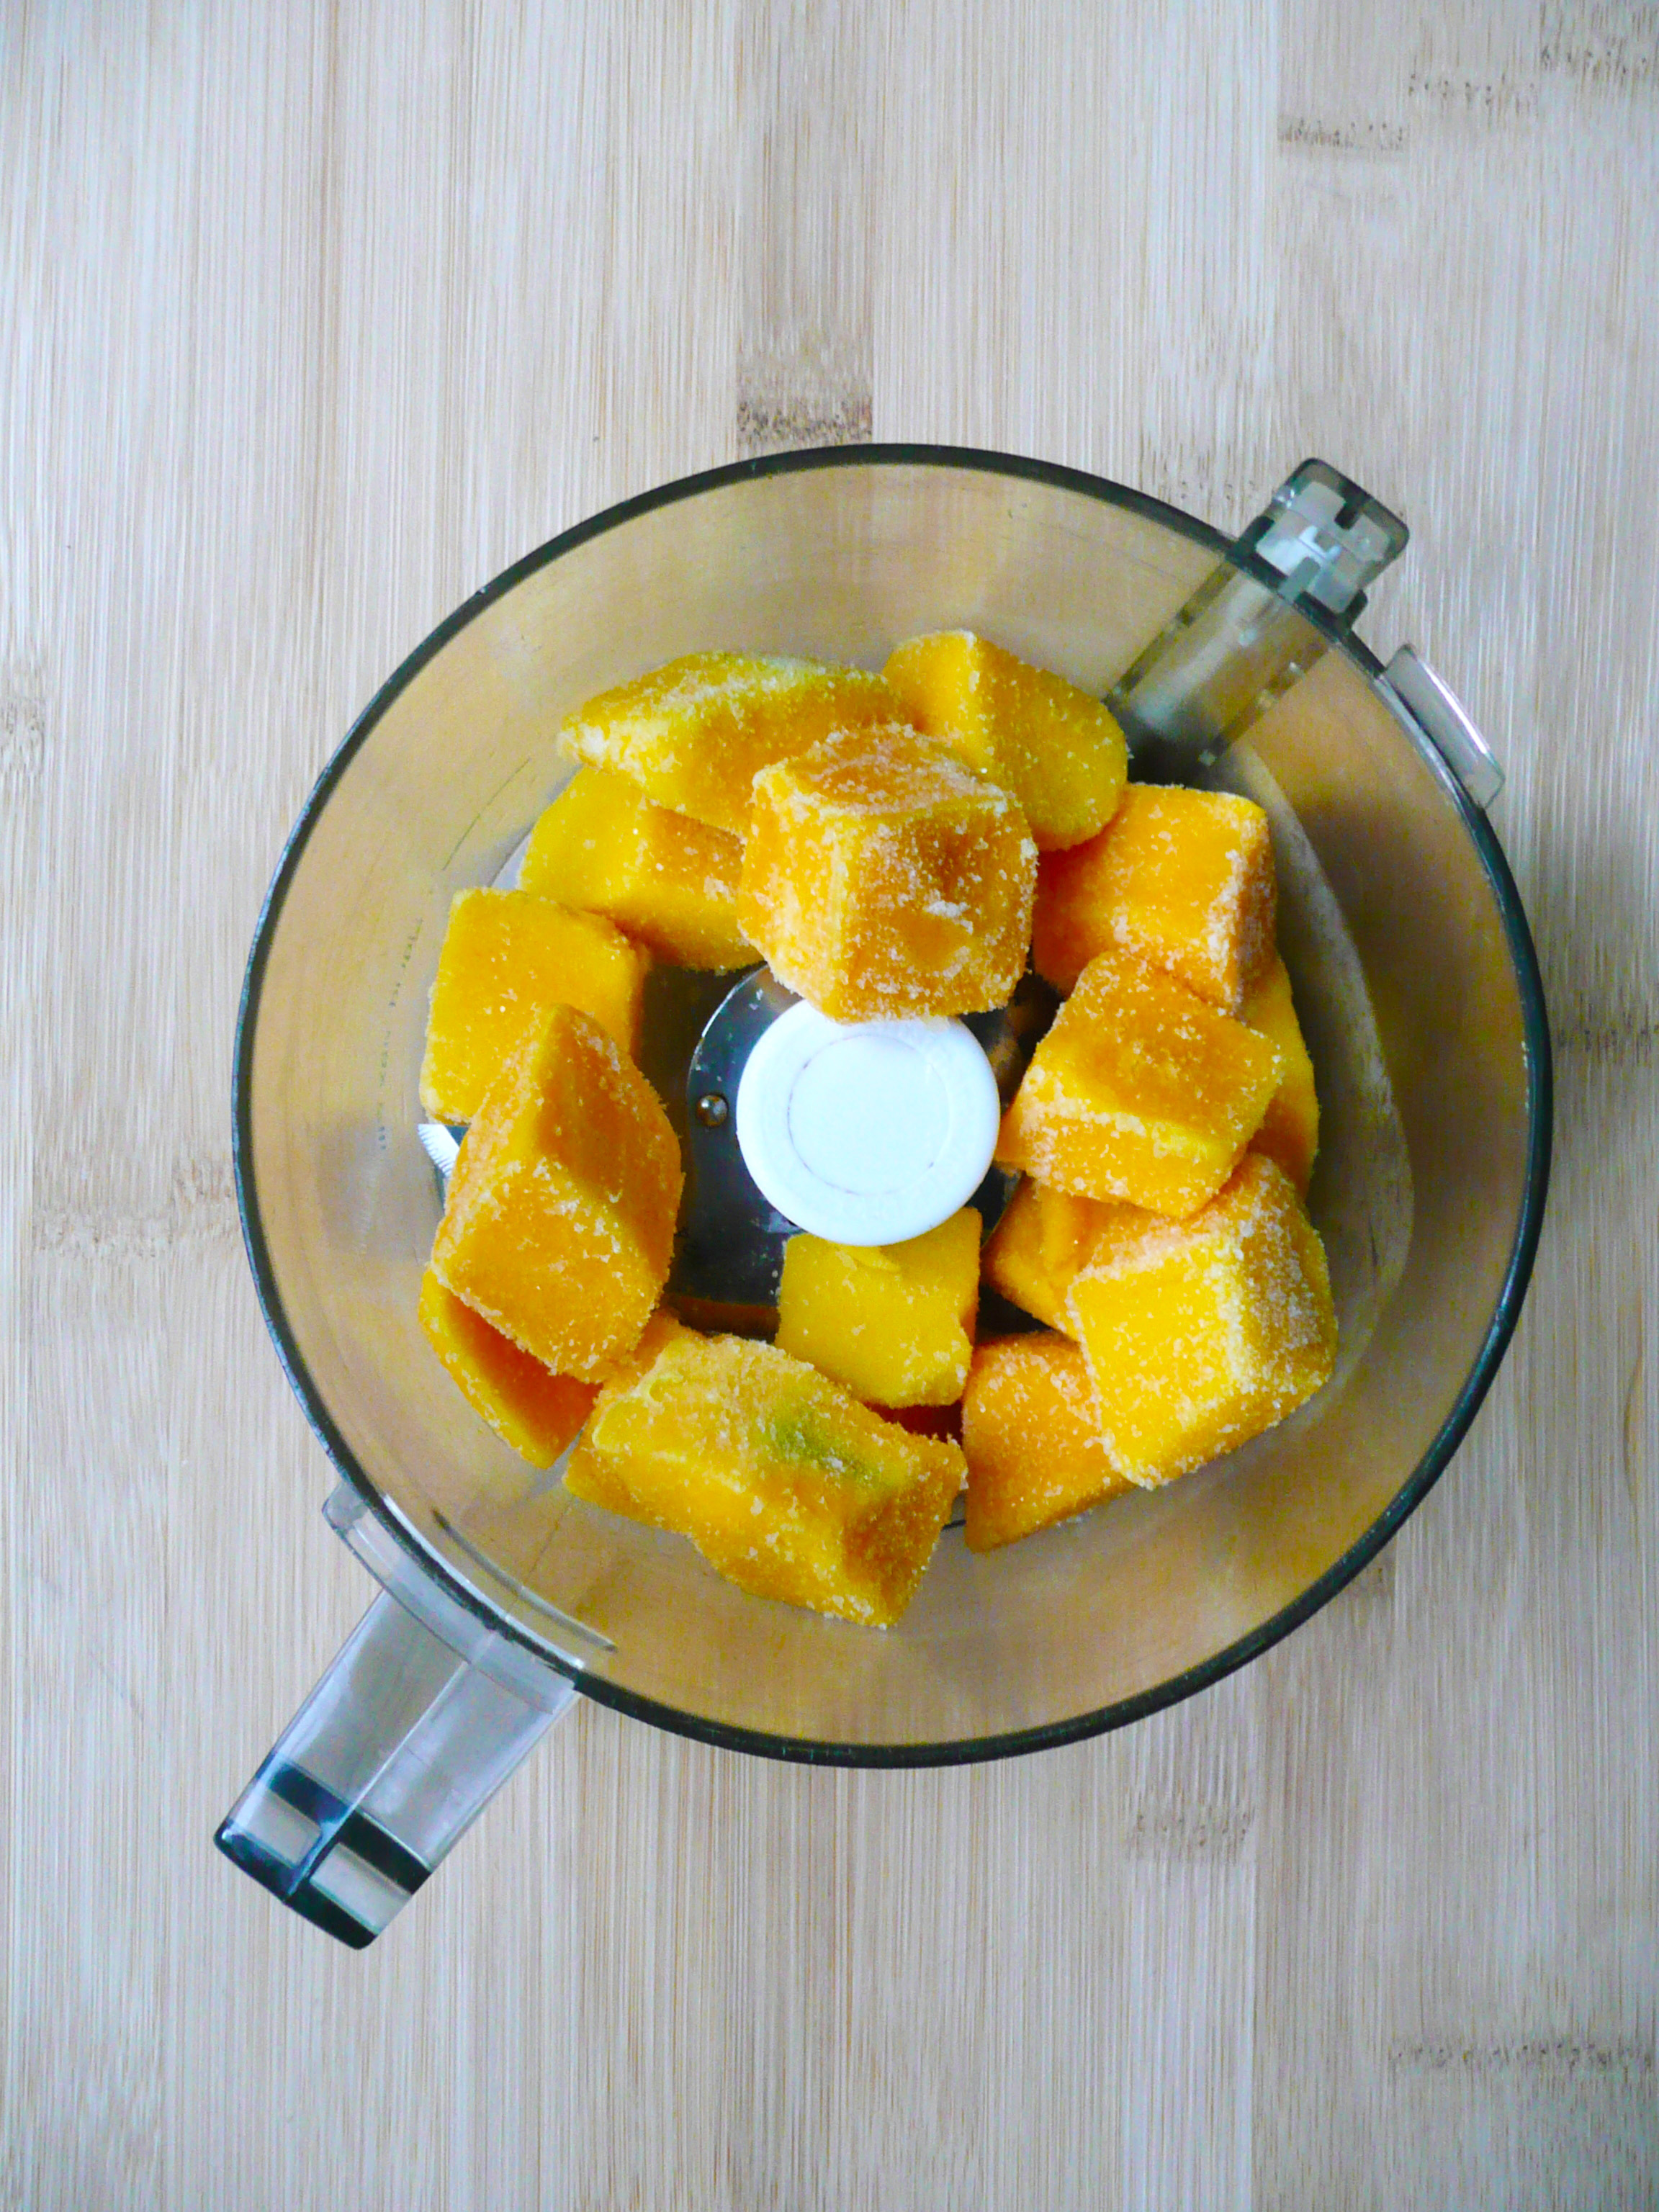
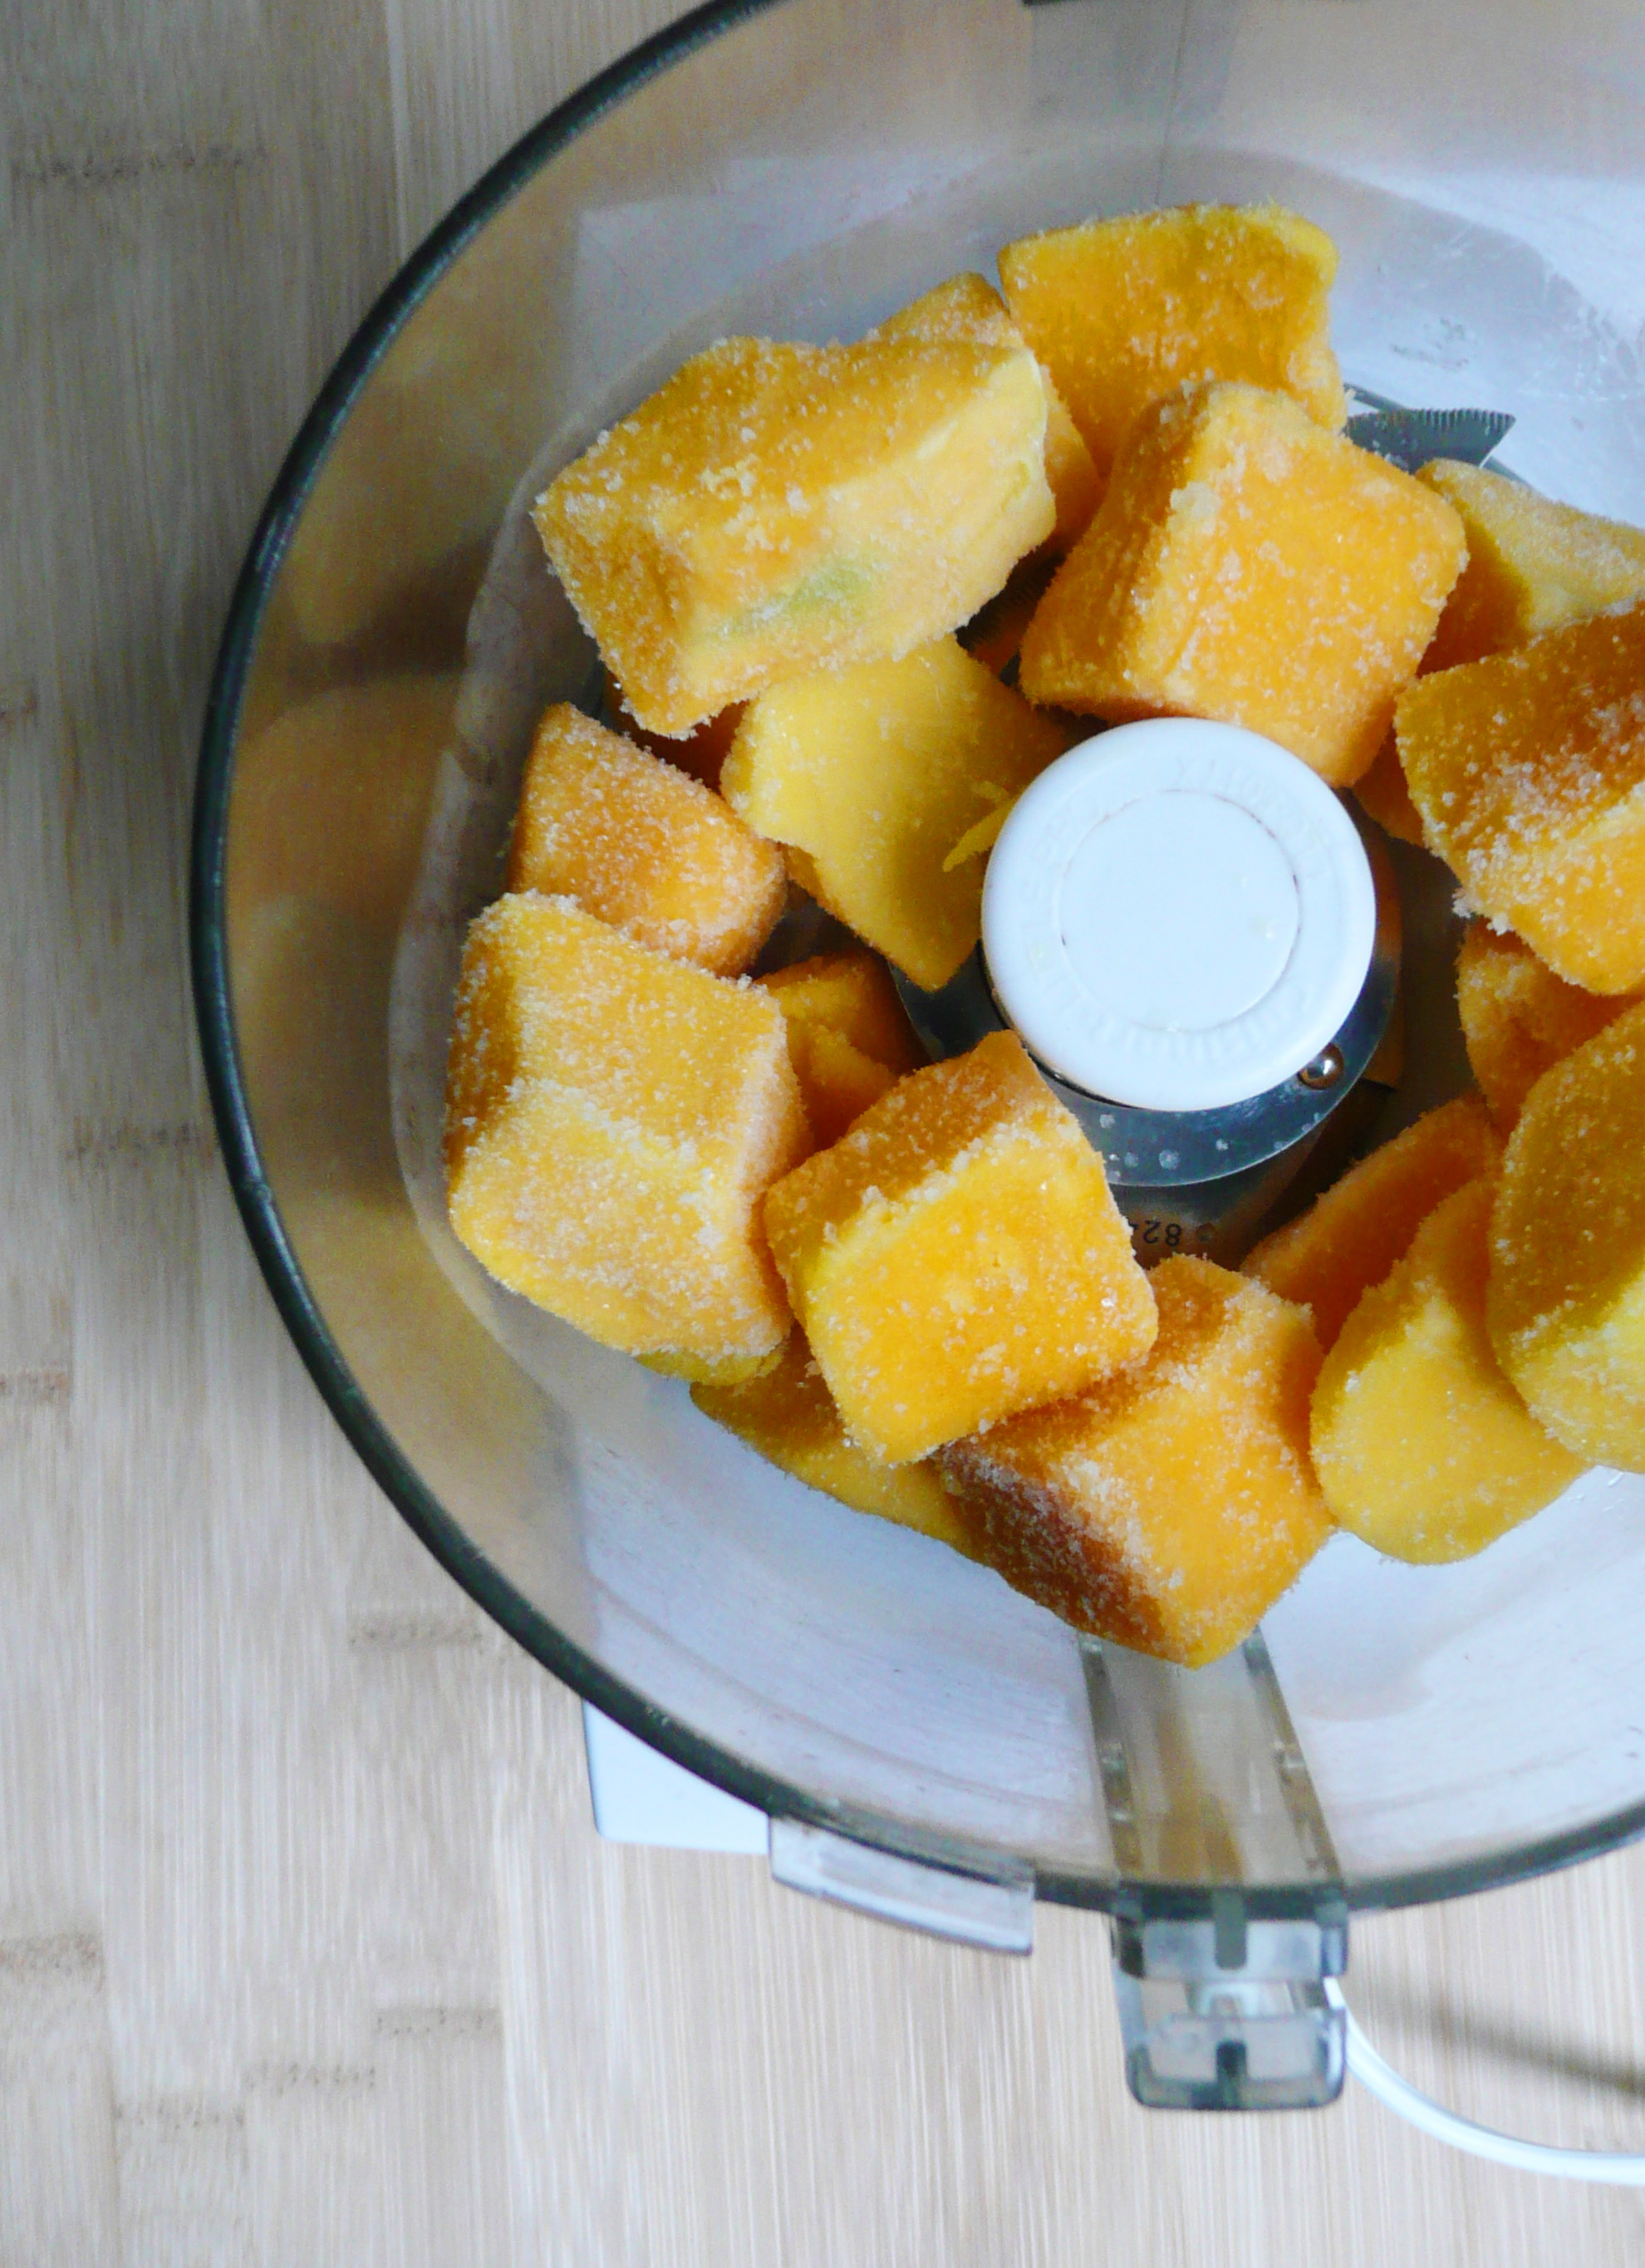
Mango Lemon Sorbet
Makes 1 generous serving (about 3 scoops)
Ingredients
2 cups frozen mango (1 inch chunks)
2 tbsp maple syrup*
1/2 tsp lemon zest (lime zest also works well)**
4 tbsp avocado oil (or any neutral flavored oil)***
1/4 cup water
Notes –
* The store bought frozen mango that I used wasn’t very sweet, so if your frozen mango is naturally very sweet, you can probably add less maple syrup. Just add a little at a time until you’re happy with the sweetness of the sorbet.
You can also omit the maple syrup entirely, and replace the water with 1/4 cup of apple juice instead if you’re trying avoid added sweeteners. The sorbet won’t be quite as sweet as it would be with the maple syrup, but will still taste really good.
**I actually used the frozen lemon rinds from this post for the lemon zest I used in this recipe.
** There is a part of the brain that lights up in the presence of a fat and sugar, so adding that little bit of fat makes the sorbet taste better, and helps to increase the absorption of the vitamin A from the frozen mango.
Instructions
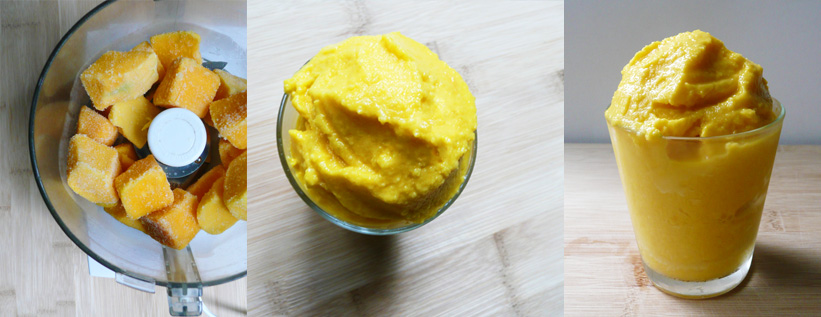
1. Lay your mango pieces onto a plate in a single layer, giving a little space between each piece of frozen mango if possible. Allow the mango to defrost for 15-20 minutes until you can pierce the cubes of mango with a fork with little resistance.
2. Transfer the mango to a food processor and add in the water, avocado oil, lemon zest and maple syrup to taste.
Blend until smooth, stopping to occasionally scrape down the sides of the food processor with a spatula.
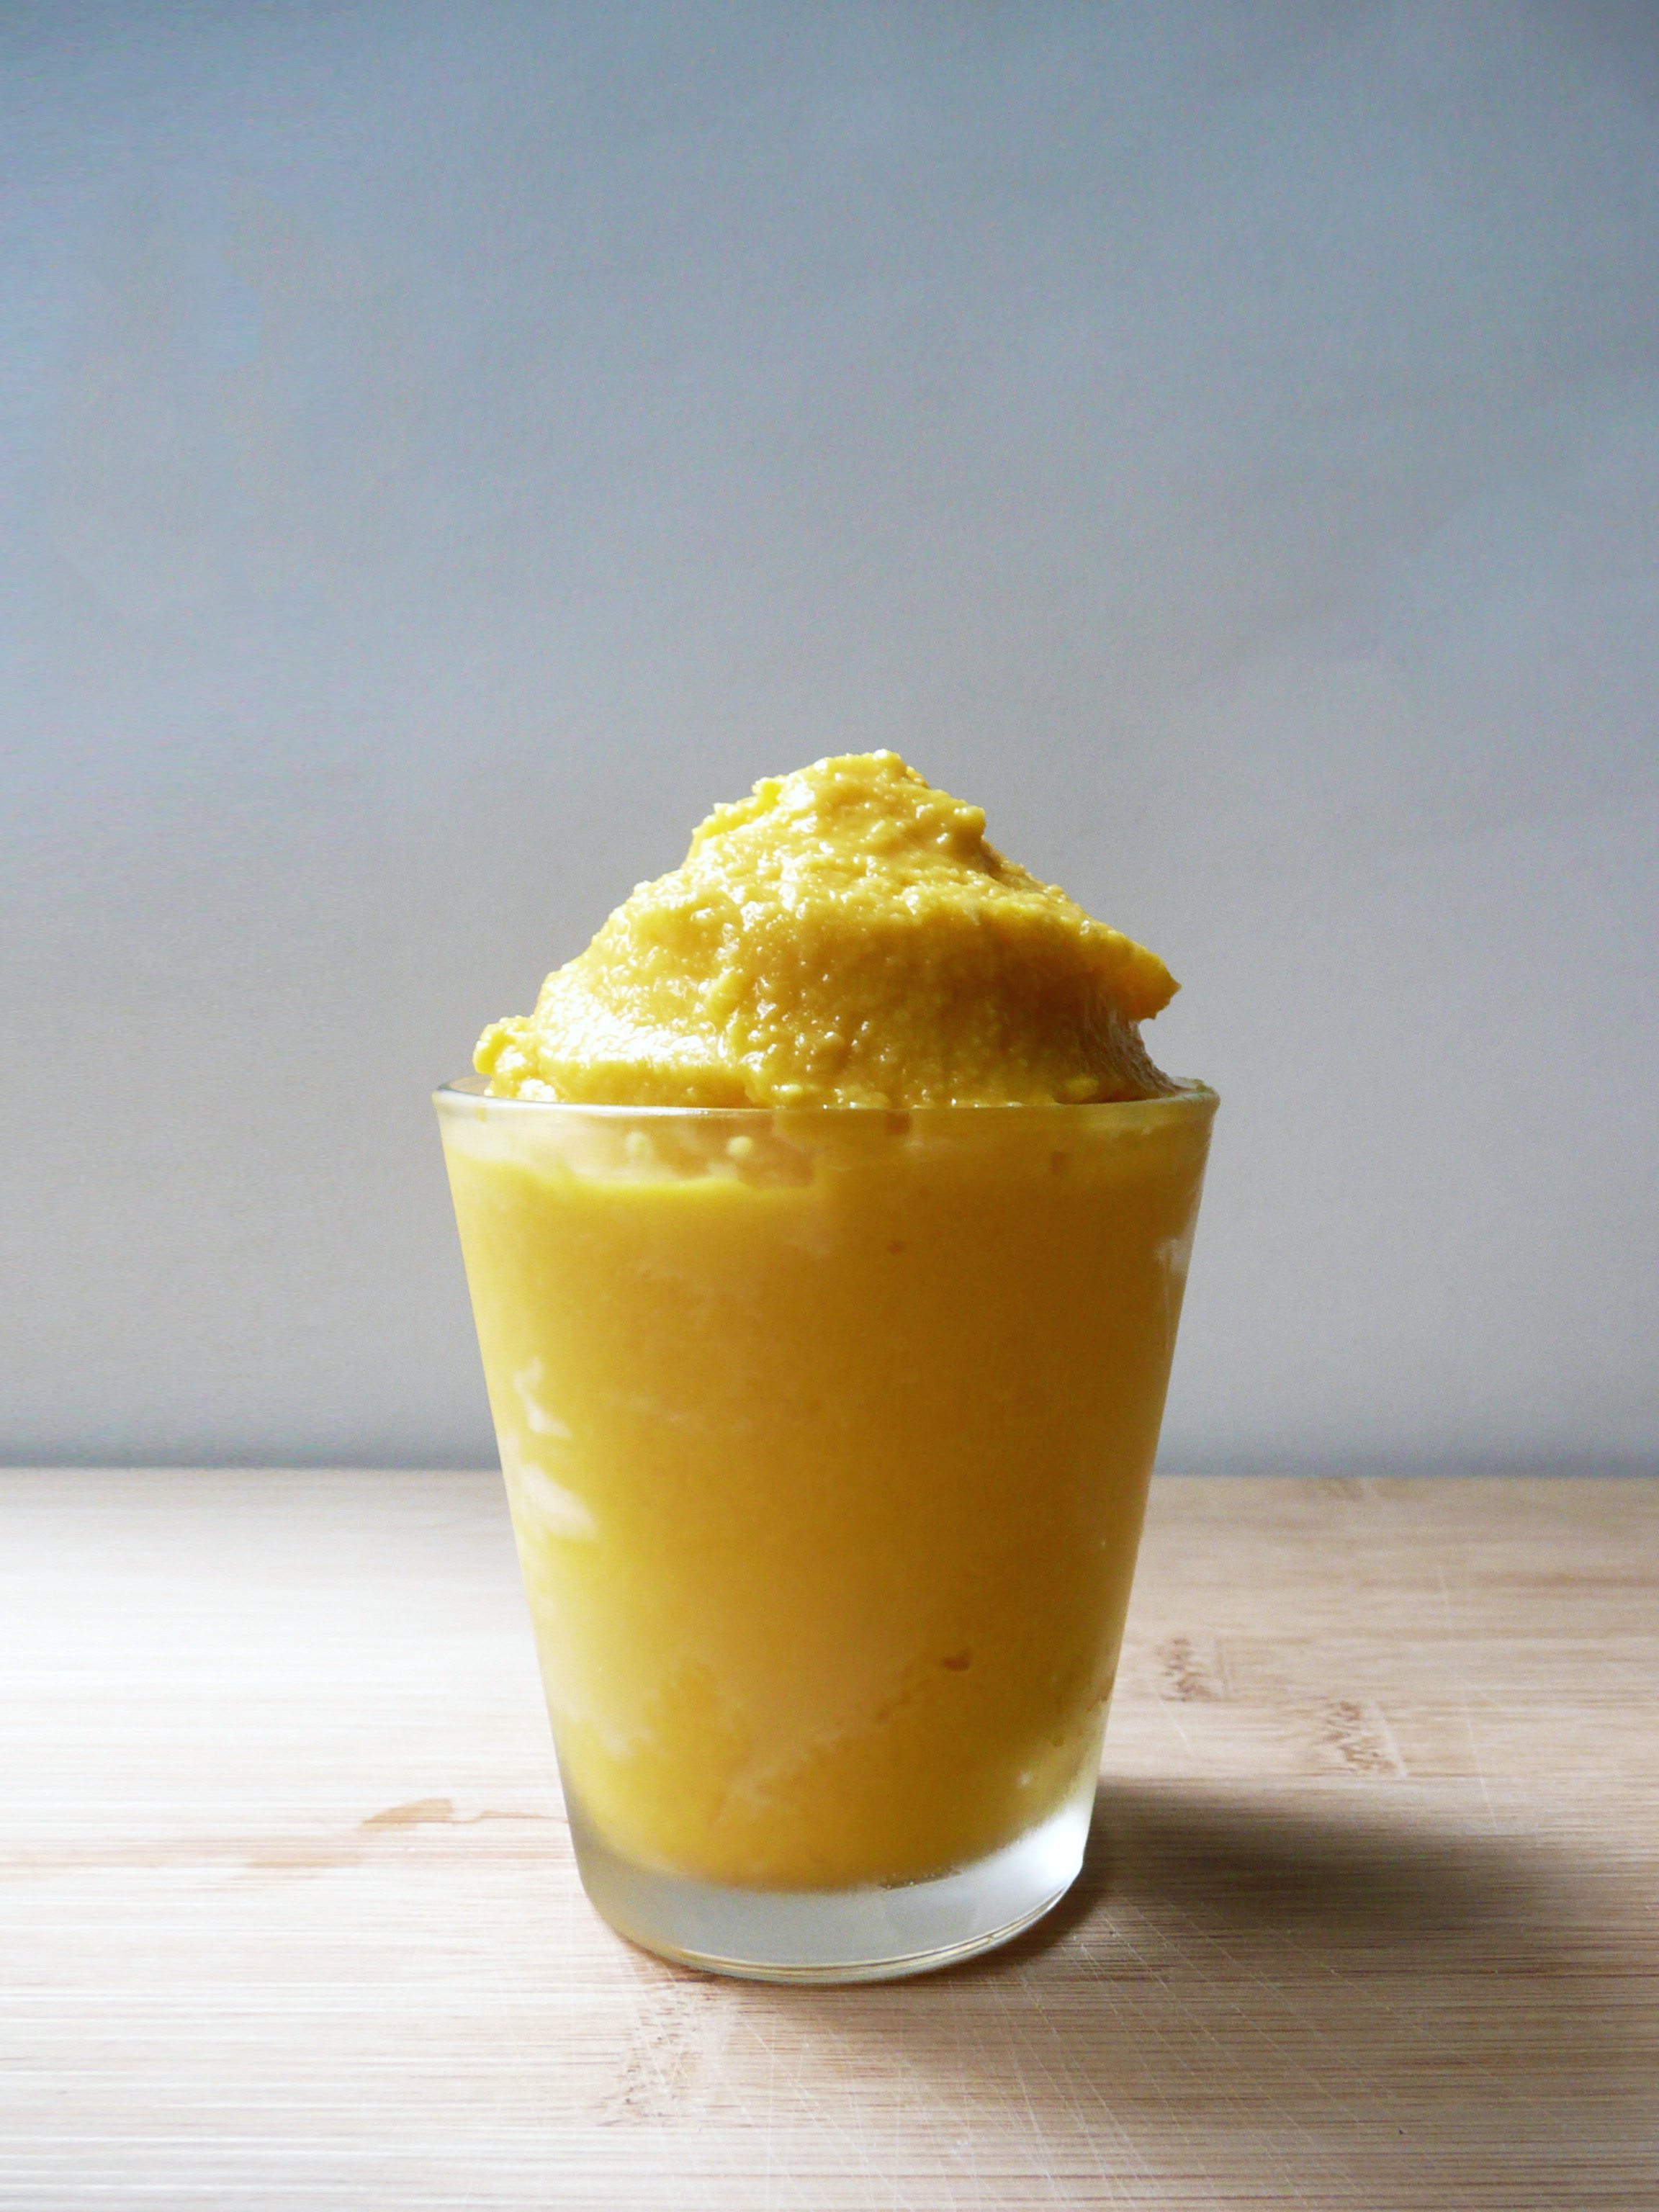
3. Serve immediately, or you can make a big batch of this and freeze it it for later in an airtight container. Allow to defrost for a bit before scooping and serving.
So good… and so simple to make! I’ll definitely be making this more often come summertime.