Lunar New Year – Red Bean Soup Recipe, Refined Sugar Free, Maple Syrup

red bean soup

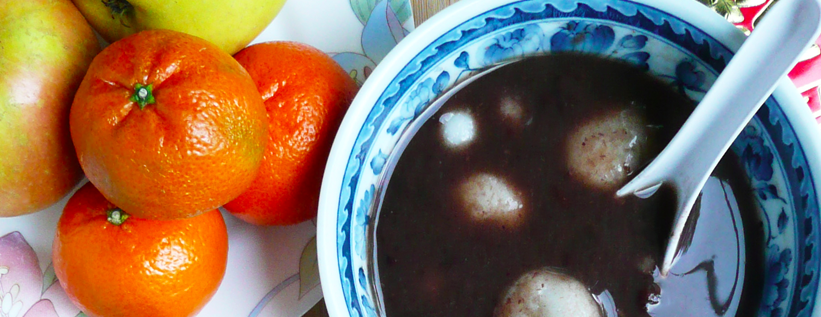
Red bean soup is a recipe that my family makes often. Red bean is a very popular flavor in Asian desserts (there’s red bean ice cream, red bean filling in mochi, and even red bean popsicles), and I’ve grown up eating this soup all my life.

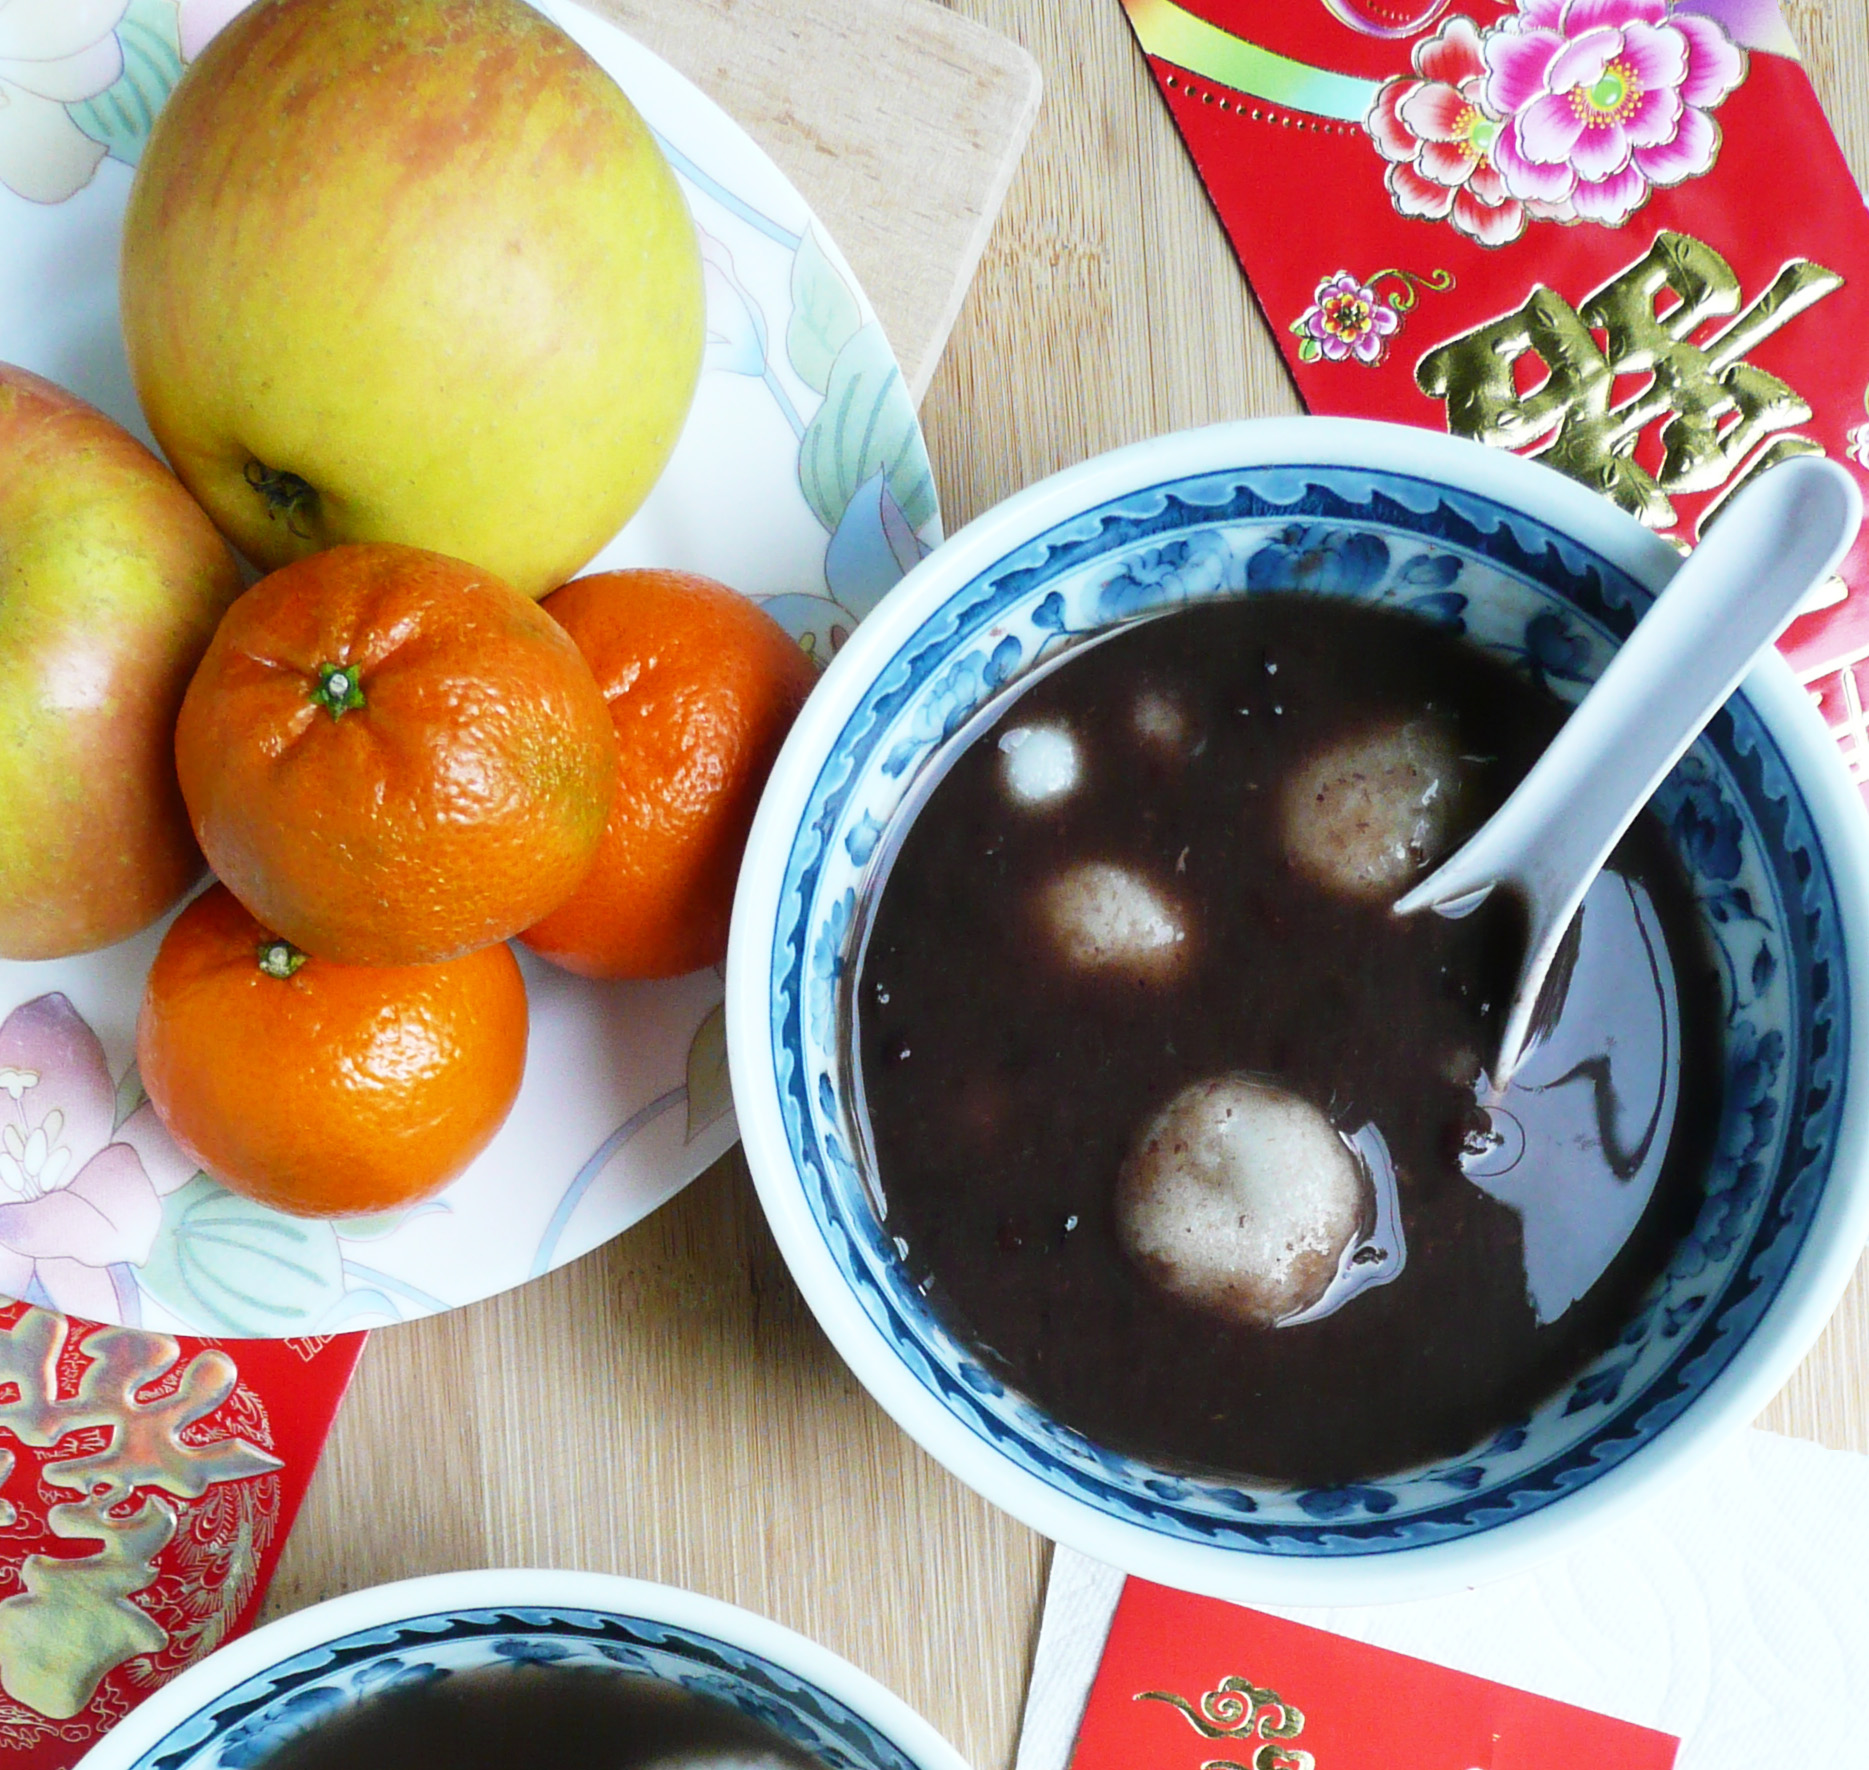
This soup is a sweet soup that warms you up in the winter, and it goes great with tang yuan, which are a traditional chewy sweet rice balls that signify family togetherness and are eaten at celebrations like weddings, and especially at Lunar New Year.

This soup is normally made with a lot of cane sugar, but I make the soup with maple syrup instead. My trick for using less sweetener when eating this soup is to drizzle about 1 tbsp of maple syrup on top of each bowl, and to not stir it in.

That way each time you take a bite, you get that little hint of sweetness and you end up using less maple syrup overall.

Another good way to cut down the sweetener in red bean soup is to cook the soup in a slow cooker. The beans taste sweeter when cooked this way, and with a few tang yuan and a drizzle of maple syrup, I promise you that you won’t miss the cane sugar version because this one is amazing.

If you need to cook red bean soup in a hurry, you can do this on the stove top in about 1 – 1 1/2 hours. The texture of the beans won’t be quite as soft and tender as the slow cooker red bean soup, but the stove top version will still be very good.

If you’re expecting to serve this to more than 6 people for Lunar New Year, I recommend making two batches of this soup. If you have extra, you can send it home with people and everyone will be extra happy for Lunar New Year.


Sweet Red Bean Soup Recipe

Makes 4 – 6 servings (if you use some of the red beans to make tang yuan, 6-8 servings if you don’t).

Ingredients

1 lb Adzuki Beans (aka Red Beans, preferably organic)

10.5 cups of filtered water

– maple syrup for serving


Instructions

Slow Cooker Directions

1. Give the beans a good rinse. Add them to a large pot and cover them with 1.5 inches of cool filtered water. Bring the beans to a boil, then set a time for 2 minutes and let the beans boil until the timer goes off.

2. Drain the beans and add them to a slow cooker along with 10.5 cups of filtered water. Cover, and let the beans cook on high for 9-10 hours until the beans are very soft and tender.

Stove Top Directions –

1. Give the beans a good rinse. Add them to a large pot and cover them with 1.5 inches of cool filtered water. Bring the beans to a boil, then set a time for 2 minutes and let the beans boil until the timer goes off.

2. Drain the beans and add them back into the pot along with 10.5 cups of filtered water. Cover, bring the beans to a boil again, then turn the heat down to medium low and let the beans cook covered for 1 – 1 1/2 hours until the beans are soft. Give the beans a stir every now and then, and if the water looks a little low, add a little more water. The soup is done when you can easy smush a bean between your thumb and forefinger.

If after an hour and a half of cooking the beans are still firm (older beans sometimes take longer to cook) turn the heat up to medium and cook for another 30-45 minutes and the beans should be soft by then.

Serve the soup with homemade tang yuan and a drizzle of maple syrup.

Happy Lunar New Year!

Oat Flour Tortillas

Gluten Free Oat Flour Tortilla Recipe – Super Easy, Cheap and Cheerful, Vegan Friendly

P1080427

Some people say “I love you” with diamonds, but personally, I’d rather have tacos for Valentine’s Day.

Nothing says “I love you” quite like a taco (and everyone loves tacos). So this Valentine’s Day, make your loved one some amazing tacos with these gluten free oat flour tortillas.

Store bought tortillas can have all kinds of fillers, and the gluten free ones can be particularly expensive. These tortillas are incredibly cheap and easy to make, and taste amazing too. Perfect for anyone who wants to eat well on a budget.

These tortillas are super flexible. Unlike normal wheat tortillas, these tortillas are actually more flexible when they aren’t piping hot, so it’s a good idea to give them a minute or two to cool once you take them out of the pan before you fill them with anything. They are also still very flexible when cold, which makes them great for packed lunches.

The dough is sturdy enough that you can make the tortillas as large as you want, and as long as you have a griddle big enough, you can make a burrito sized tortilla if you like (but you may have to adjust the cooking time).


Gluten Free Oat Flour Tortillas

Makes six 6 inch tortillas (about 2 servings)

Ingredients

1 1/4 level tsp psyllium husk powder*

1/3 cup water

1/2 tsp honey**

1 tbsp olive oil

1 cup oat flour***

1/8 tsp sea salt


Notes – *Psyllium husk powder gels like nothing else, and there’s no great substitute for it. I found mine in the bulk spice section of the local Fred Meyer, but Whole Foods, Trader Joes have been known to carry it as well. If it’s not in the natural foods, or bulk spice section, check the dietary supplement/ digestive health (where the Metamucil is) section of the store or pharmacy as it’s sometimes sold there as well.

** You can leave out the honey if you’re vegan. The tortillas will still be good, they just wont have the little brown spots when you cook them.

*** I grind oats into oat flour using a blender. Don’t grind the oats in a food processor because the flour won’t be fine enough.

Any extra oat flour I don’t use in the recipe goes into an airtight container and I use it for another recipe.

If you’re making the tortillas for someone who has celiac disease, use certified gluten free oats, as the oats from the bulk bins can sometimes be processed on the same equipment as wheat.


Instructions

1. Slowly add the water to the psyllium husk powder. Stir to combine, and don’t worry to much if it’s super clumpy. Let sit for 5 minutes

2. Add in the rest of the ingredients and stir together until a shaggy dough is formed. Knead the dough for about 1–2 minutes until the dough is fairly smooth, making sure to smush in all the little bits of psyllium husk into the dough until well combined.

The dough should look like this when you’re done kneading –

P1080403

Cover the dough with plastic wrap (or cover the bowl with a small plate) and allow the dough to sit at room temperature for 1 hour.

You can also make this dough ahead of time and keep it in the fridge for 1-2 days until you’re ready to cook the tortillas.

3. Cut the top and sides off of a gallon size Ziploc bag and open it and lay it flat to form a long rectangle.

Dip a paper towel in a little bit of oil (avocado oil, vegetable oil, or olive oil will work for this) and oil the inside of the plastic. Don’t use the coconut oil for this, it solidifies too quickly and the dough ends up sticking to it.

Cut the tortilla dough into 6 equal pieces, and keep the pieces of dough that you’re not working with covered so that they don’t dry out. If the dough is too sticky, add a little oat flour, if the dough is too dry then knead in a few drops of water into the dough. The dough should be elastic, on the firmer side, and smooth. Roll the dough into a 6 inch circle between the pieces of oiled plastic.

Peel the tortillas off the plastic and lay them on a plate. You can roll the tortillas out and overlap them on a plate as they won’t stick together, but kind of shingle them so that there are bits of each tortilla sticking out from the pile so that each tortilla will be easier to pick up when you cook them.

4. Make your pan non-stick. Cook your tortillas over medium heat. I let them cook for 1 min and 15 seconds on the first side, then flip them over and let them cook 30 seconds on the other side. They get the little brown spots this way, and are slightly crispy around the edges. If you don’t want them crispy around the edges, you can cook them for a shorter amount of time and they will still be good.

5. Stack the tortillas on a plate and fill them with whatever your heart desires. I topped mine with tomatoes, lettuce, and minced mushrooms that I’d cooked down with taco seasoning to make a vegan taco filling.

They keep great in the fridge, so you can make them ahead of time and keep them on hand for all your taco cravings.

P1080439

Enjoy!

Kitchen Tip – How to Regrow Green Onions

green onions

Green onions are used in lots of Asian recipes, and they are actually super simple to regrow on your windowsill from the trimmings that you would normally compost.

I cut the green part off the green onions so that there’s about  1.5 – 2 inches of the white part attached to the roots.  Then put the green onion roots in a little jar (old spice jars seem to work well for this) and add about 1.5 inches of cool water into the jar. I put a little piece of folded paper towel under the jar when I put it in the windowsill so that no watermarks stain the wood.

Replace the water everyday (that way the water doesn’t get slimy as quickly). I’ve been able to successfully regrow a trimmed green onion root about 2-3 times.  After that, they get a little too slimy around the roots and it’s time to compost them and wash out the jar.

The picture shows about a week of growth, and you can trim off what you need to add to dishes.

You can also plant the trimmed green onion roots in some soil, and they should regrow a few more times than if they were simply regrown in water.

I hope that this tip helps you save a little money! Let me know how this trick works for you. What would you make with your regrown green onions?

fresh herbs

How to Store Fresh Herbs

P1060471-2

When I used to buy herbs, I always seemed to buy more than I needed. If I recipe called for 2 tbsp of fresh parsley, I never seemed to know what to do with the rest of the herbs, or how to keep them from wilting before I could use them up.

After much experimentation, I throw away way fewer herbs now.

Here is how to keep your herbs fresh –

For Parsley or Cilantro

When you get home from the grocery store, take the rubber band off of the bunch of herbs. Pick out all the wilted sprigs, then loosely roll the bunch of herbs in a few sheets of paper towel. Place the roll back inside of a closed ziploc bag and place in the fridge.

Every few days, take the herbs out of the refrigerator, pick out the wilted sprigs and roll the non-wilted herbs in a few new sheets of paper towel. Compost the old paper towels and your herbs will probably keep for at least a week. Make sure you put them in a spot in your fridge where they won’t accidentally get frozen.

Quick ways to use up Parsley – blend your extra parsley into a pesto with some garlic, almonds, olive oil, salt and pepper. You can also add in kale, or basil, or cilantro to the pesto if you like. Tabbouleh is a great dish to make with excess parsley, and I’ll be posting a recipe for Quinoa Tabbouleh soon.

You can also blend a handful of the parsley with an apple, lemon juice, honey, ginger, water, and blueberries for a smoothie that helps with inflammation and joint pain.

Quick ways to use up Cilantro – you can make pico di gallo with chopped onions, tomatoes, lime juice, salt, and freshly chopped cilantro.

For herbs in clam shells – pick out any wilted stems and leaves, then fold 1-2 paper towels so that they will fit inside the container. Take the herbs out the clam shell, place the folded paper towel on the bottom of the container, put the herbs on top of the paper towels and close the clam shell and place it in your fridge.

Every few days, take the herbs out, pick out the wilted bits, and replace the paper towel before placing it back in the fridge. The herbs should last a few days longer using this technique.

Quick ways to use up Mint – You can add extra mint to tabbouleh, or make a great tea with it. I like to drink mint tea in the morning as it wakes you up without caffeine, and it has a naturally sweet flavor, so you don’t need to add any sweeteners.

I usually add about 7 mint leaves and 2 mint stalks to 1.5 cups of hot water and let it steep for at least 3 minutes before drinking. I leave the mint in the tea as I drink it, but you can remove them from the cup if you like.


Creamy Lemon Garlic Black Bean Dip

Creamy Lemon Garlic Black Bean Dip

P1070086 copy

I love hummus, and this dip originally started out as a black bean hummus, but I kept adding more lemon juice and more green onions until it became something slightly different, something even better.

It’s thinner than store bought hummus, but still wonderfully creamy and has an incredibly bright happy flavor from the lemon juice, which works well with the flavors of the garlic and green onion (which sort of prance around in the background and bring even more joy to the party).

It’s better if you make it a day ahead, that way the lemon juice will mellow out the sharp flavor of the garlic and the dip will be extra delicious.

I hope that you give this dip a try!


Creamy Lemon Garlic Black Bean Dip

Makes about 2 -3 servings

Ingredients

7 tbsp + ½ tsp fresh lemon juice

3 cloves fresh garlic

1 can black beans, drained

4 tbsp. + 1 tsp olive oil

4 tbsp finely chopped green onion

1/2 tsp sea salt

1/8 tsp black pepper


Instructions

Add all ingredients to a food processor and blend until smooth.

If you like things more lemony you can add another 1 tbsp of lemon juice, or more to taste.

Transfer the mixture into a bowl, cover with a lid or plastic wrap and refrigerate overnight.

Serve with tortilla chips or cut veggies, and if you’d like you can sprinkle over some finely chopped green onion for color and extra crunch.

Oat Flour and Brown Rice Tortilla Chips

Oat Flour and Brown Rice Tortilla Chips – Gluten Free, Dairy Free, Vegan – Tostadas

P1070082

When I first went gluten free I really missed having something crunchy to dip into hummus, or top with egg salad like a cracker.

When I came up with this recipe I found that it checked lots of carb-y, crunchy boxes.

You can eat these chips with guacamole or hummus. You can mix flax seeds and chia seeds into the dough to make multigrain crackers. For cheesy herby crackers, you can add some granulated garlic, parsley, oregano, and nutritional yeast into the dough and they bake up a treat.

Another thing that you can do with this dough is make tostadas. The tostadas bake up super crunchy and you can top them with anything that makes your heart happy.

I tried making tortilla chips and crackers in all kinds of ways before I came up  with this recipe, but it turns out that leftover brown rice was the key to making a great crunchy oat flour tortilla chip.

If you have leftover brown rice in the fridge, this is a perfect way to use it up. Making these chips / crackers are also so much cheaper than buying gluten-free crackers in the store, and I promise that they taste so much better. And if you can’t tolerate corn chips, this recipe is a great alternative. These chips also go great with my creamy lemon garlic black bean dip.

Brown Rice and Oat Flour Tortilla Chips (Baked)

Makes 10 chips (about 1 generous serving)

Ingredients

1/3 cup cooked short grain brown rice

1/3 cup oat flour

½ tsp olive oil

pinch of salt

1 -1 ½ tsp water


Instructions

1. Preheat the oven to 350 F.

2. Add all the ingredients into a bowl and mash the brown rice into the oat flour with the back of a fork. Squeeze the mixture together in your hands so that the rice incorporates into the oat flour and forms a nice dough. If the dough feels a little dry, add a little water to the dough. If the dough feels too sticky, add a little more oat flour.

3. Divide the dough into 10 equal sized pieces and roll each piece of dough into a ball .

Wet you hands lightly press each ball of dough into a 1/8 inch thick disk onto a silicone baking mat. The mixture won’t spread so the chips can be baked close together as long as they don’t touch.

4. Bake for 15 minutes, then take the chips out of the oven and use a spatula to flip over each chip. Bake for another 15 minutes until crisp.

Let them cool on the silicone baking mat for about 10-15 minutes. They will crisp up even more as they cool.

You can also use this same mixture to make about 3 tostadas about 4-5 inches in diameter (1/8 inch thick). Bake the tostadas for 15 minutes per side at 350 until crisp.

Kitchen Tips – How To Use Every Drop Of Olive Oil

P1070675

One ingredient that I use almost everyday is olive oil.

I use it in salad dressings for it’s peppery bite, drizzle it over soups and pasta sauces to give them richness, and add it to hummus for a smooth and silky texture.

Inevitably, at some point, the bottle runs empty save for a few teaspoons of that beautiful green oil that you can never seem to shake out of the bottle.

If you too can’t stand the thought of letting any food go to waste, this is my solution for getting every last drop of precious oil from the bottle.

Take a wide mouth mason jar and put it inside of a 1 quart measuring cup. Then turn the bottle of oil upside down and place the mouth of the bottle inside of the mason jar. Leave this to sit in an area where it won’t be disturbed for a day or two and all of the oil that’s left over in the bottle should drain into the mason jar.

(Putting the mason jar inside of the big measuring cup makes the bottle of oil and mason jar less likely to tip over.)

Use this reclaimed oil within a day or two, as it has been exposed to air and light and won’t keep for too long before oxidizing.

Thanks for reading!

Happy Cooking!

Chocolate Banana Soft Serve Ice Cream – Refined Sugar Free, Dairy Free, Vegan, Paleo

P1080366

When I think of chocolate desserts, I want something really decadent and rich, with a deep chocolatey flavor.

This Chocolate Banana Soft Serve Ice Cream definitely fits the bill. It’s super easy to make, and takes almost no time or effort. It’s so creamy and delicious, and it’s pretty incredible that blended up frozen bananas can turn into such an amazing treat!

When I was working on this recipe, I thought about the rich and creamy chocolate ice cream that would occasionally eat before I went dairy and refined sugar free.

I really tried to get a similar flavor with this recipe, so it does have more cocoa powder and vanilla extract than you would expect it to have, which gives the banana ice cream a similar flavor to the store bought chocolate ice creams of my younger days.

Banana ice cream also cuts down on food waste because it’s the perfect thing to make when you have overripe bananas that you don’t know what to do with. No need to throw them away! Just peel them, and freeze them, and you can have ice cream whenever you want. How cool is that?

You can also adjust the flavor of the ice cream to your liking really easily. If you want it a little sweeter (or if your bananas could have used a little more ripening before you froze them) you can add a little more maple syrup, or more cocoa if you want a deeper chocolate flavor.

However you make it, I hope that this ice cream brings a little more joy to your day.


Chocolate Banana Soft Serve Ice Cream

Makes 1 serving (about 3/4 cup)

Ingredients

1 thawed frozen banana

3 1/2 tbsp unsweetened cocoa powder *

2 1/2 tbsp + 1 tsp maple syrup

2 tbsp + 2 tsp water

1 tsp vanilla extract

tiny tiny pinch of salt


*I didn’t use a heaped tbsp, just sort of slightly higher than a level tbsp. The cocoa powder that I used was the Ghirardelli unsweetened cocoa powder.

Instructions

1. Cut the thawed banana into half inch slices with a paring knife. If the banana is too hard to cut, then let it thaw for another 5 minutes or so before trying to cut it again.

2. Add all the ingredients into a food processor and process until smooth, scraping down the sides of the bowl occasionally.

If you want a firmer texture, you can spoon the mixture into a bowl and put it into a freezer for another 15-20 minutes.

For garnish, I just used a paring knife to shave pieces off a slightly thawed frozen strawberry. It gives it a nice color and a bit of little flair, and the strawberry flavor goes well with the banana and chocolate flavors of the ice cream.

P1080371

Happy Eating!


Vanilla Extract

Kitchen Tip – Easy Way To Get The Cap Off A Vanilla Extract Bottle

vanilla


If you’ve ever known the struggle of baking cookies and not being able to get the little cap off of the vanilla extract bottle, this one’s for you.

Here’s the secret –

Wrap a few thin rubber bands around the cap of the vanilla extract. The rubber bands make the smooth metal of the cap easier to grip. The bottle of extract should be a breeze to open after that.

I use the rubber bands that come wrapped around vegetables like kale, or green onions, or bunches of cilantro or parsley. It’s a thrifty solution, and makes baking with vanilla extract much much easier.

This idea for this came to me when I was testing the recipe for the maple vanilla sugar cookies. For a moment I was concerned that I was not going to be able to get the cap off of the bottle of extract, and I actually thought for a second “Do I really need vanilla in this recipe?”

The answer was “Yes. You do need vanilla in maple vanilla sugar cookies.” So I had to come up with a solution pretty quickly, and here we are!

I hope that this kitchen tip helps you to never again be held back from your baking dreams by another difficult to open vanilla extract cap!

Happy Baking!


blueberry muffins

The Best Gluten Free Blueberry Muffins Recipe – Made with Oat Flour – Gluten Free, Dairy Free, Refined Sugar Free

I love blueberries, and I also love blueberry muffins. It’s hard to find someone who doesn’t love them.

P1080289

Lots of us have fond memories of baking them with our families, and there is just something incredibly comforting and nostalgic about them.

A good blueberry muffin is one of the things that I most wanted to eat when I went gluten free, and I’m so glad that I finally came up with a recipe for them!

These delicious blueberry muffins are made with oat flour, and taste just like the muffins that you remember eating when you were a kid.

They are such a treat, and there’s nothing like biting into a freshly baked blueberry muffin on a cold morning with a hot cup of tea.

P1080248

Heaven.

These blueberry muffins taste amazing, and are so good that you won’t believe that they are gluten free, refined sugar free, and dairy free.

They have a really great texture, just like a normal muffin, and aren’t gummy or funny textured at all.

P1080244

They use coconut oil instead of butter, but they don’t taste like coconut at all. They are perfectly sweet, and the bright flavor of the blueberries really shines through each delicious bite.

You won’t miss gluten / dairy muffins after you eat one of these, promise.

I hope that you give them a try!


The Best Gluten Free Blueberry Muffins

Makes 8 muffins


Ingredients

1 1/3 cup of oat flour (135g) *

½ level tsp of baking soda

1 ½ tbsp ground flax seed (6g)

tiny pinch of salt


¼ cup water

1/8 level tsp of psyllium husk powder**


1/3 cup + 1 tbsp maple syrup

2 tbsp of apple cider vinegar

1/3 cup melted coconut oil***

1 egg


1 cup of blueberries – I used frozen, but fresh will work too.


* For the best results, measure out the oat flour and ground flax seed by weight on a digital scale.

I grind rolled oats in a blender until I have a pretty fine flour. Don’t use a food processor for this as the flour won’t be fine enough. If I have any extra flour, I just put in into an airtight container to use for another recipe. I grind the flax seeds using the same method.

** If you don’t have the psyllium husk powder, you can just omit it. Just add the water in with the rest of the liquid ingredients. The muffins will still turn out well, just slightly more crumbly.

*** The coconut oil makes the muffins more solid at temperatures below 76 degrees, but you can heat them up in a toaster oven at a low temperature and they will become soft again. If you want the muffins to be soft all the time, you can probably substitute a neutral flavored oil that’s liquid at room temperature for the coconut oil.


Instructions

1. Grease and flour 8 of the wells in your muffin pan with some coconut oil and oat flour, or you can skip this step and just pop 8 muffin liners into the muffin pan.

2. Mix together the water and psyllium husk powder in a small bowl, and set aside the bowl aside for 5 minutes to allow the psyllium husk to gel.

3. In a large bowl sift together the oat flour, baking soda, salt, and ground flax seed.

4. In a separate medium sized bowl beat the egg, and add in the maple syrup, apple cider vinegar, and the psyllium husk mixture and stir until well combined.

5. Add the melted coconut oil to the flour mixture and give it a good stir. Add in rest of the liquid ingredients to the muffin batter and stir until well combined.

6. Set a timer for 15 minutes and let your muffin mixture rest.

7. Preheat your oven to 350.

8. When the timer goes off, put your blueberries into a sieve and using your snap mesh tea strainer (or you can use another sieve or even a tablespoon) to sift oat flour over your blueberries until they are well coated in the oat flour. Shake the berries in the sieve to get any excess oat flour off of them.

Coating the berries in the oat flour makes it so that the berries don’t sink to the bottom of the muffins while as they bake.

9. Fold the blueberries through your batter (try not to stir the mixture too much, as too much mixing will cause the frozen blueberries to turn the muffin batter purple), and divide the batter equally amongst the 8 muffin wells.

One note about this, because we’re using coconut oil and the berries are frozen, the batter will seize up on you because coconut oil turns solid under 76 degrees F (24 C). If the berries are fresh you shouldn’t have this problem, but it’s fine.

Just do the best you can to divide the batter up as equally as possible, and don’t worry if the mixture looks lumpy when you put the muffins into the oven. The muffins will smooth out in the oven and will bake up beautifully.

9. Pop the muffins into the oven, and bake for 25 minutes, turning the muffins 180 degrees after they’ve been in the oven for 13 minutes. You don’t have to do this, but it helps the muffins to bake more evenly.

Some of the muffins will look like they are baking more quickly than others. Don’t worry about this as they will all bake up evenly at the end.

11. After the 25 minutes, turn the oven temperature up to 375, and turn the muffin pan by 90 degrees. Allow the muffins to bake for another 10 minutes until they are golden brown.

If you test the muffins with a toothpick, it should come out pretty clean with just a few crumbs here and there.

Allow the muffins to cool in the pan for 30 minutes. Run a knife around the edge of each muffin and pop them out onto a plate and serve.


P1080263

Happy Eating!