Oat Flour Tortillas

Gluten Free Oat Flour Tortilla Recipe – Super Easy, Cheap and Cheerful, Vegan Friendly

P1080427

Some people say “I love you” with diamonds, but personally, I’d rather have tacos for Valentine’s Day.

Nothing says “I love you” quite like a taco (and everyone loves tacos). So this Valentine’s Day, make your loved one some amazing tacos with these gluten free oat flour tortillas.

Store bought tortillas can have all kinds of fillers, and the gluten free ones can be particularly expensive. These tortillas are incredibly cheap and easy to make, and taste amazing too. Perfect for anyone who wants to eat well on a budget.

These tortillas are super flexible. Unlike normal wheat tortillas, these tortillas are actually more flexible when they aren’t piping hot, so it’s a good idea to give them a minute or two to cool once you take them out of the pan before you fill them with anything. They are also still very flexible when cold, which makes them great for packed lunches.

The dough is sturdy enough that you can make the tortillas as large as you want, and as long as you have a griddle big enough, you can make a burrito sized tortilla if you like (but you may have to adjust the cooking time).


Gluten Free Oat Flour Tortillas

Makes six 6 inch tortillas (about 2 servings)

Ingredients

1 1/4 level tsp psyllium husk powder*

1/3 cup water

1/2 tsp honey**

1 tbsp olive oil

1 cup oat flour***

1/8 tsp sea salt


Notes – *Psyllium husk powder gels like nothing else, and there’s no great substitute for it. I found mine in the bulk spice section of the local Fred Meyer, but Whole Foods, Trader Joes have been known to carry it as well. If it’s not in the natural foods, or bulk spice section, check the dietary supplement/ digestive health (where the Metamucil is) section of the store or pharmacy as it’s sometimes sold there as well.

** You can leave out the honey if you’re vegan. The tortillas will still be good, they just wont have the little brown spots when you cook them.

*** I grind oats into oat flour using a blender. Don’t grind the oats in a food processor because the flour won’t be fine enough.

Any extra oat flour I don’t use in the recipe goes into an airtight container and I use it for another recipe.

If you’re making the tortillas for someone who has celiac disease, use certified gluten free oats, as the oats from the bulk bins can sometimes be processed on the same equipment as wheat.


Instructions

1. Slowly add the water to the psyllium husk powder. Stir to combine, and don’t worry to much if it’s super clumpy. Let sit for 5 minutes

2. Add in the rest of the ingredients and stir together until a shaggy dough is formed. Knead the dough for about 1–2 minutes until the dough is fairly smooth, making sure to smush in all the little bits of psyllium husk into the dough until well combined.

The dough should look like this when you’re done kneading –

P1080403

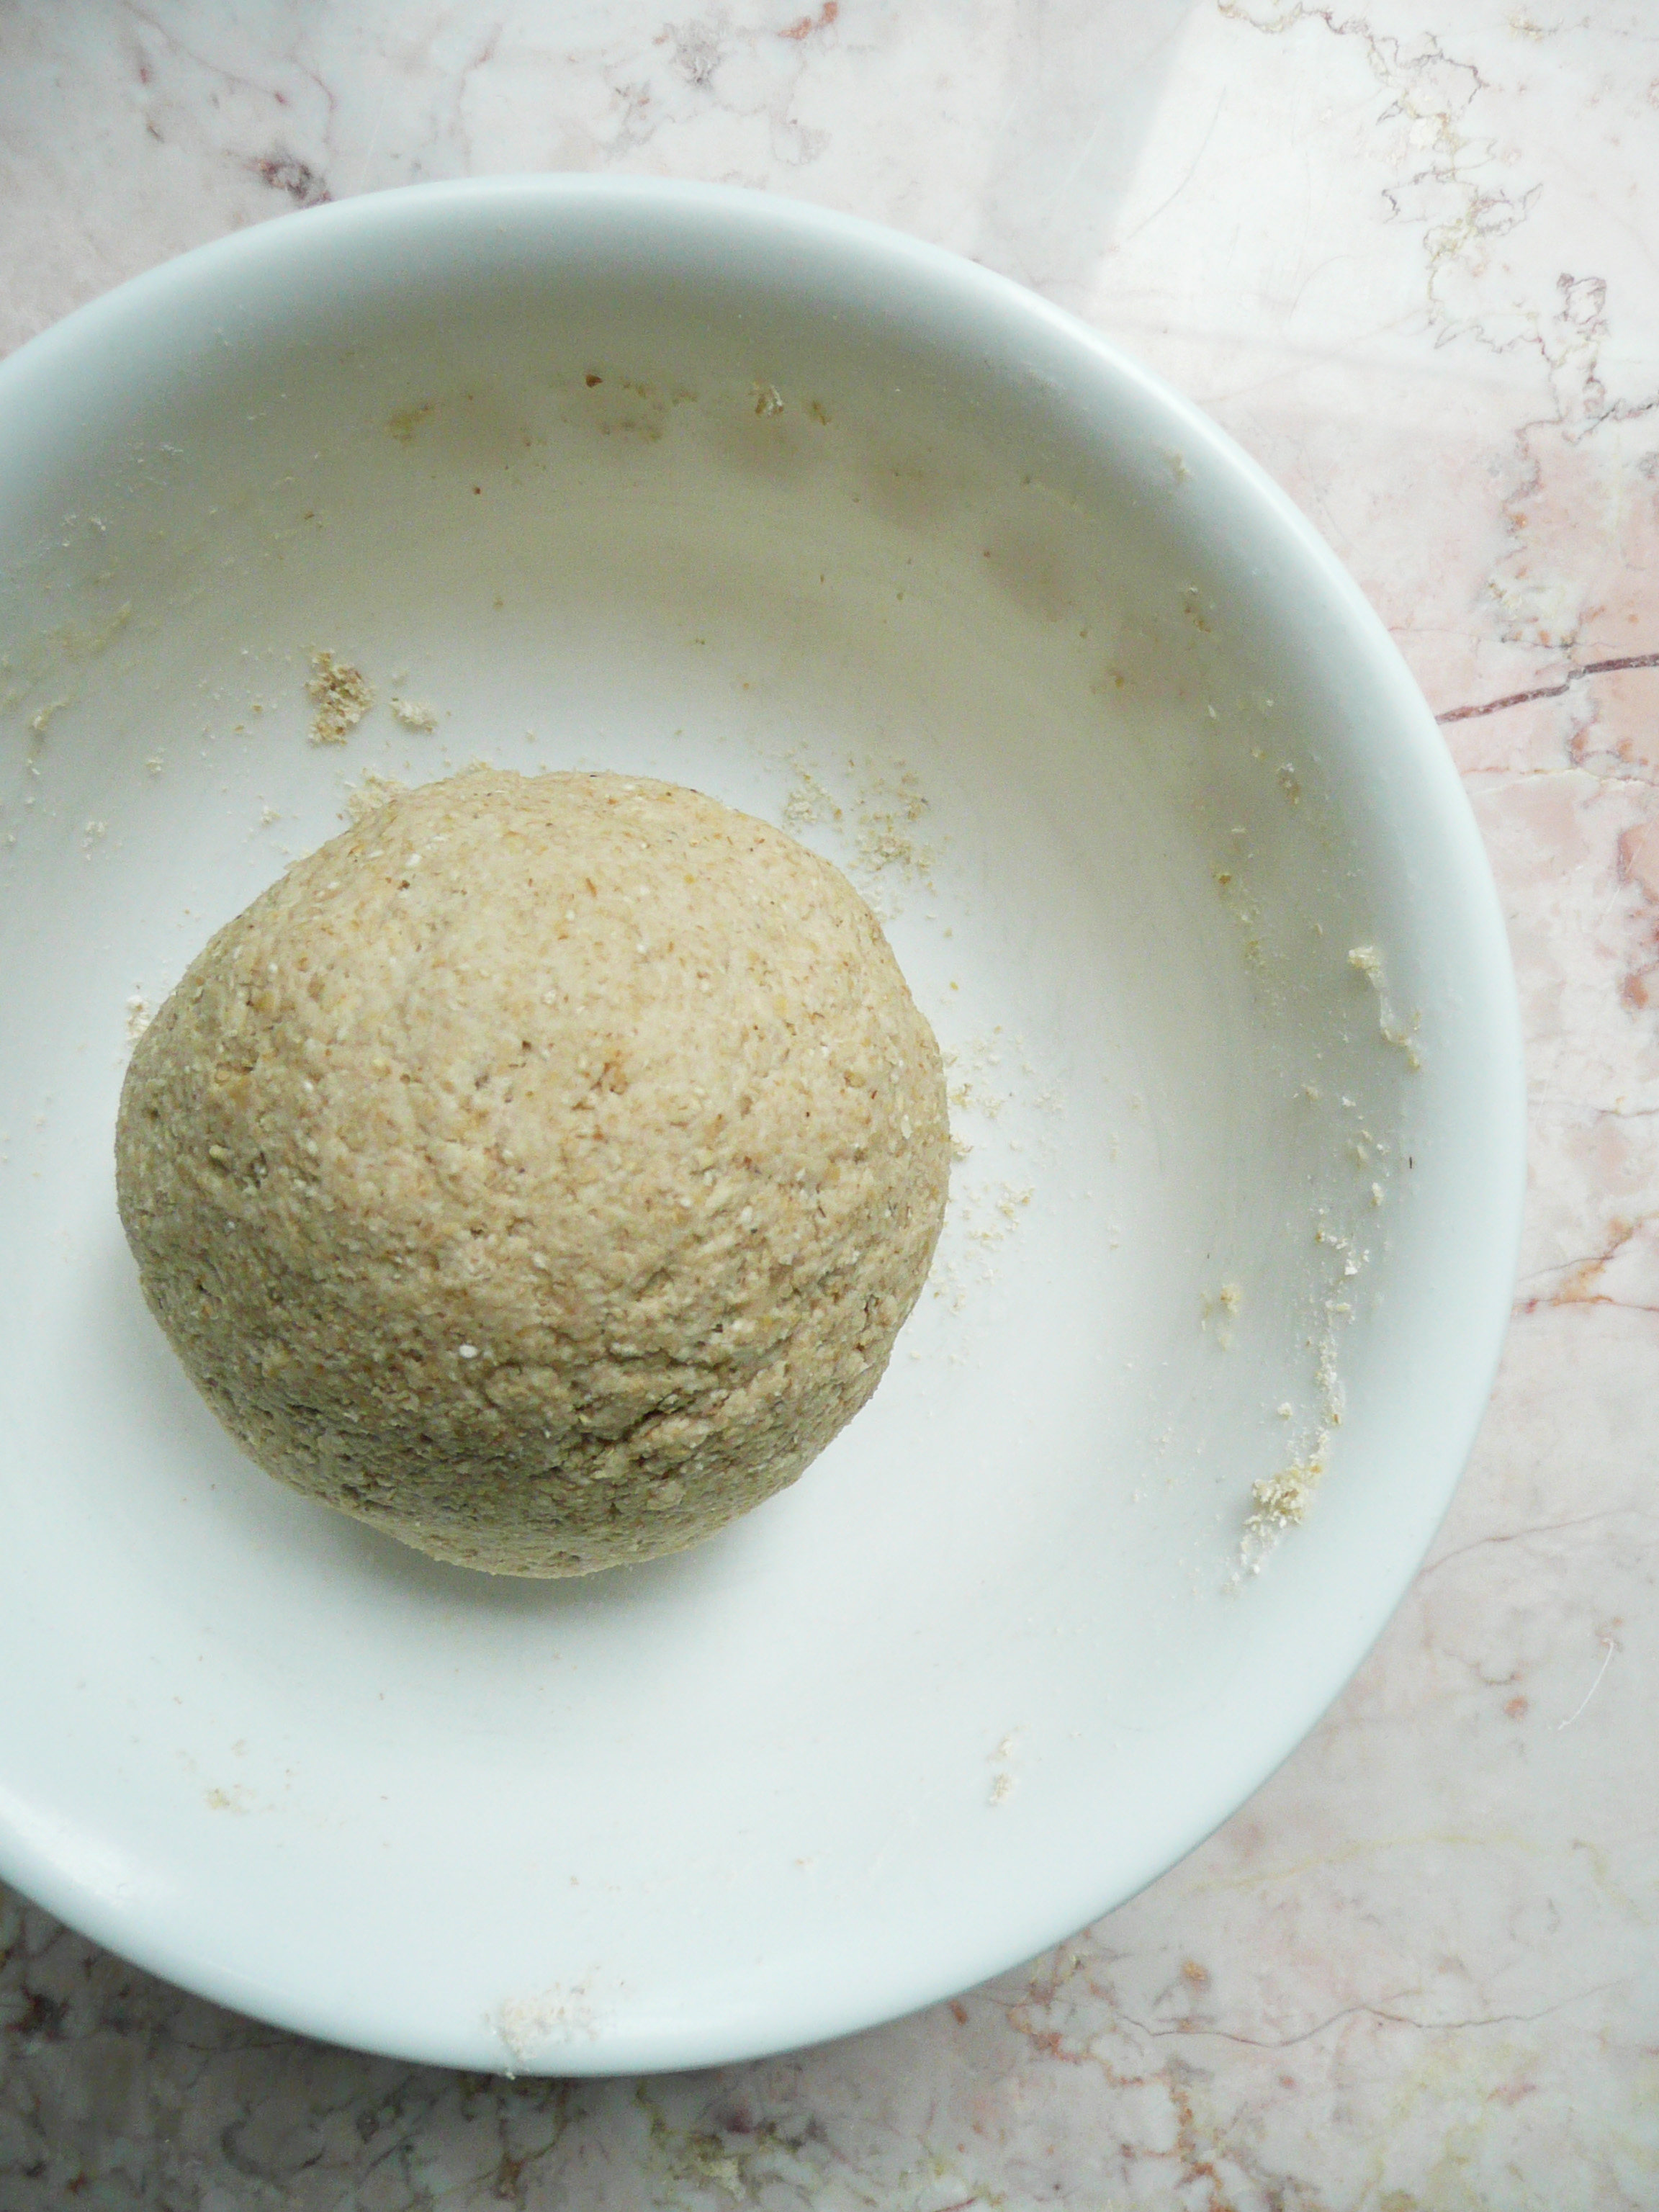
Cover the dough with plastic wrap (or cover the bowl with a small plate) and allow the dough to sit at room temperature for 1 hour.

You can also make this dough ahead of time and keep it in the fridge for 1-2 days until you’re ready to cook the tortillas.

3. Cut the top and sides off of a gallon size Ziploc bag and open it and lay it flat to form a long rectangle.

Dip a paper towel in a little bit of oil (avocado oil, vegetable oil, or olive oil will work for this) and oil the inside of the plastic. Don’t use the coconut oil for this, it solidifies too quickly and the dough ends up sticking to it.

Cut the tortilla dough into 6 equal pieces, and keep the pieces of dough that you’re not working with covered so that they don’t dry out. If the dough is too sticky, add a little oat flour, if the dough is too dry then knead in a few drops of water into the dough. The dough should be elastic, on the firmer side, and smooth. Roll the dough into a 6 inch circle between the pieces of oiled plastic.

Peel the tortillas off the plastic and lay them on a plate. You can roll the tortillas out and overlap them on a plate as they won’t stick together, but kind of shingle them so that there are bits of each tortilla sticking out from the pile so that each tortilla will be easier to pick up when you cook them.

4. Make your pan non-stick. Cook your tortillas over medium heat. I let them cook for 1 min and 15 seconds on the first side, then flip them over and let them cook 30 seconds on the other side. They get the little brown spots this way, and are slightly crispy around the edges. If you don’t want them crispy around the edges, you can cook them for a shorter amount of time and they will still be good.

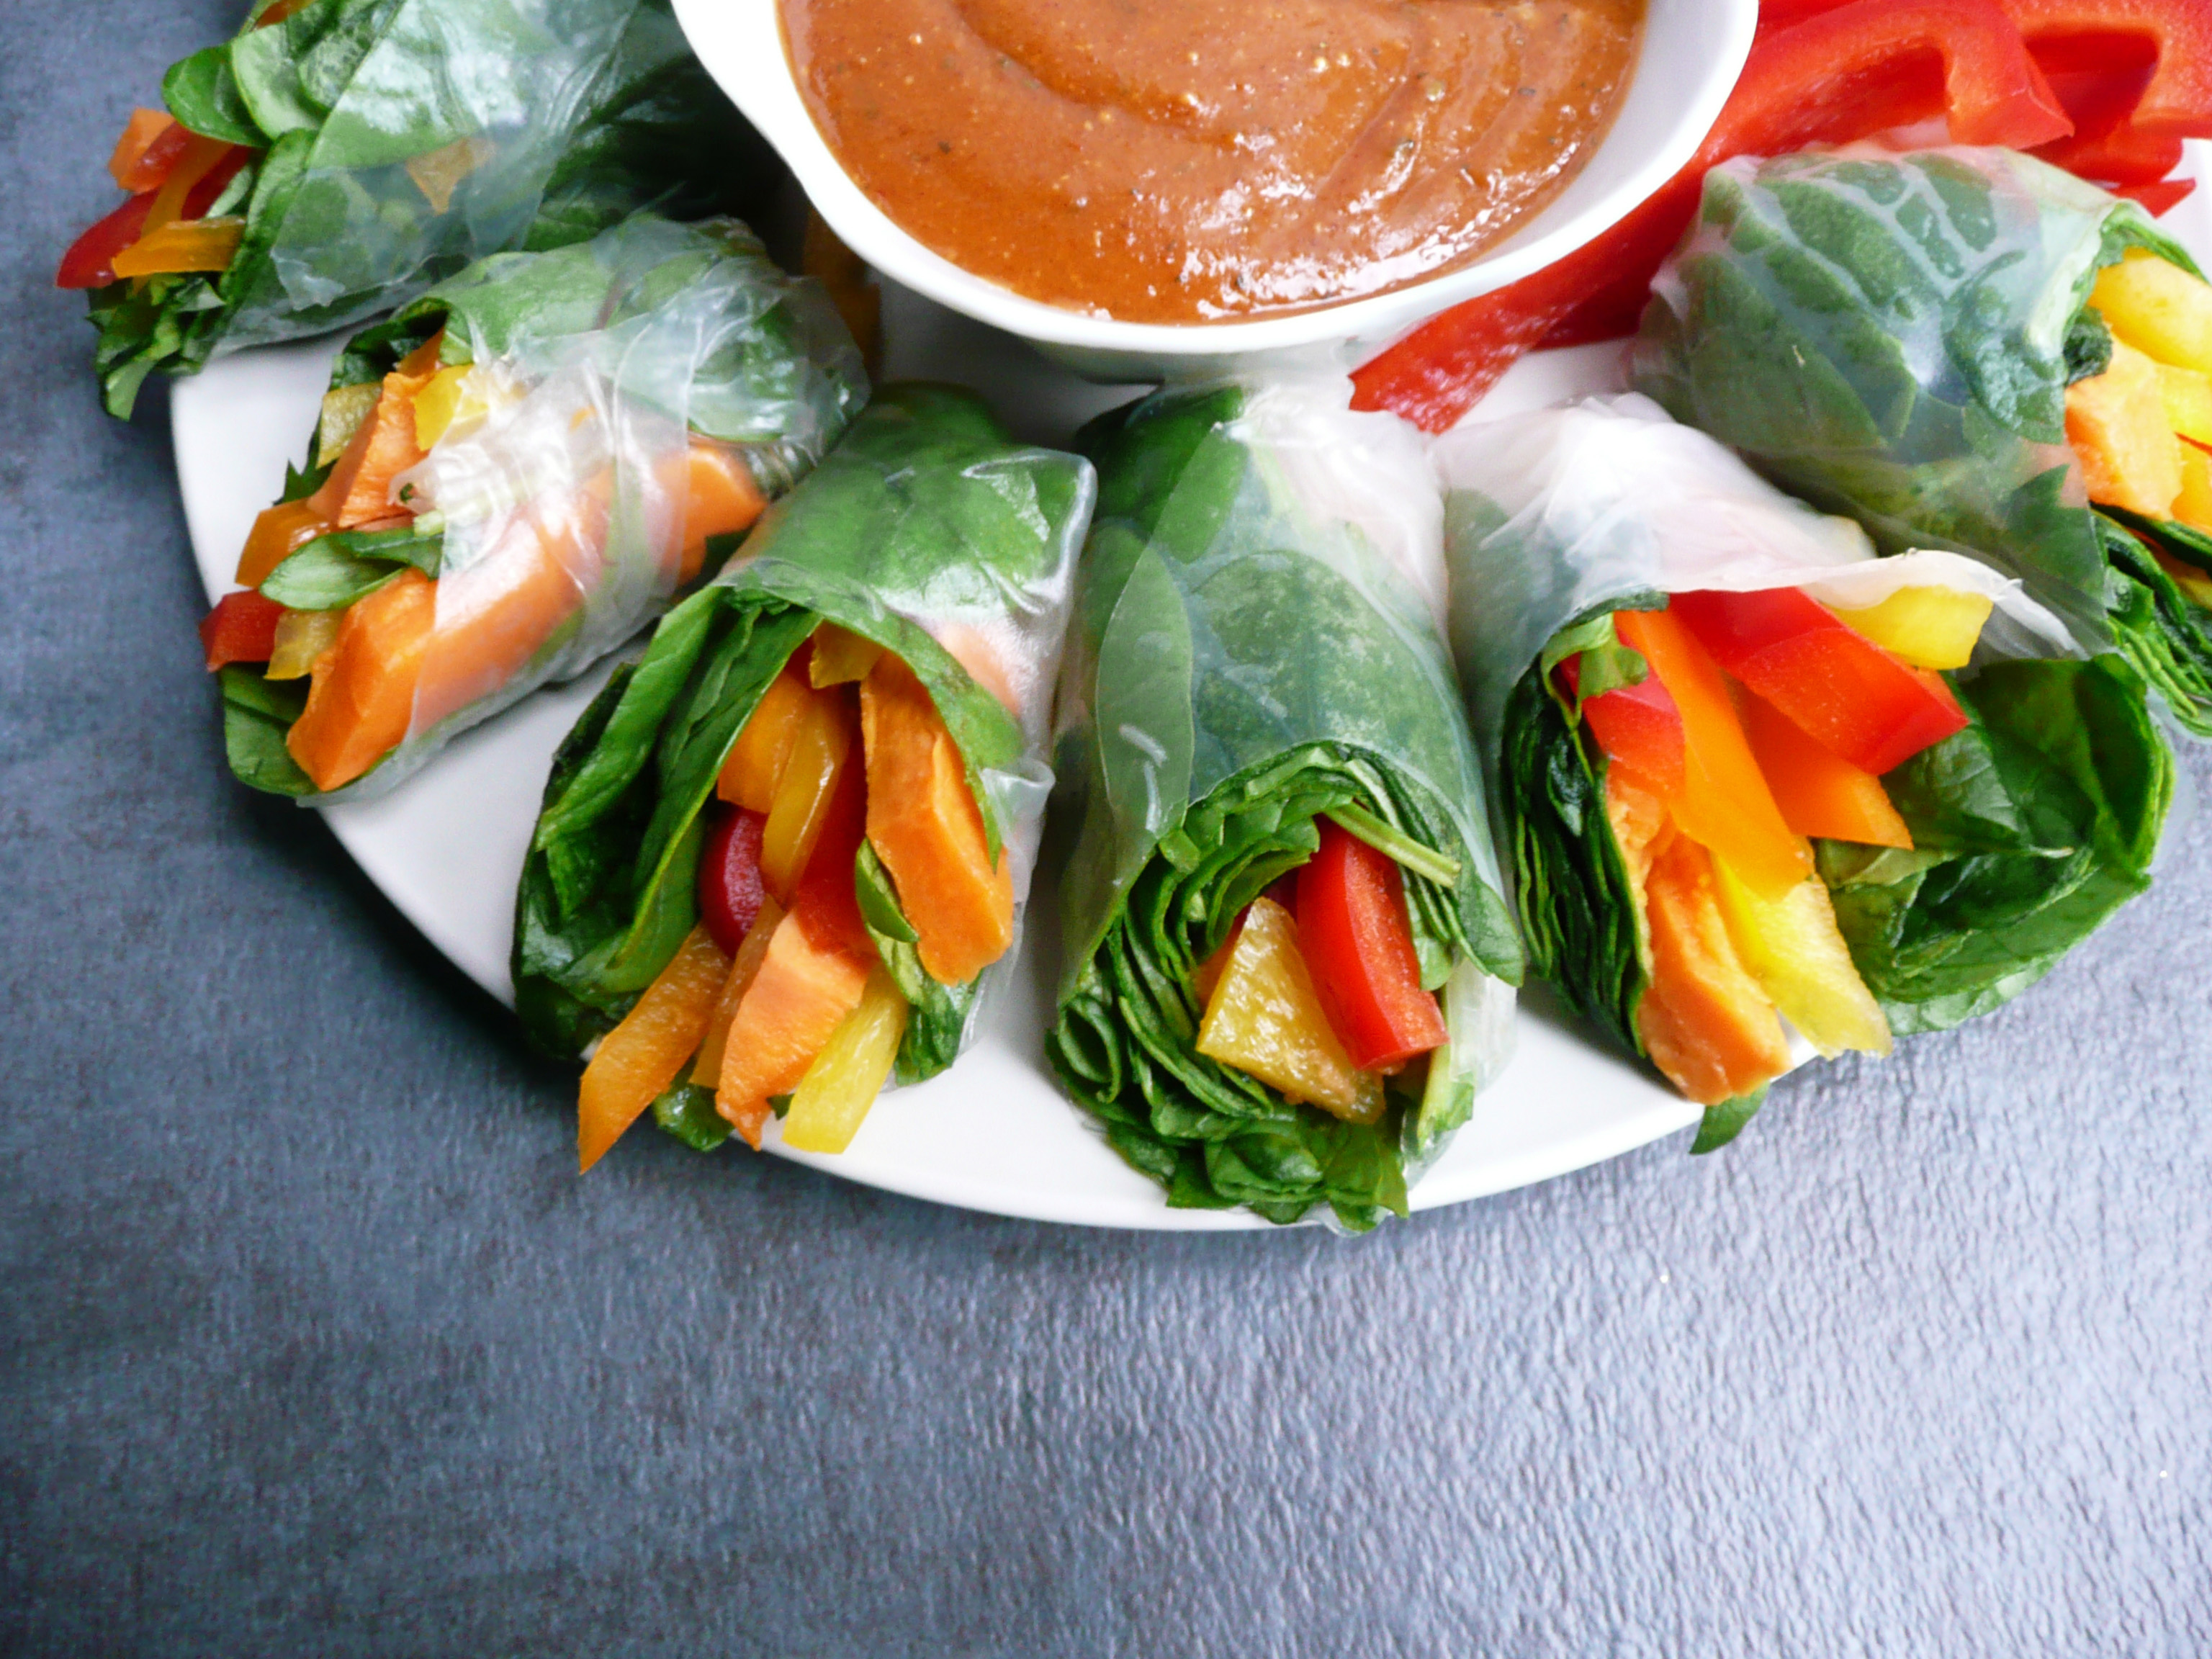
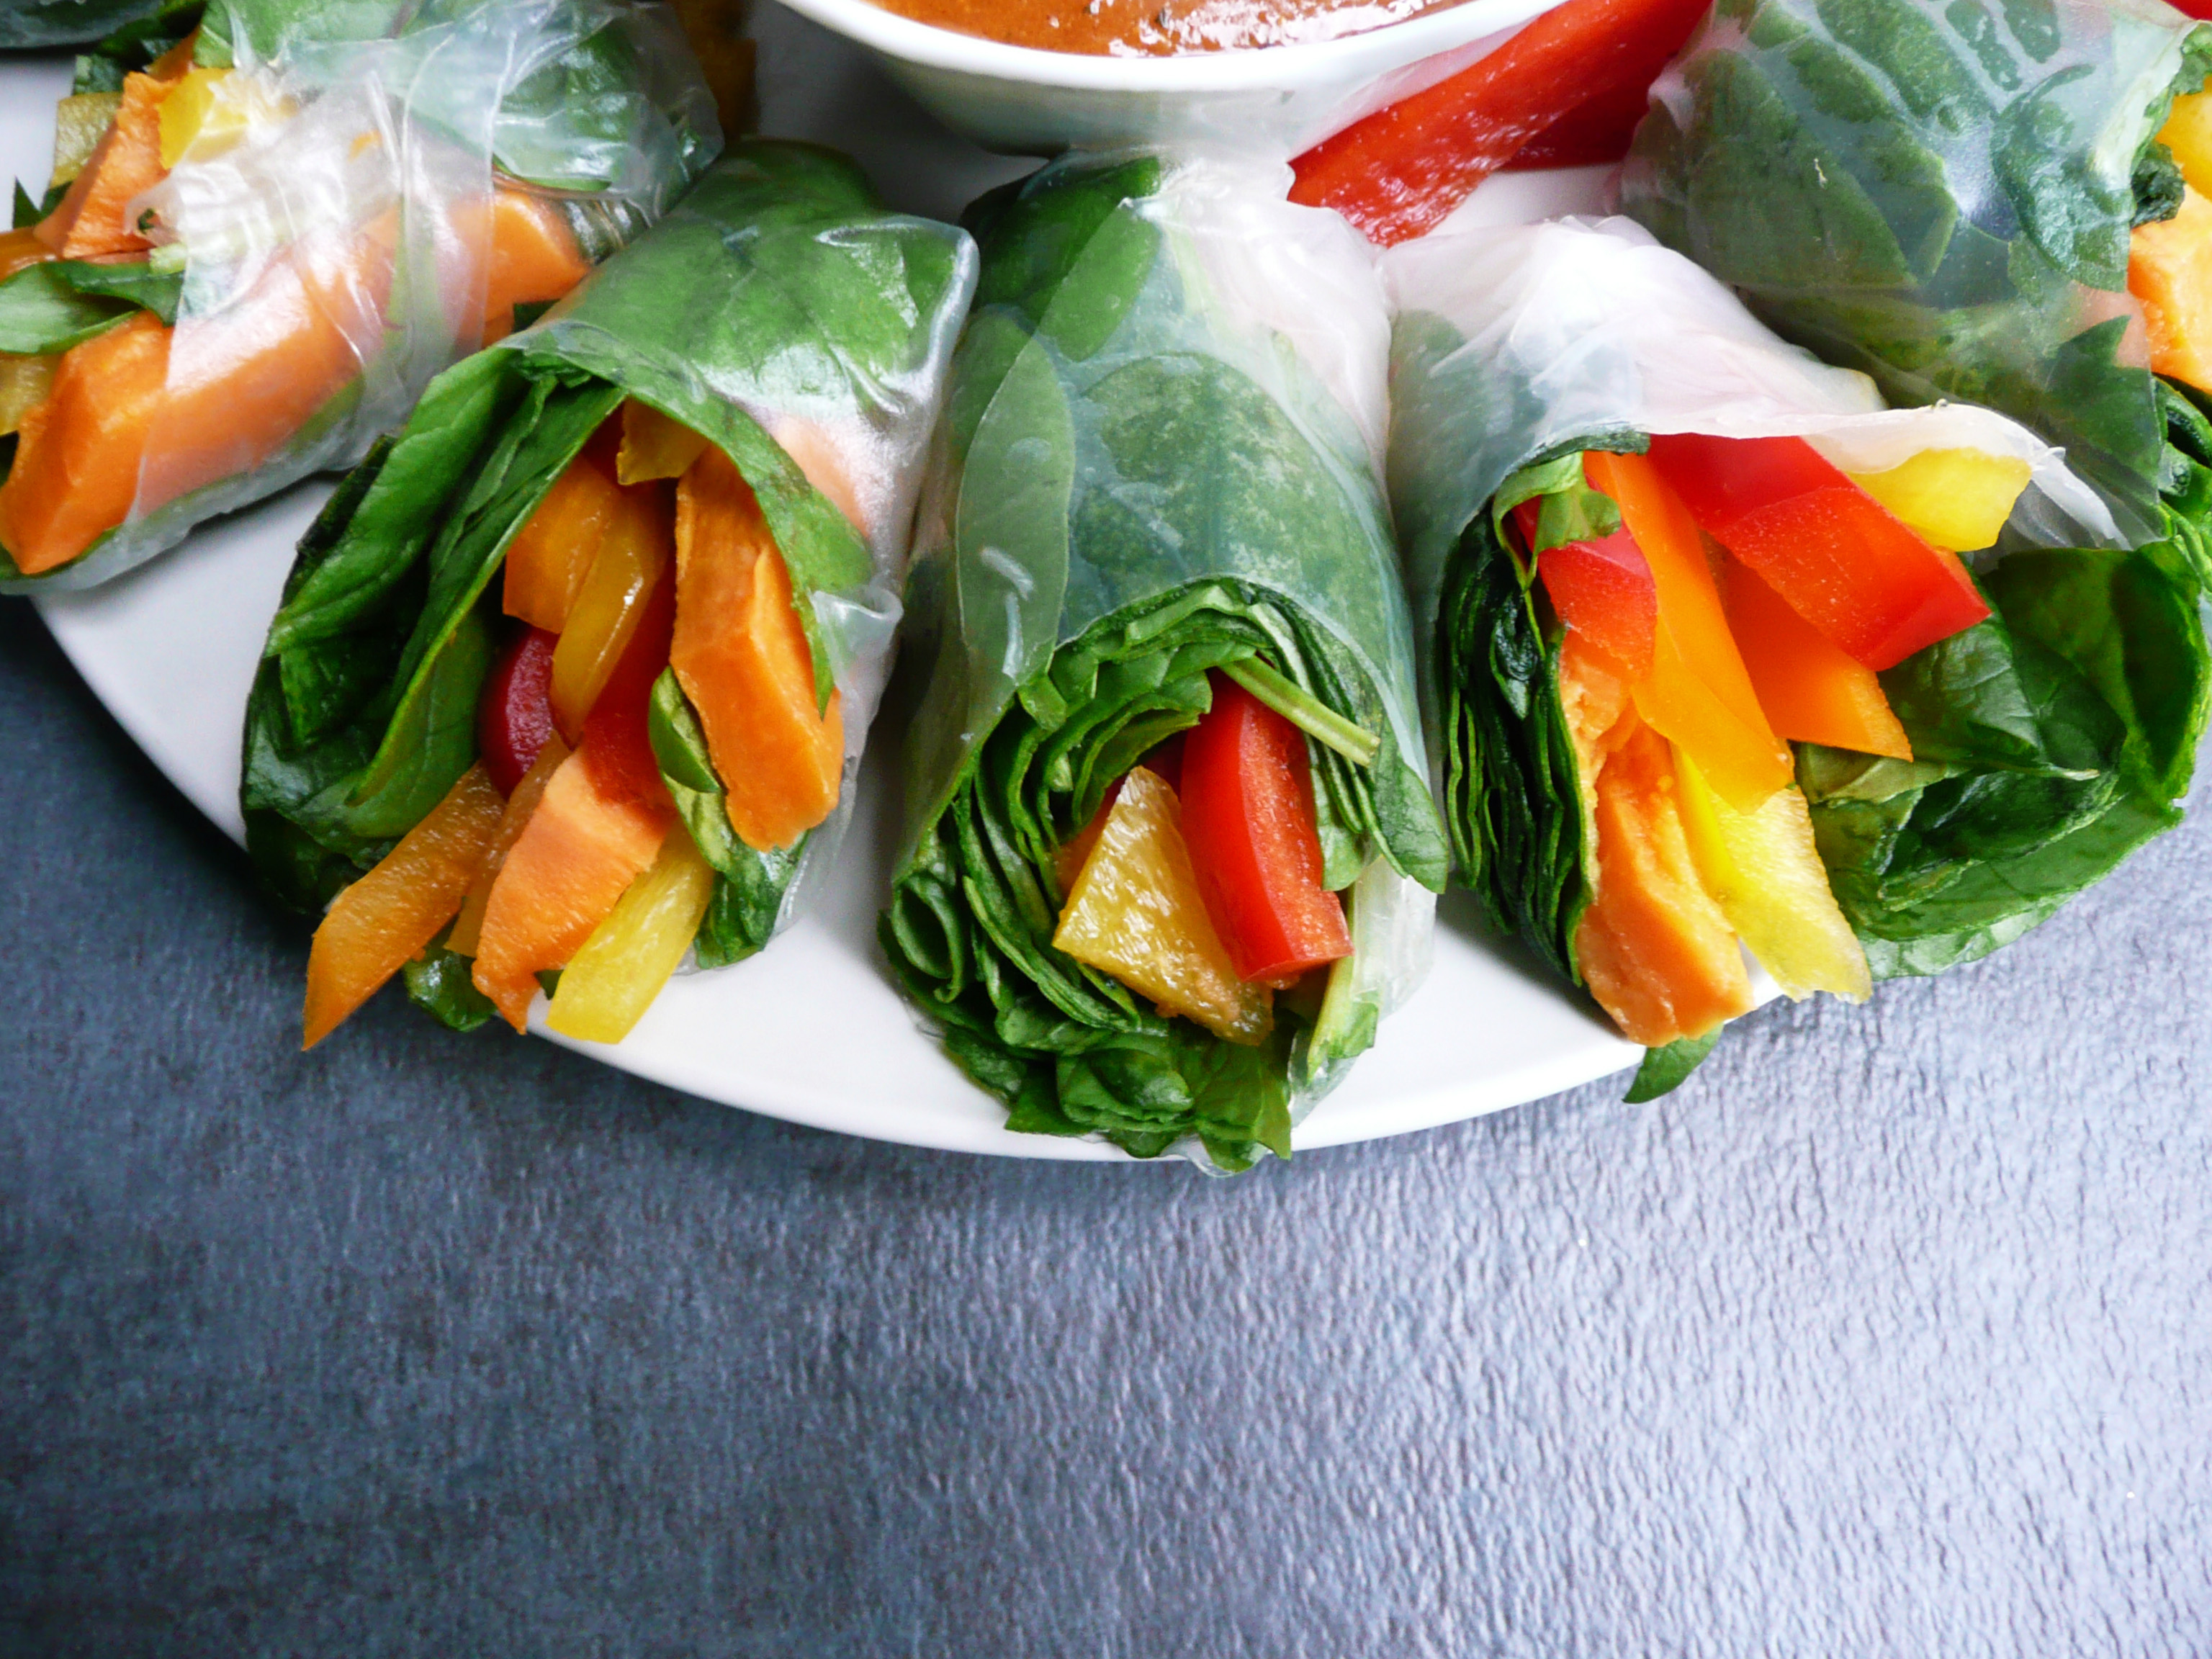
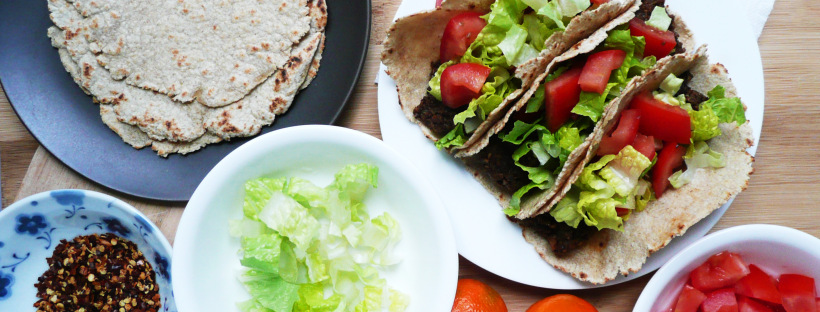
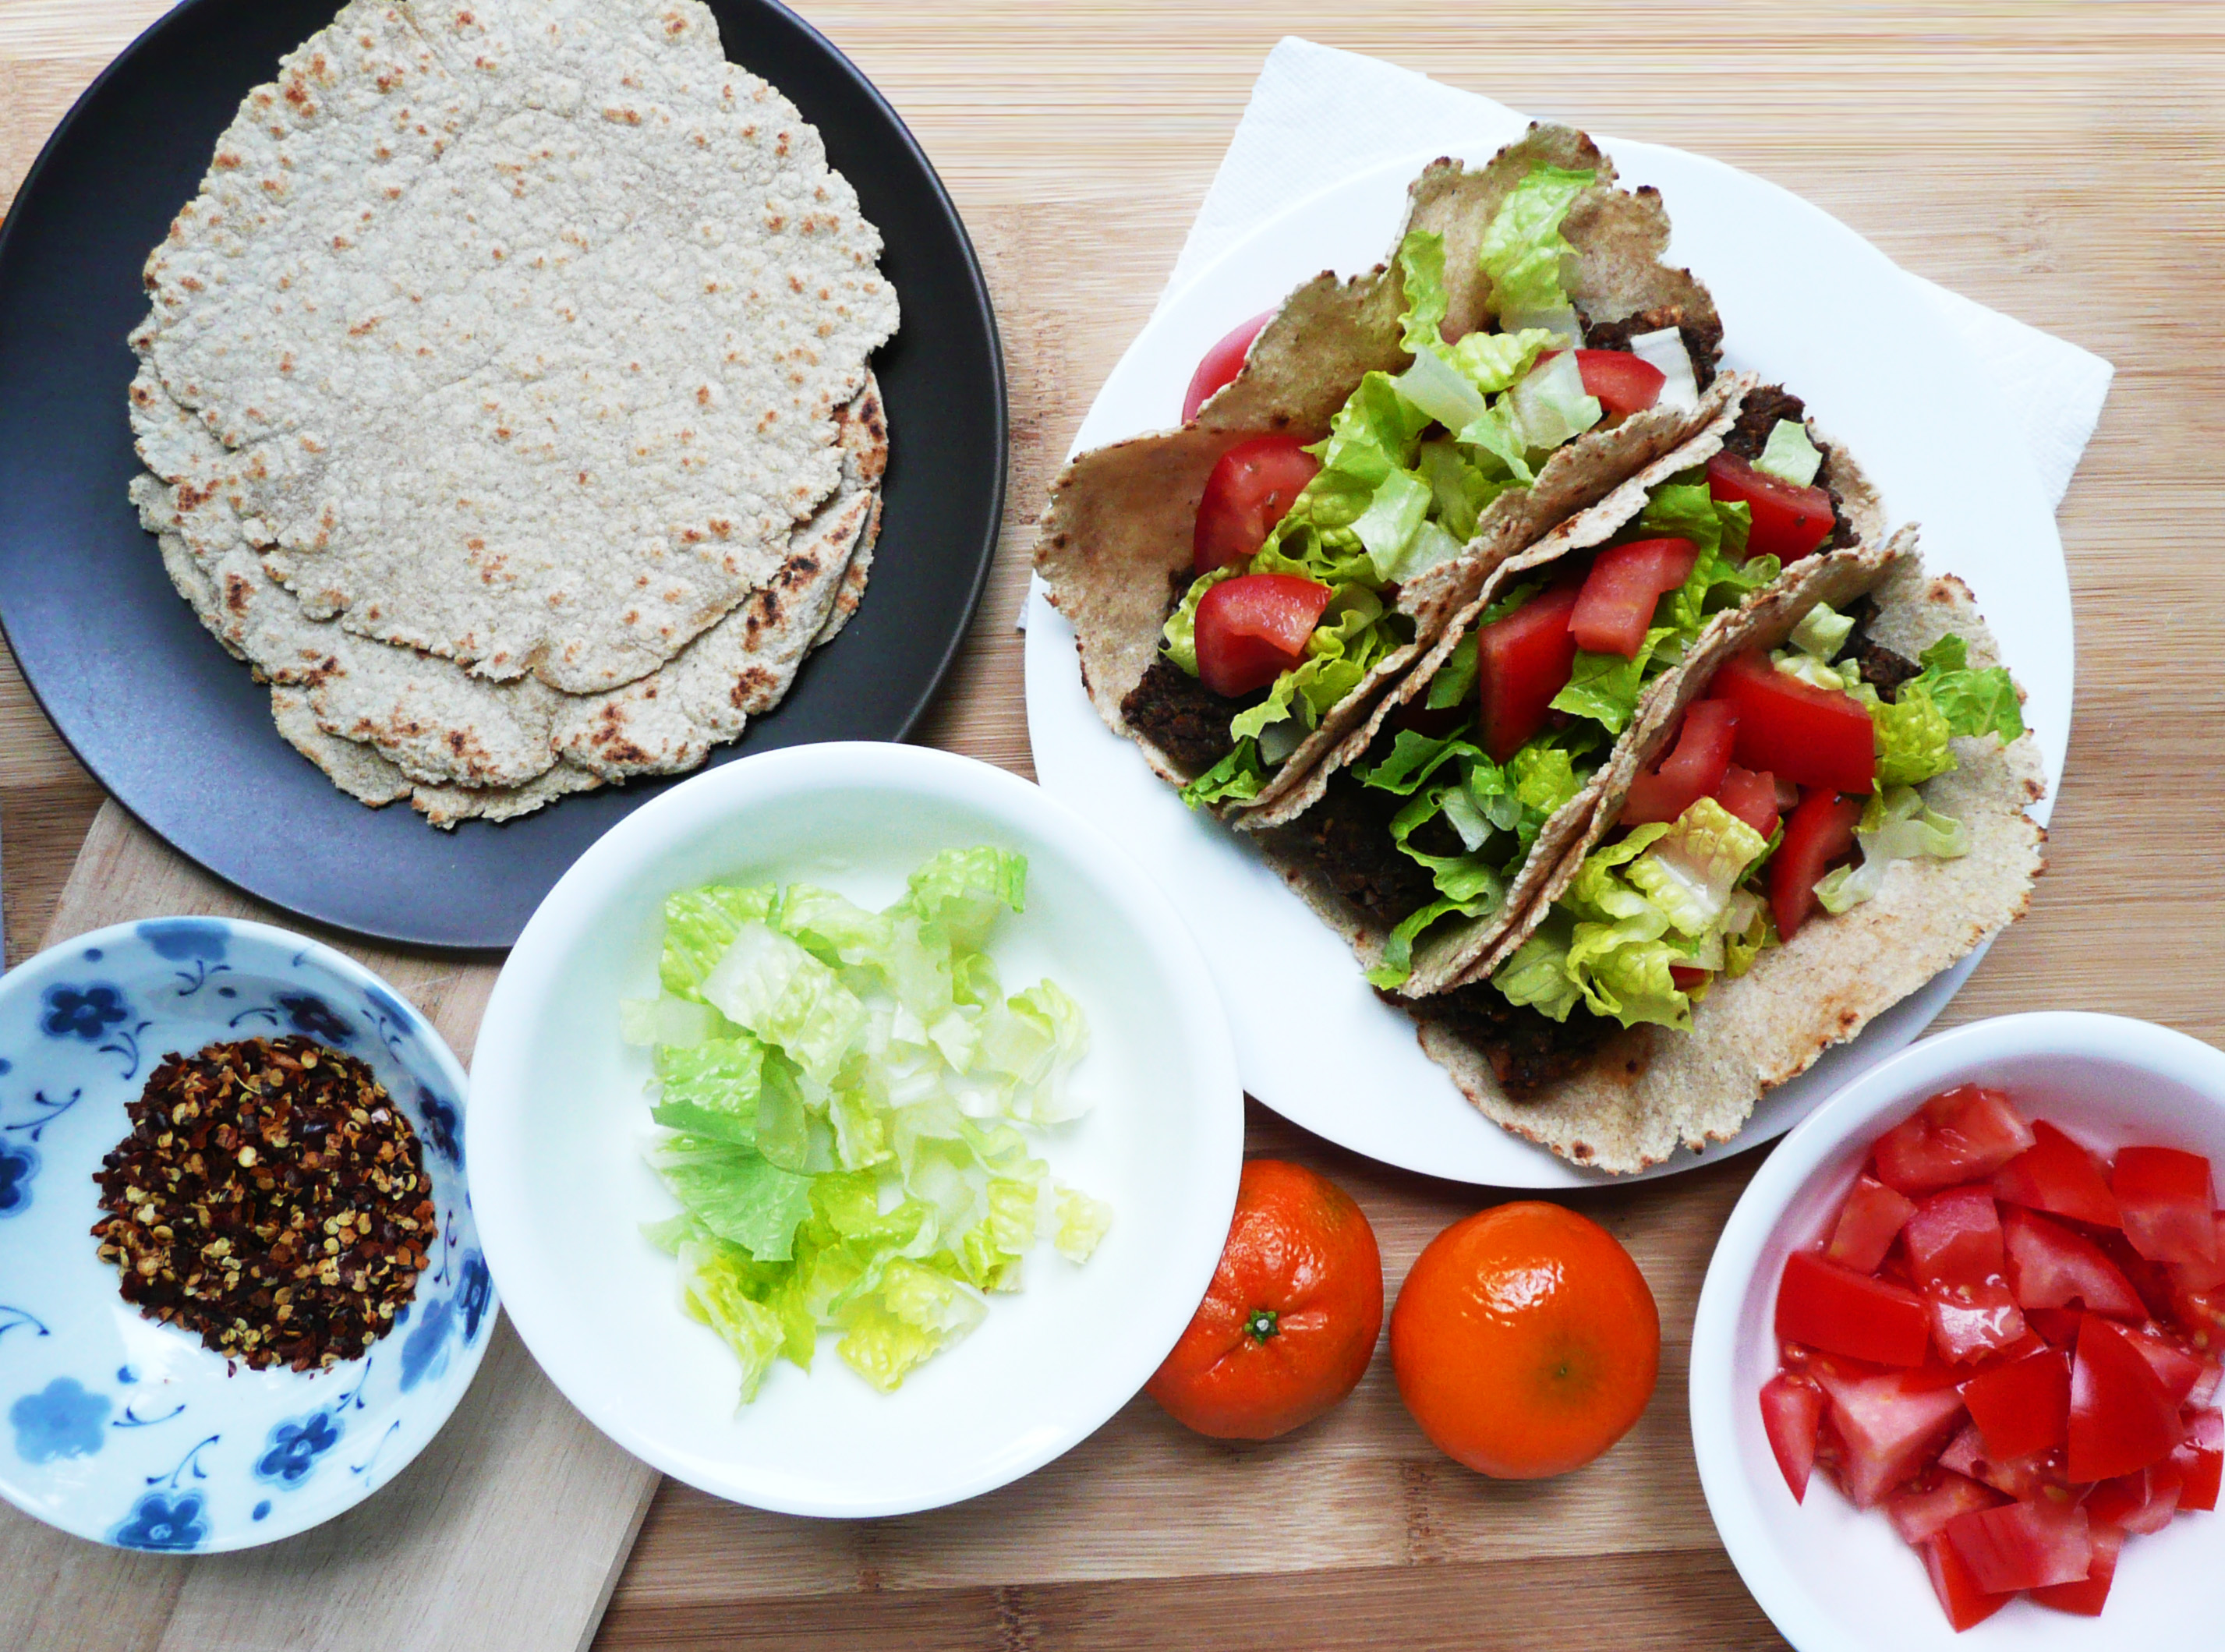
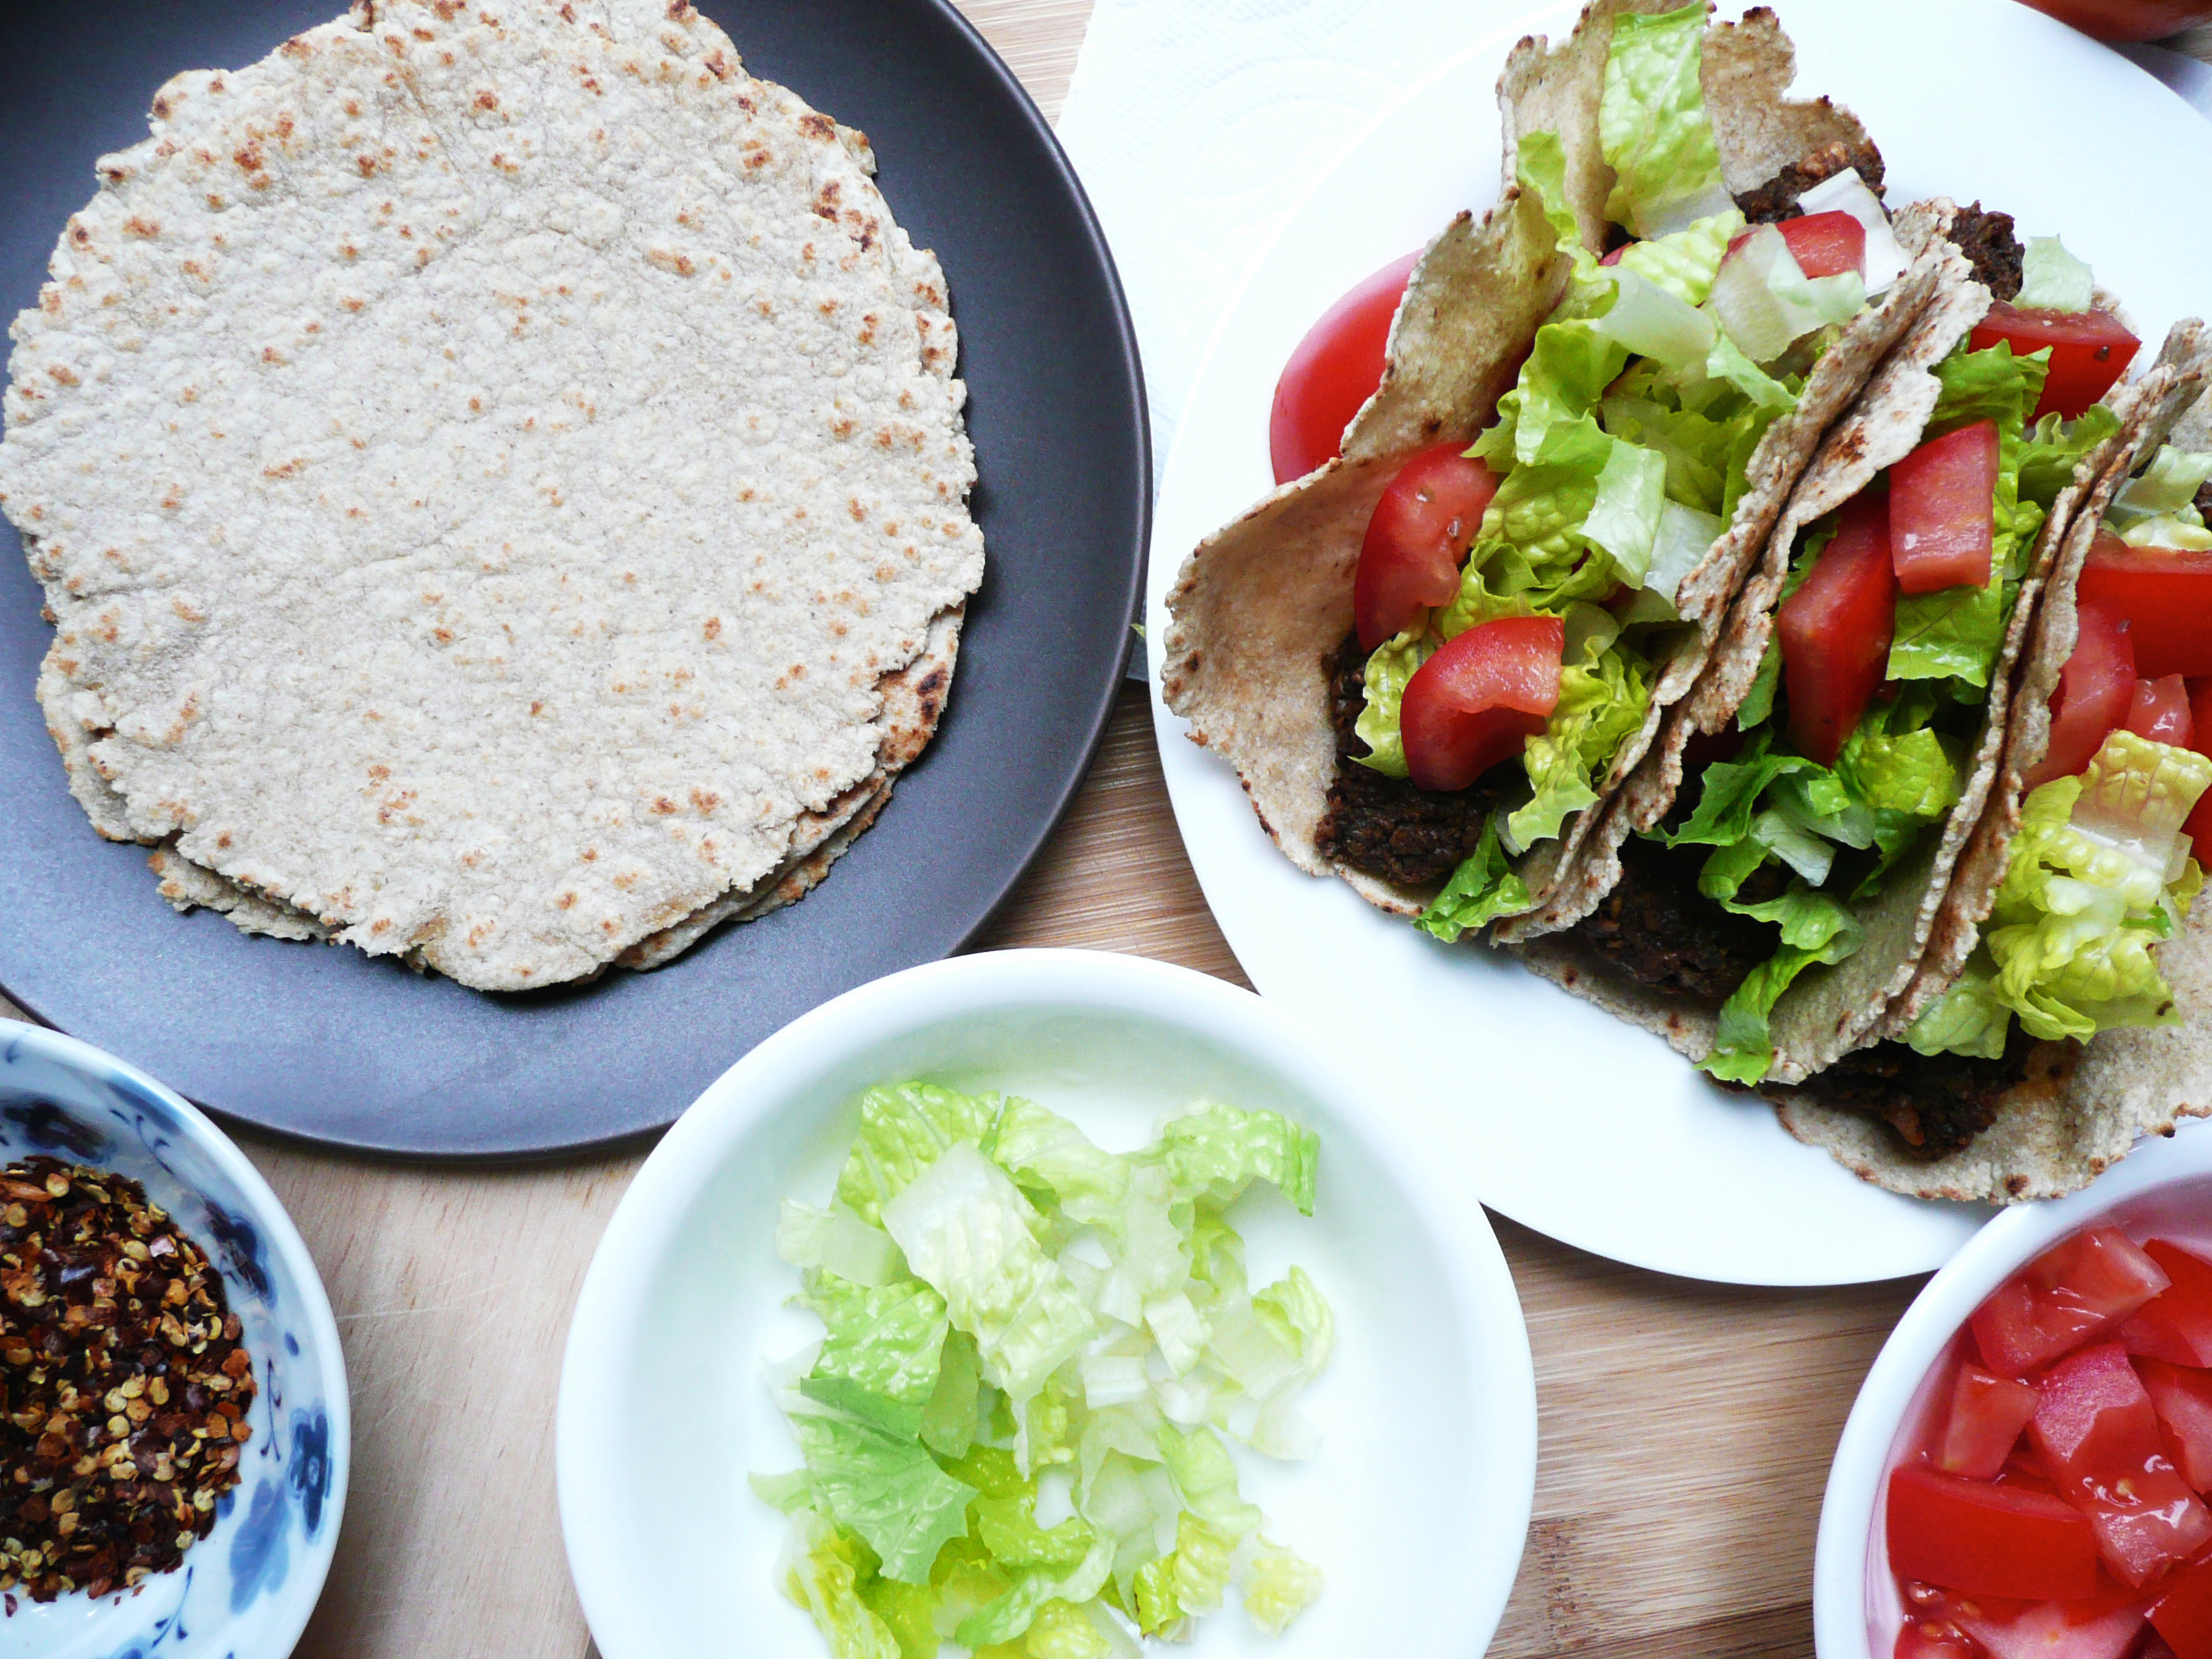
5. Stack the tortillas on a plate and fill them with whatever your heart desires. I topped mine with tomatoes, lettuce, and minced mushrooms that I’d cooked down with taco seasoning to make a vegan taco filling.

They keep great in the fridge, so you can make them ahead of time and keep them on hand for all your taco cravings.

P1080439

Enjoy!

Kitchen Tip – How to Regrow Green Onions

green onions

Green onions are used in lots of Asian recipes, and they are actually super simple to regrow on your windowsill from the trimmings that you would normally compost.

I cut the green part off the green onions so that there’s about  1.5 – 2 inches of the white part attached to the roots.  Then put the green onion roots in a little jar (old spice jars seem to work well for this) and add about 1.5 inches of cool water into the jar. I put a little piece of folded paper towel under the jar when I put it in the windowsill so that no watermarks stain the wood.

Replace the water everyday (that way the water doesn’t get slimy as quickly). I’ve been able to successfully regrow a trimmed green onion root about 2-3 times.  After that, they get a little too slimy around the roots and it’s time to compost them and wash out the jar.

The picture shows about a week of growth, and you can trim off what you need to add to dishes.

You can also plant the trimmed green onion roots in some soil, and they should regrow a few more times than if they were simply regrown in water.

I hope that this tip helps you save a little money! Let me know how this trick works for you. What would you make with your regrown green onions?

fresh herbs

How to Store Fresh Herbs

P1060471-2

When I used to buy herbs, I always seemed to buy more than I needed. If I recipe called for 2 tbsp of fresh parsley, I never seemed to know what to do with the rest of the herbs, or how to keep them from wilting before I could use them up.

After much experimentation, I throw away way fewer herbs now.

Here is how to keep your herbs fresh –

For Parsley or Cilantro

When you get home from the grocery store, take the rubber band off of the bunch of herbs. Pick out all the wilted sprigs, then loosely roll the bunch of herbs in a few sheets of paper towel. Place the roll back inside of a closed ziploc bag and place in the fridge.

Every few days, take the herbs out of the refrigerator, pick out the wilted sprigs and roll the non-wilted herbs in a few new sheets of paper towel. Compost the old paper towels and your herbs will probably keep for at least a week. Make sure you put them in a spot in your fridge where they won’t accidentally get frozen.

Quick ways to use up Parsley – blend your extra parsley into a pesto with some garlic, almonds, olive oil, salt and pepper. You can also add in kale, or basil, or cilantro to the pesto if you like. Tabbouleh is a great dish to make with excess parsley, and I’ll be posting a recipe for Quinoa Tabbouleh soon.

You can also blend a handful of the parsley with an apple, lemon juice, honey, ginger, water, and blueberries for a smoothie that helps with inflammation and joint pain.

Quick ways to use up Cilantro – you can make pico di gallo with chopped onions, tomatoes, lime juice, salt, and freshly chopped cilantro.

For herbs in clam shells – pick out any wilted stems and leaves, then fold 1-2 paper towels so that they will fit inside the container. Take the herbs out the clam shell, place the folded paper towel on the bottom of the container, put the herbs on top of the paper towels and close the clam shell and place it in your fridge.

Every few days, take the herbs out, pick out the wilted bits, and replace the paper towel before placing it back in the fridge. The herbs should last a few days longer using this technique.

Quick ways to use up Mint – You can add extra mint to tabbouleh, or make a great tea with it. I like to drink mint tea in the morning as it wakes you up without caffeine, and it has a naturally sweet flavor, so you don’t need to add any sweeteners.

I usually add about 7 mint leaves and 2 mint stalks to 1.5 cups of hot water and let it steep for at least 3 minutes before drinking. I leave the mint in the tea as I drink it, but you can remove them from the cup if you like.


Creamy Lemon Garlic Black Bean Dip

Creamy Lemon Garlic Black Bean Dip

P1070086 copy

I love hummus, and this dip originally started out as a black bean hummus, but I kept adding more lemon juice and more green onions until it became something slightly different, something even better.

It’s thinner than store bought hummus, but still wonderfully creamy and has an incredibly bright happy flavor from the lemon juice, which works well with the flavors of the garlic and green onion (which sort of prance around in the background and bring even more joy to the party).

It’s better if you make it a day ahead, that way the lemon juice will mellow out the sharp flavor of the garlic and the dip will be extra delicious.

I hope that you give this dip a try!


Creamy Lemon Garlic Black Bean Dip

Makes about 2 -3 servings

Ingredients

7 tbsp + ½ tsp fresh lemon juice

3 cloves fresh garlic

1 can black beans, drained

4 tbsp. + 1 tsp olive oil

4 tbsp finely chopped green onion

1/2 tsp sea salt

1/8 tsp black pepper


Instructions

Add all ingredients to a food processor and blend until smooth.

If you like things more lemony you can add another 1 tbsp of lemon juice, or more to taste.

Transfer the mixture into a bowl, cover with a lid or plastic wrap and refrigerate overnight.

Serve with tortilla chips or cut veggies, and if you’d like you can sprinkle over some finely chopped green onion for color and extra crunch.

Oat Flour and Brown Rice Tortilla Chips

Oat Flour and Brown Rice Tortilla Chips – Gluten Free, Dairy Free, Vegan – Tostadas

P1070082

When I first went gluten free I really missed having something crunchy to dip into hummus, or top with egg salad like a cracker.

When I came up with this recipe I found that it checked lots of carb-y, crunchy boxes.

You can eat these chips with guacamole or hummus. You can mix flax seeds and chia seeds into the dough to make multigrain crackers. For cheesy herby crackers, you can add some granulated garlic, parsley, oregano, and nutritional yeast into the dough and they bake up a treat.

Another thing that you can do with this dough is make tostadas. The tostadas bake up super crunchy and you can top them with anything that makes your heart happy.

I tried making tortilla chips and crackers in all kinds of ways before I came up  with this recipe, but it turns out that leftover brown rice was the key to making a great crunchy oat flour tortilla chip.

If you have leftover brown rice in the fridge, this is a perfect way to use it up. Making these chips / crackers are also so much cheaper than buying gluten-free crackers in the store, and I promise that they taste so much better. And if you can’t tolerate corn chips, this recipe is a great alternative. These chips also go great with my creamy lemon garlic black bean dip.

Brown Rice and Oat Flour Tortilla Chips (Baked)

Makes 10 chips (about 1 generous serving)

Ingredients

1/3 cup cooked short grain brown rice

1/3 cup oat flour

½ tsp olive oil

pinch of salt

1 -1 ½ tsp water


Instructions

1. Preheat the oven to 350 F.

2. Add all the ingredients into a bowl and mash the brown rice into the oat flour with the back of a fork. Squeeze the mixture together in your hands so that the rice incorporates into the oat flour and forms a nice dough. If the dough feels a little dry, add a little water to the dough. If the dough feels too sticky, add a little more oat flour.

3. Divide the dough into 10 equal sized pieces and roll each piece of dough into a ball .

Wet you hands lightly press each ball of dough into a 1/8 inch thick disk onto a silicone baking mat. The mixture won’t spread so the chips can be baked close together as long as they don’t touch.

4. Bake for 15 minutes, then take the chips out of the oven and use a spatula to flip over each chip. Bake for another 15 minutes until crisp.

Let them cool on the silicone baking mat for about 10-15 minutes. They will crisp up even more as they cool.

You can also use this same mixture to make about 3 tostadas about 4-5 inches in diameter (1/8 inch thick). Bake the tostadas for 15 minutes per side at 350 until crisp.

Kitchen Tips – How To Use Every Drop Of Olive Oil

P1070675

One ingredient that I use almost everyday is olive oil.

I use it in salad dressings for it’s peppery bite, drizzle it over soups and pasta sauces to give them richness, and add it to hummus for a smooth and silky texture.

Inevitably, at some point, the bottle runs empty save for a few teaspoons of that beautiful green oil that you can never seem to shake out of the bottle.

If you too can’t stand the thought of letting any food go to waste, this is my solution for getting every last drop of precious oil from the bottle.

Take a wide mouth mason jar and put it inside of a 1 quart measuring cup. Then turn the bottle of oil upside down and place the mouth of the bottle inside of the mason jar. Leave this to sit in an area where it won’t be disturbed for a day or two and all of the oil that’s left over in the bottle should drain into the mason jar.

(Putting the mason jar inside of the big measuring cup makes the bottle of oil and mason jar less likely to tip over.)

Use this reclaimed oil within a day or two, as it has been exposed to air and light and won’t keep for too long before oxidizing.

Thanks for reading!

Happy Cooking!

Chocolate Banana Soft Serve Ice Cream – Refined Sugar Free, Dairy Free, Vegan, Paleo

P1080366

When I think of chocolate desserts, I want something really decadent and rich, with a deep chocolatey flavor.

This Chocolate Banana Soft Serve Ice Cream definitely fits the bill. It’s super easy to make, and takes almost no time or effort. It’s so creamy and delicious, and it’s pretty incredible that blended up frozen bananas can turn into such an amazing treat!

When I was working on this recipe, I thought about the rich and creamy chocolate ice cream that would occasionally eat before I went dairy and refined sugar free.

I really tried to get a similar flavor with this recipe, so it does have more cocoa powder and vanilla extract than you would expect it to have, which gives the banana ice cream a similar flavor to the store bought chocolate ice creams of my younger days.

Banana ice cream also cuts down on food waste because it’s the perfect thing to make when you have overripe bananas that you don’t know what to do with. No need to throw them away! Just peel them, and freeze them, and you can have ice cream whenever you want. How cool is that?

You can also adjust the flavor of the ice cream to your liking really easily. If you want it a little sweeter (or if your bananas could have used a little more ripening before you froze them) you can add a little more maple syrup, or more cocoa if you want a deeper chocolate flavor.

However you make it, I hope that this ice cream brings a little more joy to your day.


Chocolate Banana Soft Serve Ice Cream

Makes 1 serving (about 3/4 cup)

Ingredients

1 thawed frozen banana

3 1/2 tbsp unsweetened cocoa powder *

2 1/2 tbsp + 1 tsp maple syrup

2 tbsp + 2 tsp water

1 tsp vanilla extract

tiny tiny pinch of salt


*I didn’t use a heaped tbsp, just sort of slightly higher than a level tbsp. The cocoa powder that I used was the Ghirardelli unsweetened cocoa powder.

Instructions

1. Cut the thawed banana into half inch slices with a paring knife. If the banana is too hard to cut, then let it thaw for another 5 minutes or so before trying to cut it again.

2. Add all the ingredients into a food processor and process until smooth, scraping down the sides of the bowl occasionally.

If you want a firmer texture, you can spoon the mixture into a bowl and put it into a freezer for another 15-20 minutes.

For garnish, I just used a paring knife to shave pieces off a slightly thawed frozen strawberry. It gives it a nice color and a bit of little flair, and the strawberry flavor goes well with the banana and chocolate flavors of the ice cream.

P1080371

Happy Eating!


Vanilla Extract

Kitchen Tip – Easy Way To Get The Cap Off A Vanilla Extract Bottle

vanilla


If you’ve ever known the struggle of baking cookies and not being able to get the little cap off of the vanilla extract bottle, this one’s for you.

Here’s the secret –

Wrap a few thin rubber bands around the cap of the vanilla extract. The rubber bands make the smooth metal of the cap easier to grip. The bottle of extract should be a breeze to open after that.

I use the rubber bands that come wrapped around vegetables like kale, or green onions, or bunches of cilantro or parsley. It’s a thrifty solution, and makes baking with vanilla extract much much easier.

This idea for this came to me when I was testing the recipe for the maple vanilla sugar cookies. For a moment I was concerned that I was not going to be able to get the cap off of the bottle of extract, and I actually thought for a second “Do I really need vanilla in this recipe?”

The answer was “Yes. You do need vanilla in maple vanilla sugar cookies.” So I had to come up with a solution pretty quickly, and here we are!

I hope that this kitchen tip helps you to never again be held back from your baking dreams by another difficult to open vanilla extract cap!

Happy Baking!


spring rolls and peanut sauce

Vegan Thai Peanut Sauce and Veggie Packed Spring Rolls – Vegan, Gluten Free, Dairy Free, Refined Sugar Free, Peanut Satay Sauce

P1080067-2

When I was in high school, our “wild night out” on the weekends (more often during the summer) was going bowling, and then going to eat shrimp spring rolls at the Thai restaurant that my friend’s family owned.

The spring rolls were actually a Vietnamese dish, but I didn’t know that at the time. All I knew was that these spring rolls were amazing! They were one of the best things that I’d ever eaten, and we always ate them with the Thai peanut satay sauce.

When I moved away, the shrimp spring rolls and peanut sauce was the dish that I most associated with that time in my life.

I absolutely loved eating those spring rolls, and I could never find a restaurant that made them the same way. I wanted to make them myself, but the most difficult part of recreating that dish was trying to get the peanut sauce right.

I never did get the recipe for that peanut sauce. I managed to recreate the sauce a few years later through trial and error, but it did have a lot white sugar in it, so I wanted to create a version that was refined sugar free.

And this version is vegan to boot.

P1080074-2

It tastes very similar to that peanut sauce that I first had all those years ago, sweet and mildly spicy, rich with the flavors of ginger and chili, with just a hint of salt to round out the flavor. The extra salt replaces the savoriness of the fish sauce, and the sauce is so good that you won’t miss the fish sauce.

This peanut sauce is also easier to make than the traditional version (this one you don’t have to cook, just stir it all together), but still tastes incredibly similar.

You can make this peanut sauce in advance, and it will thicken and become creamier in the fridge as it chills.

I usually make extra sauce, as you can dip vegetables in it, or spread it over noodles, and I usually eat more than one serving of spring rolls at a time, so having extra sauce on hand is great.

Vegan Thai Peanut Sauce

Makes ¼ cup of peanut sauce (1 serving)

Ingredients

3 tbsp. + 1 tsp unsweetened natural peanut butter

1 level tsp of red curry paste (most supermarkets carry it these days, I used the Thai Kitchen Brand)

3 tbsp maple syrup

4 tbsp hot water

¼ tsp – ½ tsp sea salt (to taste)


¼ tsp. crushed dried mint* (optional)

1/8 tsp ground coriander seed* (optional)


*If you don’t have a few leaves of fresh mint and cilantro to put into your spring rolls, you can add these spices to the peanut sauce to give it a similar herby brightness.


Instructions

Ideally, your peanut butter would be room temperature, but if it’s cold from the fridge, that’s ok too. It will just take a little more mixing to get everything to combine.

Stir together the peanut butter, curry paste, maple syrup and optional spices until smooth. Add in the 4 tbsp of hot water, and still until well combined. Add salt to taste (I added ½ level tsp of sea salt).


P1080069-2

Veggie Packed Spring Rolls

For the spring rolls, I wanted to make a more colorful version, because it’s January, and spring rolls are a good way to eat lots of vegetables without having to think too hard about it. You can fill them with whatever you like really, that peanut sauce tastes amazing on pretty much everything.

I’d count on making about 4-5 spring rolls per person if you’re want to make them a main course, and 2-3 spring rolls per person if you want to make them as an appetizer.

You can cut them in half on an angle if you want to show off the colorful vegetables inside, or just leave them whole (which does make them a little easier to dip into the sauce, or you can spoon the sauce over the spring rolls instead).

I used Three Ladies Brand of rice paper wrapper in the 25 cm size (which is non-GMO and gluten free), but feel free to use your favorite brand of rice paper wrapper.

I would make the spring rolls right before you plan to eat them. They texture of rice paper wrapper changes after it’s been refrigerated, so it’s better to make them fresh. You can also pre-cut your vegetables in advance and assemble them right before serving to save time.


P1080070-2


Ingredients

(For each spring roll)

1 rice paper wrapper

¼ cup lightly packed baby spinach leaves

4-5 slices bell peppers

1-2 pieces of roasted sweet potato (cut into ½ inch thick strips)


2-3 mint leaves (if you have them)

3-4 cilantro leaves (if you have them)


To make the spring rolls, dip one rice paper wrapper into warm water for about 20-30 seconds. It should just begin to feel like silk between your fingertips. Spread the rice paper onto a plate, place the mint and cilantro leaves on first, followed by the baby spinach, then the bell peppers, and roasted sweet potato.

Wrap each roll like a burrito, so the sides get folded in first, then the fold the edge closest to you over the vegetables, and roll until the spring roll is closed, and then set the spring roll aside onto another plate, and start the next one.

Here’s a good visual lesson on how to do it.

https://www.youtube.com/watch?v=IfI1wMeDXhg


Before I moved away, I did have the foresight to buy some spring rolls from my friend’s restaurant, and take one home. Here’s what was in it:
1 1/2 teaspoons of bean sprouts

1 Sprig of Cilantro

2 one inch long pieces of mint leaves

3 pieces of Halved Shrimp (shrimp cut in half length ways)

3 teaspoons of rice noodles (possibly cooked in chicken broth, as they were light brown in color, I seem to remember my friend mentioning that they may have mixed the noodles with a bit of oyster sauce).

6 teaspoons of shredded romaine lettuce

1/2 teaspoons shredded carrots


My friend’s family has since sold the restaurant, and I make simpler version of these spring rolls now at home (which I will post on the blog another day), but I thought that I’d include the recipe just in case you were curious.

Happy Eating!

Instant Homemade Vegetable Stock

Instant Homemade Vegetable Stock Mix – Vegan, Soy-free, Gluten-Free

P1080022-2

Vegetable stock is easy to make, but can be a little bit of hassle, and takes up a lot of space in the freezer. Store bought veggie stock can be expensive, and it can have a lot of added ingredients that leave you wondering “What is organic caramel coloring?” and “Why does it need to be in vegetable stock?” I find myself asking the same questions when I read the back of soup bouillon labels as well.

If you too have these questions (and are wondering if there is an easier way to make vegetable stock with less additives) this might be the answer that you’ve been looking for.

This is a super simple and easy recipe to always have vegetable stock on hand. This recipe is soy free, thrifty and easy to customize.

We’re going to basically make a spice mix that contains a lot of flavors that you would normally find in vegetable stock. You can almost think of it as a tea. Admittedly, it takes 10 minutes to steep (so not quite “instant”) but it’s still pretty quick.

You can also make a large batch of this veggie stock mix and put it into a little jar to use as needed.

If you don’t like the little bits of dried spices in your soup, you can strain the broth through a coffee filter, or place the spices in some layers of cheese cloth, tie it up with some kitchen twine and place it into your soup pot (basically like a tea bag) to fish out later once the flavors of the broth have infused.

I hope that this recipe helps you make lots of wonderful soups in the future. I plan on making a noodle soup with this pretty soon. Perfect for the cold weather.


Makes a scant 2 tbsp of veggie stock mix = 4 cups of vegetable stock

Ingredients

1 tsp granulated onion

3/4 tsp + 1/8 tsp celery salt

1/4 tsp + 1/8 tsp of granulated garlic

1/4 tsp dried rubbed sage

1/4 tsp dried parsley

1/4 – 1/2 tsp sea salt

1/8 tsp black pepper


Instructions

Stir all the spices together. Add the mixture to 4 cups of boiling water and allow to steep for 5-10 minutes. You can strain the mixture at this point or leave the spices in the stock depending on your preference.

Use in your favorite soup recipes, or add some noodles, and some veggies for a quick and filling lunch or dinner.

Enjoy!