The Etsy Shop is here!

one small blog

I’m so excited to share that the Hope and Butterflies Etsy Shop is now open!

Starting new adventures and not knowing where they will take you

When I started this blog, I had no idea where it was going to go. I knew that I loved to cook, and that I wanted to share my recipes because they were the kind of recipes that I wanted to have when I first went on a dairy / gluten / refined sugar free diet.

I had so many food sensitivities, and I missed eating the things that I loved.  It was really hard to be in more pain, or just feel ill because I ate something as normal as a blueberry muffin. My list of food sensitivities was so extensive that I couldn’t even eat most of the recipes on other gluten free websites.

So I started writing recipes, and eating gluten free versions of the foods that I loved again.

What I didn’t expect when I began this journey was that as my list of recipes grew, and as I cooked and ate my way through this rough patch, I felt more and more like myself again.

Not having recipes that worked for me meant that (for a while) the foods that I ate were boring and bland, and eating those foods brought me no joy.

I hadn’t realized how much brightness food had brought to my life before, and learning to eat the new versions of my favorite foods gave me that brightness back, and nourished not only my body, but also my spirit.

Baking and cooking have always felt very meditative to me. When I’m in the kitchen I can get lost in a recipe, and no matter what I’m going through, I always feel better (and like I’ve accomplished something) when I’ve created and eaten something delicious (especially if it’s a muffin or a brownie).

That’s what I wanted to share when I started this blog, to help other people with food sensitivities find a way to nourish their souls with the joy of creating something that they really enjoy eating.

What has also been exciting is to see how many people have visited the blog. Hope and Butterflies has had visitors from places like the UK, Australia, India, France, Ireland, Kenya, The Netherlands, Germany, and even our friendly neighbor to the north, Canada.

It feels amazing to think that this little cooking blog that I started 6 months ago would reach (and hopefully help) so many people in so many places all around our big world.

I’m also incredibly lucky to have so many good friends and family who have cheered me on during this time. So many people in my life have reached out to tell me that they enjoy reading the blog, or think it’s cool that I’m writing it, which has been amazing.

There have been many times when I think I’m out of ideas and am in doubt if I should keep trying to write recipes, and their encouragement has really cheered me on. I’m so glad that I kept writing, and I’m excited to see how the blog grows and evolves in the future.

The Prints

wonder wander comes + goes

The Hope and Butterflies Etsy Shop sells posters / prints that you can download and print at home.

Each shop listing includes 7 high resolution JPG files (300 dpi, RBG Color Format)

– 4″ x 6″
– 5″ x 7″
– 8″ x 10″
– 11″ x 14″
– 18″ x 24″
– 24″ x 36″
– Wallet Size (the size of a credit card)

Most importantly though, $1 from each sale will be donated to support girls education.

When I was designing, I wanted to create prints that would be encouraging, and most of all, kind. Many of the designs encourage self care, self acceptance, and cheer you on in difficult moments.

Life can be really hard sometimes, and you’re always doing the best that you can.

Sometimes it’s nice to have a reminder of that, which is why the prints all include a wallet size printing option as well.

Because sometimes you do need a pocket sized reminder that “You are AMAZING” when things aren’t quite going the way that you want them to. Take it from someone who knows, storms pass, you will grow from them, and things will get better.

And whoever you are, you matter too. Your dreams matter too.

I hope that in some small way, these prints will cheer you on when you start down the path towards your own dreams (even if you have no idea where it will take you).

Starting the blog was scary, but also exciting and so so rewarding. I wish you that same scary excitement (and fun surprises, and joy!) along your journey.

Girls Education

Right now, this little Etsy Shop and the Hope and Butterflies Blog are my dream.

I decided to donate part of the proceeds from each sale to support girls education, because not only is it simply the right thing to do, but also because I want to do what I can to help other young women and girls accomplish their own dreams.

I was lucky enough to be able to go to school and learn about the world around me.

Every young woman should have the right to do the same. This shop is my own little way of trying to help make that happen.

Thanks for reading. I’ll be posting more recipes soon.

And remember :


you are doing great blog

And you are wonderful, just as you are.

And Happy Mother’s Day to all the amazing moms out there!

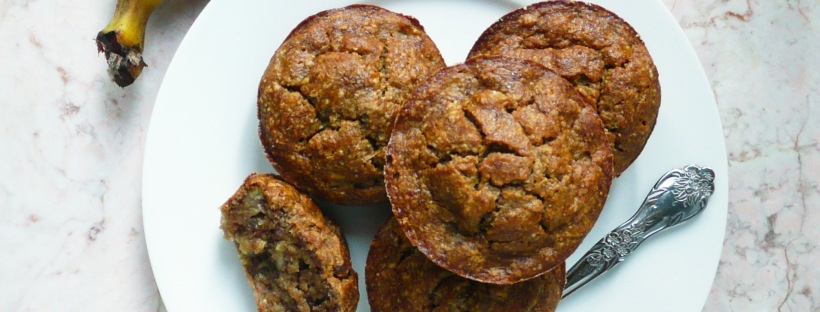
banana bread muffins

Banana Bread Muffins – Gluten Free, Dairy Free, Refined Sugar Free, Comfort Baking

Banana Bread Muffins 1

There is something magical about making muffins. You sift together a few ingredients, stir in a few more, and a little while later 12 mini cakes emerge from the oven ready to fill your heart with joy and comfort.

If there is a practice more conducive to self care than baking, I have yet to discover it.

If I’m ever having a bad day, I bake. It takes focus and when you’re measuring and stirring everything together, the things that troubled you before seem far away.

The scent of delicious muffins wafts through the air and makes any house and home seem more warm and friendly. It’s a scent that makes the world a little softer and everything feel a little more possible.

And once you bite into a freshly baked muffin the spell is complete, and life feels ok again.

banana bread muffins 2

I love blueberry muffins, but there’s something about banana bread muffins that seem extra nourishing to your soul.

When I first cut gluten out of my diet, I really missed banana bread. I missed it’s buttery sweetness, and cozy banana richness.

It took me a couple of tries to get this recipe right, but these muffins taste just like the banana bread that I used to love eating. They also have a touch of cinnamon and vanilla to give them an extra bit of warmth to their flavor.

I like to use the ripest bananas that I can find (overripe bananas work the best as they are sweeter) and baking these muffins is a great way to cut down on food waste and have breakfast ready to go for the next few days (even if you eat 3 – 4 muffins still warm from the oven like I normally do).

I like to make these muffins a day ahead and leave them out on a plate on the counter covered by a paper towel. They dry out a little overnight, and the texture gets even better the next day.


Banana Bread Muffins

Makes 12 muffins


Ingredients

1 3/4 cups mashed ripe bananas (about 4 – 4 1/2 bananas)


2 tbsp apple cider vinegar

1/3 cup melted coconut oil

2 eggs

1/4 cup maple syrup

1 1/2 tsp vanilla extract


2 cups oat flour

level 3/4 tsp baking soda

1 tsp ground cinnamon


Notes –

* I grind oats into oat flour using a blender. Don’t grind the oats in a food processor because the flour won’t be fine enough.

Any extra oat flour I don’t use in the recipe goes into an airtight container and I use it for another recipe.

If you’re making this recipe for someone who has celiac disease, please use certified gluten free oats, as the oats from the bulk bins can sometimes be processed on the same equipment as wheat.


Instructions

1. Preheat the oven to 350F.

Grease and flour muffin pan with melted coconut oil and oat flour.

2. In a large bowl, sift together the oat flour, baking soda, and ground cinnamon and set aside.

3. In a separate bowl stir together the mashed bananas, apple cider vinegar, melted coconut oil, eggs, maple syrup, and vanilla extract until well combined.

Pour the wet mixture into the dry and stir until well combined. Divide the batter evenly between the 12 muffin cups and bake at 350 F for 33 minutes (until golden). Turn the oven down to 300 F and bake for another 10 minutes until the cake tester comes out clean.

Let the muffins cool in the pan. To pop them out of the muffin tin, run a small knife around the edge of each muffin (a small butter knife works great for this) and they should come right out.

banana bread muffins 3

I wish you many happy breakfasts (and memories) with these wonderful muffins.


Vanilla Extract

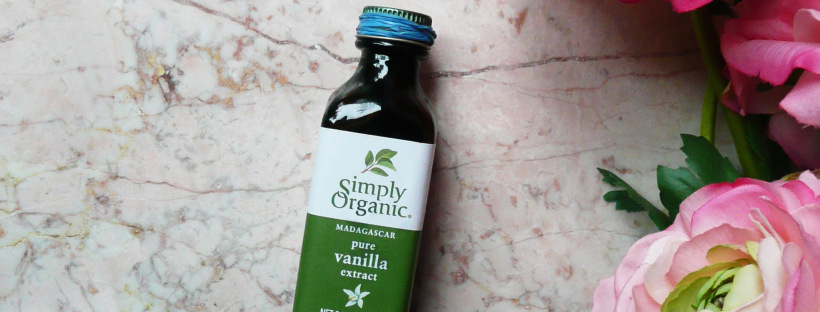
Kitchen Tip – Easy Way To Get The Cap Off A Vanilla Extract Bottle

vanilla


If you’ve ever known the struggle of baking cookies and not being able to get the little cap off of the vanilla extract bottle, this one’s for you.

Here’s the secret –

Wrap a few thin rubber bands around the cap of the vanilla extract. The rubber bands make the smooth metal of the cap easier to grip. The bottle of extract should be a breeze to open after that.

I use the rubber bands that come wrapped around vegetables like kale, or green onions, or bunches of cilantro or parsley. It’s a thrifty solution, and makes baking with vanilla extract much much easier.

This idea for this came to me when I was testing the recipe for the maple vanilla sugar cookies. For a moment I was concerned that I was not going to be able to get the cap off of the bottle of extract, and I actually thought for a second “Do I really need vanilla in this recipe?”

The answer was “Yes. You do need vanilla in maple vanilla sugar cookies.” So I had to come up with a solution pretty quickly, and here we are!

I hope that this kitchen tip helps you to never again be held back from your baking dreams by another difficult to open vanilla extract cap!

Happy Baking!


Maple Vanilla Icing

Maple Vanilla Icing – Refined Sugar Free, Dairy Free, Vegan

P1080184

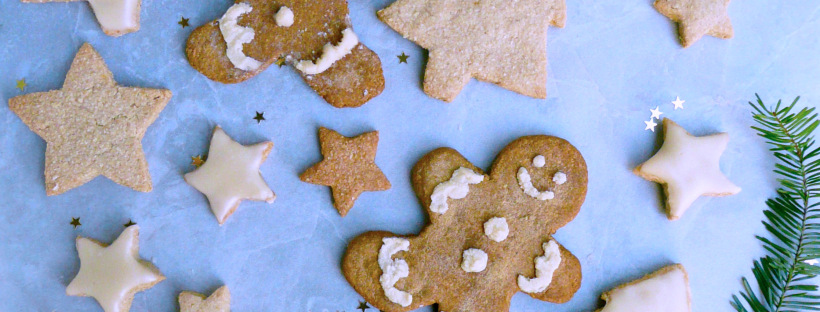
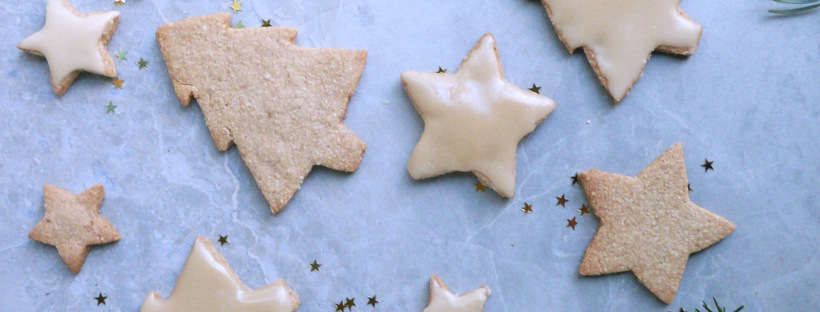
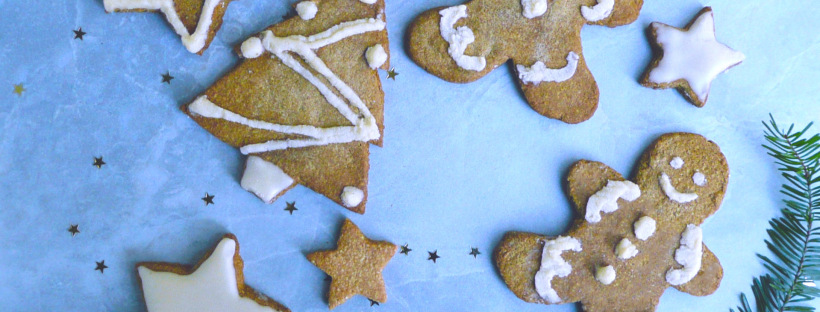
No gingerbread cookies or sugar cookies would be complete without icing! This is a super easy and allergy friendly icing for gingerbread cookies, and sugar cookies. Perfect for decorating cookies around the holidays!

Maple Vanilla Icing

Makes about 1/4 cup

Ingredients

3 tbsp + 2 tsp maple syrup

3 tbsp sweet rice flour (I used the Koda Farms Mochiko Sweet Rice Flour)

3 tbsp + ½ tsp melted refined coconut oil (I used one from Trader Joes)

¼ tsp + 1/8 tsp vanilla extract

tiny tiny pinch of salt

Instructions

1. Stir together the maple syrup, sweet rice flour, and vanilla extract until smooth.

2. Add in the melted refined coconut oil and stir until well combined.

3. Allow the icing to sit for a minute or two until the coconut oil cools a little and it’s easier to spread or pipe onto cookies.

To get a glossy finish on the cookies, ice the cookies while the icing is still warm, and use the back of a teaspoon smooth the icing to the edges of the cookie. If the icing firms up too much to frost with, just put the icing over a double boiler to gently melt the coconut oil and it will smooth right out again.

You can also use this icing to pipe with. I just scooped the icing in to a ziploc bag, cut off a tiny bit of the corner of the bag and used it to pipe the frosting onto the cookies.

If you want to pipe with the frosting, add in about 1/4 – 1/2 tsp more of the sweet rice flour to the frosting (to get a firmer frosting) and pipe the icing while the icing is still a warm.

If the icing gets firm to pipe with, scoop it out of the bag, heat it in a double boiler again, allow to cool for a minute and then scoop the icing back in to the bag, and pipe the icing as usual.

If it does look a little rough in places, you can dip your finger in some warm water and smooth down the rough edges, or use a wet toothpick for ever more precision in cleaning up the edges of your icing.


Maple Vanilla Sugar Cookies

Maple Vanilla Sugar Cookies – Gluten Free, Refined Sugar Free, Dairy Free, Egg Free, Vegan

P1080165

These are great cookies, and super simple to make. They are sort of a cross between a traditional sugar cookie, and a fortune cookie. They have a wonderful crunchiness and the maple gives them a lovely sweetness.

Another good thing about these cookies is that they don’t contain any baking soda or baking powder, so the shape of the cookies don’t spread out or distort at all during baking.

The shape that you put the cookies into the oven is the same shape that they come out of the oven, perfect for holiday cookies.

You make them exactly the same way as the gingerbread cookies (hence the same instructions are repeated here) and the maple vanilla flavor really shines through in these cookies.

They aren’t too sweet, and I love them most when they are completely frosted with the maple vanilla icing. If you also love sweeter cookies, you can double the icing recipe. They frosting really gives the cookies a very polished look and makes them taste even more amazing.


Maple Vanilla Sugar Cookies

Makes 10 – 12 cookies


Ingredients


2 tbsp water

½ level tsp psyllium husk powder *


tiny pinch of sea salt

1 ¼ cup + 2 tbsp oat flour **


¼ cup + 1 tsp maple syrup

½ tsp + 1/8 tsp vanilla extract


2 tbsp + 2 tsp melted refined coconut oil ***


Notes – *Psyllium husk powder gels like nothing else, and there’s no great substitute for it. I found mine in the bulk spice section of the local Fred Meyer, but Whole Foods, Trader Joes have been known to carry it as well. If it’s not in the natural foods, or bulk spice section, check the dietary supplement/ digestive health (where the Metamucil is) section of the store or pharmacy as it’s sometimes sold there as well.

** I grind oats into oat flour using a blender. Don’t grind the oats in a food processor because the flour won’t be fine enough.

Any extra oat flour I don’t use in the recipe goes into an airtight container and I use it for another recipe.

If you’re making the cookies for someone who has celiac disease, use certified gluten free oats, as the oats from the bulk bins can sometimes be processed on the same equipment as wheat.

*** I used the refined coconut oil from Trader Joes, which is filtered and not bleached. It’s the fat of coconut oil, without the flavor which works great for these cookies. You can use regular coconut oil for this recipe, but it probably will give the cookies a mild coconut flavor. Because I used the refined coconut oil, these cookies didn’t taste of coconut at all.


Instructions

1. In a small bowl stir together the water and psyllium husk, try to stir out all the lumps. Set aside for a few minutes and let it gel.

2. In a medium size bowl, sift the oat flour, and salt together.

3. Add the maple syrup, and vanilla to the oat flour mixture, and stir until well combined. Add in the gelled psylium husk and stir until you no longer see any bits of the gel.

4. Add the melted refined coconut oil to the mixture and stir until well combined. It will look very sticky, but don’t worry. There’s no need to add any additional flour, the coconut oil will firm up in the fridge and the dough will sort itself out.

5. Let the dough sit in the bowl for 2-3 minutes and it should be firm enough to scoop onto some plastic wrap. Wrap it up and refrigerate for at least 3 hours.

sugar cookie


6. Preheat your oven to 325 F. Cut the top and sides off of a gallon size Ziploc bag and open it and lay it flat to form a long rectangle.

Dip a paper towel in a little bit of neutral flavored oil (like avocado oil or vegetable oil) and oil the inside of the plastic. Don’t use the coconut oil for this, it solidifies too quickly and the dough ends up sticking to it.

7. Take the dough out of the fridge and cut it in half. Wrap the half you’re not working with in plastic wrap and set to the side.

If the dough breaks when you try to roll it out, you can knead it with your hands for a little bit so that the coconut oil in the dough melts a little from the heat in your hands. It should soften up and become easier to work with after this.

If the dough is too sticky to work with, you can add about 1 tbsp of oat flour, and knead it into the dough to combine, or put it back into the fridge to firm up for a few minutes.

P1080174


Roll out your dough between the layers of oiled plastic to 1/4 of an inch thick, re-oiling the plastic each time your re-roll out the dough.

Cut out the shapes with the cookie cutters. Use something like the flat edge of the back of a butter knife (an offset spatula would be perfect for this) and run it under the cookies to get them to release from the plastic.

If there are any little bits of the dough stuck to the plastic after you peel your cookies off, make a little ball out of your scrap dough, and drag it over the plastic and it should clean it right off.

If your finding it difficult to remove the cookies from the plastic (especially for more complex shapes like snowflakes), cut the cookie shapes out using the cookie cutters, and remove the excess cookie dough from around your cookies. Then lay the cookies that are stuck on the plastic onto a plate and stick them in the freezer for 10-15 minutes. After that, the cookies should be firm enough to peel off the plastic and set them onto the baking sheet.

I usually use my finger to press the sides of the cookies smooth, just to clean up the edges.

Place the cookies onto a silpat or parchment lined baking sheet and bake at 325 for 34- 38 minutes (I baked them for 36 minutes) until just lightly golden brown about the edges and firm to the touch.

Allow the cookies to cool before icing.

P1080152 copy

Enjoy!

Happy Holidays!

Gingerbread Cookies

Gingerbread Cookies – Gluten Free, Dairy Free, Refined Sugar Free, Nut Free, Vegan

P1080121

It just doesn’t really feel like Christmas without gingerbread cookies.

These cookies are free from nuts, gluten, refined sugar, dairy, egg free and completely vegan.

They are also delicious.

They are actually the best gingerbread cookies I’ve ever had. Who knew you could make amazing gingerbread cookies that work with so many dietary restrictions?

These cookies are crunchy, and not too sweet. They have a lovely warm flavor to them, and are perfectly spiced (without being too spicy) so they are perfect for kids as well.

The black pepper is optional, but I do think that it gives the cookies a wonderful complex rich flavor.

Another good thing about these cookies is that they don’t contain any baking soda or baking powder, so the shape of the cookies don’t spread out or distort at all during baking.

The shape that you put the cookies into the oven is the same shape that they come out of the oven, perfect for holiday cookies.

If you like your cookies on the sweeter side, double the recipe for the Maple Vanilla Icing and give those cookies a good coating of icing. So good…

P1080137


Gingerbread Cookies

Makes 10 – 12 cookies


Ingredients


2 tbsp water

½ level tsp psyllium husk powder *


1 tsp vanilla

3 tbsp + 1 tsp maple syrup

1 tbsp + ½ tsp organic unsulfered blackstrap molasses


1/8 level tsp ground black pepper (optional)

¾ level tsp ground ginger

1 ¼ level tsp + 1/8 level tsp ground cinnamon

1 ¼ cup oat flour + 3 tbsp oat flour **

tiny pinch of sea salt


3 tbsp + 1 tsp melted refined coconut oil ***


Notes – *Psyllium husk powder gels like nothing else, and there’s no great substitute for it. I found mine in the bulk spice section of the local Fred Meyer, but Whole Foods, Trader Joes have been known to carry it as well. If it’s not in the natural foods, or bulk spice section, check the dietary supplement/ digestive health (where the Metamucil is) section of the store or pharmacy as it’s sometimes sold there as well.

** I grind oats into oat flour using a blender. Don’t grind the oats in a food processor because the flour won’t be fine enough.

Any extra oat flour I don’t use in the recipe goes into an airtight container and I use it for another recipe.

If you’re making the cookies for someone who has celiac disease, use certified gluten free oats, as the oats from the bulk bins can sometimes be processed on the same equipment as wheat.

*** I used the refined coconut oil from Trader Joes, which is filtered and not bleached. It’s the fat of coconut oil, without the flavor which works great for these cookies. You can use regular coconut oil for this recipe, but it probably will give the cookies a mild coconut flavor. Because I used the refined coconut oil, these cookies didn’t taste of coconut at all.


Instructions

1. In a small bowl stir together the water and psyllium husk, try to stir out all the lumps. Set aside for a few minutes and let it gel.

2. In a medium size bowl, sift the oat flour, spices and salt together.

3. Add the maple syrup, molasses and vanilla to the oat flour mixture, and stir until well combined. Add in the gelled psylium husk and stir until you no longer see any bits of the gel.

4. Add the melted refined coconut oil to the mixture and stir until well combined. It will look very sticky, but don’t worry. There’s no need to add any additional flour, the coconut oil will firm up in the fridge and the dough will sort itself out.

5. Let the dough sit in the bowl for 2-3 minutes and it should be firm enough to scoop onto some plastic wrap. Wrap it up and refrigerate for at least 3 hours.

P1080096

6. Preheat your oven to 325 F. Cut the top and sides off of a gallon size Ziploc bag and open it and lay it flat to form a long rectangle.

Dip a paper towel in a little bit of neutral flavored oil (like avocado oil or vegetable oil) and oil the inside of the plastic. Don’t use the coconut oil for this, it solidifies too quickly and the dough ends up sticking to it.

7. Take the dough out of the fridge and cut it in half. Wrap the half you’re not working with in plastic wrap and set to the side.

If the dough breaks when you try to roll it out, you can knead it with your hands for a little bit so that the coconut oil in the dough melts a little from the heat in your hands. It should soften up and become easier to work with after this.

If the dough is too sticky to work with, you can add about 1 tbsp of oat flour, and knead it into the dough to combine, or put it back into the fridge to firm up for a few minutes.

P1080124

Roll out your dough between the layers of oiled plastic to 1/4 of an inch thick, re-oiling the plastic each time your re-roll out the dough.

Cut out the shapes with the cookie cutters. Use something like the flat edge of the back of a butter knife (an offset spatula would be perfect for this) and run it under the cookies to get them to release from the plastic.

If there are any little bits of the dough stuck to the plastic after you peel your cookies off, make a little ball out of your scrap dough, and drag it over the plastic and it should clean it right off.

If your finding it difficult to remove the cookies from the plastic (especially for more complex shapes like snowflakes), cut the cookie shapes out using the cookie cutters, and remove the excess cookie dough from around your cookies. Then lay the cookies that are stuck on the plastic onto a plate and stick them in the freezer for 10-15 minutes. After that, the cookies should be firm enough to peel off the plastic and set them onto the baking sheet.

I usually use my finger to press the sides of the cookies smooth, just to clean up the edges.

Place the cookies onto a silpat or parchment lined baking sheet and bake at 325 for 34- 38 minutes (I baked them for 36 minutes) until just slightly darkened about the edges and firm to the touch.

For small cookies (about 1-1.5 inches in size) bake for 22-24 minutes, until slightly darker around the edges.

Allow the cookies to cool before icing.

P1080131

Enjoy!

Happy Holidays!


Mini Chocolate Peppermint Pies – Vegan, Gluten Free, Dairy Free Tarts

P1070527

Before I cut out gluten, dairy, and refined sugar out of my diet, one of the things that I looked forward to every Christmas was the arrival of the Ghirardelli Chocolate Peppermint Bark Squares at the local grocery stores.

How I loved those little squares… so creamy, and rich, and wonderful. I loved opening each of those little brightly colored red and white wrappers.

I loved the little crunchy bits of that swirled in amongst the smooth bright flavor of the peppermint white chocolate. They were so festive, and eating each one felt like such a treat.


P1070601

This year, I decided that I would come up with a recipe to get that same sort of feeling of eating a chocolate peppermint treat at Christmastime, (but one that I could eat with my dietary restrictions) so that I wouldn’t feel like I was missing out on anything.

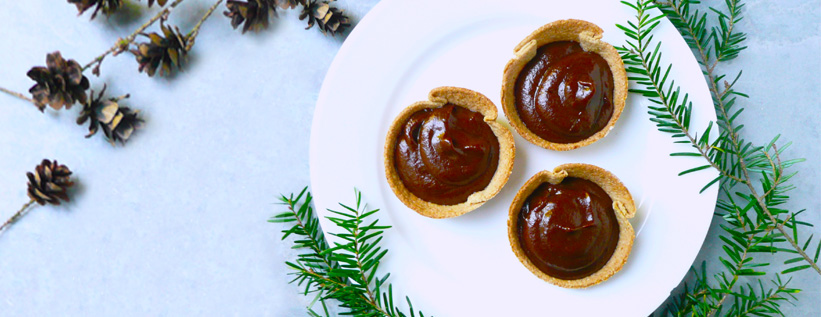
These little tarts are vegan, and nut (without the cashew cream) / soy / and gluten free, so they will work with a variety of food sensitivities and food allergies, and would be a good dessert to bring for any holiday party.

You can make this mixture ahead of time and spoon it into the tart shells right before serving. You can eat them as is, or top them with some cashew whipped cream, or a little star made from the scraps of your pie crust for a more festive look.

Any way that you eat them, I hope that you really enjoy them this holiday season!


P1070523


Makes 6 tarts

(Ingredient amounts for 12 tarts listed at the end of the post)


Ingredients

1/2 cup roasted sweet potato puree

5 tbsp maple syrup

4 tbsp unsweetened cocoa powder (I used the Ghirardelli’s brand one)

1 tsp strong coffee or espresso*

6 tbsp melted coconut oil **

1/8 tsp peppermint extract (I used the McCormick brand one) ***

tiny pinch of sea salt to taste


Instructions

1. Melt the coconut oil, and add it along with all the other ingredients into a food processor and process until smooth.

2. Taste the mixture, and if the peppermint flavor isn’t strong enough, add another drop of peppermint extract at a time to the mixture until you’re happy with the flavor.

Peppermint extract can be very strong, and there’s a very fine line between it being perfectly minty in flavor, and way too strong.

If you accidentally add too much extract, you can add in a little more of the other ingredients to balance the flavor out again. This recipe is pretty forgiving and can take a little tweaking if need be.

If your sweet potato puree was cold from the fridge before you blended the mixture together, the coconut oil may have set before it had a chance to incorporate with the rest of the ingredients. What you can do in this case is gently heat and stir the mixture over a double boiler until it’s glossy and smooth.

For serving, if you want the mixture to be sort of soft and pudding-like, you can gently heat the mixture up again using a double boiler, just until the coconut oil melts and the mixture turns glossy, and then spoon it into the tart shells. Coconut oil melts at 76 °F, so it won’t take long to heat up. For the pictures in this post, I heated the filling using this method before dolloping the filling into the shells, which gives the tarts a beautiful finish.

I prefer the texture when the filling has been refrigerated. It’s like a cross between a fudgy peppermint chocolate frosting and a chocolate mousse. Once you spoon it into the tart shells, you can give the filling a glossy finish (it won’t have the same “dollop” look, but will still look really nice) by dipping a teaspoon into hot water, and smoothing out the tops of the tarts before topping them with cashew whipped cream, a little pie crust star, or leaving them as they are.

3. Spoon the filling into the tart shells and serve immediately.


I used this recipe for the tart shells. For the stars, I used the scrap dough, cut them out using a small star shaped cookie cutter and baked them on a silpat at 375 for 10-15 minutes until golden brown around the edges.


* I add 1 tsp ground Italian Roast Coffee to a mug with 1/4 cup of hot water, allow it to cool, cover with plastic wrap and then refrigerate this overnight. This strong coffee is good to have on hand for this recipe, but also for adding a depth of flavor to other chocolate things like hot chocolate, brownies, and even chocolate frosting.

**I used regular coconut oil, and there is the faintest hint of coconut flavor in these tarts. If you that’s not really your thing, you can used refined coconut oil instead so that you don’t get that hint of coconut flavor in the tarts.

*** I would prefer to use an organic peppermint extract, but this is just the one that I had on hand, and the flavor is good.


P.S. I’ll let you in on a little secret – this recipe makes enough filling for about 7 1/2 tarts, but what that means is that you can fill the 6 tart shells, and save the extra filling as a treat to eat later after all the holiday parties. When you get home, you can look forward to having a quiet moment to yourself to sit in your jammies, and eat this and fall asleep watching Christmas specials on TV. No one will ever know…


For 12 tarts

1 cup roasted sweet potato puree

10 tbsp maple syrup

8 tbsp unsweetened cocoa powder (I used the Ghirardelli’s brand one)

2 tsp strong coffee or espresso

12 tbsp melted coconut oil

1/4 tsp peppermint extract (I used the McCormick brand one)

tiny pinch of sea salt to taste


pumpkin muffins

Pumpkin Bread Muffins – Gluten Free, Dairy Free

pumpkin muffin final

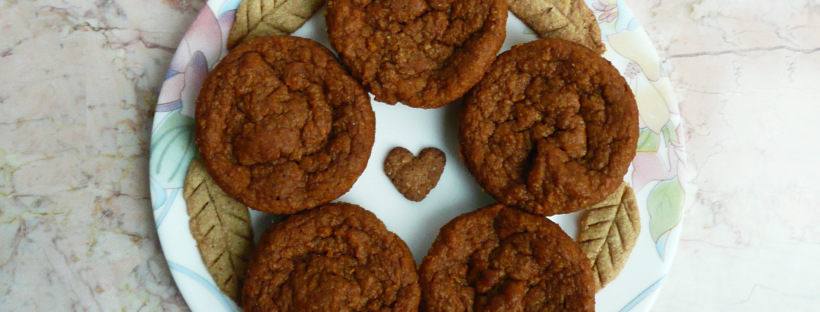
These little muffins are wonderfully spiced and perfect for when you’re craving pumpkin bread. They have a better texture the next day, so I usually bake them the night before, set them out on a plate on the counter and cover them with a paper towel. The next morning they have dried out a little, and the texture and flavor are even better than they are fresh out of the oven.

When you take them out of the oven, they will be nice and puffy, but the will flatten as they cool. Don’t worry about this, as they will still be delicious. They are wonderfully creamy in the middle and taste just like your favorite pumpkin bread.

You can either bake them as 6 full sized muffins, or as 9 snack sized (flatter) muffins. I normally prefer to bake them as 9 instead of 6 muffins, as it’s harder to wolf down 9 muffins in one sitting than 6 muffins, (trust me on this, I know). Either way, they taste amazing! I hope that you like them.

I’ve included the measurements for 12 muffins below, just in case you need them.

Pumpkin Bread Muffins
Makes 6 full sized muffins – or 9 snack sized ones.

Ingredients

¾ level tsp ground cinnamon

¼ level tsp + 1/8 level tsp ground ginger

1/8 level tsp ground cloves

1 cup oat flour (I just grind the oats in a blender until they become a fine flour)

¼ level tsp + 1/8 level tsp baking soda

1 small pinch of salt


¾ cup + 2 tbsp pumpkin puree (or sweet potato puree)

1 tbsp water

1 tbsp apple cider vinegar

4 ½ tbsp. melted coconut oil (or a neutral flavored oil)

¼ cup + 2 tbsp maple syrup

1 egg


Instructions

1. Preheat the oven to 350 degrees

2. Grease and flour the muffin pan using coconut oil (or neutral oil) and oat flour. Here’s my trick to doing this.

3. In a large bowl, sift the cinnamon, ginger, cloves, oat flour, baking soda and salt together. In a separate bowl mix the pumpkin puree, water, apple cider vinegar, oil, eggs and maple syrup.

4. Pour the wet ingredients into the dry, and stir until well combined.

For 6 muffins – divide the batter evenly between 6 muffin cups, and use the back of a spoon to smooth down the batter in each muffin cup so that the tops of the scoops of batter are flat.

Bake for 30 min at 350, then turn the oven down to 300 for another 10 minutes.

Let them cool in the pan. To remove them, run a butter knife around the edge of each muffin and pop them out and set them onto a plate.

For 9 flatter muffins – divide the batter equally between 9 muffin cups. Use the back of a spoon to smooth down the batter in each muffin cup so that the tops of the scoops of batter are flat.

Bake for 30 min at 350. Let them cool in the pan. To remove them, run a butter knife around the edge of each muffin and pop them out and set them onto a plate.


Note
– I made the little decorative leaves from the extra scrap dough from making the tart shells. I used a small paring knife to cut the shape of the leaves and the tines of a fork to make the little indentations. Bake the leaves at 375 for 10-15 minutes until golden brown around the edges.


For 12 muffins

1 ½ level tsp ground cinnamon

¾ level tsp ground ginger

¼ level tsp ground cloves

2 cups oat flour

¾ level tsp baking soda

2 small pinches of salt

1 ¾ cup pumpkin puree (or sweet potato puree)

2 tbsp water

2 tbsp apple cider vinegar

9 tbsp melted coconut oil (or a neutral flavored oil)

¾ cup maple syrup

2 eggs


apple tarts

Apple Tarts – Dairy Free, Gluten Free, Vegan

P1060750-2

Happy Thanksgiving!

This is a bonus recipe, my gift to you for Thanksgiving! I hope that your family will enjoy them as much as my family does.

Apple tarts are full of fall flavors, and conjure up happy memories (or simply lovely daydreams) of wearing plaid (lots of plaid), and being bundled up in warm hats, scarves and mittens, and going to the local orchard for a fun day of apple pickin’ with friends and family.

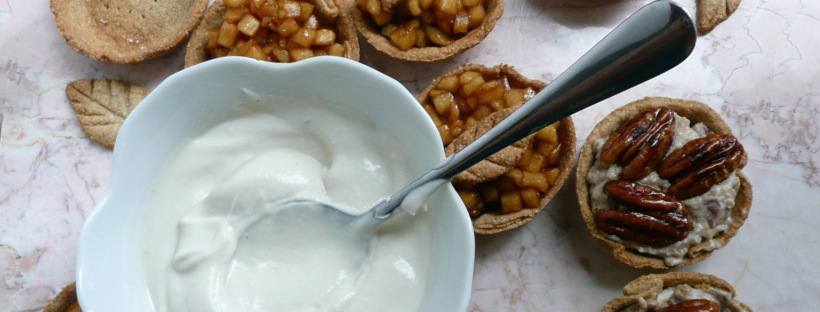
These tarts are simple to make, they just require about 35 minutes of your time, and a bit of stirring. I made up a batch of apple filling last night, and it’s just sitting in the fridge as we speak. I’ll spoon it into the tart crusts and top them with some cashew whipped cream right before serving.

You can easily double the batch to make the filling for 12 tarts, and I’ll leave the measurements for 12 tarts at the bottom of post, just in case you need them. You may have to slightly adjust the cooking times for the bigger batch.

Apple Tarts

Makes 6

Ingredients

2 Fuji Apples – cut into 1/4 inch dice (about 2 1/2 cups)

1/2 cup maple syrup

1 1/2 cups water


1/4 level tsp ground cinnamon

3/4 tsp vanilla extract

2 tsp avocado oil (or any neutral flavored oil)


Instructions

1. In a medium saucepan (if doubling the recipe, us a large pot instead) cook the apples, water and maple syrup over medium high heat for 20 minutes, stirring frequently.

Wear an oven mitt and a shirt with long sleeves to stir the mixture, as the steam from the cooking apples can be hot.

2. Turn the heat to medium, and cook for another 10 minutes stirring constantly.

Don’t touch the mixture with your hands during the final 10 minutes, or until it cools, as we’re basically making a caramel with apples in it. You don’t want to burn yourself from the hot sugar mixture.

The pieces of diced apple will become golden brown, and there shouldn’t be any more pools of liquid in the pan. The mixture will become more difficult to stir, and lots of tiny tiny bubbles will form on the bottom of the pan while you stir.

The mixture is done cooking when you can turn your spoon to the side and most of the apple mixture on the spoon will stick to the spoon instead of falling back into the pot.

3. Take the pan off the heat, and carefully scrape the mixture into a bowl and allow to cool.


P1060779

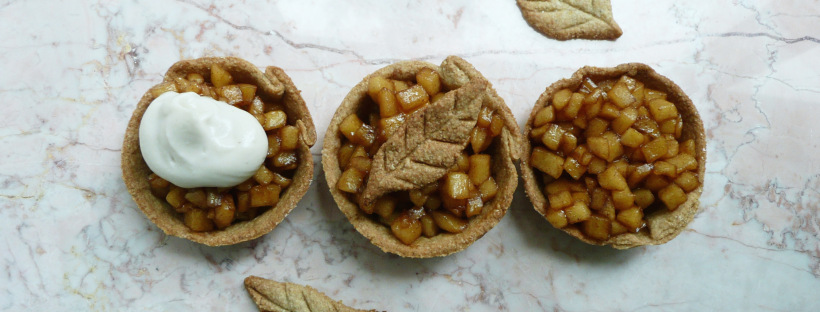
I kinda love how the middle tart almost looks like an apple pie version of a golden snitch. An apple tart with the wings of golden (gluten free) pie crust!

4. Add the cinnamon, vanilla extract, and oil to the cooled apple mixture and stir to combine. Spoon about 2 tbsp of the apple mixture onto each tart shell, and top with a dollop of cashew whipped cream. Serve immediately.


For 12 tarts

4 Fuji Apples – cut into 1/4 inch dice (about 5 cups)

1 cup maple syrup

3 cups water

1/2 level tsp ground cinnamon

1 1/2 tsp vanilla extract

4 tsp avocado oil (or any neutral flavored oil)


Cashew Whipped Cream

Cashew Whipped Cream – Dairy Free, Gluten Free, Vegan

P1060684-2.jpg

This cashew whipped cream is a great alternative to store bought whipped topping, and it’s super easy to make.

On it’s own, this cashew whipped cream isn’t super flavorful, but poured over a fresh summer peach it is absolutely spectacular, and it gives a wonderful creaminess when dolloped over mini pecan tarts, or pumpkin tarts at Thanksgiving.

Once it’s blended, you can add another tsp. of maple syrup, or a little more vanilla to taste, but the pie fillings will already be quite sweet, so try the cashew cream on a tart with some pie filing before adjusting the flavor of the cashew cream.

The oil may seem like a little bit of an odd addition, but it gives the cashew cream a little extra richness, and rounds out the flavor of the cashew whipped cream along with the sweetness of the maple syrup.

If you’re making a lot of tarts, you can easily double this recipe if need be. You can make this in advance and then keep it in an airtight container in the fridge until you’re ready to serve.

P1060787

Cashew Whipped Cream

Makes about ¾ cup.

Ingredients

½ tsp vanilla extract

1 tsp maple syrup

½ cup raw cashews (soaked overnight)

5 ½ tbsp. water

1 -1 ½ tsp avocado oil, or any neutral flavored oil (optional)


Instructions

1. Soak the cashews overnight, and drain. Add the cashews to a blender along with the rest of the ingredients and blend until smooth and creamy.

2. Spoon over fresh fruit or mini tarts. Serve.

Note – If you forget to soak the cashews, you can boil them for 50 minutes (it’s a long time I know, but they plump right up), adding water the pot occasionally if the water runs low. Drain them and allow them to cool to room temp before using