What To Do With Leftover Garlic

honey garlic 4

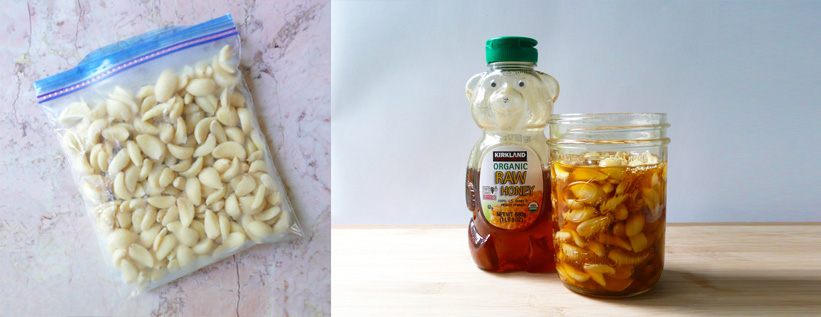
(fresh garlic + raw honey)

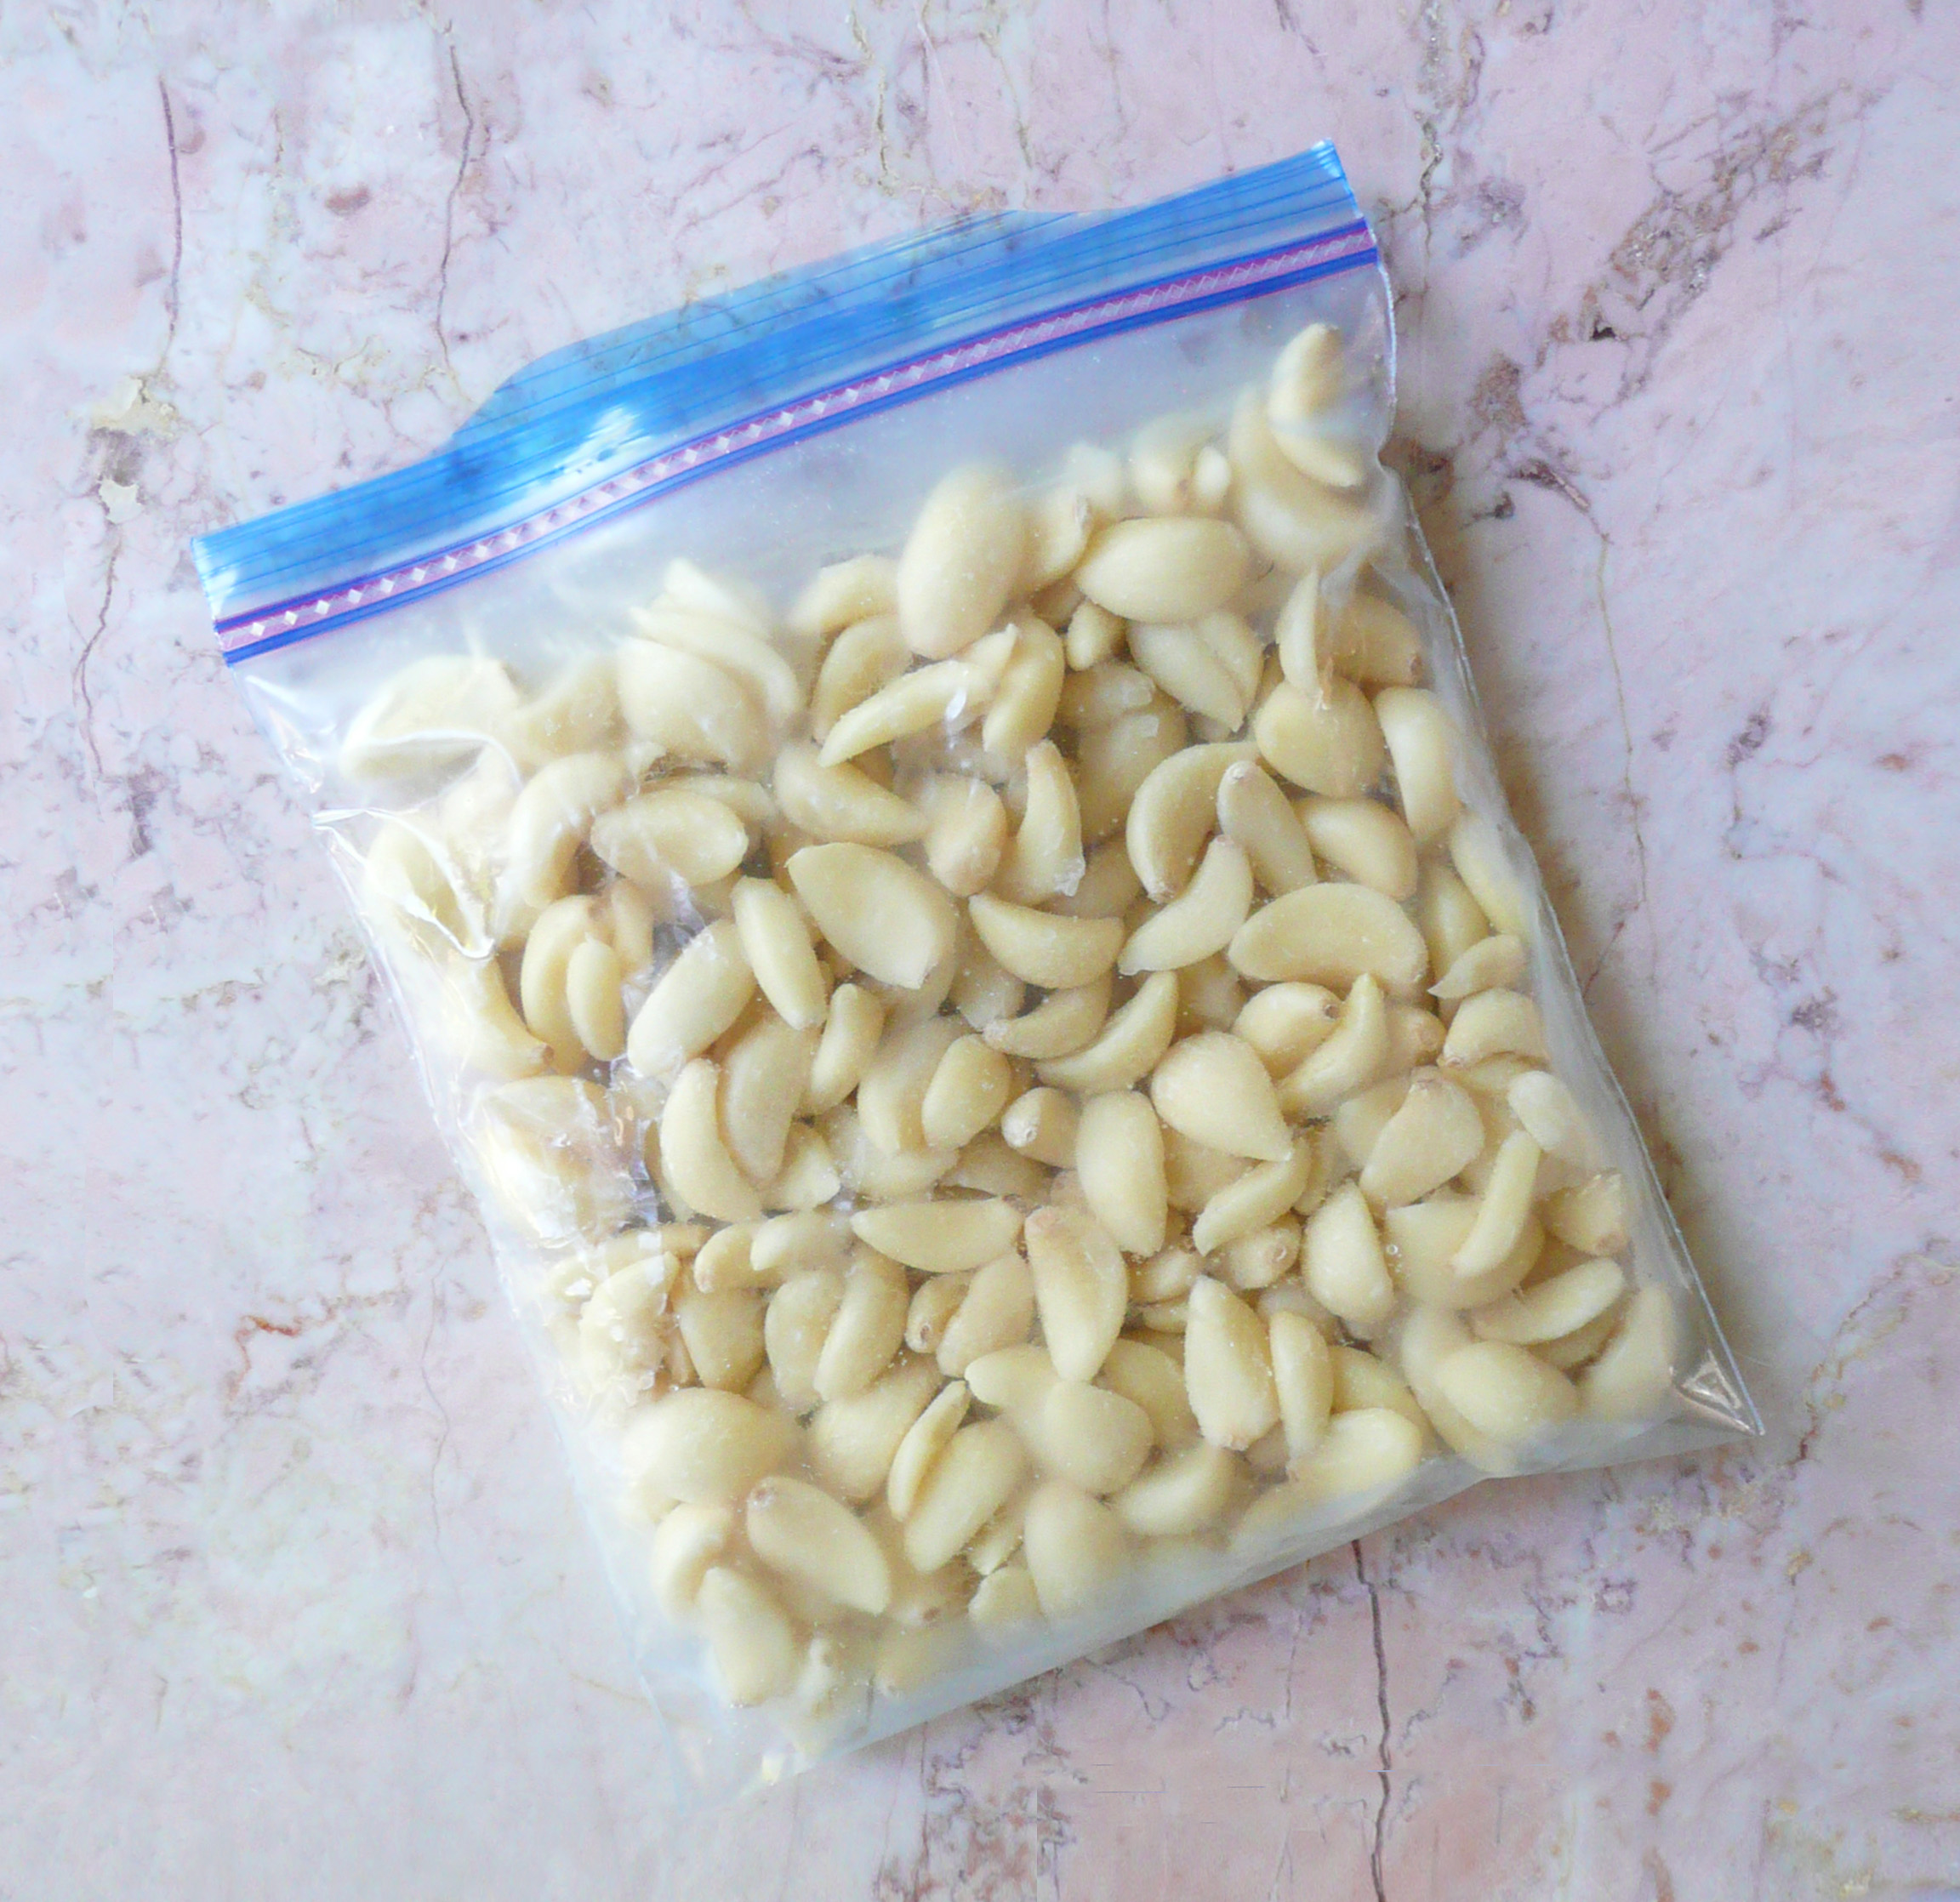
Finding giant bags of organic peeled garlic at the grocery store (or at Costco) usually seems like a huge win. It’s not very expensive (yay!) and will save you tons of time peeling garlic when you’re cooking.

Cut to a week later and you realize that even though you’ve been eating more garlic than normal (because you don’t have to peel it, throwing extra garlic into dishes is super easy) you’ve barely made a dent in your giant bag of garlic.

Peeled garlic also doesn’t have as long of a shelf life as unpeeled garlic either, so now  you’re thinking that it’s unlikely that you’ll be able to eat all of it before it goes bad.

But don’t worry! Here are two ways of storing extra garlic cloves so that you can use them up when you’re ready to.

1. Freeze The Extra Garlic Gloves

frozen garlic

This is super simple to do and you can use up all your garlic cloves in your own time.

Instructions

1. Pour the extra garlic cloves that you want to freeze into a bowl and set aside. Add a folded paper towel or two to the garlic cloves in the original package that they came in that you want to keep fresh in your fridge (the paper towel will absorb any excess moisture and the garlic will keep fresher for longer). Replace the paper towel every couple of days.

2. Give the excess garlic cloves a good rinse. Transfer them into ziploc freezer bags and squeeze out as much air as possible, and freeze them flat.

3. When you’re ready to use them, take out as many cloves as you need and run them under warm water for a few seconds to defrost. Chop and use as usual.

They will have a softer texture than fresh garlic cloves, and the flavor might be slightly milder, but you can always add another clove or two to your dish to balance that out.

2. Make Fermented Garlic Honey

I love watching the It’s Alive series on the Bon Appétit YouTube channel. It is hilarious. The editing and the host are fun and you learn a lot about fermentation. Here’s the episode about fermenting garlic in honey.


I’ve made garlic honey a few times now. I’ve made a few other fermented things before (red cabbage kimchi kraut and lacto-fermented garlic cloves) but the fermented garlic honey is by far the easiest thing to make if you’re looking to start preserving food using fermentation.

Garlic honey is delicious drizzled onto gluten-free bread, or homemade tortilla chips. I like to eat a few cloves of this when I have a cold. I’m not sure if it does anything to fight off a cold, but it’s a nice treat to have nonetheless.

I’m not a expert in this, so please watch the video above for more info, especially about adding the splash of apple cider and keeping the pH below 4.6 to be on the safe side.

Instructions

1. Rinse off your garlic cloves with filtered water (chlorine can prevent or slow fermentation). If you use straight tap water, that’s ok too. Just rinse them off with filtered water. Drain off as much water as possible and place them onto plates lined with paper towels to dry.

The next day replace the paper towels with dry ones, and leave the garlic cloves to dry another day until they are completely dry to the touch.

2. Pick out the cloves the look a little rough and trim off any blemishes or dark spots on the cloves. Put the cloves onto a cutting board and bash them with a knife or cut them in half. Add all the garlic into a clean dry wide mouth mason jar and cover them in raw honey (leaving about 2-3 inches of headroom in the jar).

I didn’t leave enough headroom in my jar, and the honey has leaked a little out of the top of the jar while it’s been fermenting (not a big deal, you can just wash it off).  Give everything a good stir so that the garlic and honey are well combined.

honey garlic 5

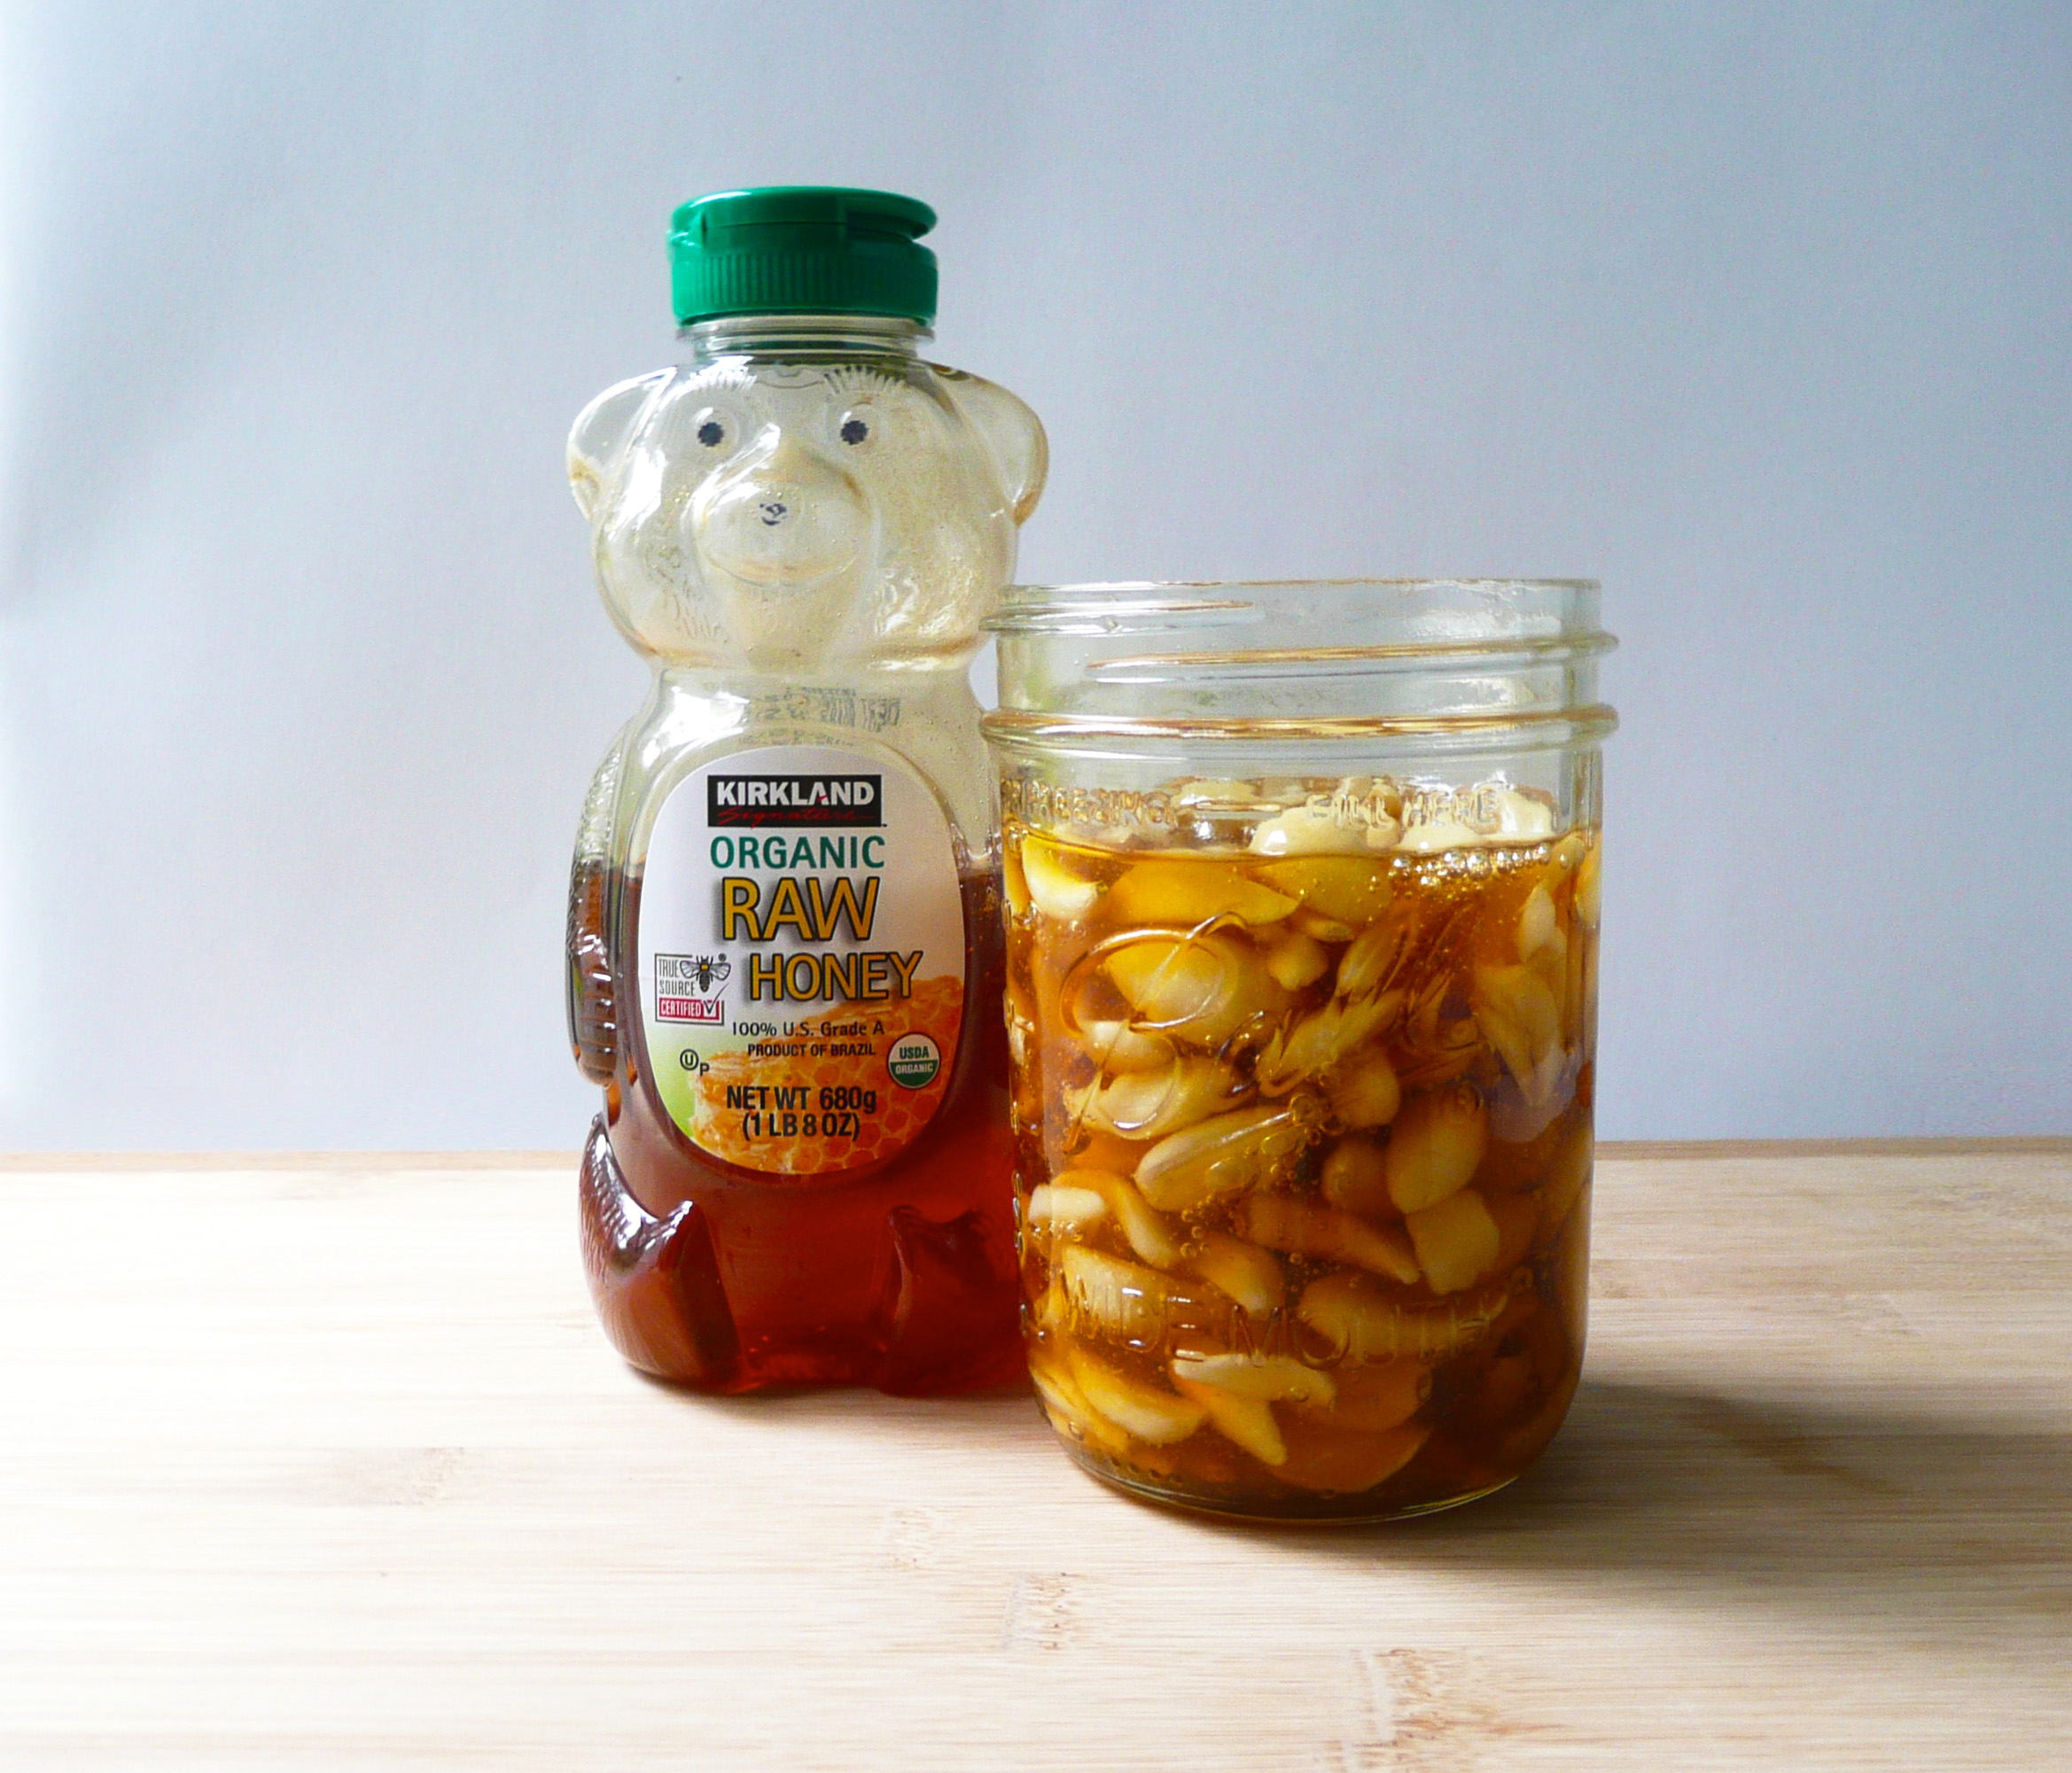
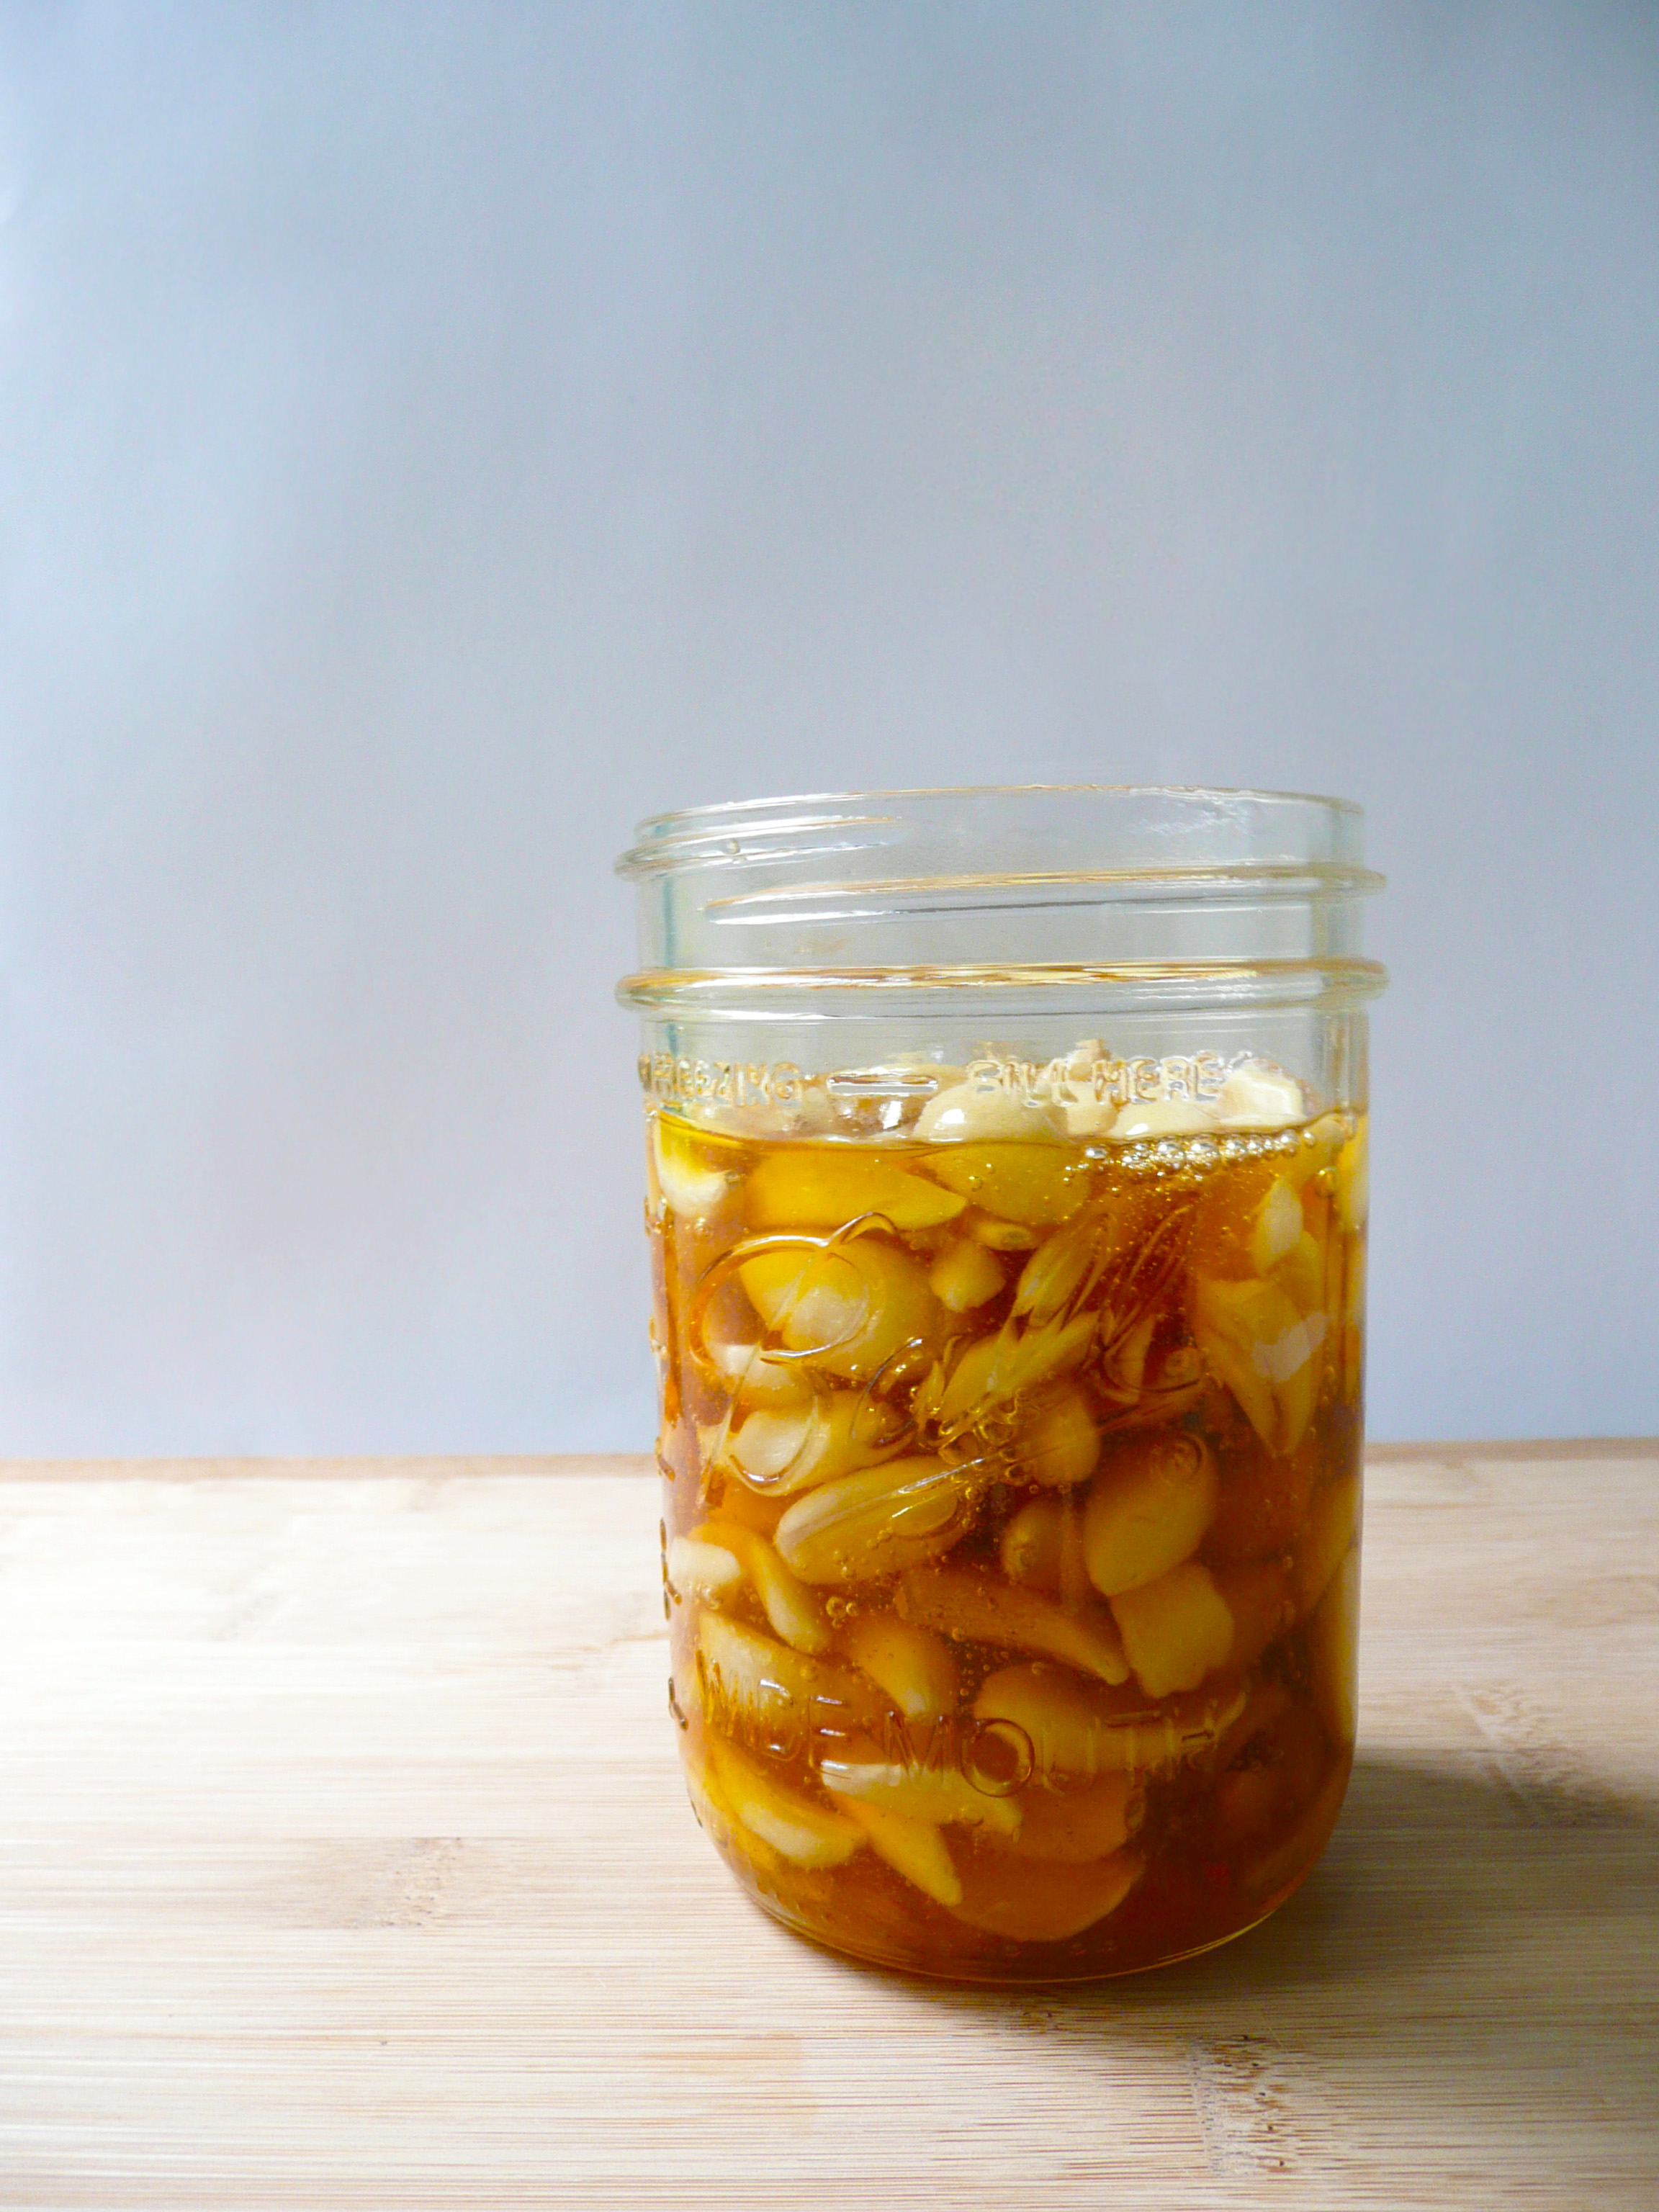
3. Put the lid on the mason jar and don’t screw the jar completely tight, leave it a little loose so that any gases produced during the fermentation can escape. Set the jar aside in an area without any direct sunlight where it wont be disturbed. I set my jar on a small plate so that it will catch any honey that might leak out from the top of the jar during fermentation, which makes it easy to rinse the honey off of the plate and the outside of the jar every few days.

Every day for the first few days, screw the lid on tightly and turn the jar upside down so that the honey can cover all the garlic cloves. Turn the jar right side up, loosen the lid, and place it back in it’s spot again.

After the first week, you can just do this every few days or so. After a month, you can just leave it alone with the lid a little loose and it should look after itself. Check the pH periodically to make sure that it stays below 4.6.

I’ve never had a jar of garlic honey go bad on me yet, but if you have any mold growing in the jar or if anything looks funny, when in doubt, throw it out.

honey garlic 1

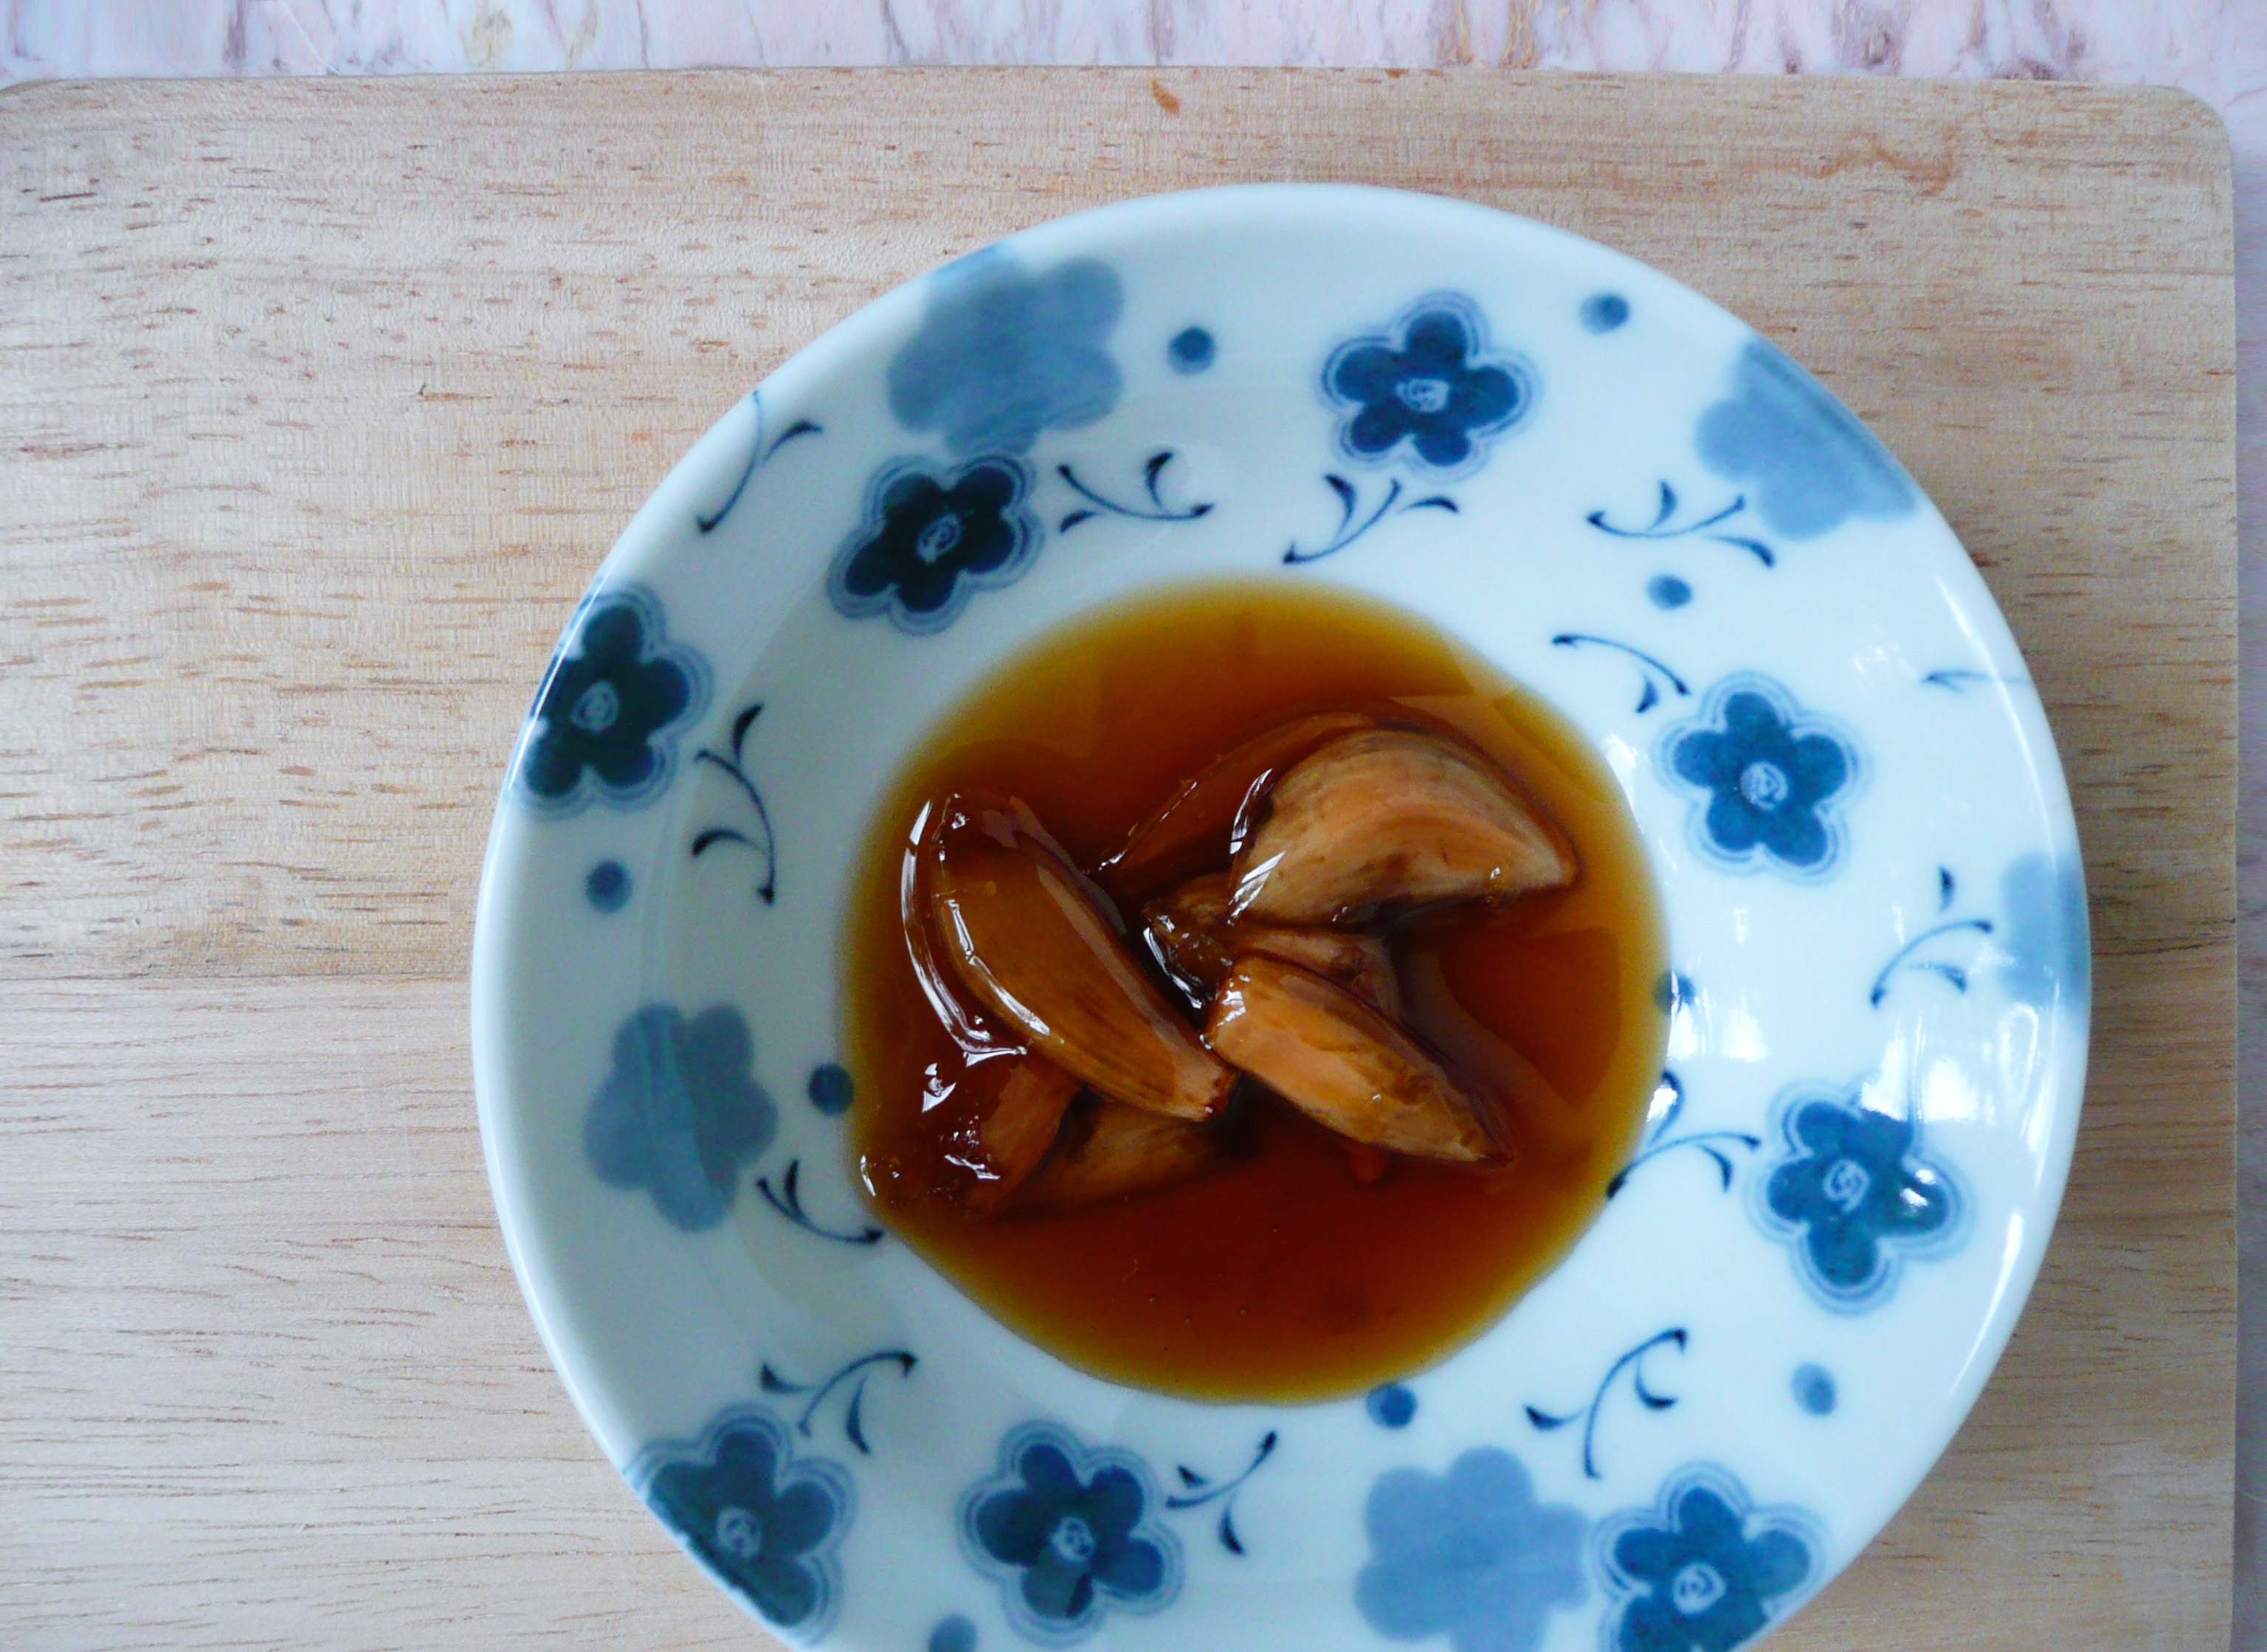
This is what the garlic will look like after 6 months. The flavor of the garlic mellows out over time, and the cloves become sweet and chewy. The longer the garlic sits in the honey, the mellower the garlic flavor and the chewier they get. If you have a friend who loves garlic, a jar of this garlic honey makes a great gift.


What To Do With Leftover Limes

P1080003-2

Limes are a great way to add zip and flavor to all kinds dishes from tacos, to pho, or sorbets, or pad thai. The the little burst of bright sourness that they give can instantly make a dish go from “good” to “Wow! This tastes AMAZING!”

Organic limes can be a little hard to find at my local grocery store. They also tend to be expensive if I don’t buy them in bulk. The cheapest place that I’ve seen them is at Trader Joe’s for about $2 for a bag for 4 -5 organic limes, so that’s where I tend to buy them from.

Limes are also not an ingredient that I tend to use very often, so before I figured out that there was a way to freeze them, I tended to buy a bag of limes when I really only needed one or two, and then forget that I had them at the back of the fridge until eventually I had to throw them out.

But no more! If you ever find yourself with leftover limes, here’s how to freeze them so that you have them on hand whenever you need them.

Instructions

1. Give your limes a good scrub with a vegetable brush. Juice them, and pour the juice into ice cube trays (any ice cube tray will do, this is just a circular one). Once the juice is frozen, transfer the lime juice cubes into a ziploc bag and keep in the freezer until ready to use.

You can set a few of the lime juice cubes in a little bowl on the counter to defrost, and then use the juice as needed.

2. Take the lime rinds and freeze them in a separate ziploc bag. You can zest the lime rinds from frozen when you need lime zest. The zest will defrost almost instantly once grated, and you can use it the same way that you would fresh lime zest.

If you find that the lime juice is a little bitter (some limes are bitter and some aren’t, I’m not entirely sure why) you can add a little maple syrup (if you’re vegan) or honey to your dish and it should balance out the bitterness.

I did this recently when I was making pico di gallo for a family get together and found the the limes that I had were a little bitter. So I added a little honey to the pico, and that smoothed out the bitterness and the bright flavor of the lime still came through. The pico came out great, and everyone happy ate their tacos and even went for seconds.

I hope that this helps you make the most of the times when you have fresh limes! If you use this tip, let me know what dishes you used your frozen limes for. It would be great to see all the different dishes that everyone was able to make with limes that they saved.


Shrimp Pad Thai

Weeknight Shrimp Pad Thai – Easy and Quick Recipe – Refined Sugar Free

P1080345

Pad Thai is the kind of dish that you love to eat, but are not quite sure how to make yourself.

At least that’s what I thought until I found a really easy recipe for pad thai on Goop.

What I really loved about the recipe from Night + Market on Goop was how simple the recipe was. I love pad thai, but most of the recipes that I found online had a lot of specialty ingredients that I would have to go a little out of the way to find.

I never attempted to make it myself before, but that recipe looked so easy, and with a few swaps, I knew that I could make a pad thai that would work with my dietary restrictions.

P1080307-2

This pad thai is made from ingredients that you can find at your local grocery store, and can be made in about half an hour. Perfect for a weeknight dinner.

Also great if you’re craving pad thai, but don’t live anywhere close to a Thai restaurant…

I used wild caught pink shrimp from Oregon (which I was able to find at my local supermarket in the display case at the seafood section, but I’ve also seen it sold at Costco as well). I only buy this kind of shrimp these days because it’s sustainably harvested, and also because it doesn’t contain any preservatives or ingredients that many other frozen shrimp are processed with.

The working conditions for people who catch, farm, and process shrimp around the world can also be very harsh and inhumane, so by purchasing domestically caught shrimp, I hope that I’m supporting more ethical working conditions for people who work in the shrimping industry.

You can find more information about Oregon Pink Shrimp here. This isn’t an affiliate link, just more info in case you’re curious about how the shrimp are caught.

P1080304

This type of shrimp is pretty inexpensive, at about $8 – $9 per lb, and it’s also just as tasty as the larger shrimp which makes it a good buy in my book. The amount of pink shrimp in this dish cost about $1, so while this pad thai feels very luxurious, it’s actually really budget friendly.

For more information on what to look for when buying shrimp, you can check out this article here.

About the fish sauce, I use the Red Boat brand fish sauce, because it’s only made from anchovies and salt (and therefore paleo, and refined sugar free). You can find it online, but I managed to find a bottle of the 500 ml (17 oz.) size for about $7 at my local Asian market, so it’s worth checking out your local Asian market if you have one nearby to see if they have it cheaper than online.

The noodles that I used were Fettuccini Style / Pad Thai noodles from Tinkyada which I found at my local grocery store. They weren’t organic, (but hey, it happens, you do the best you can). They were also on sale, which was definitely a plus, and the noodles worked great for this recipe.

brown rice noodles.jpg

There is a decent amount of maple syrup in this recipe, so if you’re watching your sugar intake, this may not be a meal that you eat every night, but it is certainly a really amazing and tasty dinner to have as a treat every once in a while.

If you’re planning on eating a few sides along with this (like a salad, fruit, etc.) this recipe makes enough for 2 smaller servings, but if you’re just eating it by itself, then it’s really just enough for one person, especially if you’re really hungry.

I hope that you give the recipe a try! It’s so good, and you’ll be super proud that you made a dish that you once thought that you could only enjoy in restaurants.


P1080350

Weeknight Shrimp Pad Thai

Adapted from this recipe.

Makes 2 servings, or 1 larger serving for a very hungry person.


Ingredients

4-5 oz of dried brown rice noodles *

4 tbsp of maple syrup

2 tbsp of fish sauce

2 tbsp of apple cider vinegar

1/3 cup of frozen pink shrimp

1-2 eggs (depending on how hungry you are)

2 green onions, thinly sliced


1 lime, cut into wedges for serving


* Note – If you hold the noodles between your thumb and forefinger, the circle that 4-5 oz. of noodles should make will be about the size of a quarter.

If you can get your hands on some bean sprouts, then definitely add those in too, as they add a nice crunch to the dish. I just couldn’t find any at my local grocery store, but the dish was still incredibly tasty.


Instructions

1. Make a skillet non-stick, and scramble your eggs. Tip the cooked eggs onto a plate and set aside.

2. Put the shrimp into a strainer and rinse under cool water. Place the shrimp into a medium size saucepan and cover them with about an inch of water. Bring the water to a boil and let the shrimp cook for a minute or two before draining. Set the shrimp aside.

The shrimp is already cooked, I just do this because it brings the shrimp up to temperature, but also kills off any potential pathogens that it may have picked up while it was sitting in the display case with raw fish.

3. Fill the medium saucepan with water and then cook your noodles. The directions for this package of noodles said to cook them for 10 -11 minutes, but I only cooked them for 6-7 minutes. You want to undercook your noodles a bit, as you’re going to finish cooking the noodles in the pad thai sauce. Drain the noodles and set aside.

4. Stir together the apple cider vinegar, fish sauce, and maple syrup. Add the sauce to the skillet along with the cooked noodles and cook over medium heat, stirring frequently until the noodles have absorbed all the sauce.

5. Add in the green onions, cooked eggs, and shrimp and stir them through the noodles, and continue to cook them for another 30 seconds or so until the eggs and shrimp are warmed through.

6. Spoon the noodles into a bowl (or two bowls) and serve with lime wedges, and a little bowl of red pepper flakes on the side.


P1080354

(I ate half of the pad thai before I realized that I had forgotten to photograph the lime wedges as well… Whoops. It was so good…)

spring rolls and peanut sauce

Vegan Thai Peanut Sauce and Veggie Packed Spring Rolls – Vegan, Gluten Free, Dairy Free, Refined Sugar Free, Peanut Satay Sauce

P1080067-2

When I was in high school, our “wild night out” on the weekends (more often during the summer) was going bowling, and then going to eat shrimp spring rolls at the Thai restaurant that my friend’s family owned.

The spring rolls were actually a Vietnamese dish, but I didn’t know that at the time. All I knew was that these spring rolls were amazing! They were one of the best things that I’d ever eaten, and we always ate them with the Thai peanut satay sauce.

When I moved away, the shrimp spring rolls and peanut sauce was the dish that I most associated with that time in my life.

I absolutely loved eating those spring rolls, and I could never find a restaurant that made them the same way. I wanted to make them myself, but the most difficult part of recreating that dish was trying to get the peanut sauce right.

I never did get the recipe for that peanut sauce. I managed to recreate the sauce a few years later through trial and error, but it did have a lot white sugar in it, so I wanted to create a version that was refined sugar free.

And this version is vegan to boot.

P1080074-2

It tastes very similar to that peanut sauce that I first had all those years ago, sweet and mildly spicy, rich with the flavors of ginger and chili, with just a hint of salt to round out the flavor. The extra salt replaces the savoriness of the fish sauce, and the sauce is so good that you won’t miss the fish sauce.

This peanut sauce is also easier to make than the traditional version (this one you don’t have to cook, just stir it all together), but still tastes incredibly similar.

You can make this peanut sauce in advance, and it will thicken and become creamier in the fridge as it chills.

I usually make extra sauce, as you can dip vegetables in it, or spread it over noodles, and I usually eat more than one serving of spring rolls at a time, so having extra sauce on hand is great.

Vegan Thai Peanut Sauce

Makes ¼ cup of peanut sauce (1 serving)

Ingredients

3 tbsp. + 1 tsp unsweetened natural peanut butter

1 level tsp of red curry paste (most supermarkets carry it these days, I used the Thai Kitchen Brand)

3 tbsp maple syrup

4 tbsp hot water

¼ tsp – ½ tsp sea salt (to taste)


¼ tsp. crushed dried mint* (optional)

1/8 tsp ground coriander seed* (optional)


*If you don’t have a few leaves of fresh mint and cilantro to put into your spring rolls, you can add these spices to the peanut sauce to give it a similar herby brightness.


Instructions

Ideally, your peanut butter would be room temperature, but if it’s cold from the fridge, that’s ok too. It will just take a little more mixing to get everything to combine.

Stir together the peanut butter, curry paste, maple syrup and optional spices until smooth. Add in the 4 tbsp of hot water, and still until well combined. Add salt to taste (I added ½ level tsp of sea salt).


P1080069-2

Veggie Packed Spring Rolls

For the spring rolls, I wanted to make a more colorful version, because it’s January, and spring rolls are a good way to eat lots of vegetables without having to think too hard about it. You can fill them with whatever you like really, that peanut sauce tastes amazing on pretty much everything.

I’d count on making about 4-5 spring rolls per person if you’re want to make them a main course, and 2-3 spring rolls per person if you want to make them as an appetizer.

You can cut them in half on an angle if you want to show off the colorful vegetables inside, or just leave them whole (which does make them a little easier to dip into the sauce, or you can spoon the sauce over the spring rolls instead).

I used Three Ladies Brand of rice paper wrapper in the 25 cm size (which is non-GMO and gluten free), but feel free to use your favorite brand of rice paper wrapper.

I would make the spring rolls right before you plan to eat them. They texture of rice paper wrapper changes after it’s been refrigerated, so it’s better to make them fresh. You can also pre-cut your vegetables in advance and assemble them right before serving to save time.


P1080070-2


Ingredients

(For each spring roll)

1 rice paper wrapper

¼ cup lightly packed baby spinach leaves

4-5 slices bell peppers

1-2 pieces of roasted sweet potato (cut into ½ inch thick strips)


2-3 mint leaves (if you have them)

3-4 cilantro leaves (if you have them)


To make the spring rolls, dip one rice paper wrapper into warm water for about 20-30 seconds. It should just begin to feel like silk between your fingertips. Spread the rice paper onto a plate, place the mint and cilantro leaves on first, followed by the baby spinach, then the bell peppers, and roasted sweet potato.

Wrap each roll like a burrito, so the sides get folded in first, then the fold the edge closest to you over the vegetables, and roll until the spring roll is closed, and then set the spring roll aside onto another plate, and start the next one.

Here’s a good visual lesson on how to do it.

https://www.youtube.com/watch?v=IfI1wMeDXhg


Before I moved away, I did have the foresight to buy some spring rolls from my friend’s restaurant, and take one home. Here’s what was in it:
1 1/2 teaspoons of bean sprouts

1 Sprig of Cilantro

2 one inch long pieces of mint leaves

3 pieces of Halved Shrimp (shrimp cut in half length ways)

3 teaspoons of rice noodles (possibly cooked in chicken broth, as they were light brown in color, I seem to remember my friend mentioning that they may have mixed the noodles with a bit of oyster sauce).

6 teaspoons of shredded romaine lettuce

1/2 teaspoons shredded carrots


My friend’s family has since sold the restaurant, and I make simpler version of these spring rolls now at home (which I will post on the blog another day), but I thought that I’d include the recipe just in case you were curious.

Happy Eating!

stainless steel pan

How to Make a Stainless Steel Pan Non-stick (non-toxic)

stainless steel pan 1

(This is what the pan looks like before the coating of oil).

When I decided to stop using non-stick cookware, one of the hardest thing to get my head around was how I was going to be able to cook things like pancakes and sunny-side up eggs.

I googled “how to make a stainless steel pan non-stick” and wasn’t able to find an answer.

So after much trial and error, I finally figured it out. And it’s actually super simple to do.

By heating the oil in a pan this way, the oil binds to the surface of the steel (forming a polymer – whatever that means…), creating a temporary non-stick coating. I’ve used this method with olive oil, coconut oil, and avocado various times and all have worked great.

Instructions

1. Start with a cool stainless steel pan. Rub the bottom of the inside of the pan with probably about ½ tsp (maybe less) of olive oil with either your fingertips or a paper towel. You only need a thin layer, but want to coat the entire bottom of the pan so that there are no gaps in where you put the oil.

2. This can get a little smelly so, I’d turn on the cooking fan for this.

Put the pan onto a cold burner and turn the heat up to medium. Hover your hand a few inches above the pan. When the air over the pan feels about as warm as a warm bath you’d give a baby (so not too hot) then turn the burner off, and leave the pan to cool on the burner while you prep your veggies for your stir-fry, or your pancake batter.

3. Then just cook as usual.

The non-stick coating is temporary, but you should be able to get through cooking a batch of pancakes, or fry a few eggs on this surface just fine before you need to add a little more oil.

When you’re done cooking, you can scrub this non-stick surface off with some baking soda mixed into a paste with a little dish soap and a scrubby sponge. When I need a non-stick surface next time, I just repeat the process.

stainless steel pan 2

(This is what the pan looks like after it’s been heated with the oil).

For me, I cook on an electric stove, and I’ve done this enough times now that I know that if I start with a cold pan, it takes 5 minutes to heat to the baby bath level of warmth. Now I can just rub the pan’s surface in oil, put it onto the burner, turn on the stove, turn on the fan, and set a timer for 5 minutes.

You may have to adjust the timer for your stove, as you may find that your stove heats up more quickly or more slowly than mine does.

I always stay in the kitchen as I do this, just in case the pan starts to smoke.

If you see the pan start to smoke, pull the pan off the hot burner right away (also turn off the burner) and put the pan on one of the cold burners to cool. Once cool, it should still have created a non-stick surface and you can just cook on this pan as usual.

If you fry an egg sunny side upon this surface, I’d cover the pan with a plate or a lid while the egg is cooking. The egg white cooks through more evenly with a lid on the pan.

What would you cook using this trick? Let me know in the comments below.

Happy Cooking!