enoki mushrooms

Sautéed Enoki Mushrooms with Garlic – Quick and Easy, Vegan, Paleo

enoki mushrooms 3

This is a super speedy and delicious vegetable dish for nights when you want to get dinner on the table as quick as possible. It’s paleo, and vegan and works with most dietary restrictions.

When I was growing up, we ate enoki mushrooms in Hot Pot at Lunar New Year, and for family celebrations. I loved scooping them out of the pot with a slotted spoon (along with lots of baby corn and tofu) and eating them with Taiwanese BBQ Sauce (the BBQ sauce with the cartoon bull on the side of the can is where it’s at, but it’s been a few years since I’ve had it).

The mushrooms come in 7 oz packages from the Asian grocery stores, and while I love button mushrooms too, eating the enoki mushrooms is sometimes a nice way to change up the different vegetables in my diet.

Giving the enoki mushrooms a quick sauté with a little garlic enhances the delicate flavor of the mushrooms. They have a great texture and are a great side dish to have on any table.

Sautéed Enoki Mushrooms with Garlic

Makes 2 small servings


Ingredients

2-3 cloves of garlic, finely chopped

1 package of enoki mushrooms (7.05 oz / 200 g)

1-1.5 tbsp olive oil

sprinkle of sea salt to taste


Note – I added the green onions in for the picture, but when I tasted it, I found that I actually preferred the mushrooms without the green onion. The enoki mushrooms have a subtle flavor, and that was overpowered slightly by sharpness of the green onions, but if you like green onions, go ahead and add them. It’s all about cooking the food that you enjoy eating.

Instructions

1. Wash the mushrooms under cool water. Cut the mushrooms about 1 inch above the roots. Give them another good rinse. Place them on a cutting board and cut them lengthwise in half.

enoki mushrooms 2

2. Add the mushrooms to a sauté pan with the garlic and olive oil. Cook over medium heat for 5 minutes, stirring constantly. Then turn the heat up to medium high and cook for another 3 minutes until lightly golden brown. 

Add a sprinkle of salt to taste and serve.

enoki mushrooms 1

Happy Eating!


gravy

Gorgeous Gravy – The Best Vegan And Gluten Free Gravy Recipe

P1060948-2

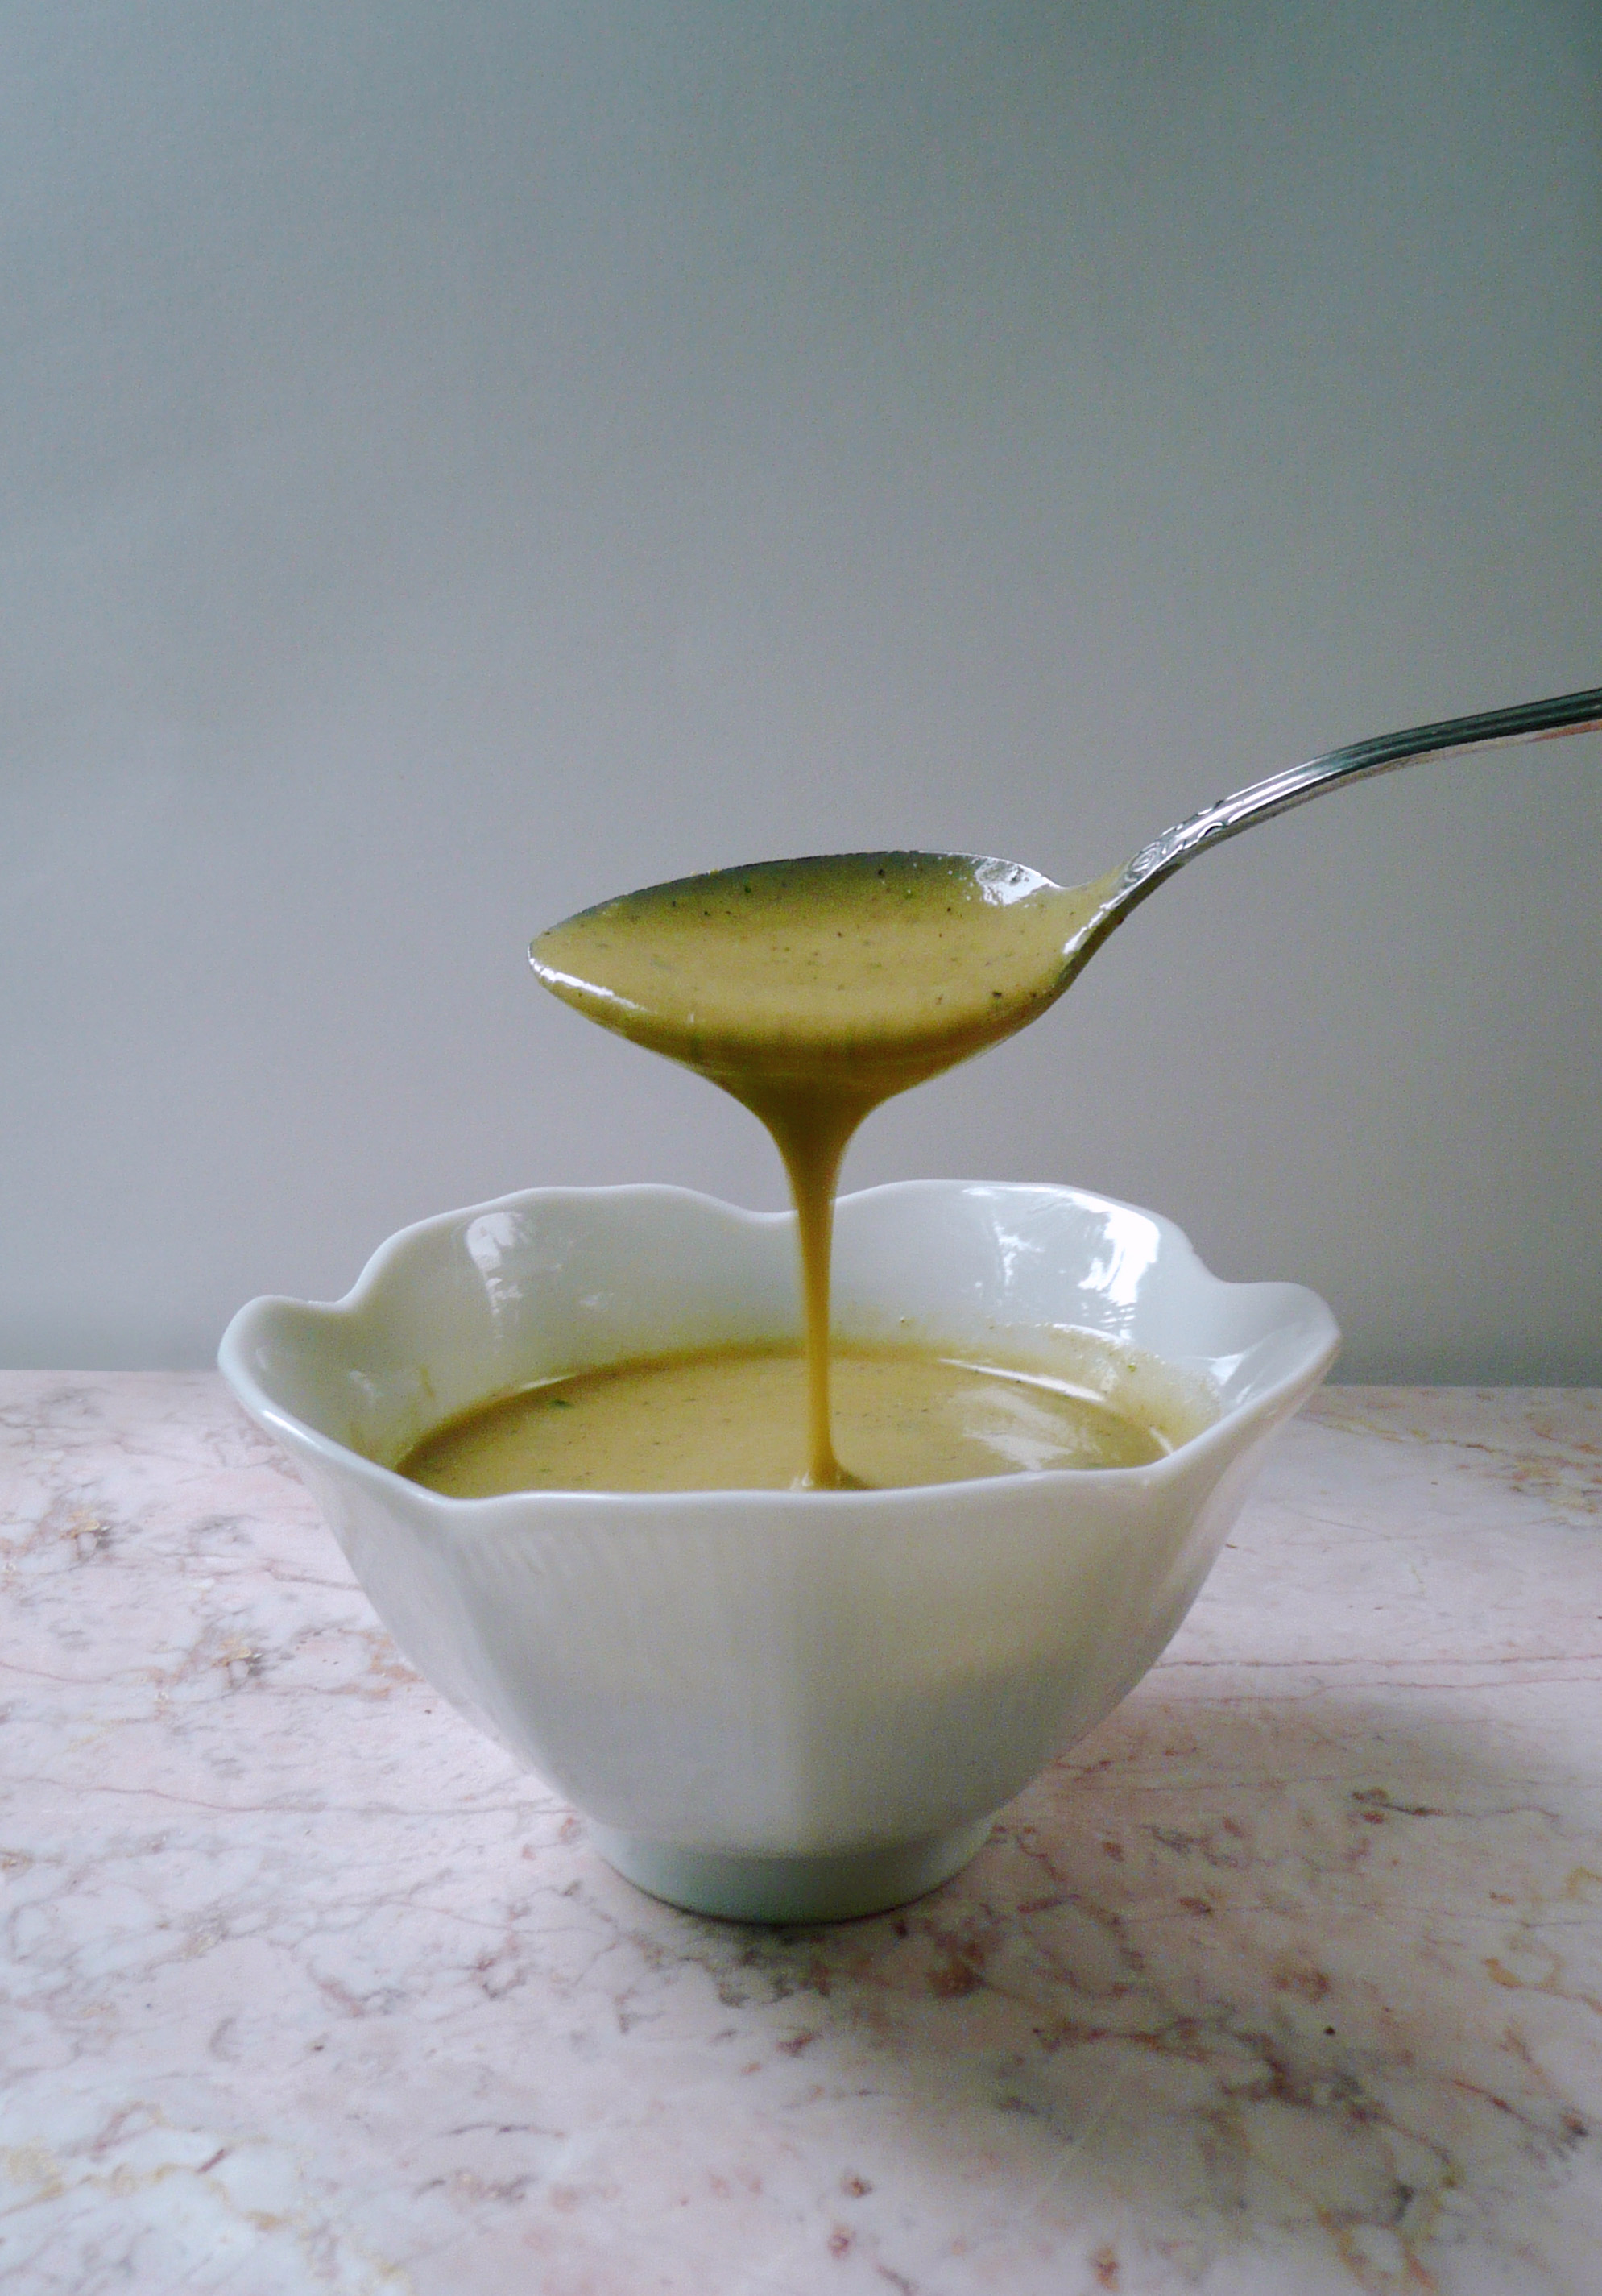
This is hands down the best gravy I’ve ever had. It’s totally vegan, and incredibly delicious.

It has all the flavors that you want in a gravy. The browned mushrooms give it a deep savory richness. The sage and the other spices give it that special Thanksgiving charm, and the oat flour gives the gravy a velvety, creamy, buttery texture with out any dairy.

I promise that you won’t miss the chicken stock or the butter.

It’s great served over mashed potatoes, turkey and stuffing, but delicious enough to be eaten on it’s own. You can double or triple the recipe and serve it with sautéed mushrooms as a creamy mushroom soup, or serve it over pasta for something like a creamy mushroom alfredo sauce.

I would add just a pinch more salt to this myself, but I like things more on the savory side. Some people like things less salty, and leaving that extra little bit of salt out gives your guests a little more wiggle room as far as the savory level of their gravy is concerned.

This recipe works well with lots of different dietary restrictions, but if you know that one of your guests has celiac disease, then be sure to use certified gluten free oats. Oats are naturally gluten free, but normal oats from bulk bins can sometimes be processed on the same equipment as normal flour, and can contain trace amounts of gluten.

You can make this gravy ahead of time, and just reheat it right before serving. One less (delicious) thing to worry about cooking on Thanksgiving is something to be thankful for indeed.

Gorgeous Gravy
Makes 2 cups

Prep time – 5 min
Cook Time – 30 min
Total Time – 1 hr 20 min

Ingredients

1 2/3 cup diced mushrooms (about 5 white or crimini mushrooms)

¾ cup diced onion (about ½ a medium onion)

1 tbsp. diced celery

7 tbsp. olive oil

¼ cup oat flour *

2 cups water


½ + 1/8 tsp. sea salt

¼ tsp. black pepper

¼ + 1/8 tsp. dried rubbed sage

¼ tsp. dried thyme

3 tsp. finely chopped fresh parsley.


Instructions

1. Sauté the mushrooms over medium high heat with 4 tbsp of olive oil for about 8 – 10 minutes until the mushrooms have become golden brown around the edges. Pour the mushrooms and olive oil into a bowl and set aside.

2. Allow the pan to cool off the heat for 10 minutes. The onions and celery will cook more evenly if they are allowed to start off cooking from a cool pan.

3. Add the onions and celery into the cooled pan along with another 3 tbsp of olive oil. Cook the onions and celery over medium high heat for 3-4 minutes. Then turn the heat down to medium and cook for another 3 minutes until the vegetables are softened.

4. Add the oat flour into the celery and onions and cook for 3 minutes, stirring the mixture as it cooks.

5. Add the 2 cups of water and the cooked mushrooms to the pan and turn the heat up to medium high. Cook uncovered for about 8 minutes until the mixture has thickened, stirring frequently. Don’t worry if the gravy looks a little lumpy right now, the blender will smooth that all out.

6. Take the pan off the heat, and let the gravy cool for 30 minutes.

Caution when blending hot liquids – remove the little clear plastic cap off the top of the blender lid (the lid’s center insert) and put a folded towel over the top, then blend.

If you don’t allow the blender to vent steam while blending hot liquids, pressure can build up and the blender contents can explode. Taking the center insert off the lid, and using the folded towel should prevent this from happening.

Add the gravy to the blender, and blend until smooth. Add in the the salt, pepper, sage, parsley and thyme and give the gravy a quick blitz to stir in the spices, but still allow some green from the fresh parsley to show through in the final gravy.

You can stash this in the fridge overnight and then reheat the gravy in a saucepan over medium heat right before serving.

Notes – * I grind oats into oat flour using a blender. Don’t grind the oats in a food processor because the flour won’t be fine enough.

Any extra oat flour I don’t use in the recipe goes into an airtight container and I use it for another recipe.

roasted sweet potatoes

Roasted Sweet Potatoes

P1060409

Roasted sweet potatoes are surprising versatile and super simple to make.

I roasted sweet potatoes a number of ways until I found Gwyneth Paltrow’s recipe for roasted sweet potatoes in her book It’s All Good.

This is a version of her recipe. I added the olive oil to crisp up the skin, and also put the sweet potatoes on a sheet pan (instead of roasting them directly on a baking rack) just for the sake of easy clean up.

I usually roast 4-5 of them at a time on a stainless steel baking sheet or a large glass pyrex dish, and they make a quick snack when I’m hungry but a little too tired to think to hard about what I want to eat. They usually get sweeter when they are refrigerated overnight. For a quick snack, I sprinkle them with a little cinnamon, and maybe a drizzle of little maple syrup if I’m craving something sweet

The cheapest place that I found organic sweet potatoes was at Costco (they don’t always have them) but you can get a 10 lb bag of them for around $11. Trader Joes almost always have them year round, and they are a little more expensive than Costco, but much cheaper than anywhere else.

You can puree them and use them to make my pumpkin tarts, mash them with some cinnamon and maple syrup, or add them to my vegan cheddar bay biscuits (recipe coming soon!).

Ingredients

4-5 sweet potatoes

½ – 1 tsp olive oil

Instructions

1. Preheat the oven to 425.

2. Give the sweet potatoes a good scrub. Pat them dry with a paper towel and prick them 4-5 times with a fork.

3. Rub the olive oil over the sweet potatoes, place them on a baking sheet or pyrex dish and roast for 1 hr.

4. If the sweet potatoes are thicker than 2 inches in diameter, cook them for an addition 15 -30 minutes until cooked through and you can pierce them with a paring knife with no resistance.

To clean up the caramelized/ blackened sweet potato goo, soak the pan or baking sheet overnight. Pour off the water and make paste from a little baking soda and dish soap. Use a scrubby sponge and baking soda paste to scrub off any of the remaining sweet potato goo.