blueberry smoothie

Glorious Orange Berry Blitz-ish Smoothie (Mango, Pineapple, Blueberry) – Vegan, Paleo

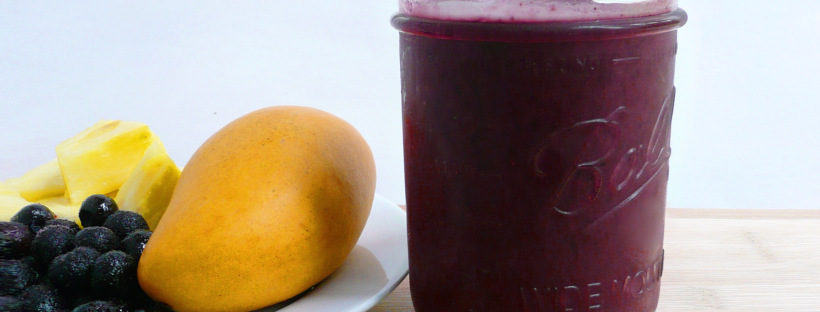
blueberry smoothie 1

When I was a youngin,’ I once went to a summer camp. The camp was located on a college campus and close by was a Jamba Juice. So most days (during the few weeks we were there), I and some of the other students would go to Jamba Juice for smoothies and a scone for breakfast.

My favorite smoothie was the (now discontinued) Orange Berry Blitz. I loved how the orange juice gave the blueberries and pineapple smoothie a wonderful brightness.

It’s funny how food and flavors can sometimes take you back, and suddenly, there you are again, cocooned in a marvelous memory.

I smile now just thinking of how happy I was that summer, and and this berry smoothie is still the perfect thing to drink on a nice summer day.

blueberry smoothie 2

This is my version of that glorious smoothie. I added mango because I think that it gives the smoothie a little more of a tropical flavor (and an extra little bit of sweetness as well).

Feel free to play around with the ingredients. Sometimes I replace the apple juice with water, or add in a few handfuls of baby spinach (if I want to get my greens in for the day without having to give it too much thought).

Make the smoothie that you want to drink (though I will say that this smoothie is pretty awesome as written) and have fun!

Glorious Orange Berry Blitz-ish Smoothie

Makes 1 generous serving

Ingredients

3/4 cup ripe mango (cut into roughly 1 inch cubes, about 1 mango)

3/4 cup fresh pineapple chunks (cut into about 1.5 inch wedges, canned pineapple works too)

1 1/4 cup frozen blueberries

1/2 cup apple juice (I used the Martinelli’s brand)

2-3 tbsp orange juice


Instructions

1. Add all ingredients into a blender and blend until smooth. Serve immediately.


Blueberry smoothie 3

This is what the plate of fruit looked like after I added the fruit into the blender. I think that it’s quite beautiful in a wabi-sabi kind of way.

I hope that you have many happy summer days drinking smoothies with your loved ones.

Enjoy!

Joyful Fruit Salad – Vegan, Paleo

fruit salad

There’s a really funny writer/actor/comedienne extraordinaire named Tiffany Haddish who has a dish called “Joyful Greens.” She says that they are “Joyful Greens” because she smiles when she picks the collard greens from her garden, she smiles when she washes them, and she smiles when she cooks them. All that joy, love and care that she puts into growing and preparing the greens make them extra delicious.

Taylor Swift also loves Tiffany’s Joyful Greens. Tiffany brought them with her to one of Taylor’s dinner parties and where they also dined on homemade barbecue chicken, potato salad, and cornbread (don’t we all wish that we could have been at that dinner party? It’s sounds amazing.)

Here’s a video of Tiffany teaching Oprah and Ellen how to make them.


While I didn’t grow these fruits myself, this is my joyful fruit salad. It’s joyful because you smile while you’re picking out the fruit (you smile at how wonderful and sweet that ripe mango smells), you smile when you see how bright and happy the different colors of the fruits are together, and you smile when you eat it (because it tastes so good…)

It’s super quick to put together, and I like packing it in a lunch because the colors look so cheerful together that I always look forward to eating it. This combination of fruits taste lovely together, and eating it feels like a real treat.


Fruit Salad 3


Joyful Fruit Salad

Makes 1 generous serving

Ingredients

1 ripe mango*

1 ripe kiwi**

1/3 cup blueberries (fresh or frozen)


Notes – *Ripe mangoes smell very sweet and fragrant. Mangoes that aren’t ripe won’t smell much like anything.

** Ripe kiwis are soft, but not squishy. If you have one that’s really firm, go ahead and leave alone for a couple days and it will ripen up.


Instructions

1. Cut the mango into 3/4 inch cubes (or cut it up however you like, this is just how I do it).

There are many ways to cut up a mango. I slice the cheeks off either side of the seed, then try and carefully slice off any remaining mango flesh that I can off of the seed. Then I cut the mango cheeks into 3/4 inch strips and use a paring knife to carefully separate the peel from the mango flesh (kind of like how you would peel an apple with a paring knife). I then cut the peel away from the slices of mango that I cut away from the seed into rough chunks and add them to a bowl with the rest of the cubed mango.

I’ve also seen people use a potato peeler to peel the mango and then slice the mango cheeks off either side of the seed, but I don’t do it that way because I find that the mango gets really slippery to hold while you’re trying to make your initial cuts.

All this is to say, cut up your mango in a way that works for you. The fruit salad will still be awesome.

2. Peel your kiwi and slice it into 1/4 inch slices.

How I peel a kiwi – Cut 1/4 inch off the top and bottom of your kiwi. Sit it flat on your cutting board and make 1/2 inch slices down the sides of the kiwi, cutting as close to the peel as you can until you’ve cut off all the kiwi peel.

You can also cut 1/4 inch off the top and bottom of a kiwi and slide spoon between the kiwi peel and the green flesh. Rotate your spoon under the peel until the peel has completely separated from the fruit.

3. Add your kiwi to the bowl of cubed mango along with the blueberries.

Enjoy!


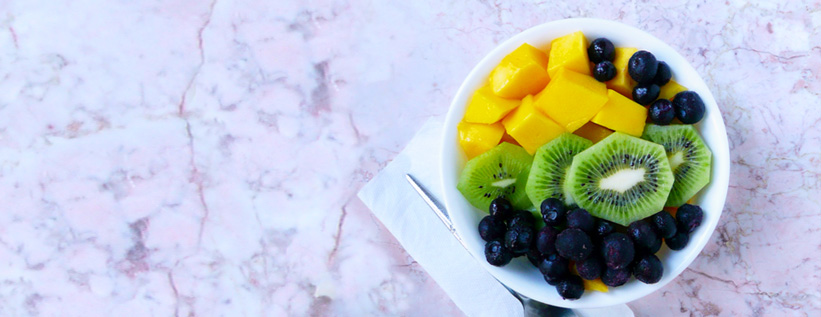
fruit salad empty

What the bowl looks like once I packed the rest of it into a mason jar for tomorrow’s lunch. This is what was leftover, which looks very pretty on it’s own.

No worries, this didn’t go to waste. I ate it right after I took the picture, and I felt very happy and grateful.

Mini Chocolate Peppermint Pies – Vegan, Gluten Free, Dairy Free Tarts

P1070527

Before I cut out gluten, dairy, and refined sugar out of my diet, one of the things that I looked forward to every Christmas was the arrival of the Ghirardelli Chocolate Peppermint Bark Squares at the local grocery stores.

How I loved those little squares… so creamy, and rich, and wonderful. I loved opening each of those little brightly colored red and white wrappers.

I loved the little crunchy bits of that swirled in amongst the smooth bright flavor of the peppermint white chocolate. They were so festive, and eating each one felt like such a treat.


P1070601

This year, I decided that I would come up with a recipe to get that same sort of feeling of eating a chocolate peppermint treat at Christmastime, (but one that I could eat with my dietary restrictions) so that I wouldn’t feel like I was missing out on anything.

These little tarts are vegan, and nut (without the cashew cream) / soy / and gluten free, so they will work with a variety of food sensitivities and food allergies, and would be a good dessert to bring for any holiday party.

You can make this mixture ahead of time and spoon it into the tart shells right before serving. You can eat them as is, or top them with some cashew whipped cream, or a little star made from the scraps of your pie crust for a more festive look.

Any way that you eat them, I hope that you really enjoy them this holiday season!


P1070523


Makes 6 tarts

(Ingredient amounts for 12 tarts listed at the end of the post)


Ingredients

1/2 cup roasted sweet potato puree

5 tbsp maple syrup

4 tbsp unsweetened cocoa powder (I used the Ghirardelli’s brand one)

1 tsp strong coffee or espresso*

6 tbsp melted coconut oil **

1/8 tsp peppermint extract (I used the McCormick brand one) ***

tiny pinch of sea salt to taste


Instructions

1. Melt the coconut oil, and add it along with all the other ingredients into a food processor and process until smooth.

2. Taste the mixture, and if the peppermint flavor isn’t strong enough, add another drop of peppermint extract at a time to the mixture until you’re happy with the flavor.

Peppermint extract can be very strong, and there’s a very fine line between it being perfectly minty in flavor, and way too strong.

If you accidentally add too much extract, you can add in a little more of the other ingredients to balance the flavor out again. This recipe is pretty forgiving and can take a little tweaking if need be.

If your sweet potato puree was cold from the fridge before you blended the mixture together, the coconut oil may have set before it had a chance to incorporate with the rest of the ingredients. What you can do in this case is gently heat and stir the mixture over a double boiler until it’s glossy and smooth.

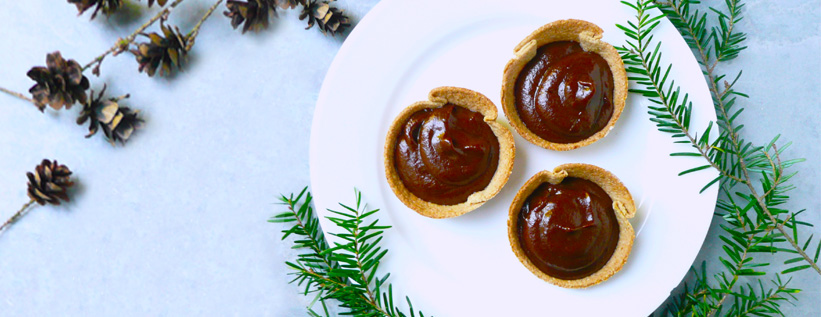
For serving, if you want the mixture to be sort of soft and pudding-like, you can gently heat the mixture up again using a double boiler, just until the coconut oil melts and the mixture turns glossy, and then spoon it into the tart shells. Coconut oil melts at 76 °F, so it won’t take long to heat up. For the pictures in this post, I heated the filling using this method before dolloping the filling into the shells, which gives the tarts a beautiful finish.

I prefer the texture when the filling has been refrigerated. It’s like a cross between a fudgy peppermint chocolate frosting and a chocolate mousse. Once you spoon it into the tart shells, you can give the filling a glossy finish (it won’t have the same “dollop” look, but will still look really nice) by dipping a teaspoon into hot water, and smoothing out the tops of the tarts before topping them with cashew whipped cream, a little pie crust star, or leaving them as they are.

3. Spoon the filling into the tart shells and serve immediately.


I used this recipe for the tart shells. For the stars, I used the scrap dough, cut them out using a small star shaped cookie cutter and baked them on a silpat at 375 for 10-15 minutes until golden brown around the edges.


* I add 1 tsp ground Italian Roast Coffee to a mug with 1/4 cup of hot water, allow it to cool, cover with plastic wrap and then refrigerate this overnight. This strong coffee is good to have on hand for this recipe, but also for adding a depth of flavor to other chocolate things like hot chocolate, brownies, and even chocolate frosting.

**I used regular coconut oil, and there is the faintest hint of coconut flavor in these tarts. If you that’s not really your thing, you can used refined coconut oil instead so that you don’t get that hint of coconut flavor in the tarts.

*** I would prefer to use an organic peppermint extract, but this is just the one that I had on hand, and the flavor is good.


P.S. I’ll let you in on a little secret – this recipe makes enough filling for about 7 1/2 tarts, but what that means is that you can fill the 6 tart shells, and save the extra filling as a treat to eat later after all the holiday parties. When you get home, you can look forward to having a quiet moment to yourself to sit in your jammies, and eat this and fall asleep watching Christmas specials on TV. No one will ever know…


For 12 tarts

1 cup roasted sweet potato puree

10 tbsp maple syrup

8 tbsp unsweetened cocoa powder (I used the Ghirardelli’s brand one)

2 tsp strong coffee or espresso

12 tbsp melted coconut oil

1/4 tsp peppermint extract (I used the McCormick brand one)

tiny pinch of sea salt to taste