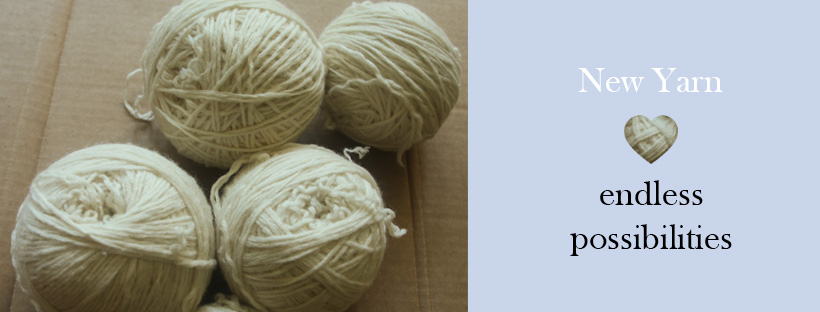
new yarn banner 2

New Yarn, Endless Possibilities…

5 balls of yarn

There’s always a little bit of magic in each new ball of yarn. As you run your fingers over the soft wool, you think “I could make a hat, or a scarf, or maybe some gloriously warm socks for chilly mornings…”

The possibilities are endless. Then you get the excitement of looking at patterns on Ravelry, or google searching images of sweaters that you like so that you can start trying to design your own.

Buying that yarn is the first part of a new journey. You know that you’ll knit most of the stitches with love, sometimes a little frustration, and maybe a little (or a lot) of confusion. You’ll drag your project with you on the bus, to coffeeshops to knit with friends, or simply knit quietly at home reveling in the joy of making something with your own hands.

Making something by hand is never perfect, but it’s not supposed to be and that’s something worth celebrating. You will make mistakes when knitting. Maybe you miscount a stitch and purl when you should have knitted, or were kind enough to teach someone else to knit and purl on your latest project and you kept their stitches in your final work as well. There is joy and beauty in every stitch that you make, and they all help to tell a story of where you were in your life when you were making each project.

I hope that every new ball of yarn brings you that same incandescent joy and excitement. Because life is just a little more awesome when you have a new project waiting for you to begin.


mini pumpkins

Halloween – Quick & Easy (Last Minute No Carve) Pumpkin Decorating!

Halloween is one of my favorite holidays! It’s always so fun to see everyone’s costumes, and I have many happy childhood memories of eating lots and lots of candy.

Let me tell you, when you have dietary restrictions, the most difficult holiday isn’t Thanksgiving, it’s Halloween, because there’s always leftover candy and you have to give it away quick, or else you find that you’re eaten half the bag before you know it.

I don’t speak from experience of course…

But sometimes eating half a bag of left over Halloween candy once a year is SO worth feeling crummy afterwards.

Especially when you have white chocolate Kit Kats or white chocolate peanut butter cups… which are just extra awesome.

Another thing that makes Halloween super fun is decorations! While I love carving pumpkins at Halloween, it can be messy and time consuming and if you’ve left your Halloween decorating to the last minute, you can still make adorable decorations to put in the window to welcome all the trick or treaters!

clone tag: -2224802199802910510

There are lots of tutorials for spray painting pumpkins, but I wanted to be able to cook with these after Halloween, so I used painters tape to make low tack stickers to put on these mini sugar pie pumpkins.

If you don’t have time to do this DIY, another option is just to buy some colorful stickers at the craft store and stick them onto the pumpkins instead. The store bought stickers might be harder to pull of the pumpkins, but I think that if you press the store bought stickers to your skin before putting them onto the pumpkins, the stickers might lose a little of their tackiness and be easier to pull of the pumpkins when you’re read to cook with them.

This DIY is best done a few days ahead of time if possible so that you can be sure the stickers are really dry before you start cutting them, but can also be done in about an hour or two before you want to start decorating the pumpkins if you use hairdryer to help the paint and Modge Podge layers dry quickly.

For your homemade stickers, you will need:

-painters tape

-acrylic paint

-ziptop bags

-Modge Podge (optional)

-glitter (optional)

-brushes

-scissors

-hairdryer (if you’re doing this DIY at the last minute)

Instructions

1. Lay your ziptop bag flat on the table and overlap pieces of painters tape by about 1/2 an inch over the bag. You want to have about 2 layers of tape on the plastic.

clone tag: -4494802101336254546

2. Paint a thin layer of acrylic paint of your choice over the painters tape. Allow to dry, or use a hairdryer to dry the paint quickly. Paint on more layers of color (using the hairdryer between layers) until you’re happy with the result.

Optional – Everything is more fun with glitter! If you want your stickers to be glittery, mix a little bit of Modge Podge with a generous amount of glitter and paint it over the top of your painted painters tape. Use a hairdryer to speed up the drying process.

What I first did is I painted the tape with acrylic paint and then sprinkled glitter on over the top while the paint was still wet, thinking that it would be tacky enough to keep the glitter on. That turned out not to be the case, and there was tons of glitter fallout (which you’ll see in the pictures, but a little glitter just makes things more festive! :D). I ended up having to vacuum up a lot of glitter, but it all came out ok in the end. I fixed the problem by spreading some Modge Podge over the top of each glittery sticker with my finger and blasted them with a hairdryer to get them to dry quickly and voila! No more glitter fallout.

clone tag: 8765980823518095111

So glittery! And super affordable!

clone tag: 7427284561683169572

Once the layers of paint and Modge Podge are dry, cut away the excess plastic from the sticker tape. Peel the plastic off the back of the sticker tape and then cut out whichever shapes you like and stick them onto your pumpkins.

Give each sticker a good press once you place them onto the pumpkins and decorate to your heart’s content!

clone tag: 6629403141417885135

This is the disco mini sugar pie pumpkin…

clone tag: -6387611760906468731

The Cinderella pumpkin (this variety of mini pumpkin is naturally white so I didn’t have to paint it). I love the glittery stars! This pumpkin looks so elegant!

clone tag: -6372366725628939485

The sweetheart pumpkin…

clone tag: -353266238720428542

And the Jack-o-lantern pumpkin enjoying the sunshine.

clone tag: -8858926983194438683

All the mini pumpkins in their 2018 class picture…

20181019_161833

And the Jack-o-lantern pumpkin being extra friendly and steppin’ forward to wish you a very Happy Halloween!

clove balm banner

Homemade Soothing Balm – All Natural, for Bug Bites and Sore Muscles

clove oil 2

It’s Summer at the moment, which means that in addition to the beautiful warm weather, inevitably you may get bitten by a mosquito or two.

This is a great home remedy for itchy bug bites. A little dab of this on a fresh or day old bug bite will soothe the itchiness and help with swelling.

clove oil 1

(The oil before it’s been strained)

I also use this balm as a muscle rub for soothing sore muscles. It’s super simple to make and is made from only ground cloves (they are not just for pumpkin pie after all!) and olive oil.

Cloves are high in eugenol and also have pain relieving properties. Before you make this though please read the side effects of using cloves topically here. I would also wash your hands after applying this, and avoid touching your eyes with it.


Soothing Balm

(This is just a ratio, you can make as much balm as you need)

Ingredients

1/2  tsp ground cloves

1 tbsp of olive oil


Instructions

1. Stir together the olive oil and ground cloves. Cover with plastic wrap and leave to sit at room temperature for 1-2 days.

After this, you can strain infused oil through a scrap of fabric (or you can leave the ground cloves in there and just use the oil that’s risen above it), cover with plastic wrap and stash in your fridge. The oil will keep for at least a week, and will firm up in cool temperature of the fridge.

clove oil 3

I hope that this helps many a bug bite and sore muscle.