Tulips

Springtime and June

I’m working on lots of fun things at the moment. I’ve been writing more recipes that I’m excited to share soon!

I’ve been loving how beautiful all the local farmers markets have become now that it’s springtime!

Lavender

All the pretty lavender plants at the local farmers market.

Tulips

Nothing brings joy like stunning tulips in spring!

Knitting Swatches

I’ve also been knitting swatches to try and figure out which size knitting needle gives the best result with the cream colored wool that I reclaimed from a gigantic J. Crew sweater (truly the biggest sweater that I have ever laid my eyes on) that I thrifted for a less than $2. The sweater was 100% wool and I’m so excited to make something with all that yarn! My new favorite thing to do is listen to podcasts while knitting simple swatches. It’s pure bliss…

And in honor of July 4th coming up (Happy Birthday America!) I want to take a moment to celebrate a true American hero – Claire Saffitz from the Bon Appétit test kitchen!

Claire is the coolest! I love watching her Gourmet Makes series because she manages to recreate these industrially produced snacks through some blend of creativity, alchemy, perseverance and gumption.

One of my favorite moments from this episode is at 28:26 when she comfort-wraps her homemade starbursts to cheer herself up (with melancholy piano music playing dramatically in the background) after every batch of taffy that she’s made has come out wrong. Thankfully at the end of the episode (thanks in part to the diligence of her co-worker Chris Morocco) she manages to get a decent batch of cherry flavored taffy that’s pretty darn close to an original starburst.

Claire never gives up and always keeps her sense of humor throughout each episode, and that’s pretty inspiring. Sometimes I’ll be working on a recipe that’s not coming out quite right, and I think “If Claire can make homemade Doritos, then I can figure out how to fix this recipe!” And eventually, a few tries later, I do manage to get my recipe right.

I hope that all of you have a wonderful July 4th!

Elaine

new yarn banner 2

New Yarn, Endless Possibilities…

5 balls of yarn

There’s always a little bit of magic in each new ball of yarn. As you run your fingers over the soft wool, you think “I could make a hat, or a scarf, or maybe some gloriously warm socks for chilly mornings…”

The possibilities are endless. Then you get the excitement of looking at patterns on Ravelry, or google searching images of sweaters that you like so that you can start trying to design your own.

Buying that yarn is the first part of a new journey. You know that you’ll knit most of the stitches with love, sometimes a little frustration, and maybe a little (or a lot) of confusion. You’ll drag your project with you on the bus, to coffeeshops to knit with friends, or simply knit quietly at home reveling in the joy of making something with your own hands.

Making something by hand is never perfect, but it’s not supposed to be and that’s something worth celebrating. You will make mistakes when knitting. Maybe you miscount a stitch and purl when you should have knitted, or were kind enough to teach someone else to knit and purl on your latest project and you kept their stitches in your final work as well. There is joy and beauty in every stitch that you make, and they all help to tell a story of where you were in your life when you were making each project.

I hope that every new ball of yarn brings you that same incandescent joy and excitement. Because life is just a little more awesome when you have a new project waiting for you to begin.


Honeycomb Stitch Close Up

Adventures in Knitting! – The Honeycomb Cable Stitch

Honeycomb Cable Stitch Close Up

Honeycomb Cable Stitch

It’s springtime! The local cherry trees have once again donned their festive pink blossoms, and the weather has finally warmed up again.

It’s crazy to think that just 3 weeks ago there was still snow on the ground. Right now the skies are clear and blue, and temperatures are hovering in the 60’s. How amazing is it that so many changes can appear in such a short amount of time?

I’m still a knittin’. I’ve been eyeing some Aran sweater patterns and have been experimenting with some more complicated stitches in my quest to become a better knitter.

Aran Sweater Swatch

My Aran Sweater Swatch

I’ve tried my hand at the Moss Stitch Diamond Pattern, the Wheat Ear Cable Stitch, and the Honeycomb Cable Stitch, as well as experimenting with 1×1 and 2×2 ribbing stitches. The little blue loop is a stitch marker that I used to keep track of where one pattern started and another ended. I knitted this swatch in cotton just for practice, but traditionally Aran sweaters are knitted in wool.

Moss Stitch Diamond

Moss Stitch Diamond

The Moss Stitch Diamond was difficult for me. There were 22 different rows to knit through before the pattern repeated, so I constantly had to refer back to the directions. I think that I might try knitting another swatch of this cable and try to work out where I went wrong because my swatch looked like a slightly melted version of the original pattern.

Wheat Ear Cable

Wheat Ear Cable Stitch

The Wheat Ear Cable Stitch was a dream to knit. It looks beautiful (sort of like an ear of wheat waving to and fro in a gentle breeze) and the pattern repeats again after only 4 rows. This meant that I only had to refer to the directions every 3rd row or so because only one row of the 4 actually requires you to do any cable stitches. I can’t wait to knit this on something bigger than a swatch!

Close Up of Knitted Swatch

Honeycomb Cable Stitch – With Practice Cables

The final stitch that I learned was the Honeycomb Cable Stitch. Many Aran sweater designers traditionally use this stitch in the center front panel of their sweaters. This cable stitch looks super complicated and I was intimidated to even try to knit it.

Could I hack it? Would my honeycomb swatch be super messy? Would you even be able to make out the honeycomb pattern at all once I was finished?

3 Balls of Yarn - Pink, Yellow, White

My Confetti Colors!

As it turns out, this pattern is way simpler to knit than I thought. The pattern repeats after 8 rows, but you barely have to glance at the directions because it’s intuitive where you have to knit your cables. Some you hold in front of your work, and right afterwards you hold the next set of cables behind your knitting. It’s almost like weaving in a way, working your stitches in front of your work and then behind your work.

The variation in the knitting comes from knitting with 3 differently colored yarns. Knitting them all together creates a confetti colored pattern which I really like. It’s like knitting joy into every stitch.

Close Up of Knitted Swatch

Party in a Swatch

It took a few hours to create 6-8 inches of knitted honeycomb. I felt quite proud when I finished! Learning each new stitch was like accomplishing a mini-goal. At first you don’t know if you’ll be able to coax sticks and string into knitting more complex fabric in an orderly fashion, and then a few hours later you’ve done it!

It’s funny to think that I only started knitting in January of this year. I have yet to make anything more complicated than flat knit socks, but it’s so exciting to think that there are so many more stitches and techniques to discover! It’s like being a knitting explorer!

This must be like how Sally Ride felt when she was blasting off into space for the first time. So many new adventures await!

Adventures in Knitting! – Flat Knit Socks

Two Knit Socks - Blue and Green

I know what you’re wondering…

Did Elaine get snowed in at some point during the past few weeks?

Why, yes. Yes I did.

I have lived in snowy places before, but I have never in my life seen as much snow as I have the past few weeks.

It just kept snowin’…

Three foot long icicles hung from the roof, and I was knee deep in snow for more than a week. It was super crazy!

But also kind of fun. There was something really nice about knowing that everyone in the surrounding areas got to spend some extra time with their families for a few days.

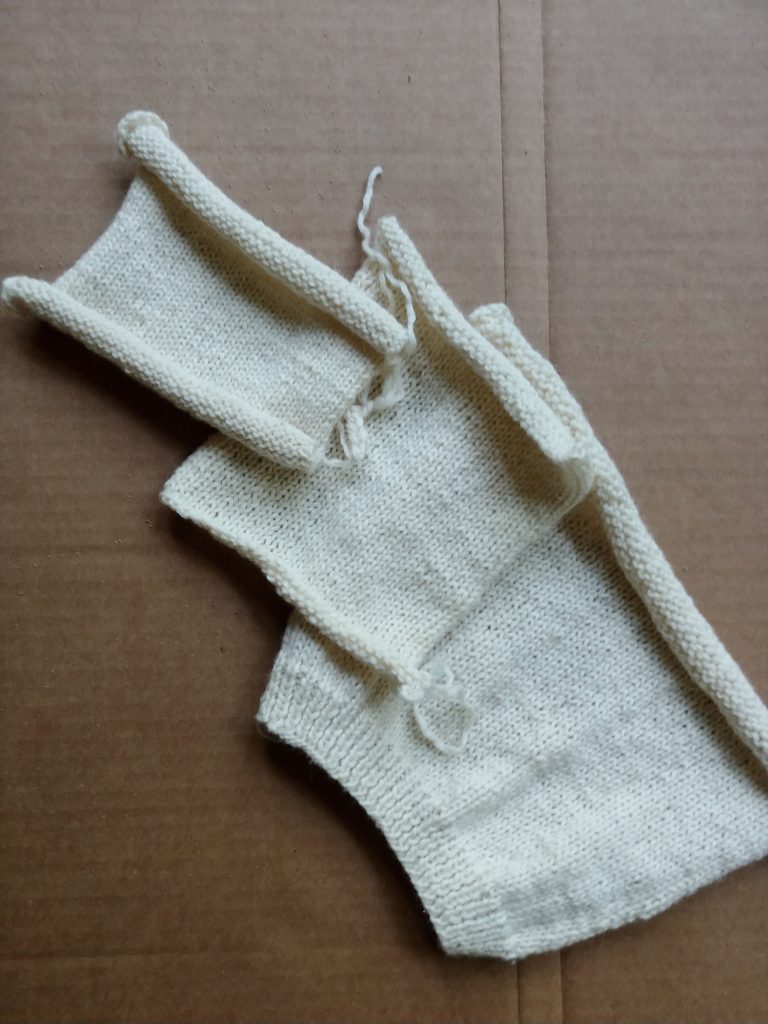
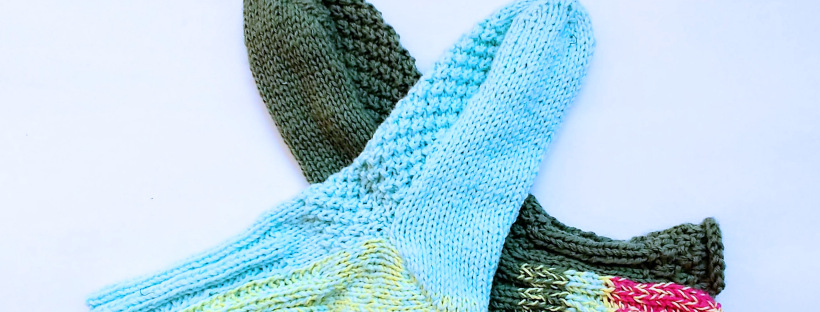
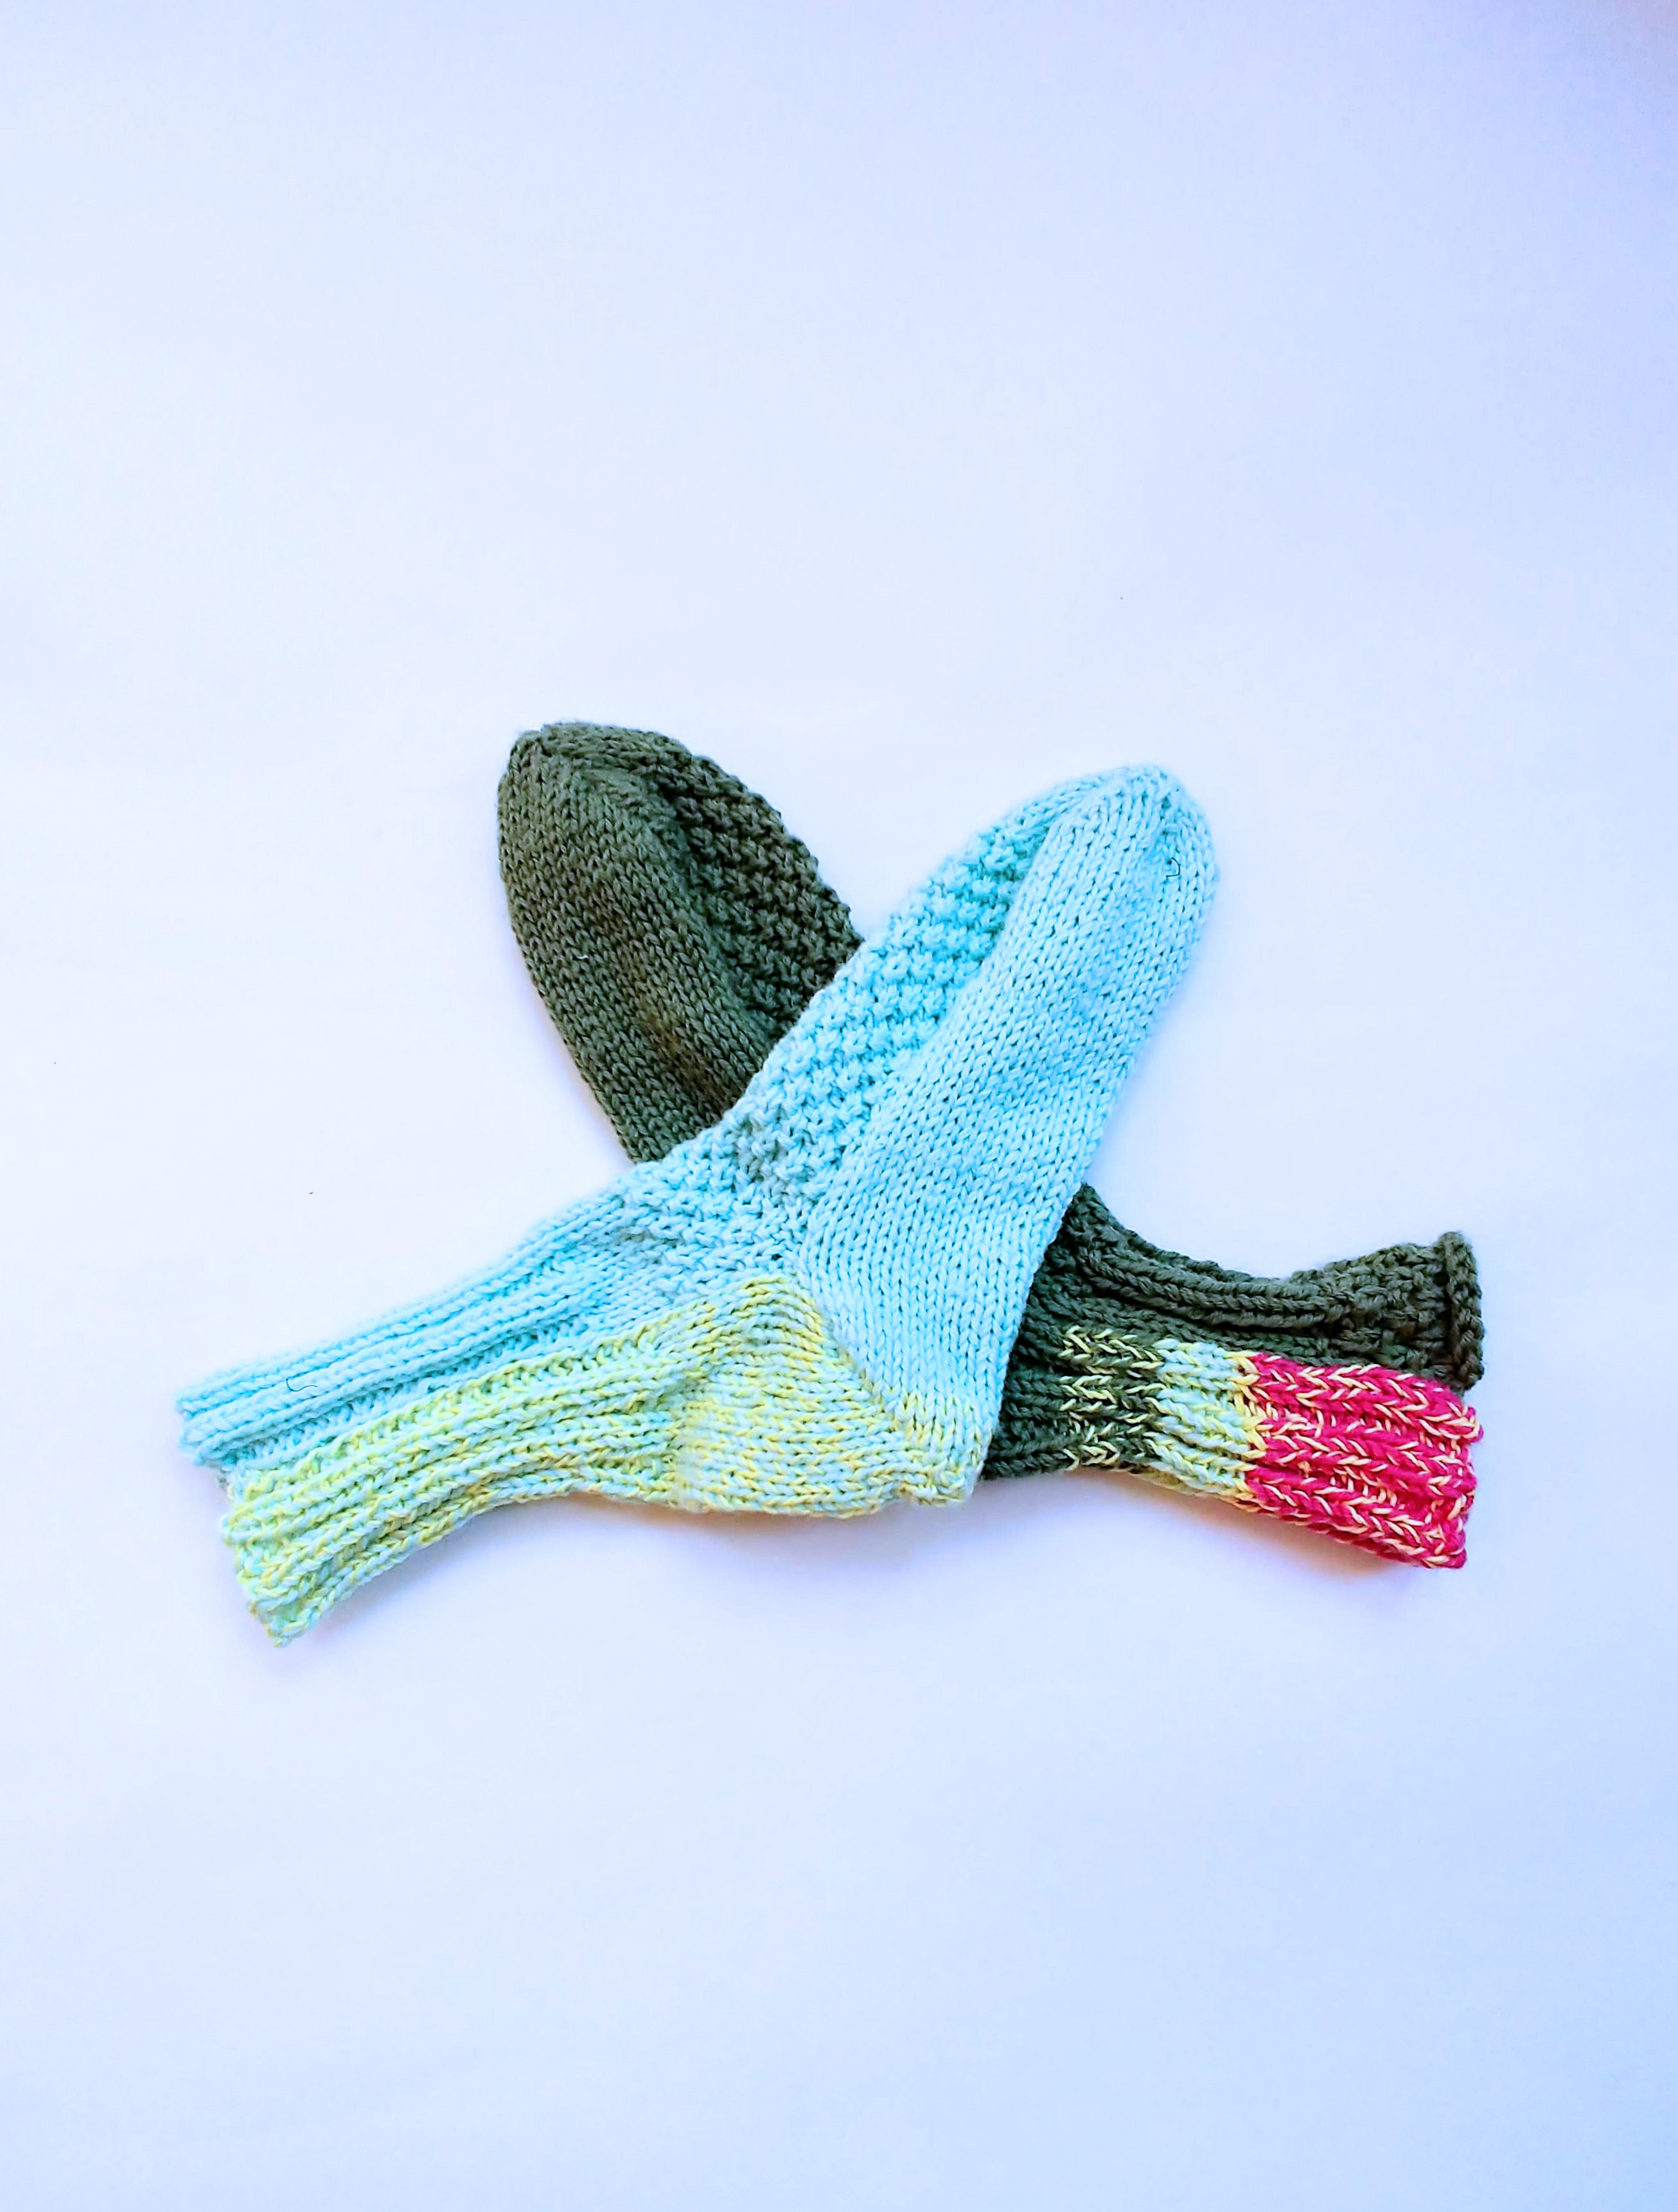
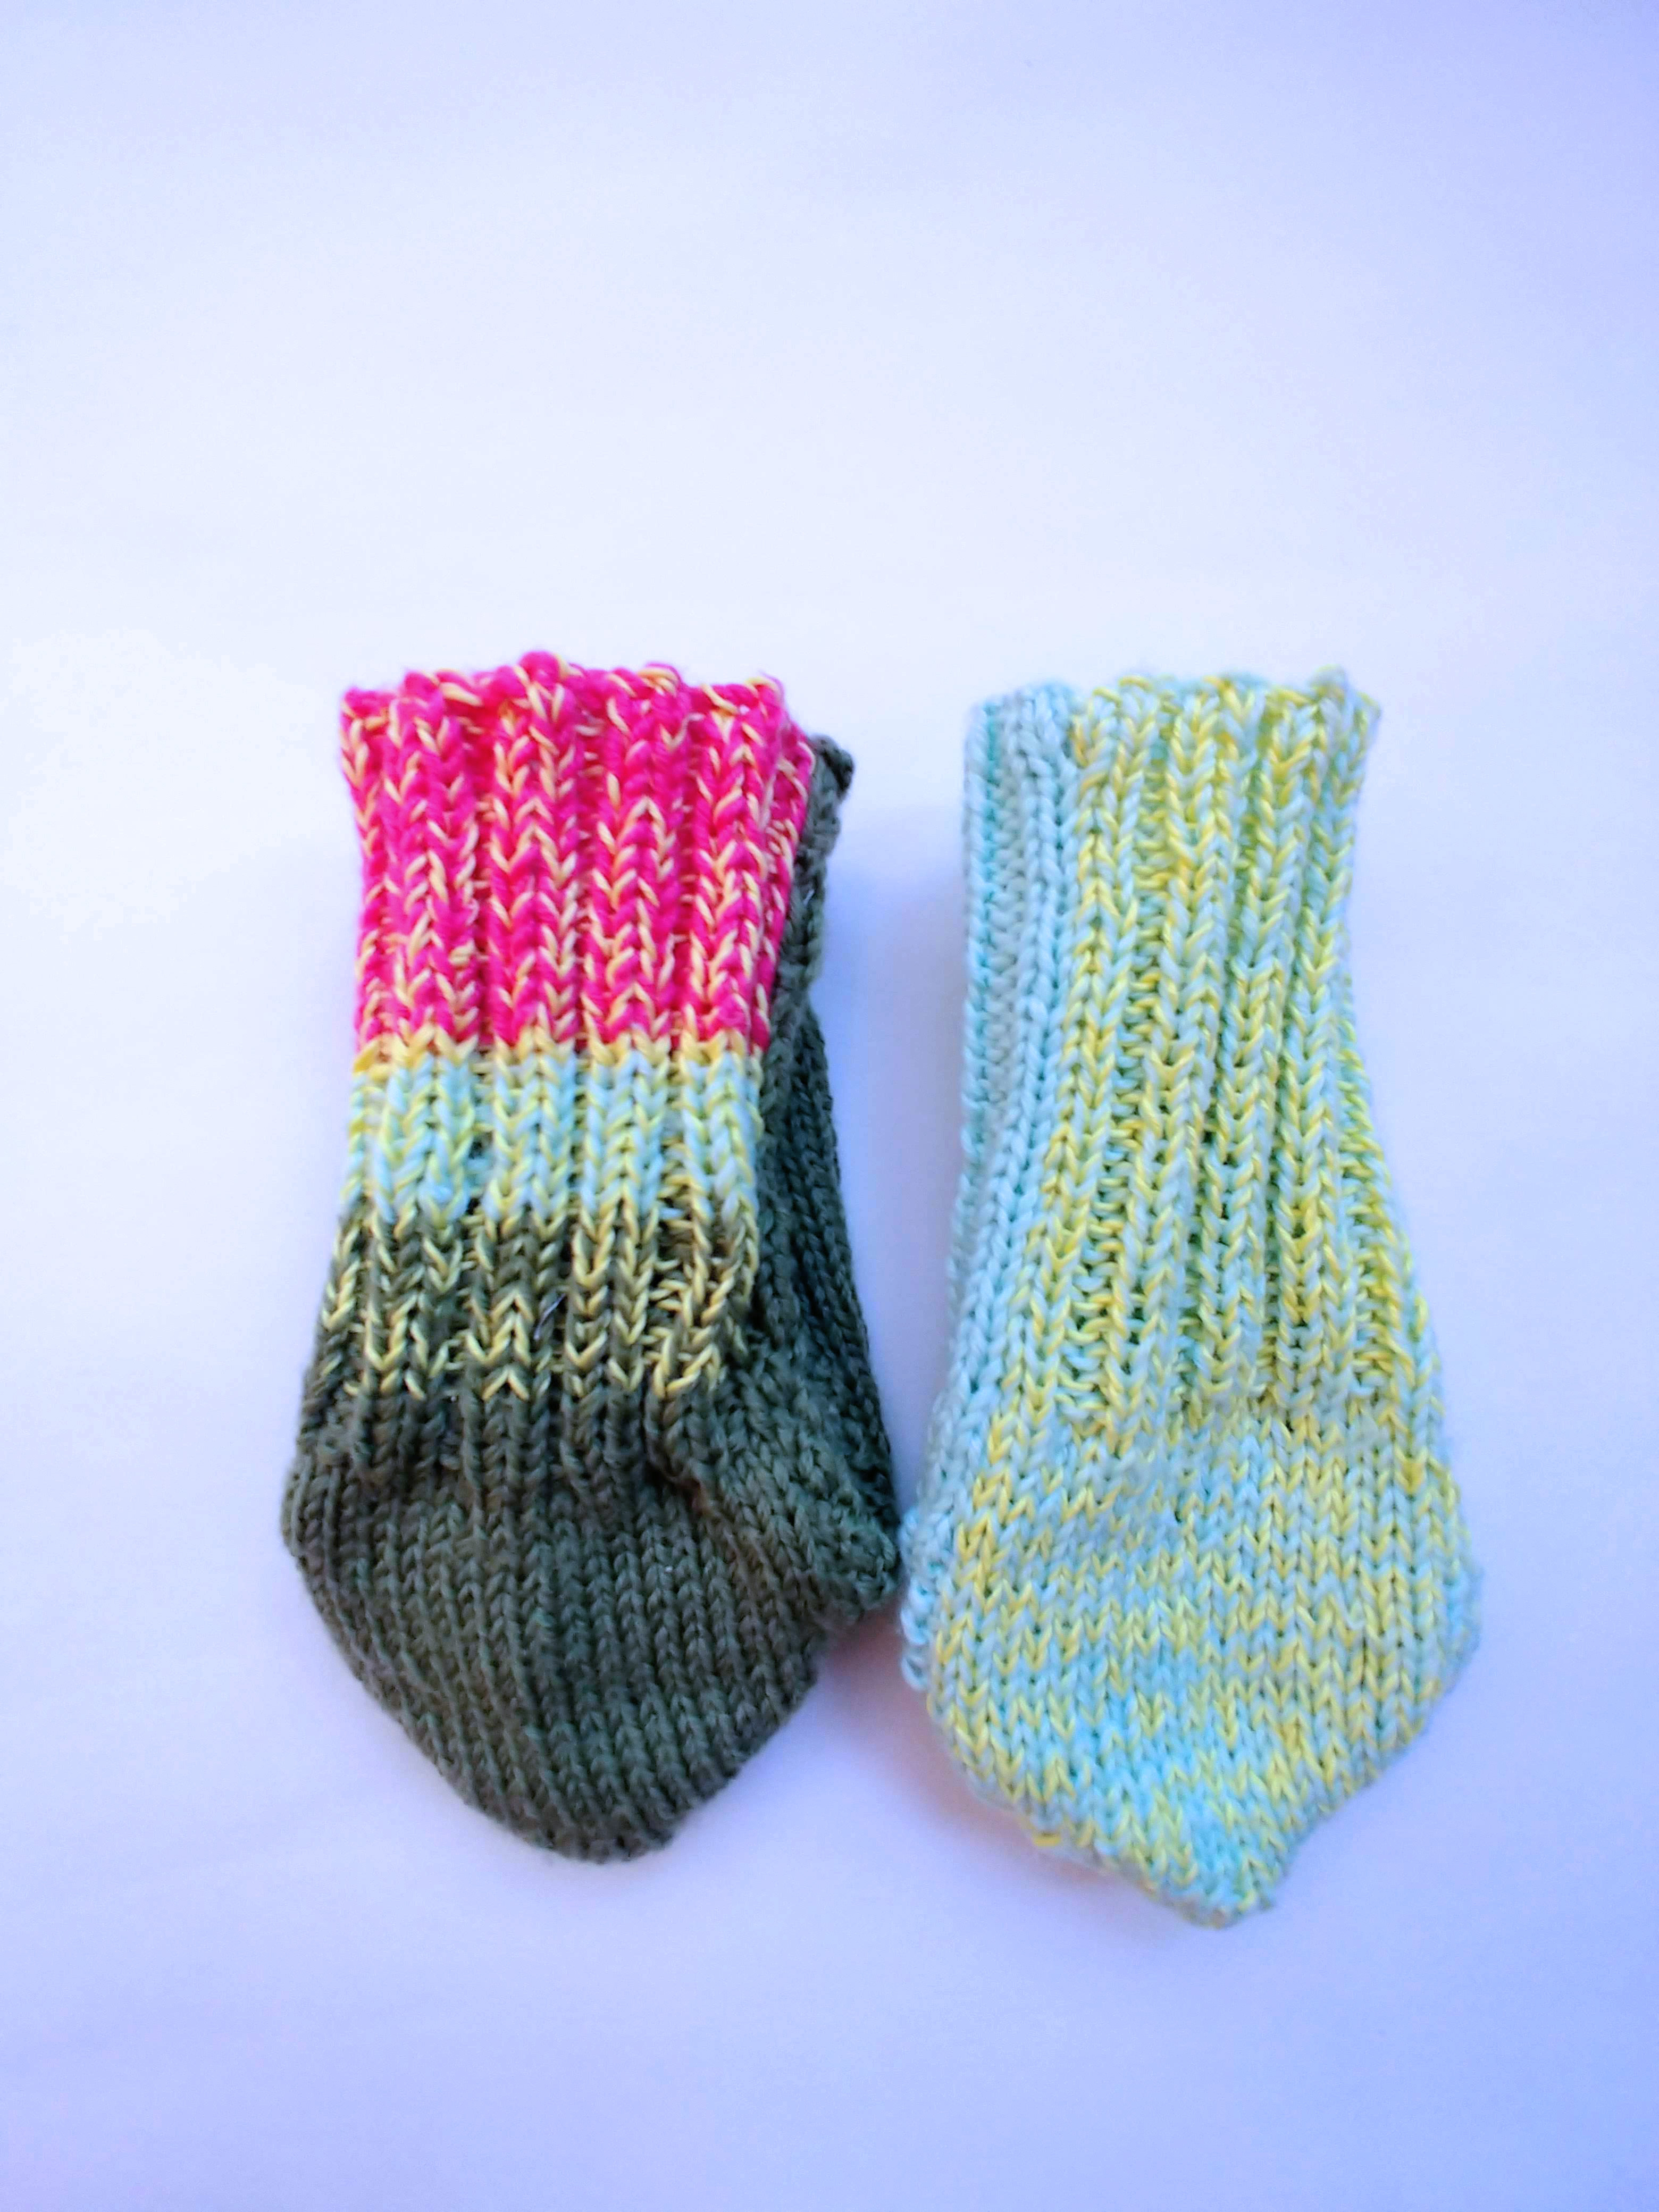
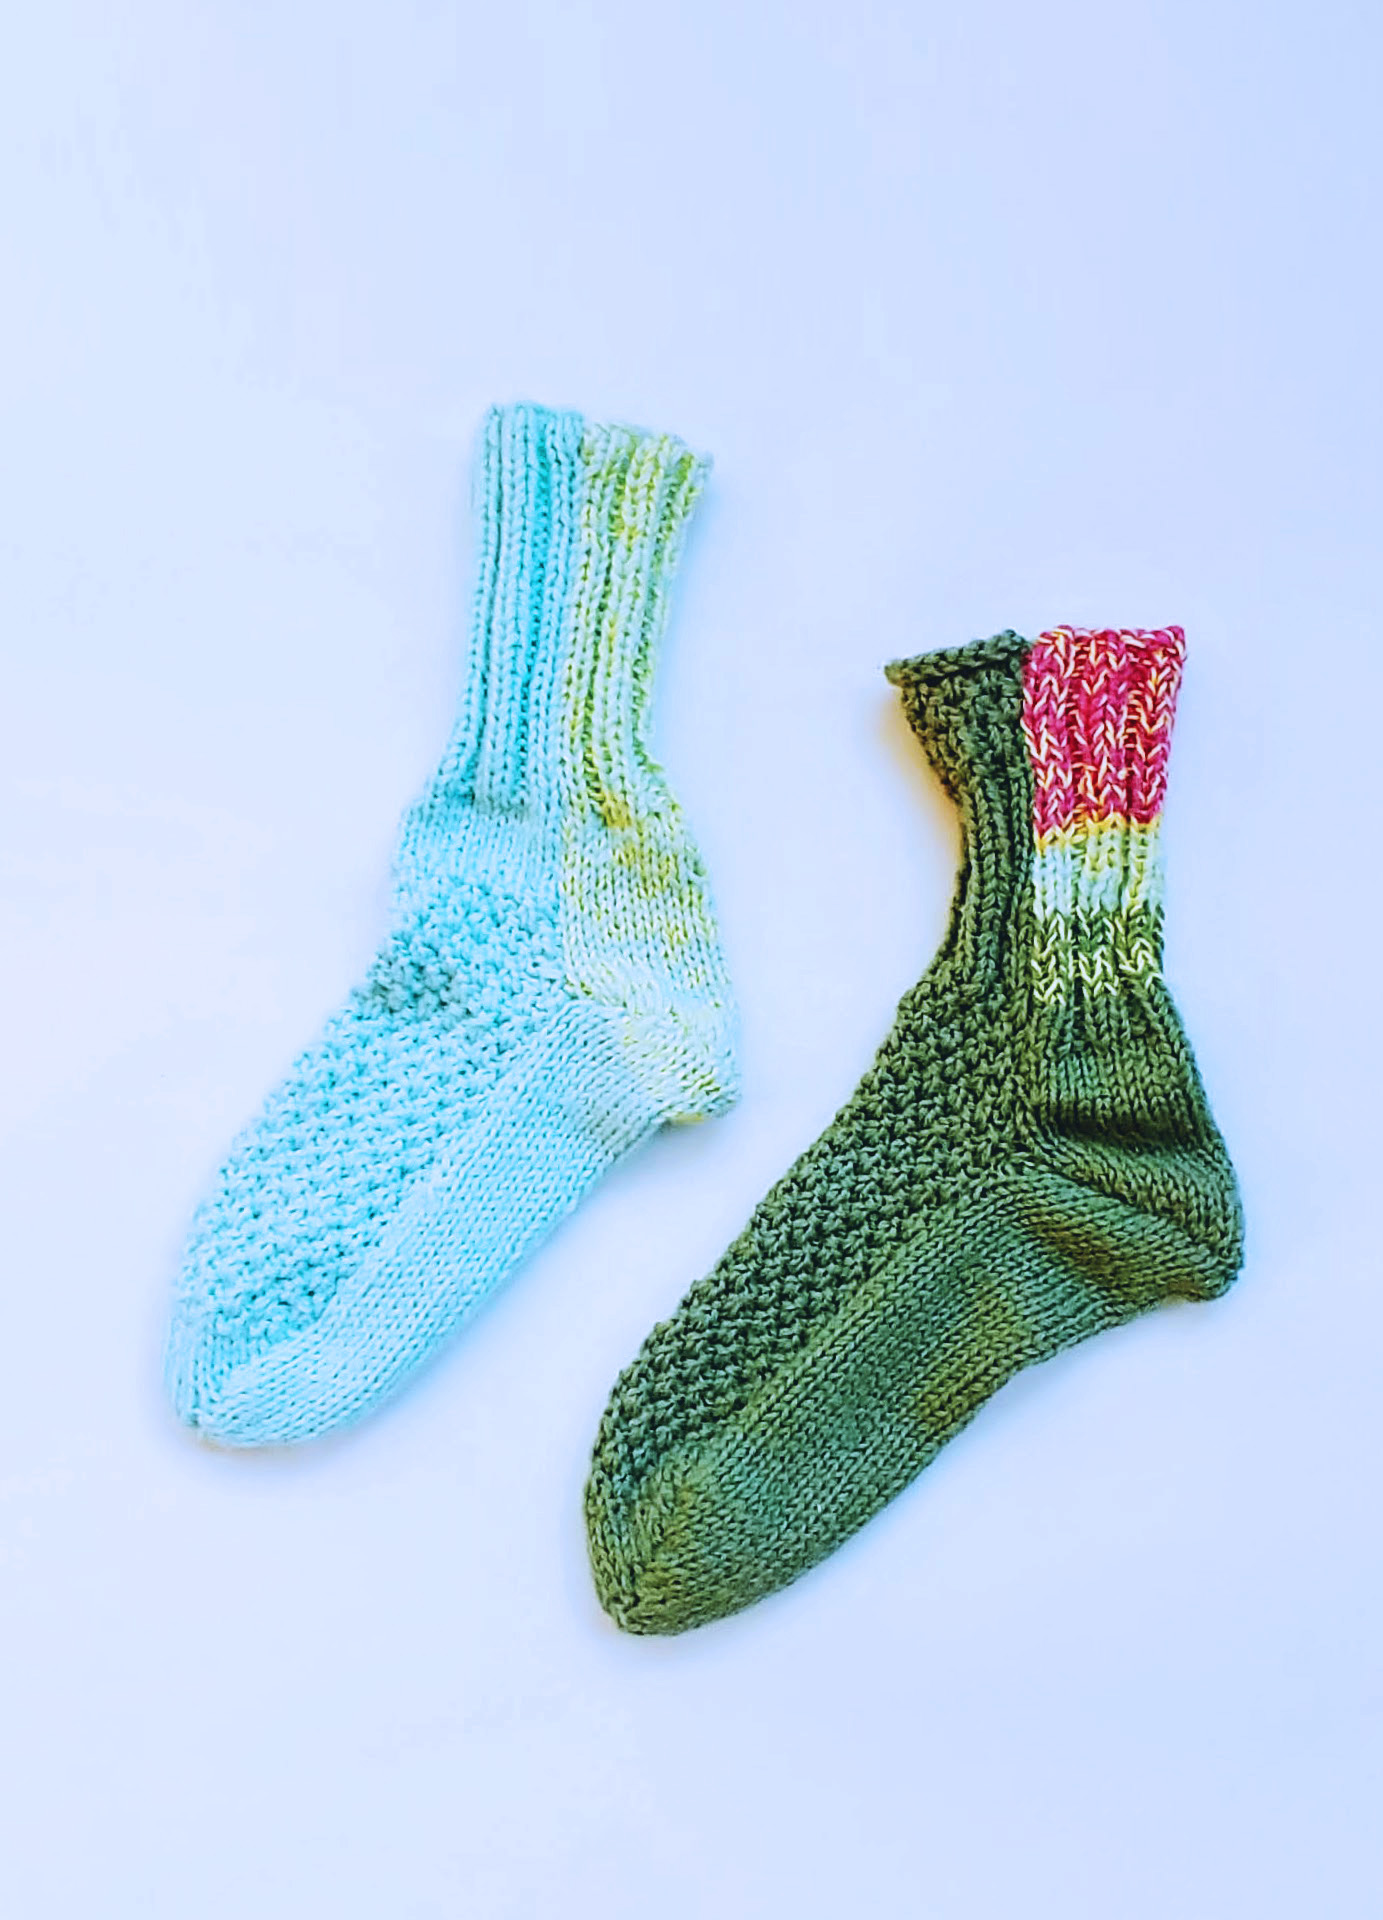
Good news though! The weather finally cleared, the snow finally melted (well, mostly… there’s still some piles of it here and there) and I have finished my socks!

Nothing says snowed in like flat knit socks. They are pretty easy to knit, and I had to knit them flat because I lacked the size 7 double pointed needles that I needed to knit them in the round. (Unfortunately, those double pointed needles don’t just appear in the snow like Turkish Delights do in Narnia…)

Oddly enough, the hardest part came when I had to seam them together. I couldn’t get the socks to fit together properly for a while. Finally after using the seamless mattress stitch to seam them together for the 3rd time was I able to get a sock-like shape.

I still have to block the socks (wash them gently and shape them flat for drying) but that’s a project for the weekend I think.

I found the pattern for flat knit socks online. Admittedly, they don’t match and they are slightly different patterns as well.

Back of Socks - Blue and Green


This is for a fun reason!

I managed to reuse a green swatch I was knitting for the top of one of the socks when I realized that I had accidentally cast on the exact number of stitches in the swatch that I needed for the socks, therefore saving myself 4-6 hours of work. I just ripped out some of the extra stitches to make the swatch shorter (and the right length for the top of the sock), and then started knitting the decreases for the toe.

I could have made matching socks by making green and pale robin’s egg blue stripes, but it would have made for a pretty unattractive color combination. Plus, when I made them my feet were freezing. I made these socks to wear under my tall boots, so it didn’t matter to me that the colors matched so much as long as the socks were warm.

Two Knitted Socks - Blue and Green

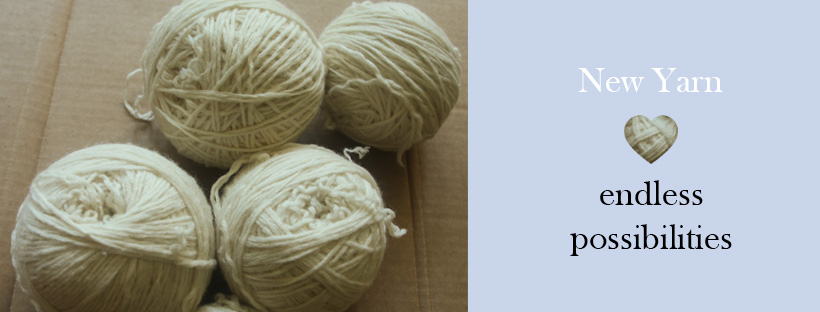
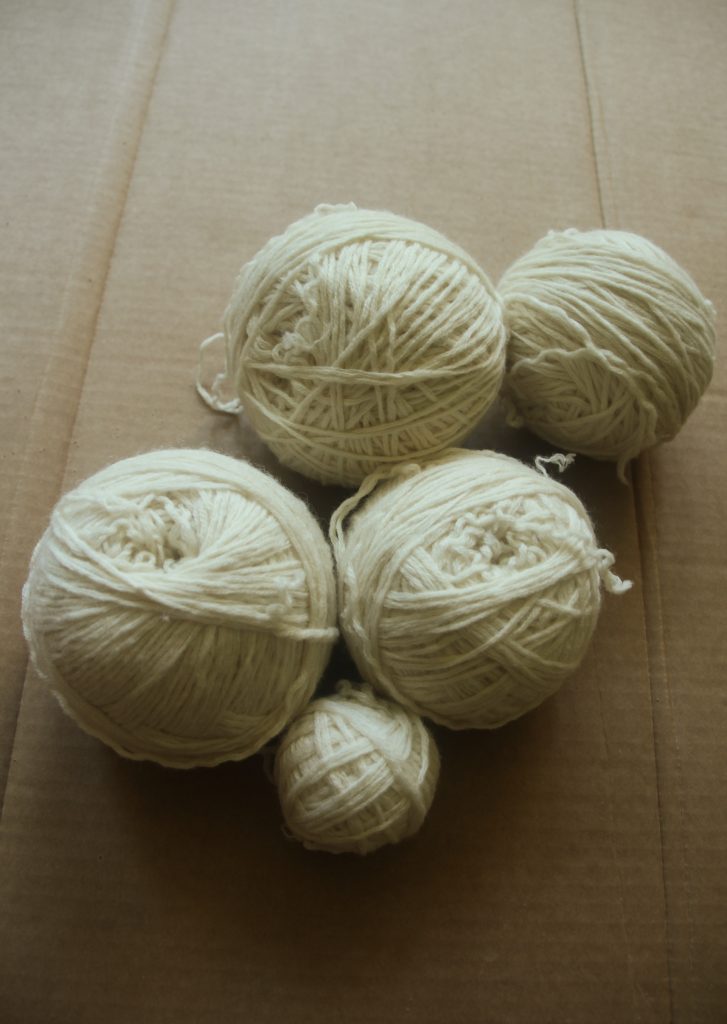
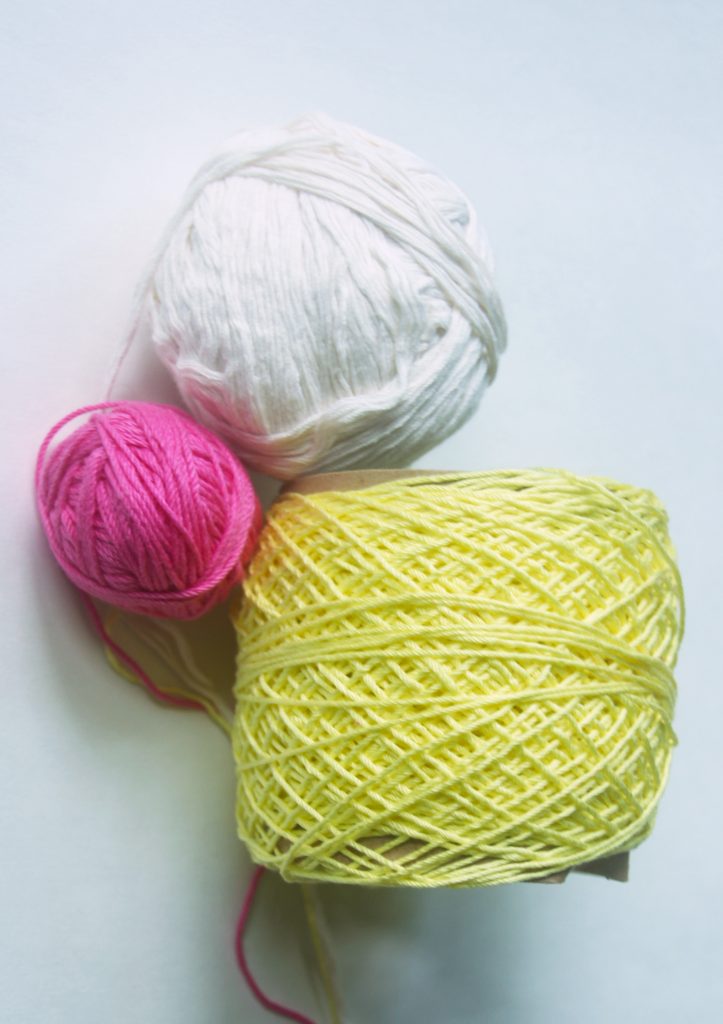
I’ve got a ball of pink worsted merino yarn and a ball of yellow cotton yarn left. I started making a pink hat about a week ago. I had bought some circular needles a few weeks ago in anticipation of making the hat but (being a new knitter) didn’t realize that you couldn’t make a hat on 29 inch circular needles because all of the extra cord gets in the way of knitting.

Of course, this was yet again a day that the local knitting store was closed, and I wanted to start my hat! So again to the kitchen I went to grab some more takeout chopsticks. I wish I would have figured out that I could make the double pointed needles before I made the socks, but it was probably good that I learned to knit them flat first. I could focus on learning to increase and decrease stitches and not have to worry about knitting in the round.

It took me about 2 hours to shave down, sharpen, sand and polish 4 double pointed bamboo knitting needles (size 7 of course). I had to keep sharpening my craft knife using fine sandpaper (thank you YouTube for teaching me how to do this) to cut the bamboo properly, but making my own knitting needles was actually a really fun process. All I needed was chopsticks, sandpaper, a buffing block and a craft knife.

There’s something very satisfying in knowing that you needed something, and then you made it yourself. I also loved the process of doing a simple carving project and knowing that my effort created something useful, something that will help me create more things in the future.

And my double pointed needles work just fine, the yarn slides smoothly across them. I started to knit with them and after knitting about 3 inches of hat I realized that the hat pattern that I was using was way too small for my head. The hat was about 19 inches in diameter, too small for anyone but a child, so I ripped the stitches out and rolled the yarn back onto the ball.

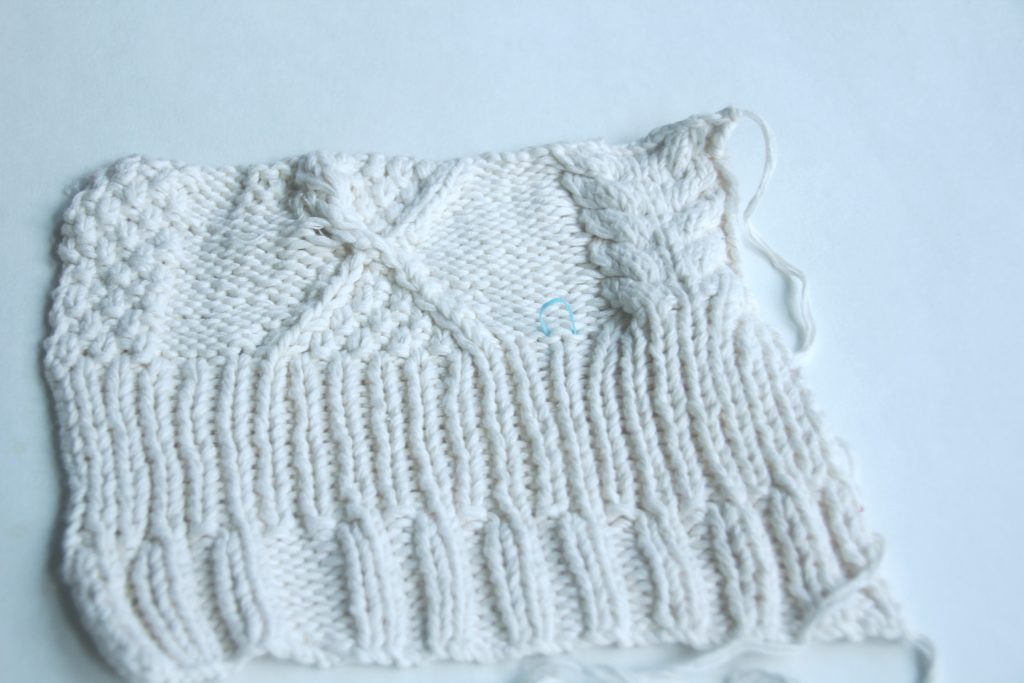
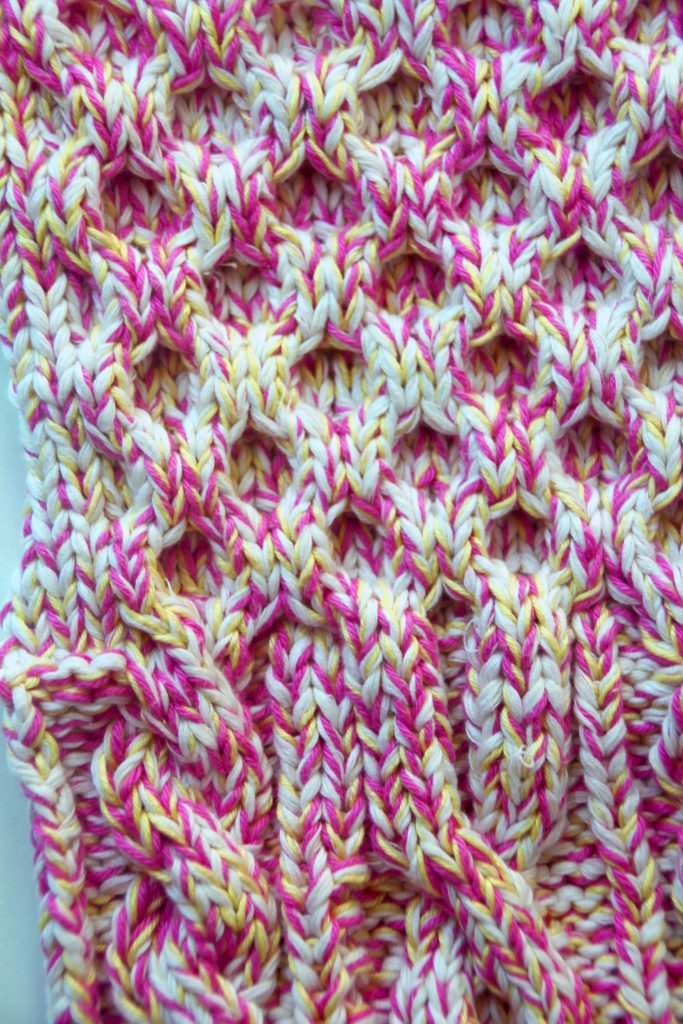
I think that I’m going to try and knit a more complicated hat pattern. I saw one with cables and an Irish Moss pattern that I love, but I’m going to try and make it with a different style of cable.

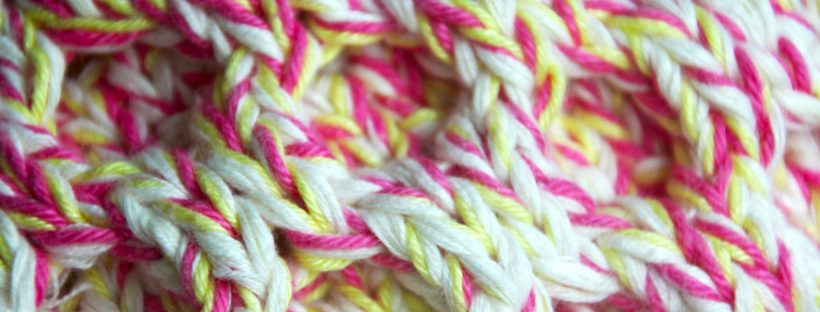
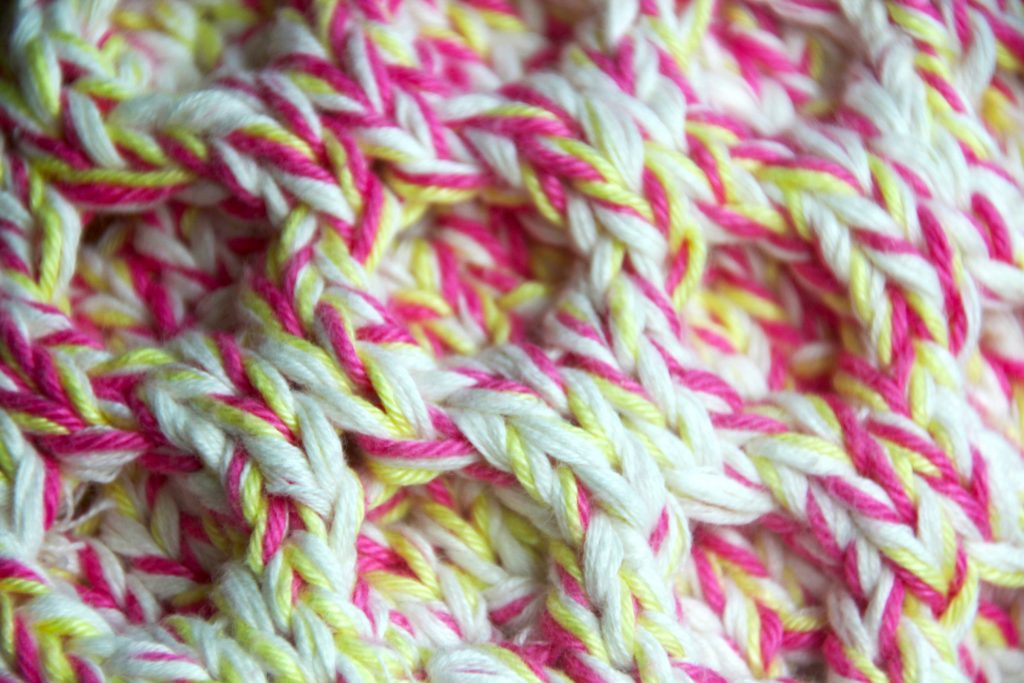
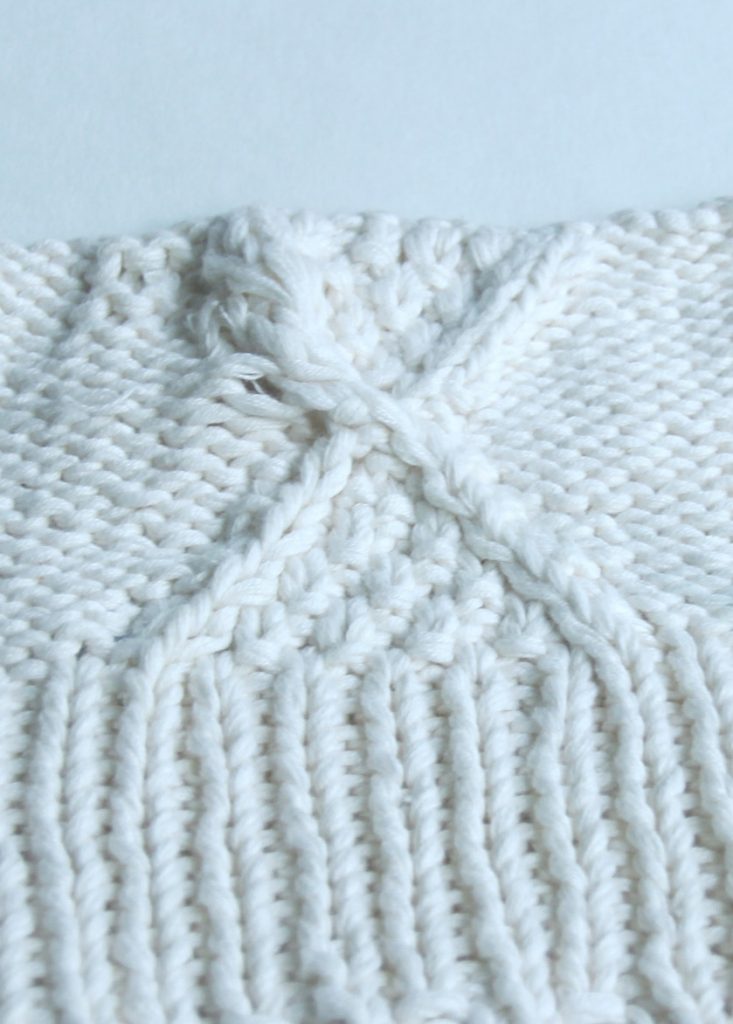
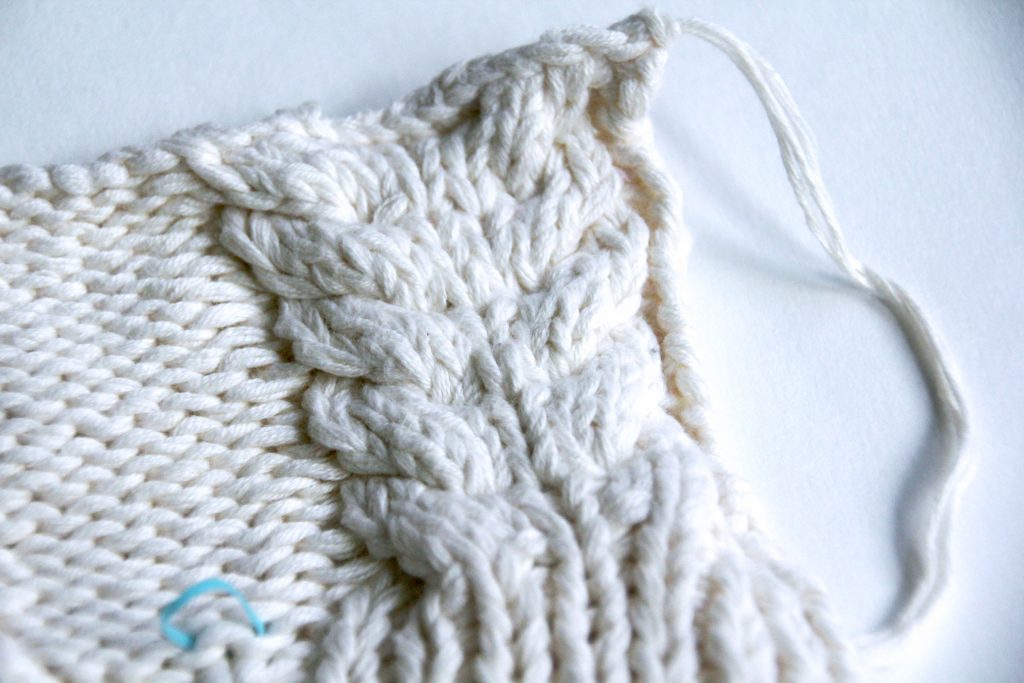
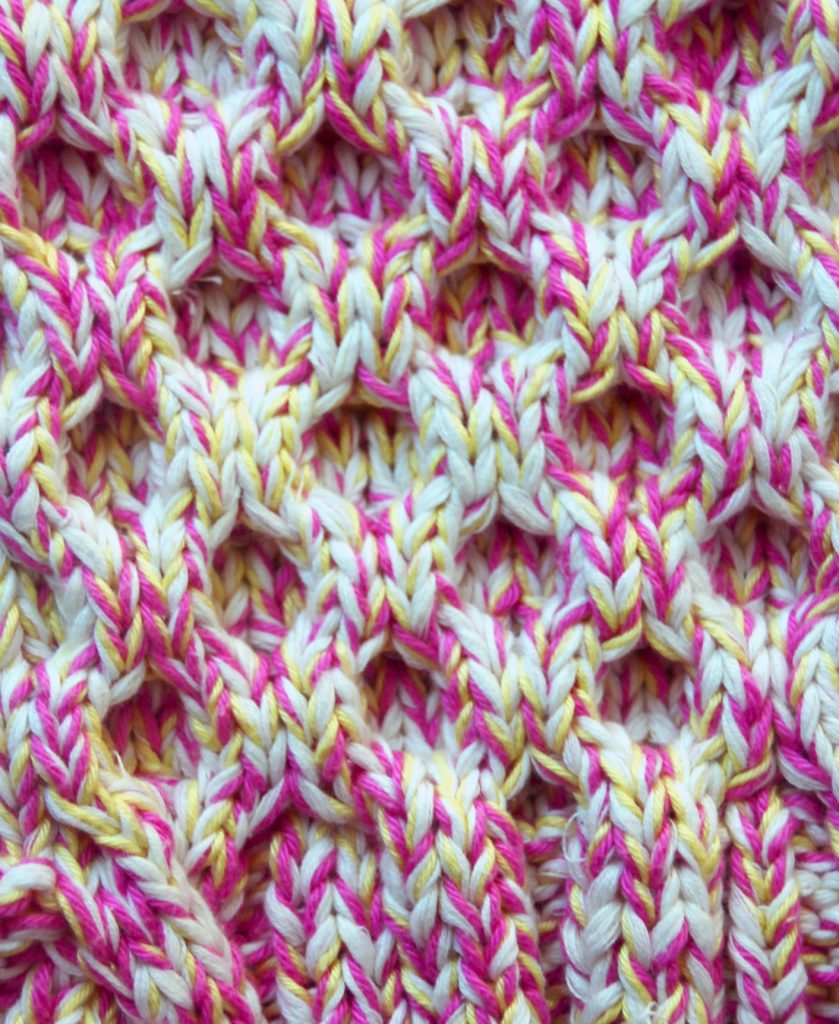
I also learned how to do basic cables!

Pink Cable Knitting


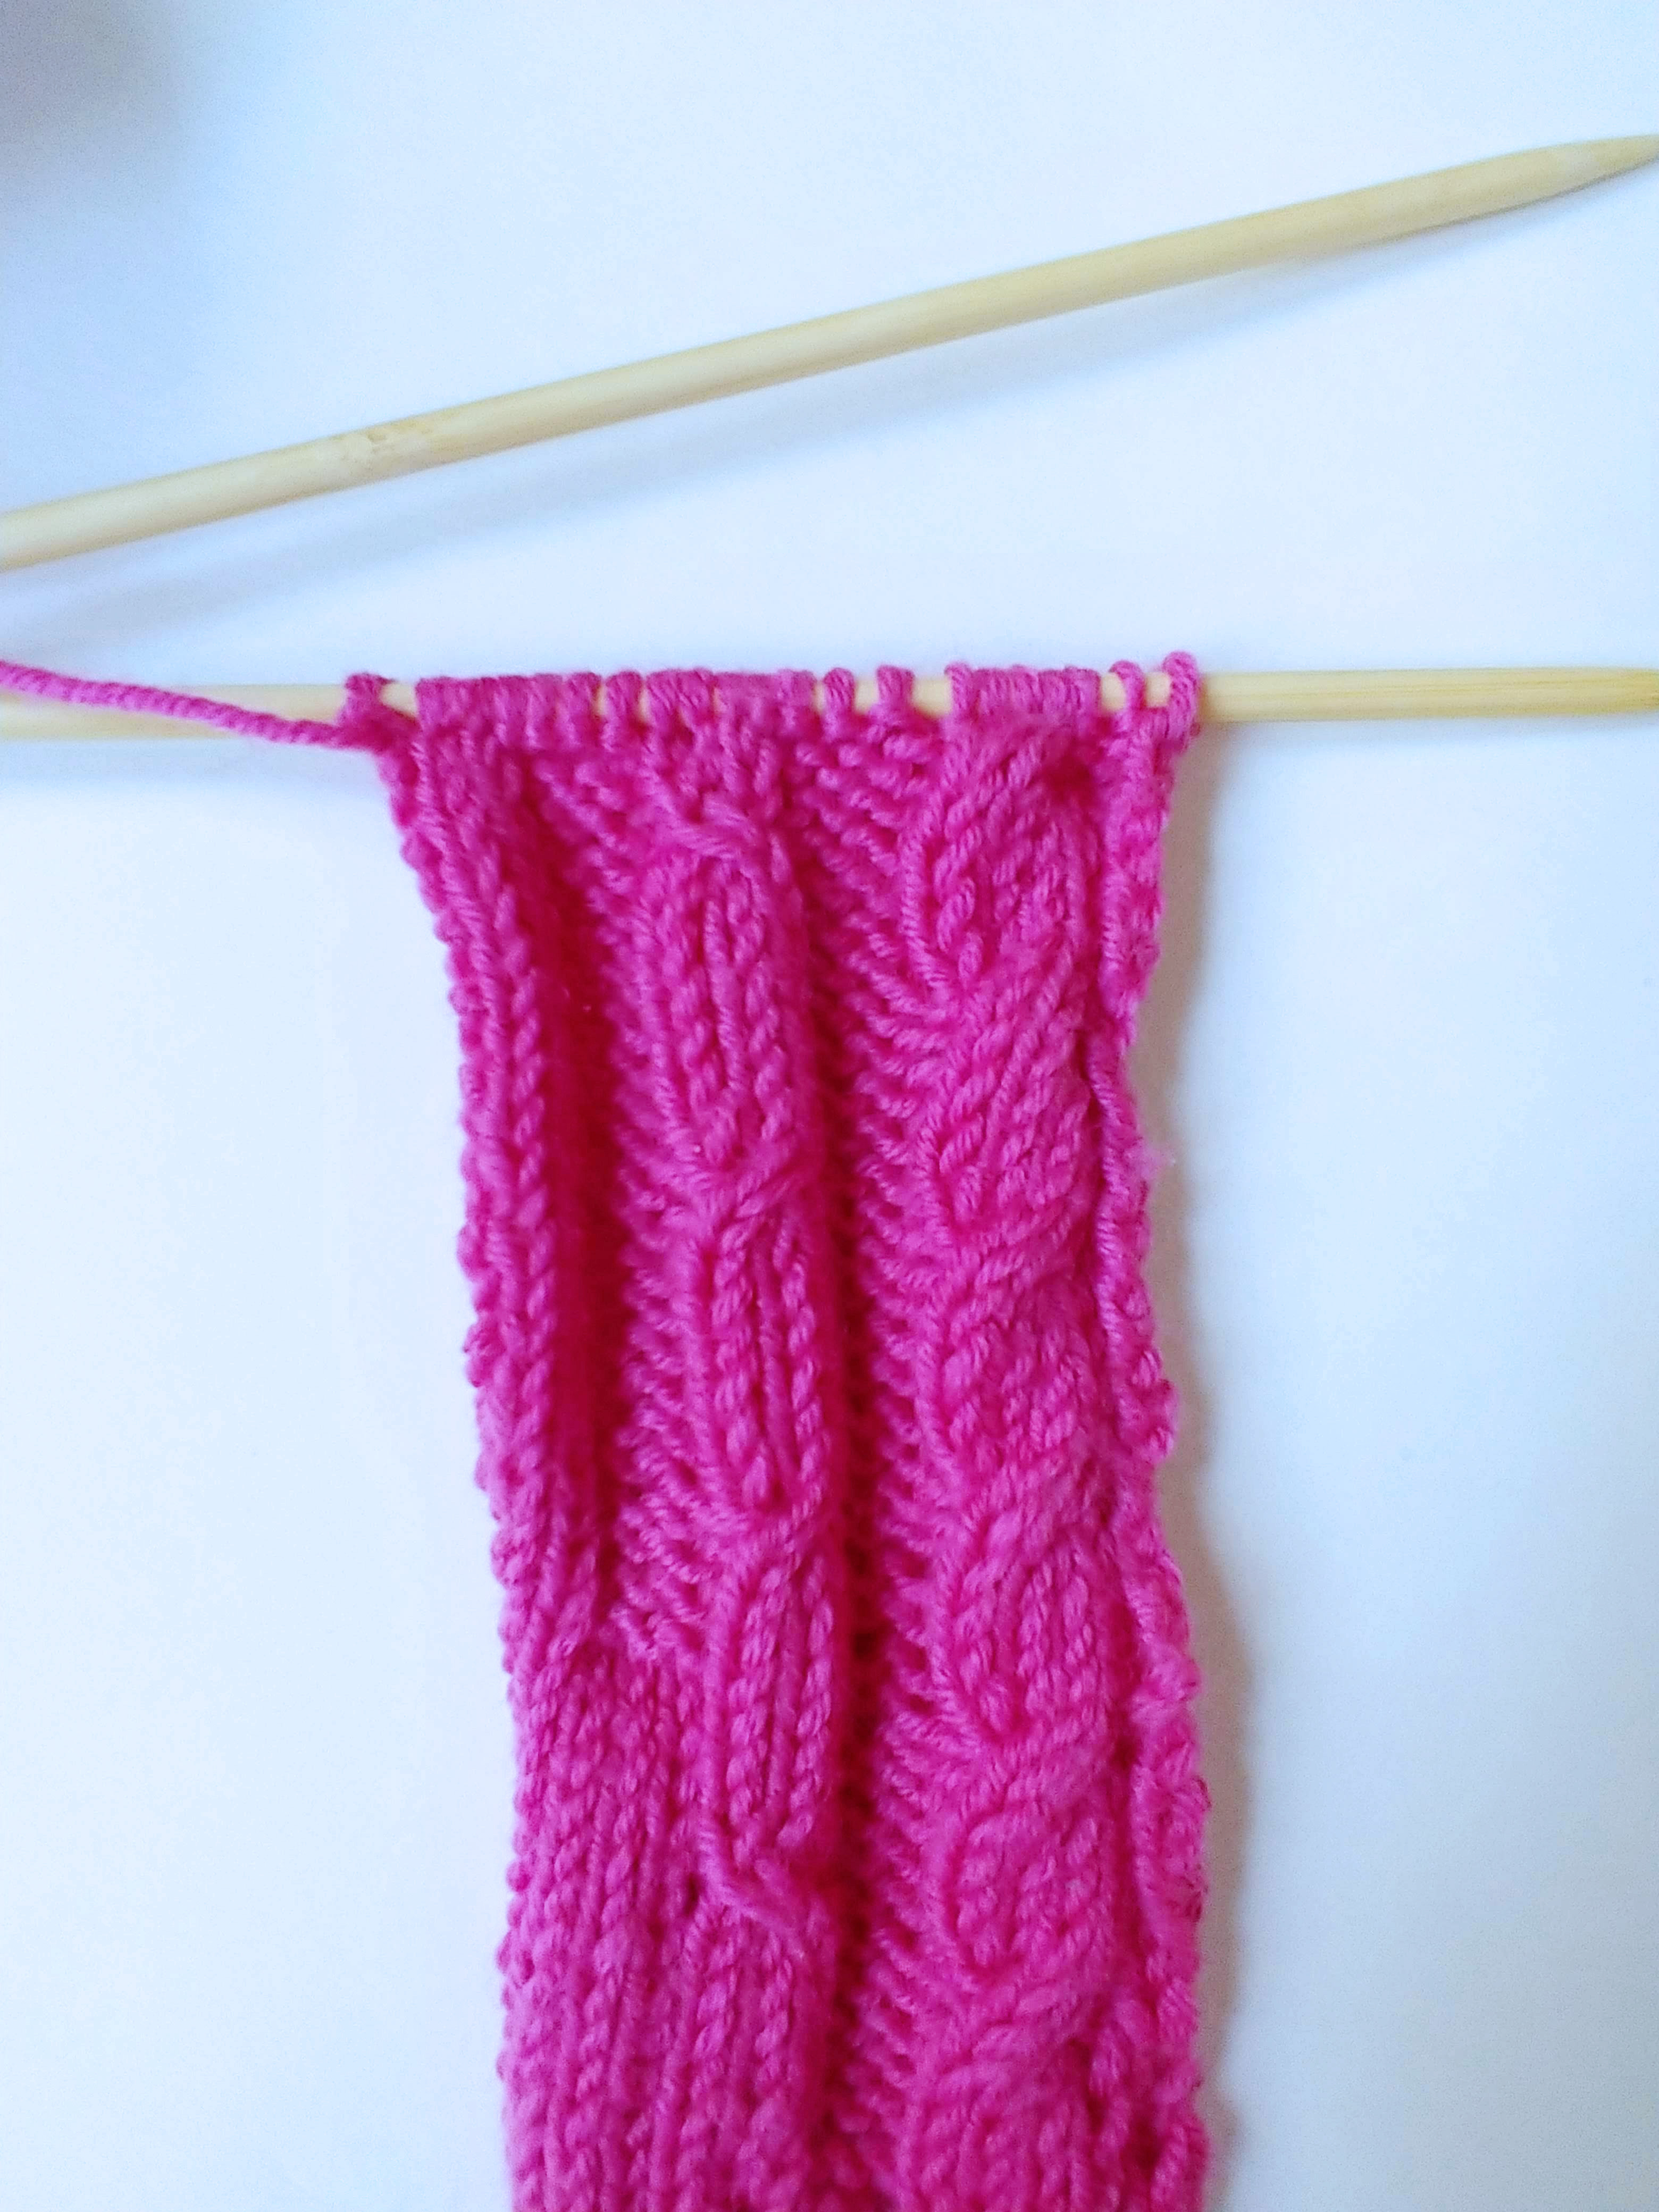
Here’s my pretty swatch in bubblegum pink merino. My goal for this year was to be able to knit a cable and I seem to have accomplished that 10 months early. I will have to find a bigger knitting goal for this year now. Yay!

What was your first knitting project?

And if you have any advice for a new knitter it would be greatly welcome. I’ve got so much to learn and I am super excited to keep making things.

If only nice wool was cheaper…

mini pumpkins

Halloween – Quick & Easy (Last Minute No Carve) Pumpkin Decorating!

Halloween is one of my favorite holidays! It’s always so fun to see everyone’s costumes, and I have many happy childhood memories of eating lots and lots of candy.

Let me tell you, when you have dietary restrictions, the most difficult holiday isn’t Thanksgiving, it’s Halloween, because there’s always leftover candy and you have to give it away quick, or else you find that you’re eaten half the bag before you know it.

I don’t speak from experience of course…

But sometimes eating half a bag of left over Halloween candy once a year is SO worth feeling crummy afterwards.

Especially when you have white chocolate Kit Kats or white chocolate peanut butter cups… which are just extra awesome.

Another thing that makes Halloween super fun is decorations! While I love carving pumpkins at Halloween, it can be messy and time consuming and if you’ve left your Halloween decorating to the last minute, you can still make adorable decorations to put in the window to welcome all the trick or treaters!

clone tag: -2224802199802910510

There are lots of tutorials for spray painting pumpkins, but I wanted to be able to cook with these after Halloween, so I used painters tape to make low tack stickers to put on these mini sugar pie pumpkins.

If you don’t have time to do this DIY, another option is just to buy some colorful stickers at the craft store and stick them onto the pumpkins instead. The store bought stickers might be harder to pull of the pumpkins, but I think that if you press the store bought stickers to your skin before putting them onto the pumpkins, the stickers might lose a little of their tackiness and be easier to pull of the pumpkins when you’re read to cook with them.

This DIY is best done a few days ahead of time if possible so that you can be sure the stickers are really dry before you start cutting them, but can also be done in about an hour or two before you want to start decorating the pumpkins if you use hairdryer to help the paint and Modge Podge layers dry quickly.

For your homemade stickers, you will need:

-painters tape

-acrylic paint

-ziptop bags

-Modge Podge (optional)

-glitter (optional)

-brushes

-scissors

-hairdryer (if you’re doing this DIY at the last minute)

Instructions

1. Lay your ziptop bag flat on the table and overlap pieces of painters tape by about 1/2 an inch over the bag. You want to have about 2 layers of tape on the plastic.

clone tag: -4494802101336254546

2. Paint a thin layer of acrylic paint of your choice over the painters tape. Allow to dry, or use a hairdryer to dry the paint quickly. Paint on more layers of color (using the hairdryer between layers) until you’re happy with the result.

Optional – Everything is more fun with glitter! If you want your stickers to be glittery, mix a little bit of Modge Podge with a generous amount of glitter and paint it over the top of your painted painters tape. Use a hairdryer to speed up the drying process.

What I first did is I painted the tape with acrylic paint and then sprinkled glitter on over the top while the paint was still wet, thinking that it would be tacky enough to keep the glitter on. That turned out not to be the case, and there was tons of glitter fallout (which you’ll see in the pictures, but a little glitter just makes things more festive! :D). I ended up having to vacuum up a lot of glitter, but it all came out ok in the end. I fixed the problem by spreading some Modge Podge over the top of each glittery sticker with my finger and blasted them with a hairdryer to get them to dry quickly and voila! No more glitter fallout.

clone tag: 8765980823518095111

So glittery! And super affordable!

clone tag: 7427284561683169572

Once the layers of paint and Modge Podge are dry, cut away the excess plastic from the sticker tape. Peel the plastic off the back of the sticker tape and then cut out whichever shapes you like and stick them onto your pumpkins.

Give each sticker a good press once you place them onto the pumpkins and decorate to your heart’s content!

clone tag: 6629403141417885135

This is the disco mini sugar pie pumpkin…

clone tag: -6387611760906468731

The Cinderella pumpkin (this variety of mini pumpkin is naturally white so I didn’t have to paint it). I love the glittery stars! This pumpkin looks so elegant!

clone tag: -6372366725628939485

The sweetheart pumpkin…

clone tag: -353266238720428542

And the Jack-o-lantern pumpkin enjoying the sunshine.

clone tag: -8858926983194438683

All the mini pumpkins in their 2018 class picture…

20181019_161833

And the Jack-o-lantern pumpkin being extra friendly and steppin’ forward to wish you a very Happy Halloween!