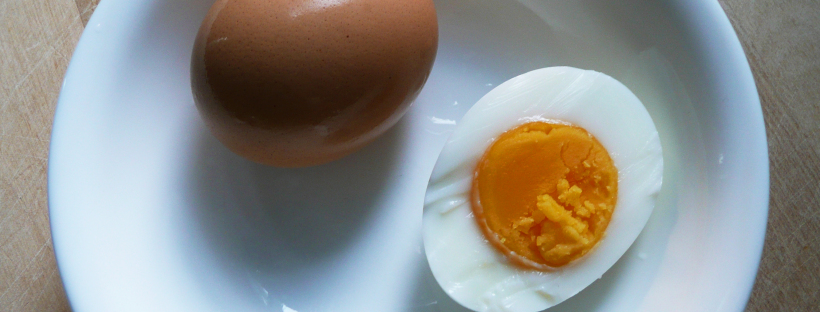
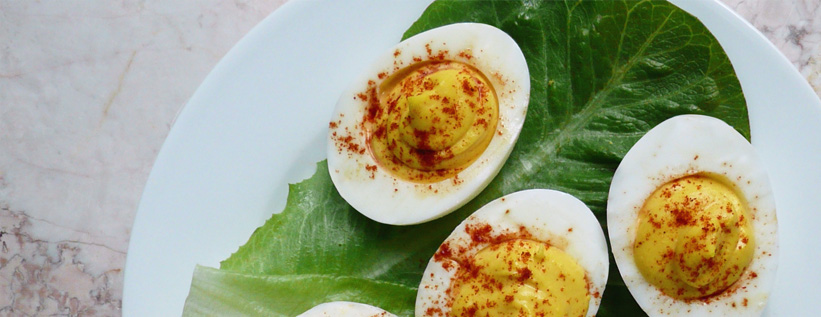
hardboiled eggs banner

How to “Hard boil” Eggs in a Rice Cooker (Super Easy)

egg2

Hardboiled eggs are one of those things that are great to have stashed away in the fridge. They are perfect high protein snacks (they even have a built in wrapper!) and make a great breakfast on the go as well.

The not so nice part of hard-boiled eggs? The sitting / waiting for a large pot of water to boil.

As it turns out, cooking them in a rice cooker is much easier and faster too!

I first got the idea to do this when I saw an awesome post on the Digging Food blog about how to steam fresh eggs. I had no idea that you could steam eggs before I read their post.

After a little experimentation, I figured out how to make perfect “Hard-boiled” eggs in a rice cooker.

Let me walk you through how to make them…

Step 1 –  Place your desired number of eggs in a heat safe bowl (ceramic or metal is fine).

I use a Tatung 10-Cup Multifunctional Cooker (the most useful piece of cooking equipment known to man). It’s a great rice cooker / steamer, and when I was in college (and living in small dorm room) I managed to make 60 tamales from scratch in one.

Step 2 – Add water. I pour about 1/2 cup of water in the bottom of the cooker before adding a rack that looks like this (you can buy it pretty inexpensively in a larger Asian grocery store like 99 Ranch).

wire rack.jpg

Step 3 – Put the bowl on the rack (this ensures that your food won’t scorch on the bottom of your bowl).

egg1

Step 4 – Cover the rice cooker with the lid and turn the rice cooker on, then set your timer.

My rice cooker takes about 5 minutes until I start to see steam come out the sides of the lid. Your rice cooker make take more or less time to heat up, and it may take a little trial and error before you figure out the right amount of time to cook the eggs to your liking.

For my rice cooker (from the time you turn the rice cooker on to when you turn it off):

Soft Boiled –  takes 13 minutes

“7 Minute Egg”  (Like the one pictured) – takes 14 minutes

Hard-boiled – takes 20 minutes


Step 5 – Turn the rice cooker off.

Put on an oven mitt and transfer the eggs into an ice bath using tongs.

****Please be careful not to burn yourself **** The steam is pretty hot and you can use the lid of the pot to fan the steam away from you before you take the eggs out of the rice cooker.

egg3

Step 6 – Leave the eggs to rest in the ice bath for at least 30 minutes.

egg4

After this, the eggs should be pretty easy to peel. I like the keep them in the fridge unpeeled (I just like the ritual of peeling them right before I eat them) or you can peel the eggs and keep them in an airtight container in the fridge.

The most I’ve done at once is 4 eggs in one batch, and the cooking time doesn’t change if you cook 1-2 eggs or 4 at the same time.

Update – Jan 14, 2018 – I’ve found that it does make a difference what bowl you use to cook the eggs in. You want a sort of normal serving bowl and not something that’s super deep with high sides so that the steam can surround the eggs better. My preference these days is to cook 6 eggs at a time for 18 minutes (perfectly hard boiled , dunk them into ice water and then keep them in fridge for breakfast / snacking.

I hope that this helps make your breakfast / snacking / meal prep a little easier!

How do you like your eggs for breakfast?

– Elaine

Classic Homemade Deviled Eggs – Paleo

easter egg 2

Like many people, I love a good deviled egg. There is something about these little bites of heaven that is both kind of fancy, but very comforting at the same time.

They take a little time and care, but they are everybody’s favorite thing to eat at a party.

You can top them with just about anything from chives to smoked salmon, but I like paprika on my deviled eggs because it gives a little color and flare, with just a hint of spice.

Deviled eggs are best when they are made ahead of time so that they get a chance to get nice and cold in the fridge. You can store them in an airtight container and snack them if you get hungry, or make a big batch of them and bring them to an Easter party this weekend.

easter egg 3

Classic Homemade Deviled Eggs

Makes 4 deviled eggs (but you can easily scale this recipe up)

Ingredients

2 eggs

2 tbsp of mayo (I used an avocado oil mayo, but feel free to use your favorite mayo)

1/2 tsp yellow mustard

3/4 tsp water

Sprinkle of paprika for garnish


Instructions

1. Place your eggs in a pot and cover with about 3/4 – 1 inch of room temperature water. Cover and bring the pot to a boil over medium high heat. Take the pan off the heat, and set aside (keeping the lid on the pot) and set a timer for 12 minutes.

2. After 12 minutes, take a slotted spoon and transfer the eggs to a big bowl of ice water and let them sit for 20 minutes. Peel and slice the eggs in half. If the eggs still feel warm at this point, transfer them to an airtight container and refrigerate until completely cool.

If the egg yolks are too warm when you mix them with the mayo, the filling for the deviled eggs will split, so you want the eggs to be nice and cold before you move on to the next step.

3. You can mash up the filling for the deviled eggs in a bowl with a fork, but the I find that the way to get the smoothest texture is to use a food processor. Add the cooked egg yolks, mayo, mustard and water to a food processor and blend until smooth (or mash together in a bowl with a fork, it will taste just as good).

If the food processor overmixes the filling and you see that the filling has separated, that’s ok. It’s an easy fix.

Add a few drops of water to a bowl with about about 1/4 – 1/2 tsp of the deviled egg filing. Mix together until smooth and it should become creamy and emulsified again. Keep whisking in little bit of the separated filling mixture into the emulsified filling (adding the occasional little bit of water if needed to get the mixture to become smooth again) until all the separated mixture has been whisked into the smooth mixture.

Don’t be afraid to adjust the taste of the filling to your liking. If you like a more spicy deviled egg, add a little more mustard (or use dijon mustard instead of yellow mustard if you want to live on the edge). If you like creamier and milder flavored deviled egg, add a little more mayo. It’s completely up to you, so make the deviled egg that you want to eat.

4. Spoon the filling into a ziploc bag and cut off a bit of one corner of the bag. Pipe the filling into the cooked egg whites and then sprinkle each deviled egg with a bit of paprika.

You can also skip piping the mixture and just spoon it into the cooked egg whites instead to give the deviled eggs a more friendly and comfortable kind of charm.

eggs easter

However you make them, I’m sure that they will taste AMAZING.

Happy Easter!